Test Token Introspection in ZITADEL with Postman

Developer Advocate
- Introduction
- Create an API
- Set Up an API Application in ZITADEL
- Test the API with Postman
- Run a Sequence of Requests in Postman
- Wrap-up
Introduction
In our previous post, we focused on how to use Postman to test the user login process, detailing the steps for authenticating users in a web application and obtaining an access token. We also illustrated how to use this access token to access ZITADEL's userinfo endpoint, a secured endpoint that requires an access token for access. In this post, we'll guide you through the process of implementing API introspection within your API, ensuring it requires a token to respond to requests. Furthermore, we'll show you how to use Postman to call this secured API.
We can utilize the token obtained from the user login flow in the previous post. However, to guarantee that this token provides the access we require, a minor adjustment to its scopes is essential. By updating the token's scopes, we can align its permissions with the security demands of our target API, facilitating authenticated and authorized interactions. We'll delve into this aspect shortly. First, let's set up a sample API.
Create an API
This step is optional if you already have an API to test. To create a simple API with two endpoints (a simple GET that doesn’t require a token, and a GET that checks the token by calling the ZITADEL introspection endpoint) using Node.js and Express, follow these steps.
Prerequisites
- Install Node.js
Step 1: Initialize Your Node.js Project
Create a new directory for your project, initialize a Node.js application, and install the necessary packages as detailed below:
mkdir zitadel-api
cd zitadel-api
npm init -y
npm install express axios dotenv
Step 2: Set Up Environment Variables
Create a .env file in the root of your project directory. Add your ZITADEL credentials and the introspection endpoint URL. To obtain these values, you must create an API application in ZITADEL, which will be done in the next section.
ZITADEL_CLIENT_ID=<your_client_id>
ZITADEL_CLIENT_SECRET=<your_client_secret>
ZITADEL_INTROSPECTION_ENDPOINT=<https://your-zitadel-instance.com/oauth/v2/introspect>
Step 3: Create the API
Create a file named app.js in your project directory. Open it in your text editor and add the following code:
require('dotenv').config();
const express = require('express');
const axios = require('axios');
const app = express();

app.use(express.json());

// Simple GET endpoint
app.get('/simple-get', (req, res) => {
   res.send({ message: "This is a simple GET response." });
});

// Protected GET endpoint
app.get('/protected-get', async (req, res) => {
   const authHeader = req.headers.authorization;
   if (!authHeader) {
       return res.status(401).send({ error: "No authorization header provided" });
   }

   const token = authHeader.split(' ')[1];
   try {
       const response = await axios.post(process.env.ZITADEL_INTROSPECTION_ENDPOINT, `token=${token}`, {
           headers: {
               'Content-Type': 'application/x-www-form-urlencoded',
           },
           auth: {
               username: process.env.ZITADEL_CLIENT_ID,
               password: process.env.ZITADEL_CLIENT_SECRET,
           },
       });

       if (!response.data.active) {
           return res.status(403).send({ error: "Inactive token" });
       }

       res.send({ message: "Access to the protected resource granted." });
   } catch (error) {
       console.error("Introspection error:", error.response ? error.response.data : error.message);
       return res.status(500).send({ error: "Failed to introspect token", details: error.response ? error.response.data : error.message });
   }
});

const PORT = process.env.PORT || 3000;
app.listen(PORT, () => {
   console.log(`Server running on port ${PORT}`);
});
This API features two endpoints:
-
/simple-get: A simpleGETendpoint that responds with a basic message. This endpoint is public and does not require authentication, making it accessible to any client that makes a request to it and returns a greeting message. -
/protected-get: This is a securedGETendpoint that requires a valid Bearer token for access. This endpoint demonstrates how to implement token-based authentication in an Express application by:- Extracting the token from the
Authorizationheader of incoming requests. - Using the
axiosHTTP client to send the token to ZITADEL's introspection endpoint, validating the token's activity status. - Responding with access to a protected resource if the token is active, or appropriate error messages if the token is missing, inactive, or if there's an error during introspection.
- Extracting the token from the
Step 4: Run Your API
Run your API by executing:
node app.js
Your API is now running on http://localhost:3000 (or another port if you've configured it differently) and can be tested using Postman.
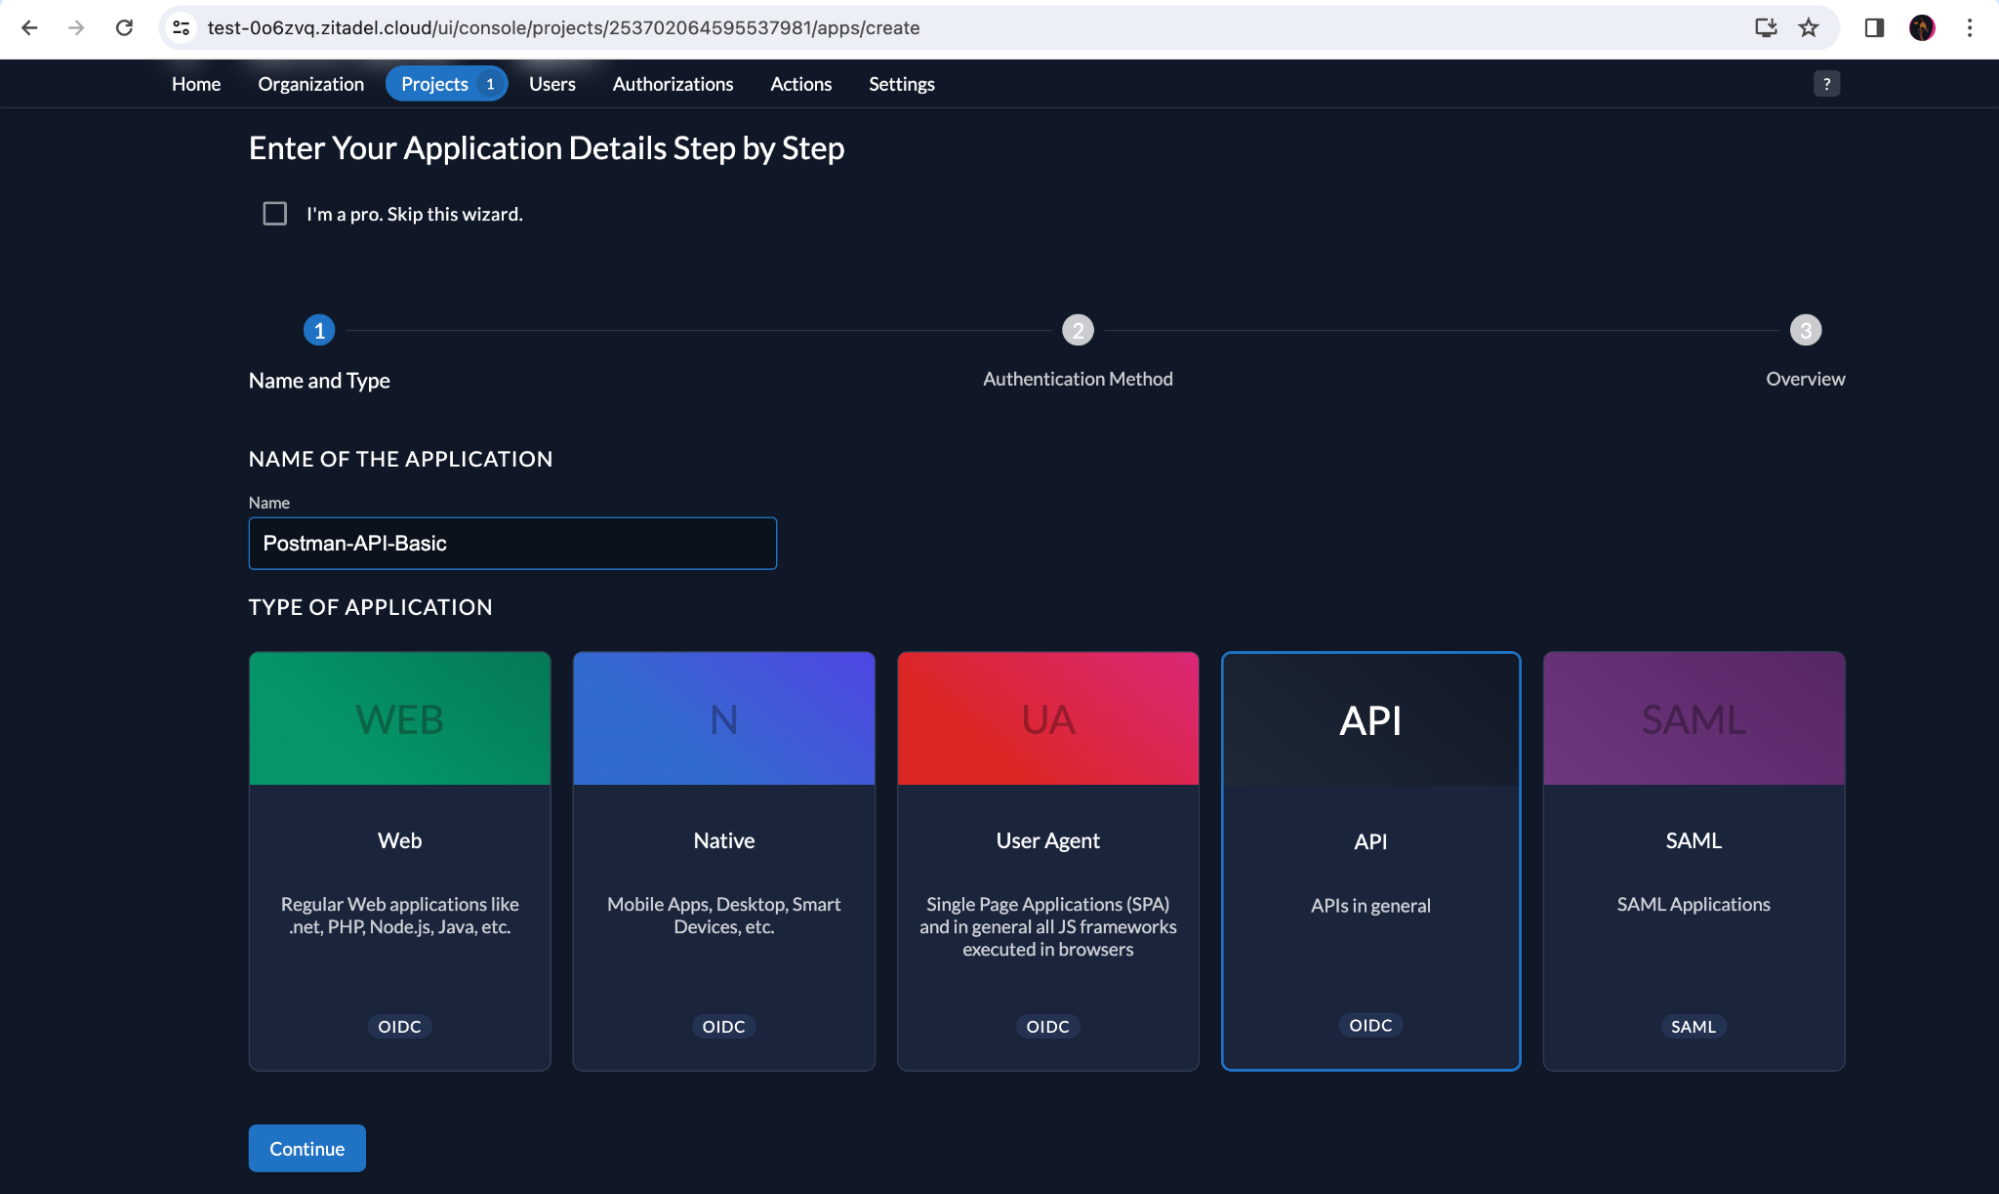
Set Up an API Application in ZITADEL
Go to your ZITADEL project and add a new API application by selecting type API.
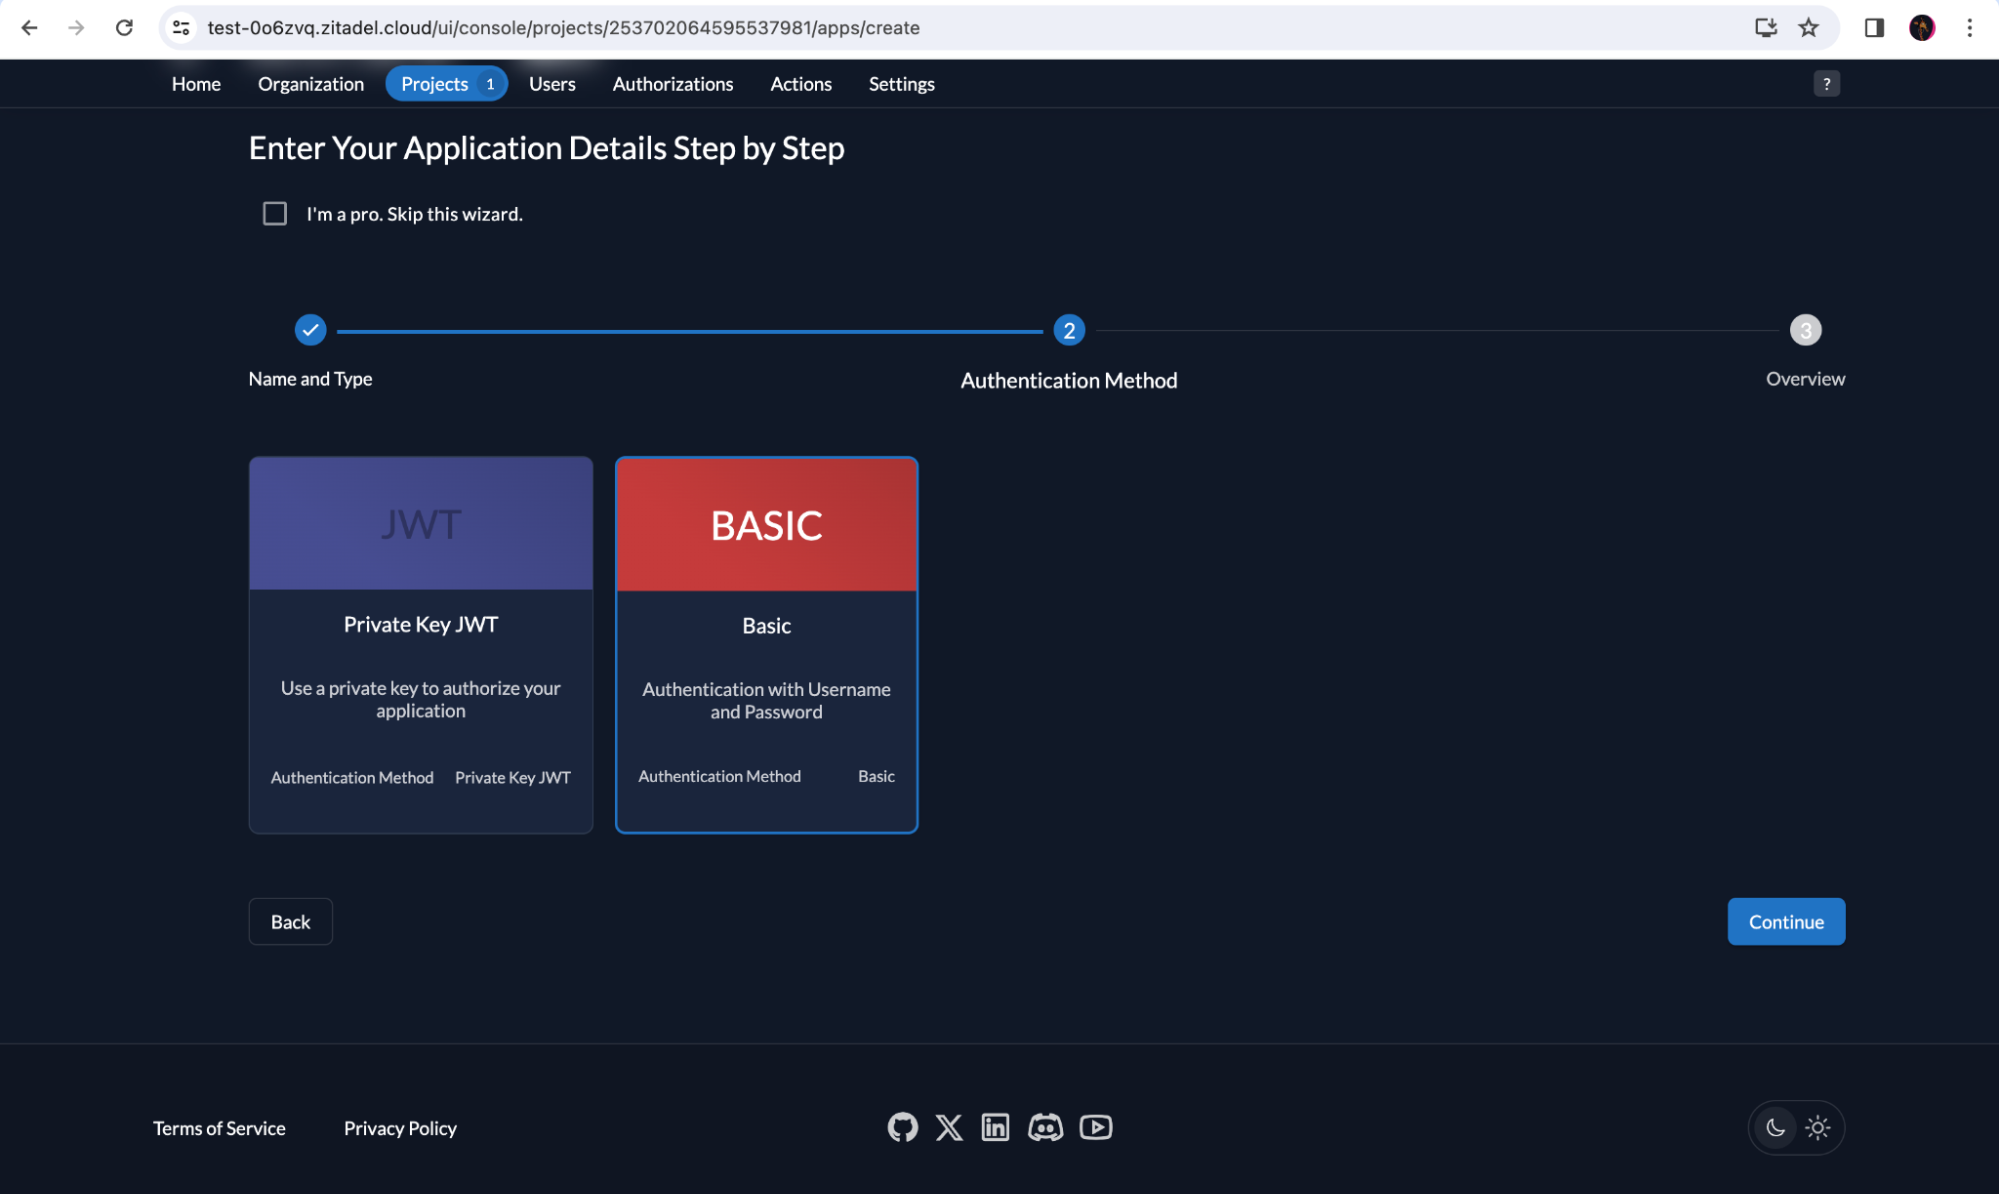
Click on Basic in the next screen because we will be using a Client ID and Client Secret for the API application to authenticate itself when introspecting a token with ZITADEL. Click Continue.
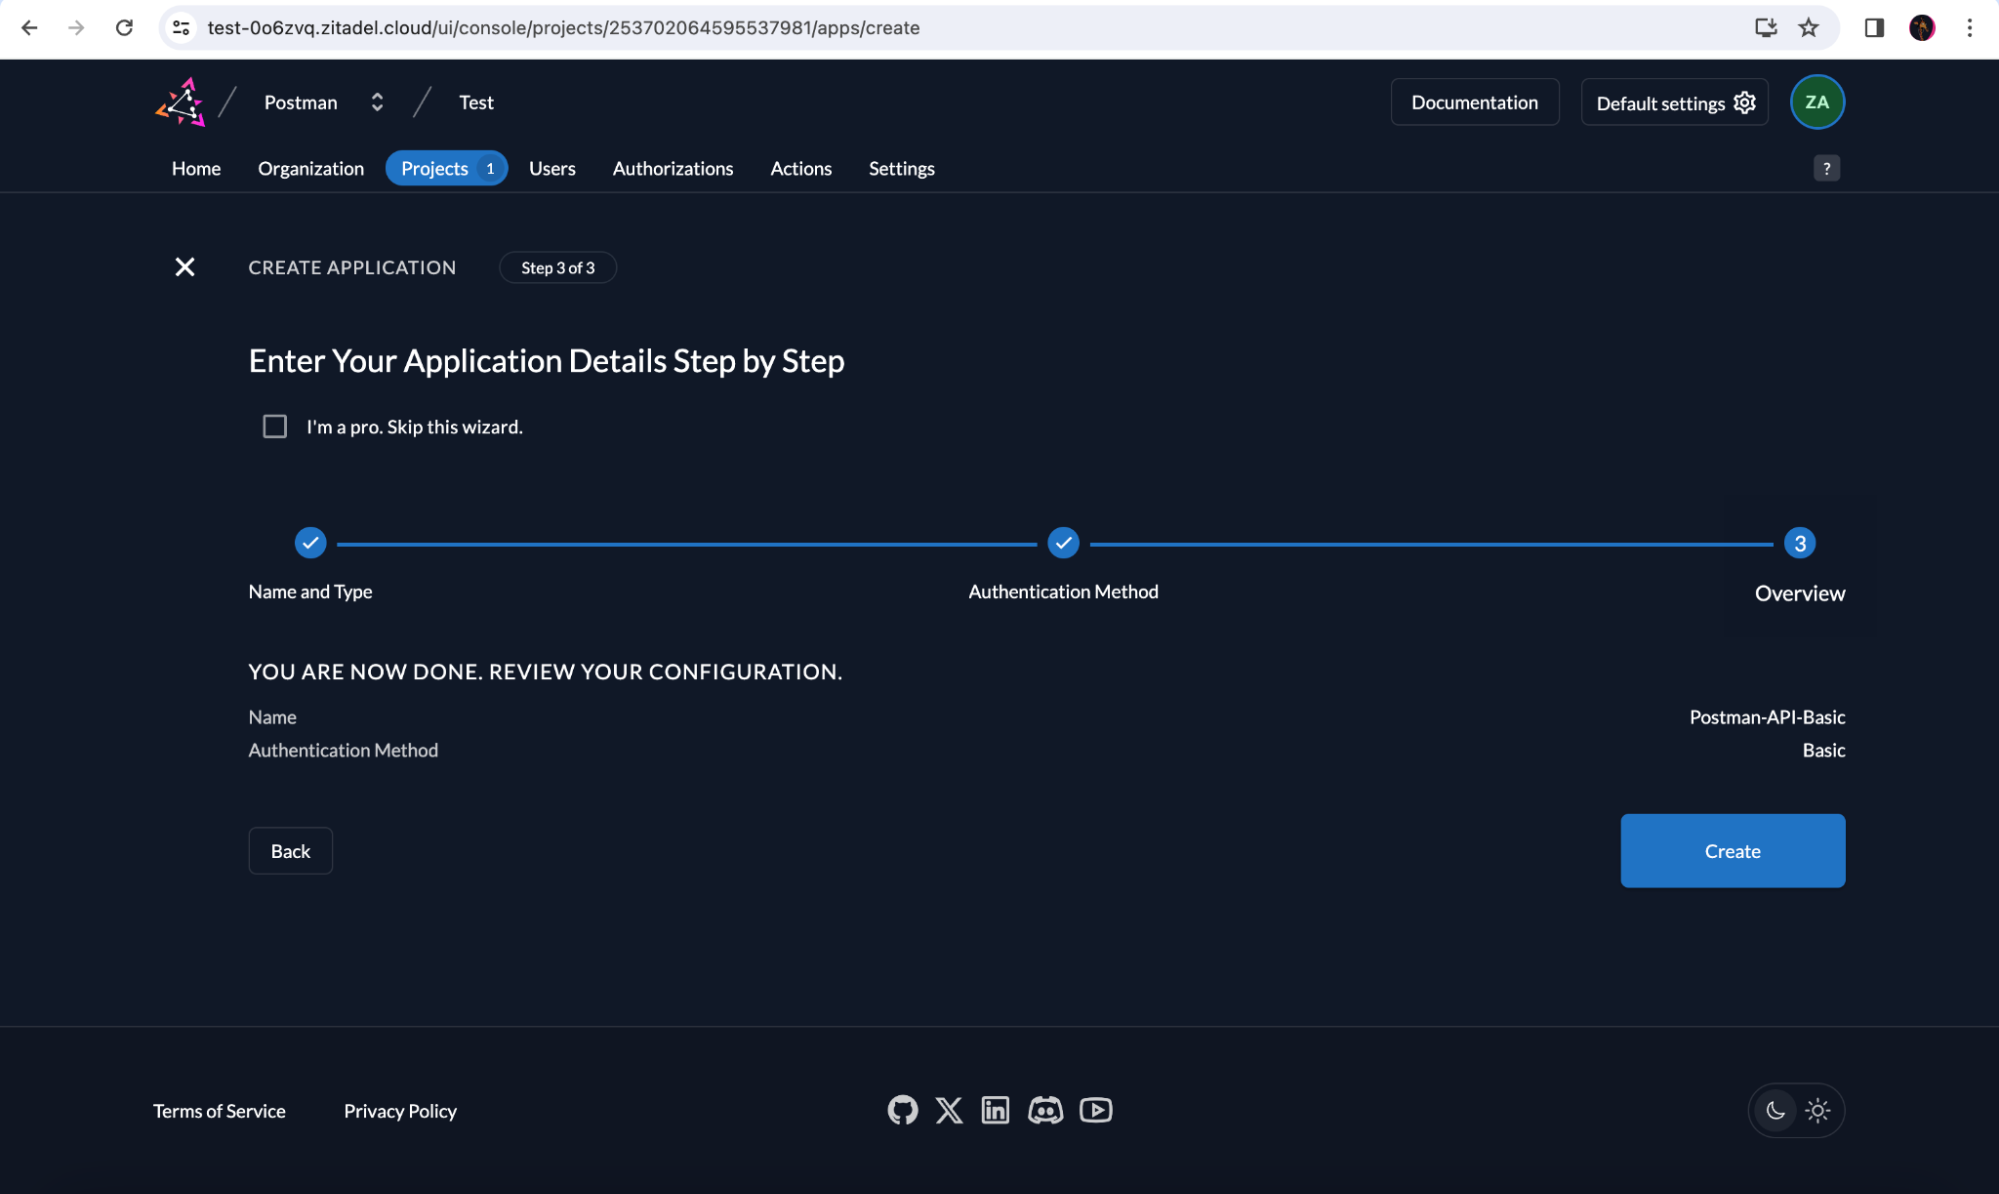
In the next screen, review your application details and click Create.
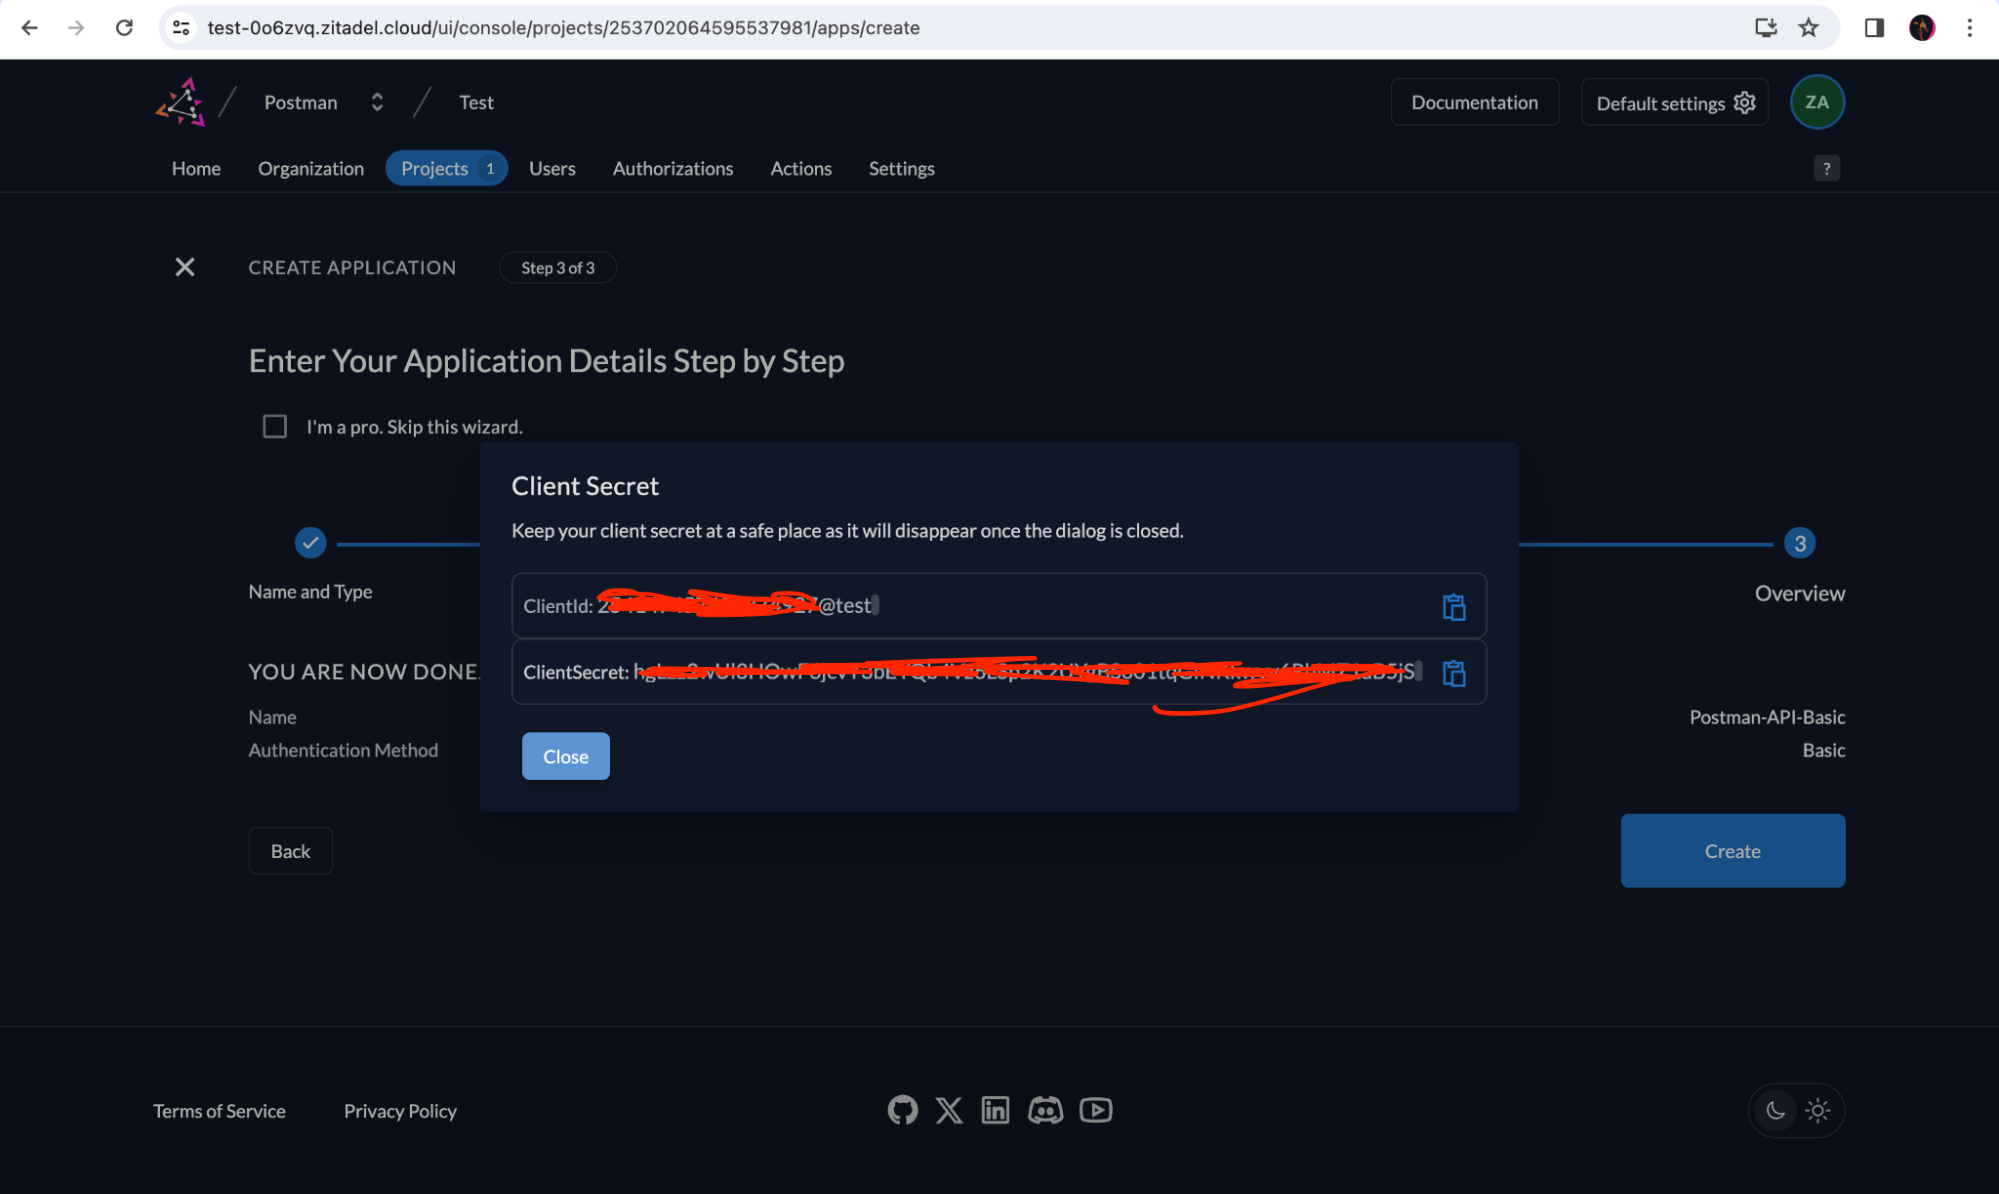
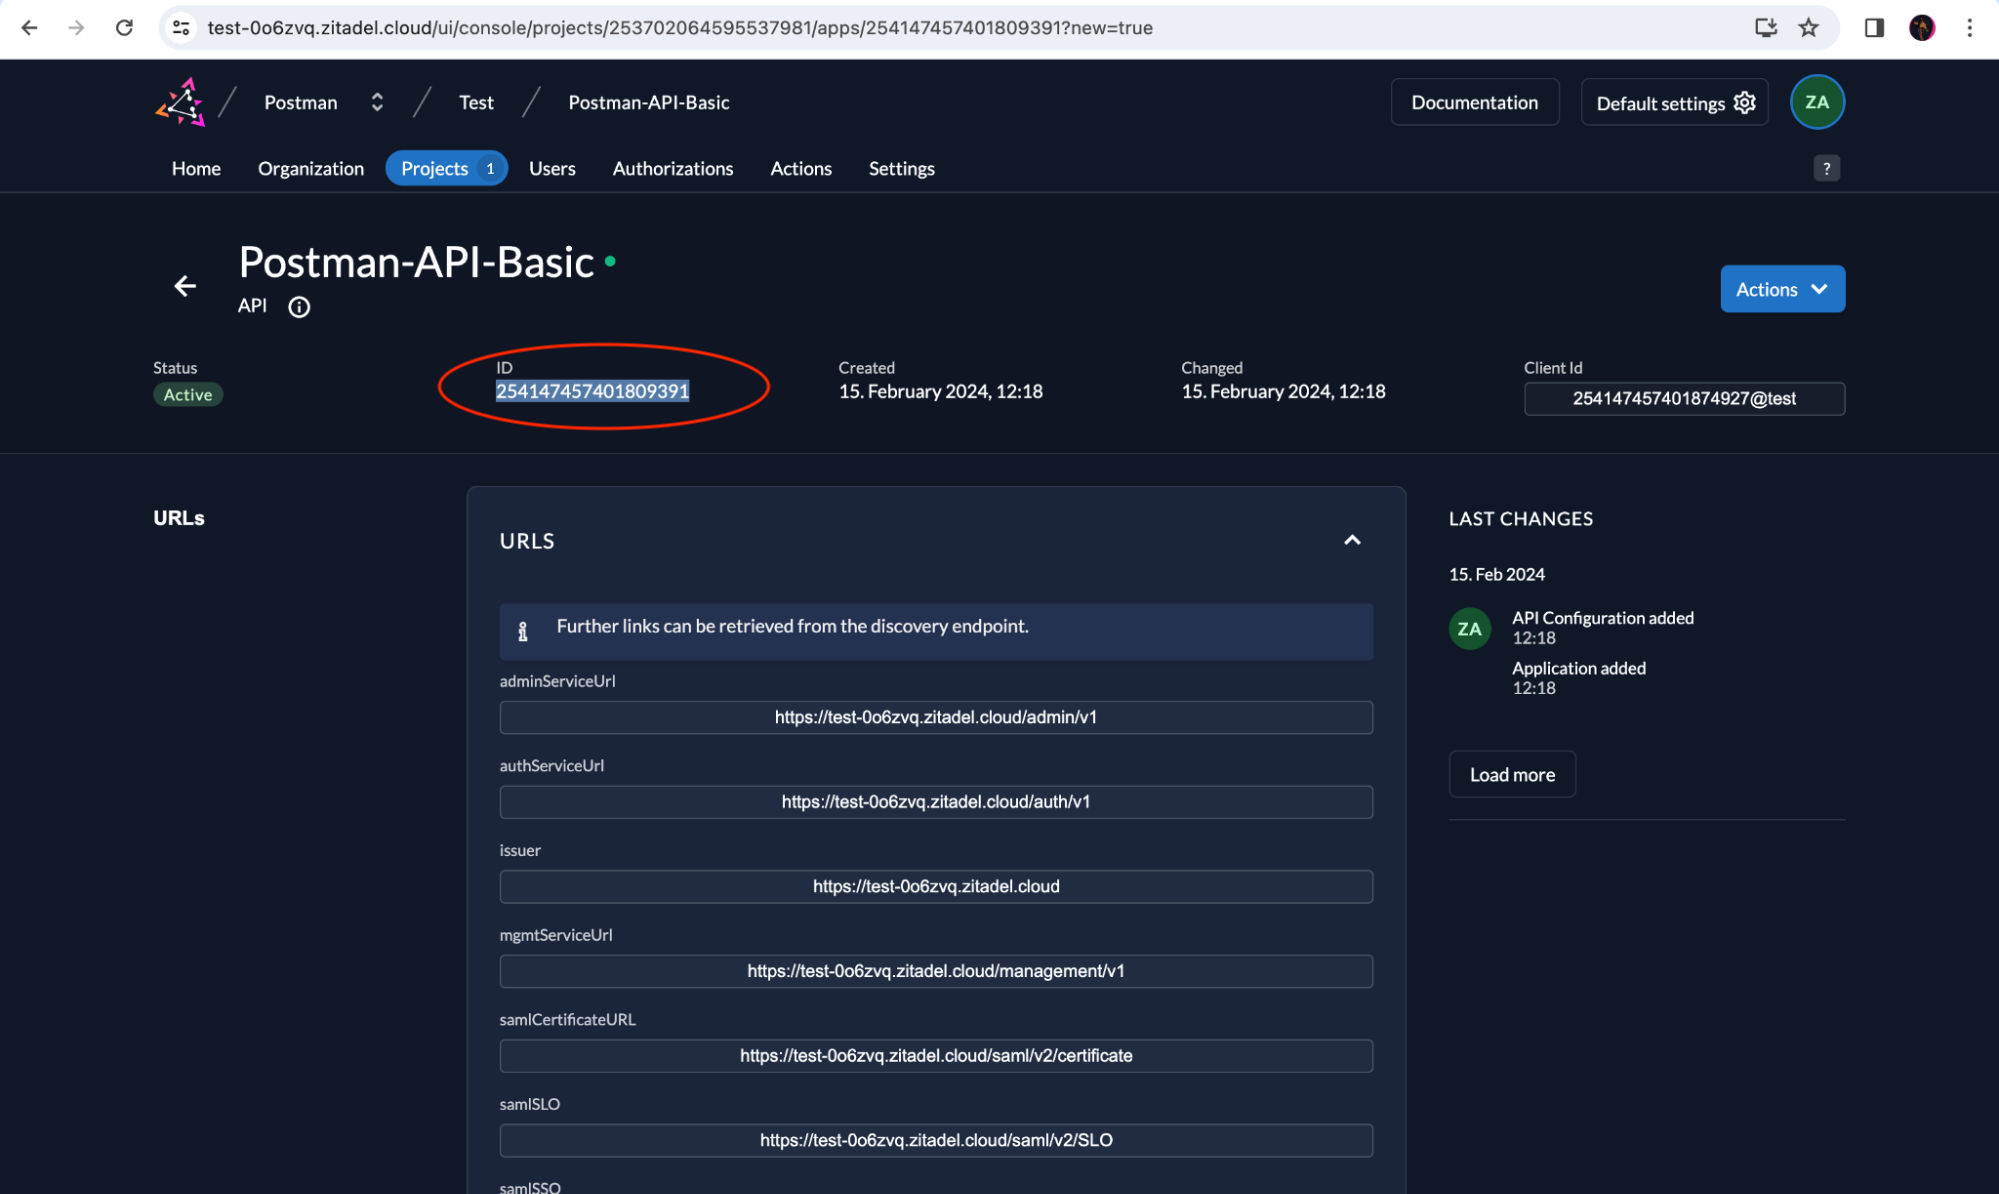
Now you will be shown a Client Id and Client Secret, which you must add to the .env file we created for our Node.js application.
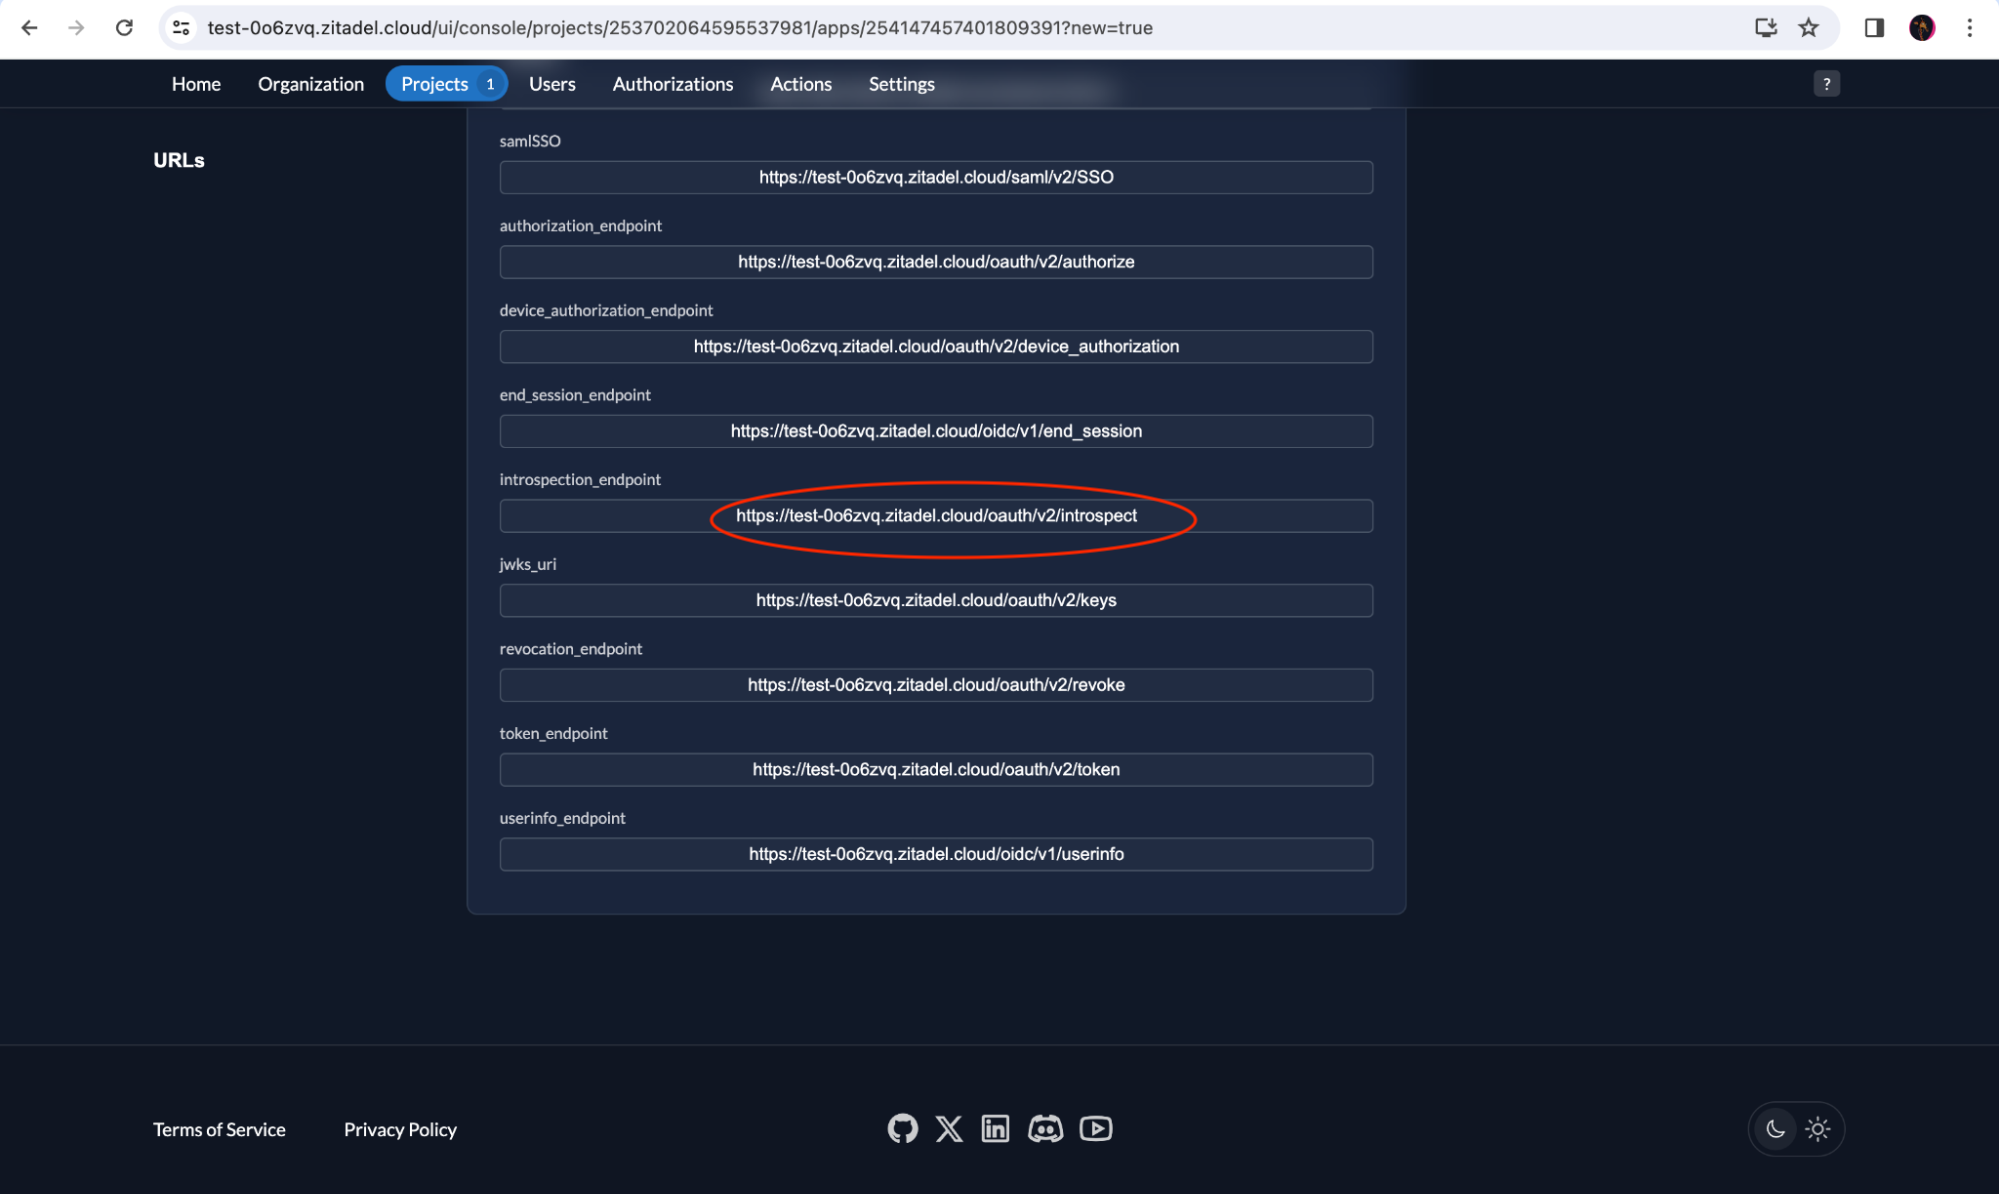
You must also copy the introspection_endpoint to add to the .env file. The introspection endpoint can be found in the URLs section.
Note that when testing an API locally (when using localhost), you will need to install the Postman Desktop Agent in your browser. Postman prompts you to install the Desktop Agent on your browser when you try to make a request to localhost.
Test the API with Postman
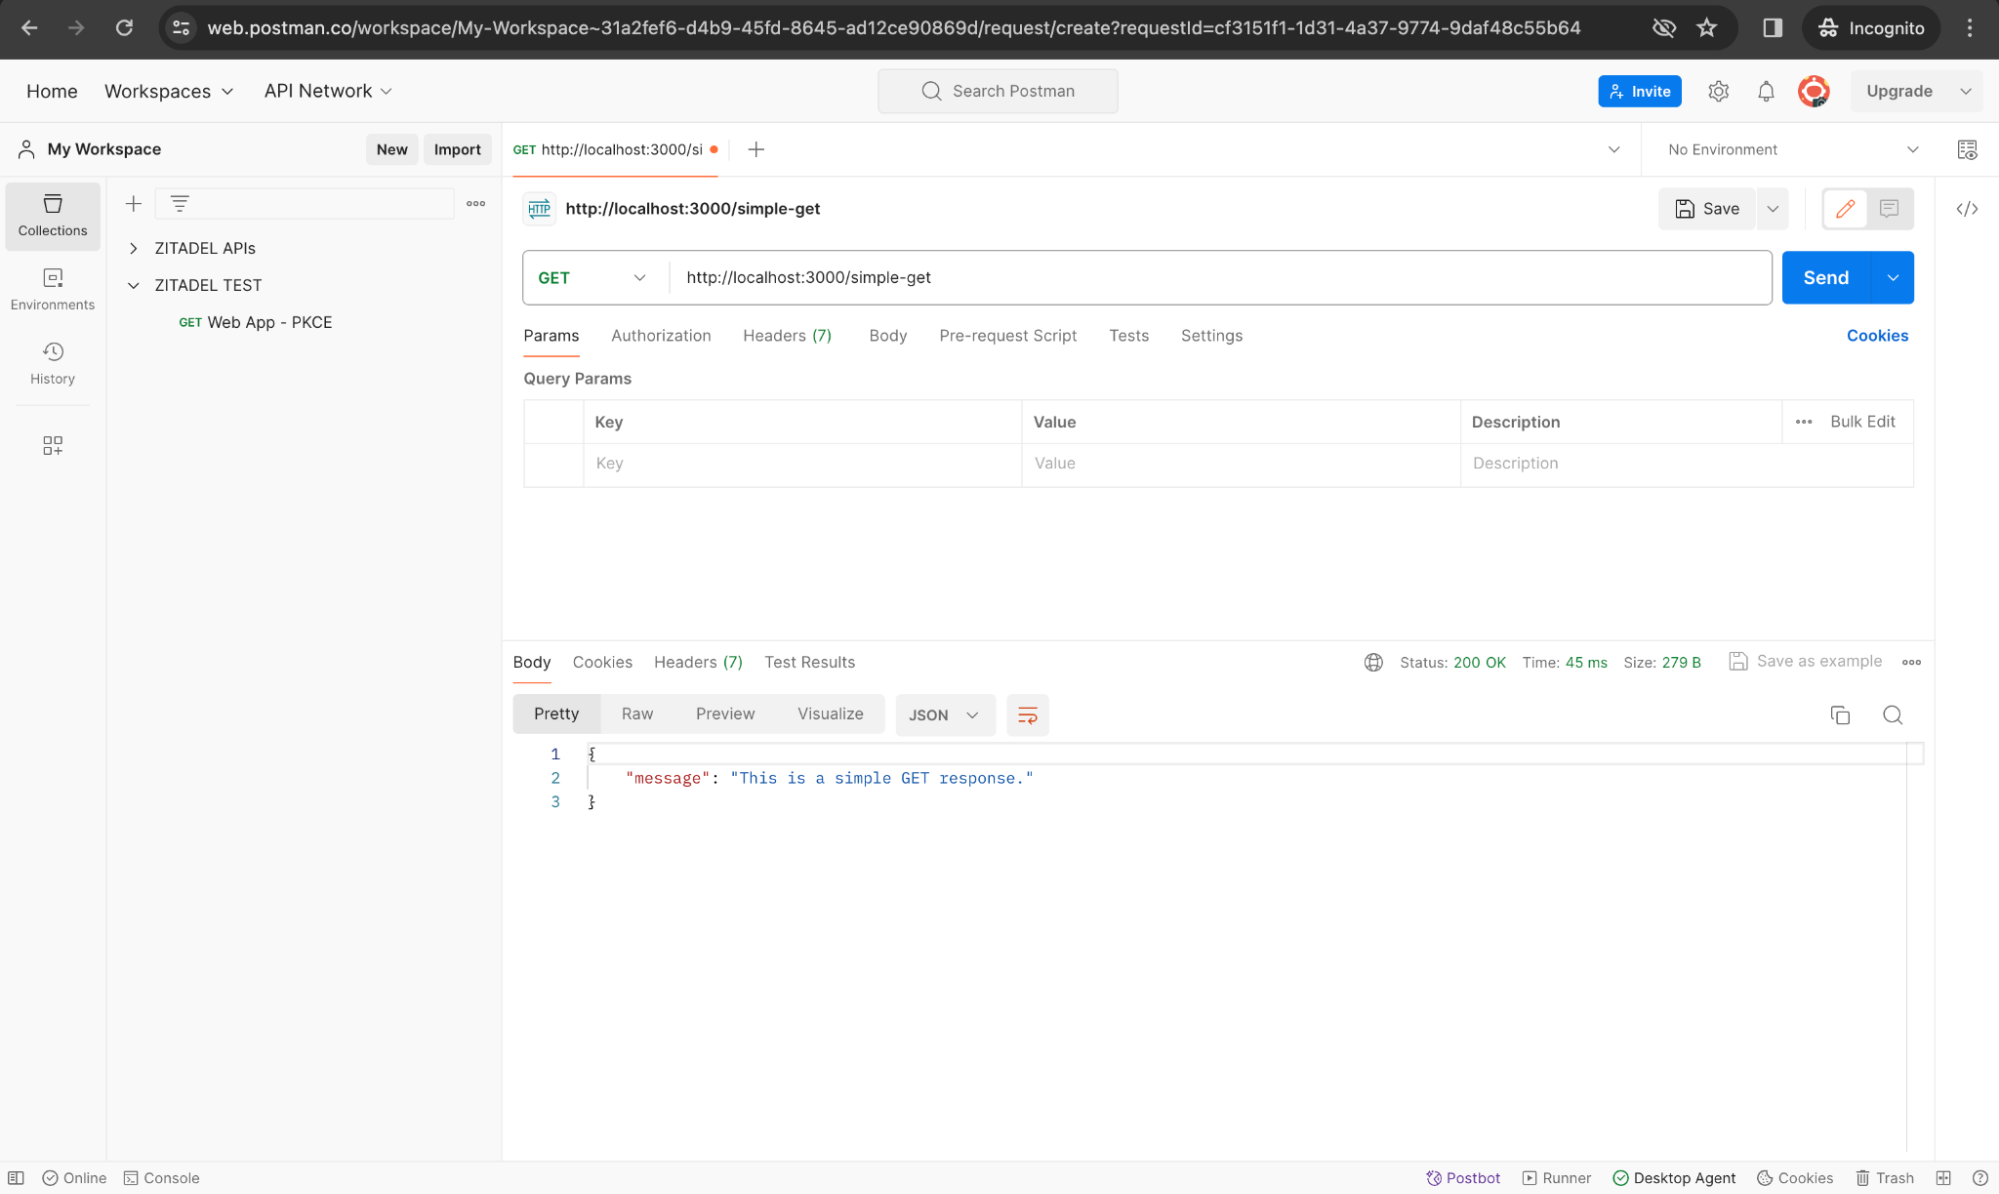
Test the Non-Secured Endpoint
In Postman, create a new request to test the simple GET endpoint of our API: http://localhost:3000/simple-get. Since this endpoint doesn’t require a token for access, you will get the response as shown below:
Test the Secured Endpoint
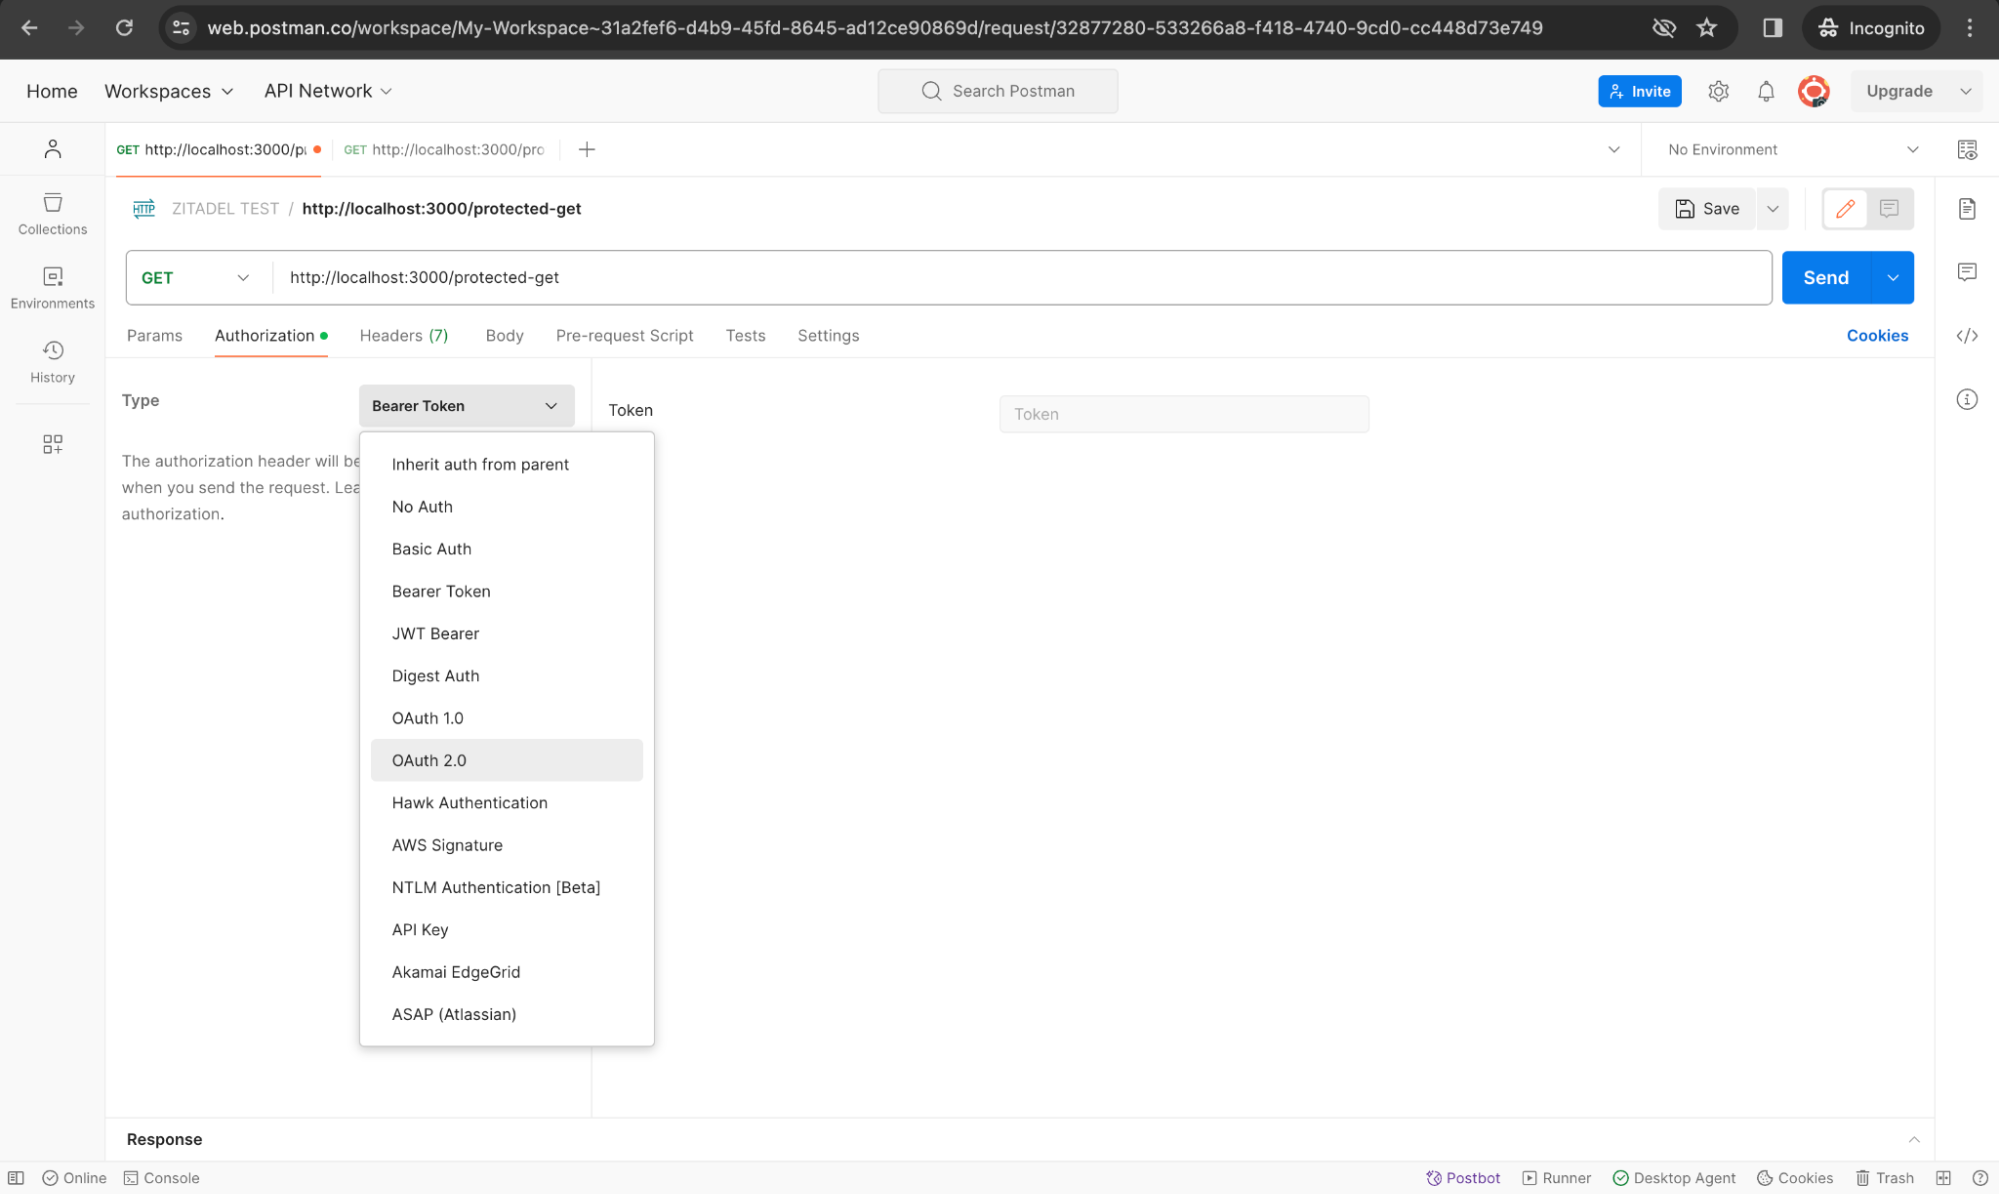
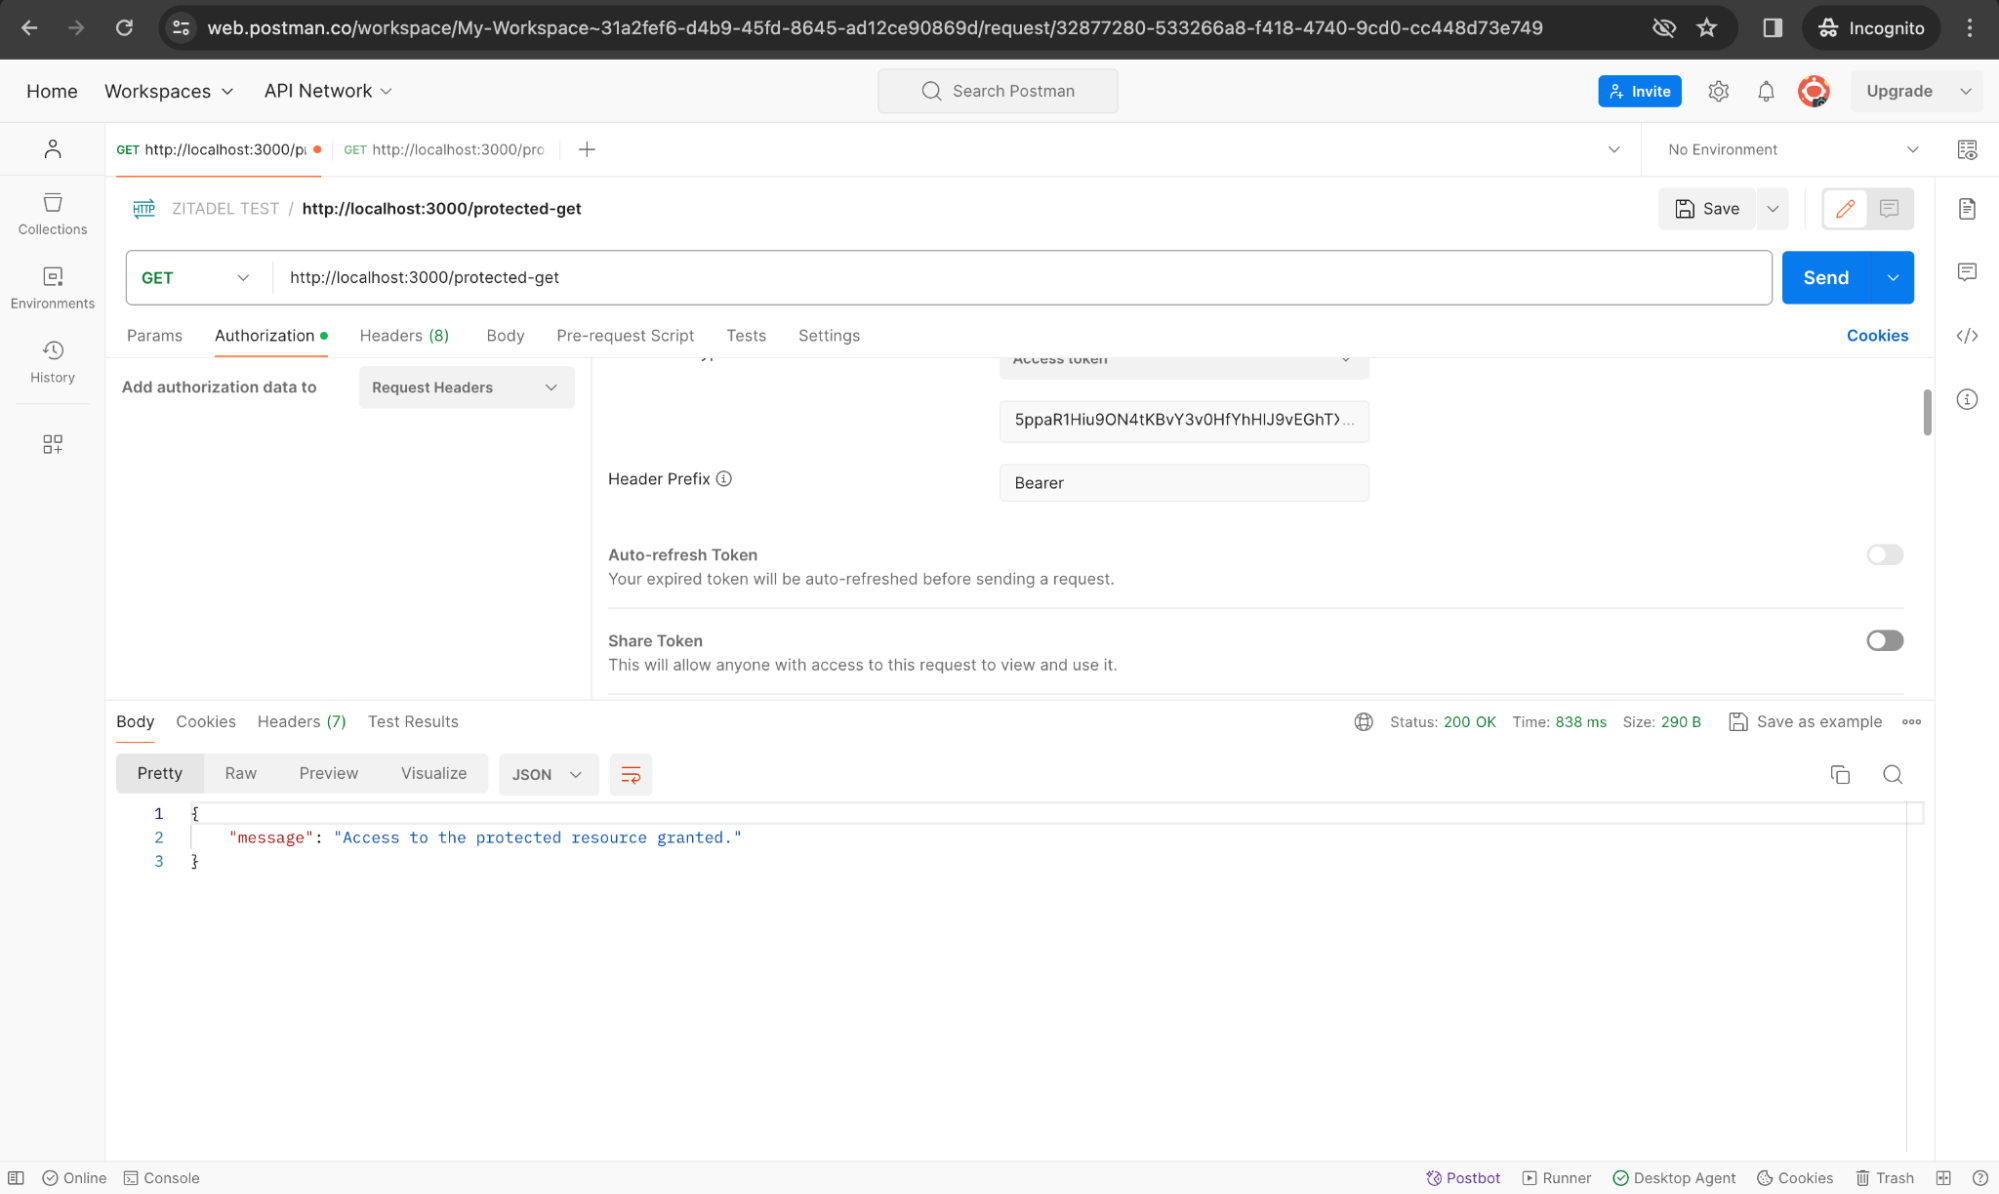
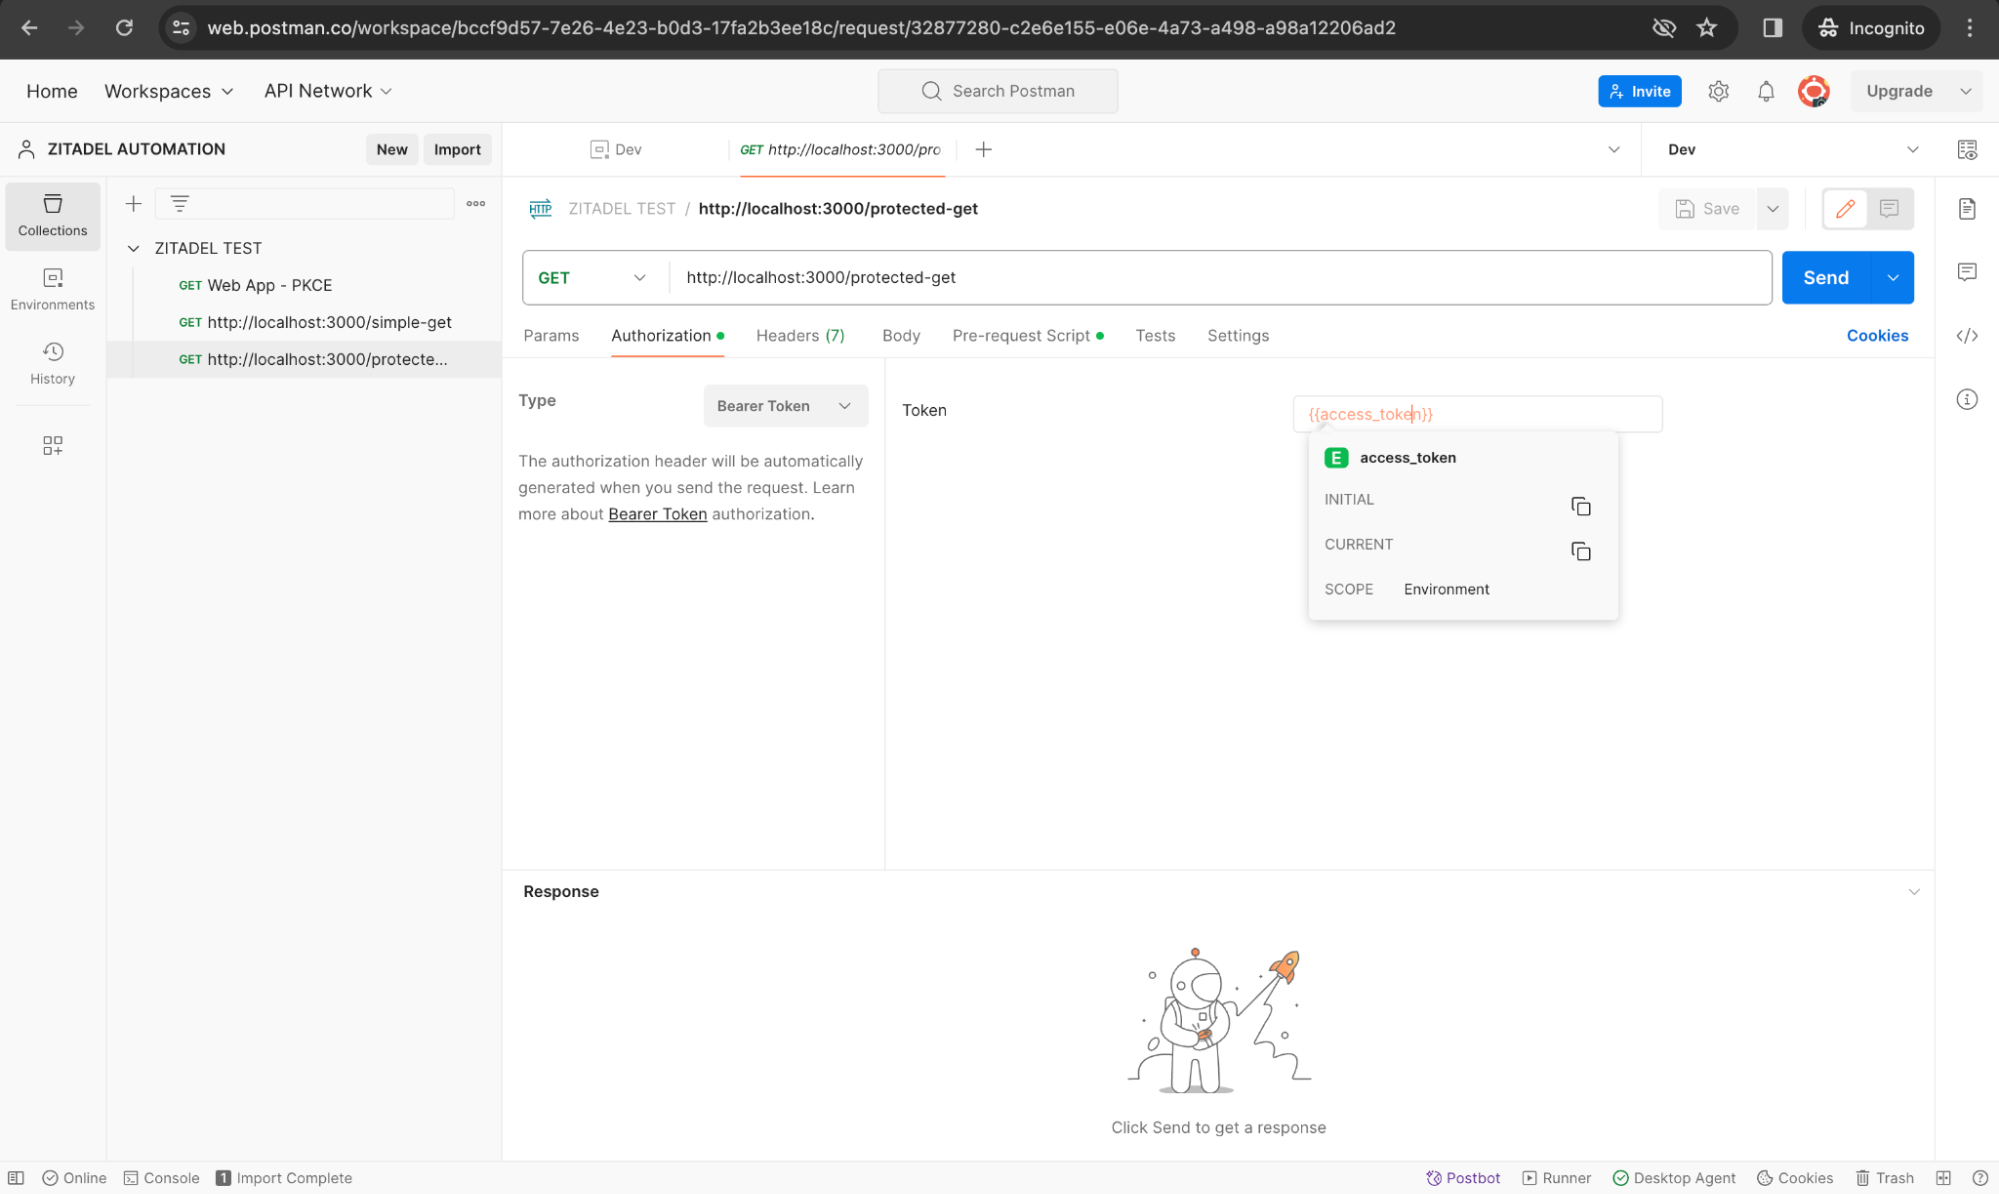
To test the protected endpoint, you need a valid token. Create a new API request in your collection for http://localhost:3000/protected-get.
Next, go to the Authorization tab and select OAuth 2.0 in the Type dropdown as shown below:
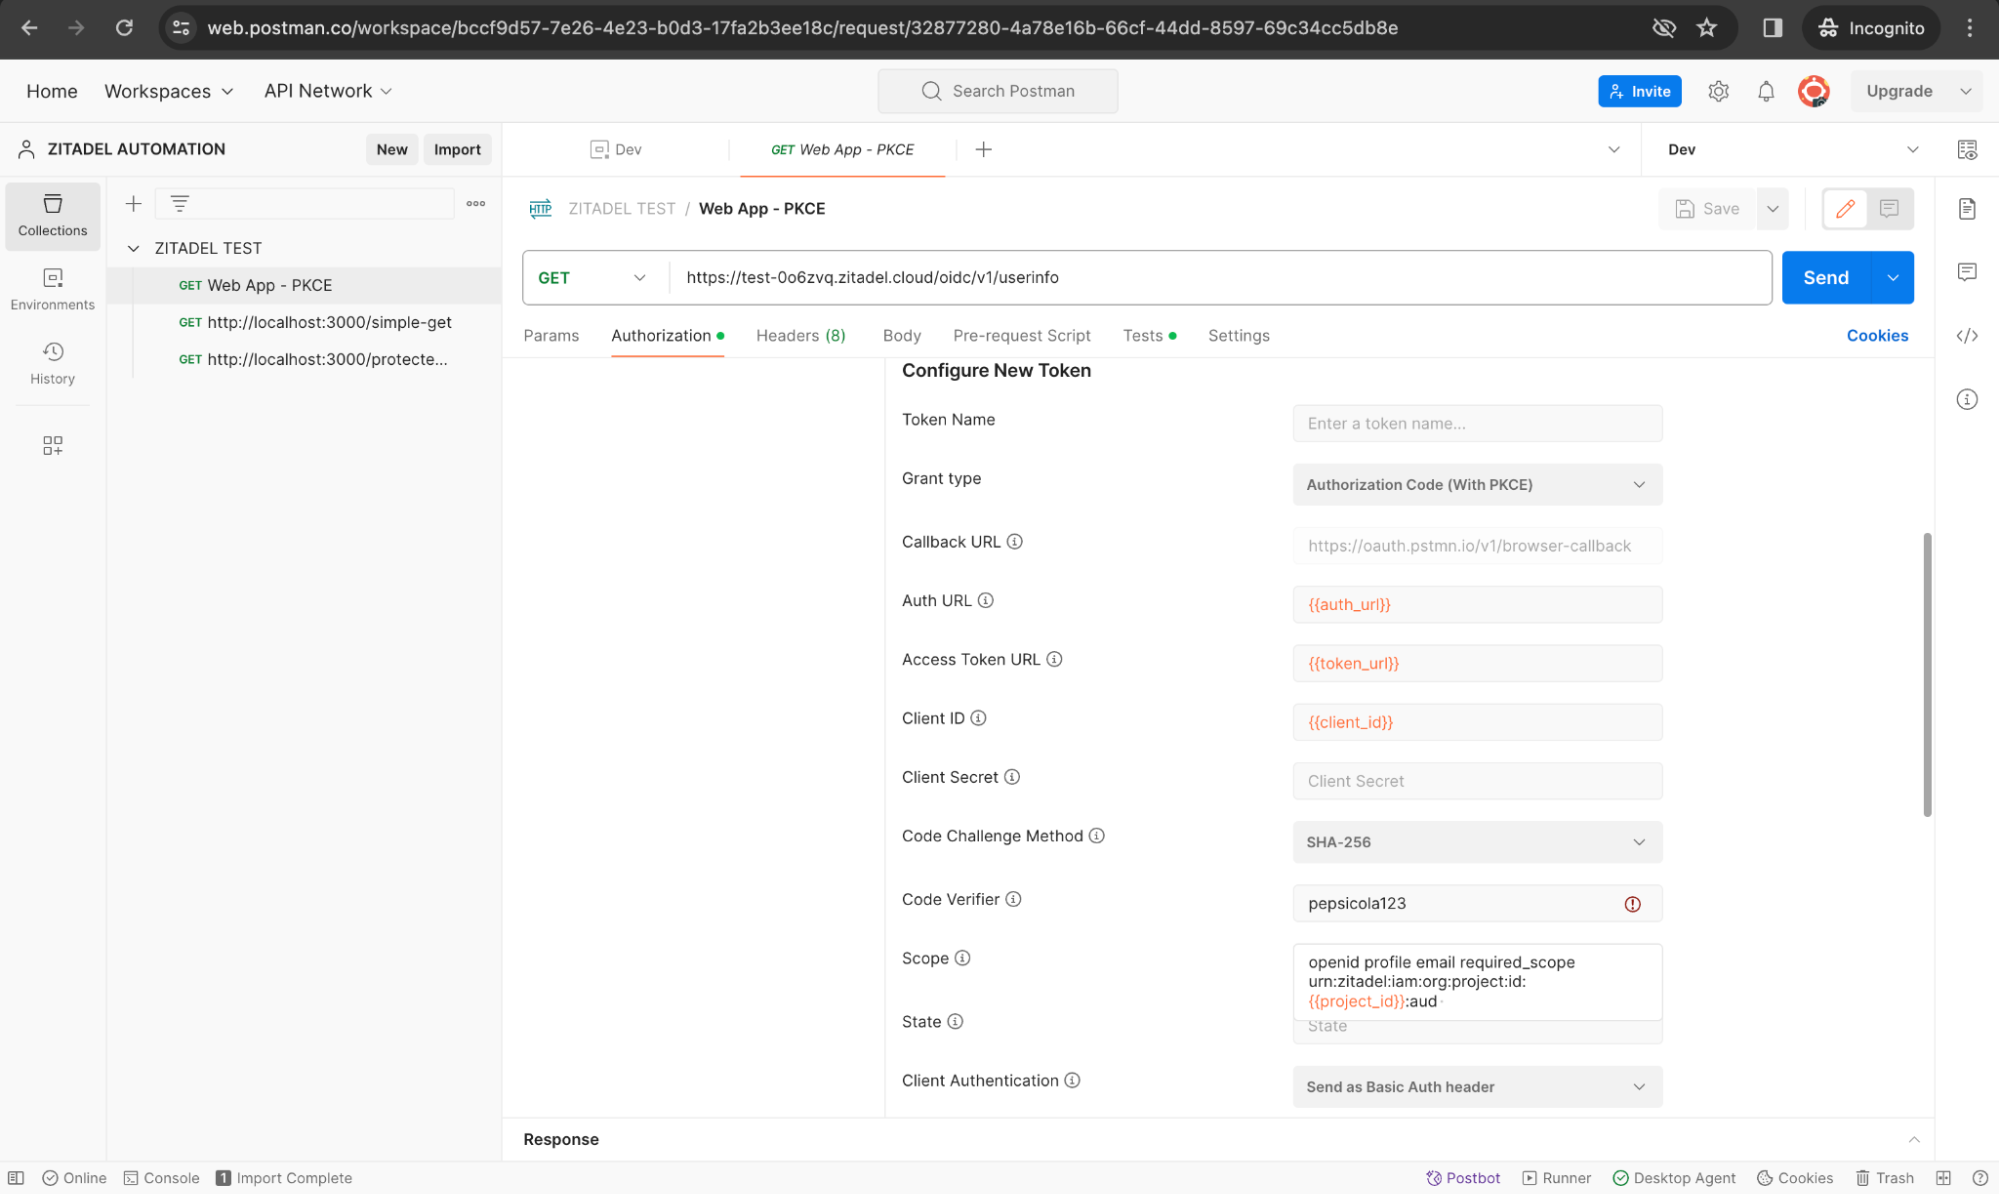
Next, you need to add an access token. You can obtain the access token the same way we did earlier with the PKCE request. However, we have to make a small adjustment in the scope parameter to include the Project ID as shown below.
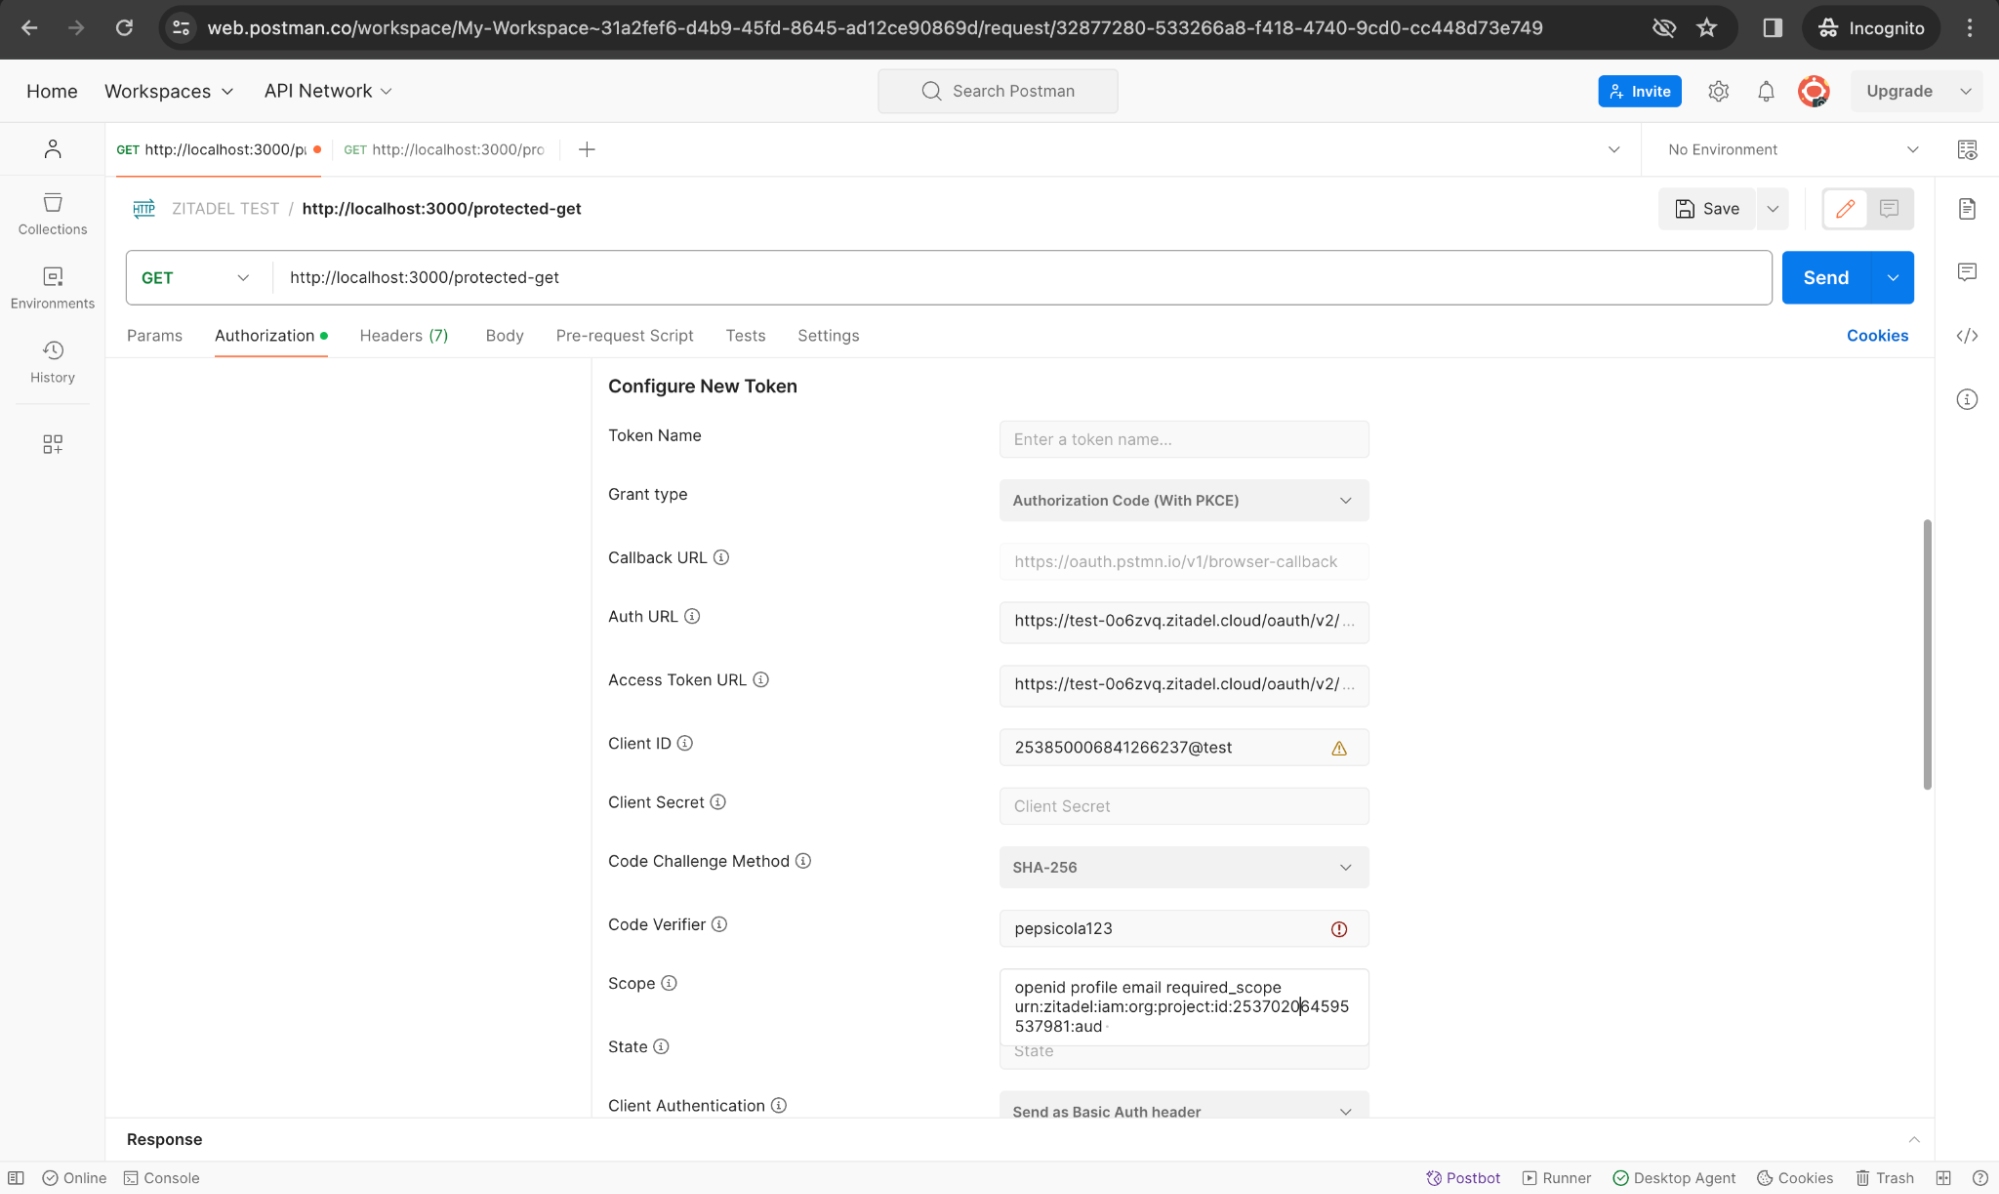
You must set up the required scopes and claims to ensure that the front-end (Postman) and back-end can exchange data securely. It’s important to note that when specifying the scope when calling the token API, the scope must contain the project ID of the ZITADEL project in which the API resides (to enable token validation by the back-end API). Copy the ID of the project, which you can find in the ZITADEL UI, as highlighted below:
Go back to Postman and modify the scope field to the following:
openid profile email urn:zitadel:iam:org:project:id:YOUR_API_PROJECT_ID:aud.
Replace API_PROJECT_ID with the ID of the ZITADEL project in which your API resides.
Get a token, and then send the request. If the token is valid, you will receive a response as shown below:
Run a Sequence of Requests in Postman
We can automate our requests to the APIs, especially when the execution depends on the outcome of previous requests (like utilizing an obtained token in subsequent calls). This can be managed through Postman's Collection Runner and Pre-request Scripts. Here's how to achieve this, including handling token refreshes:
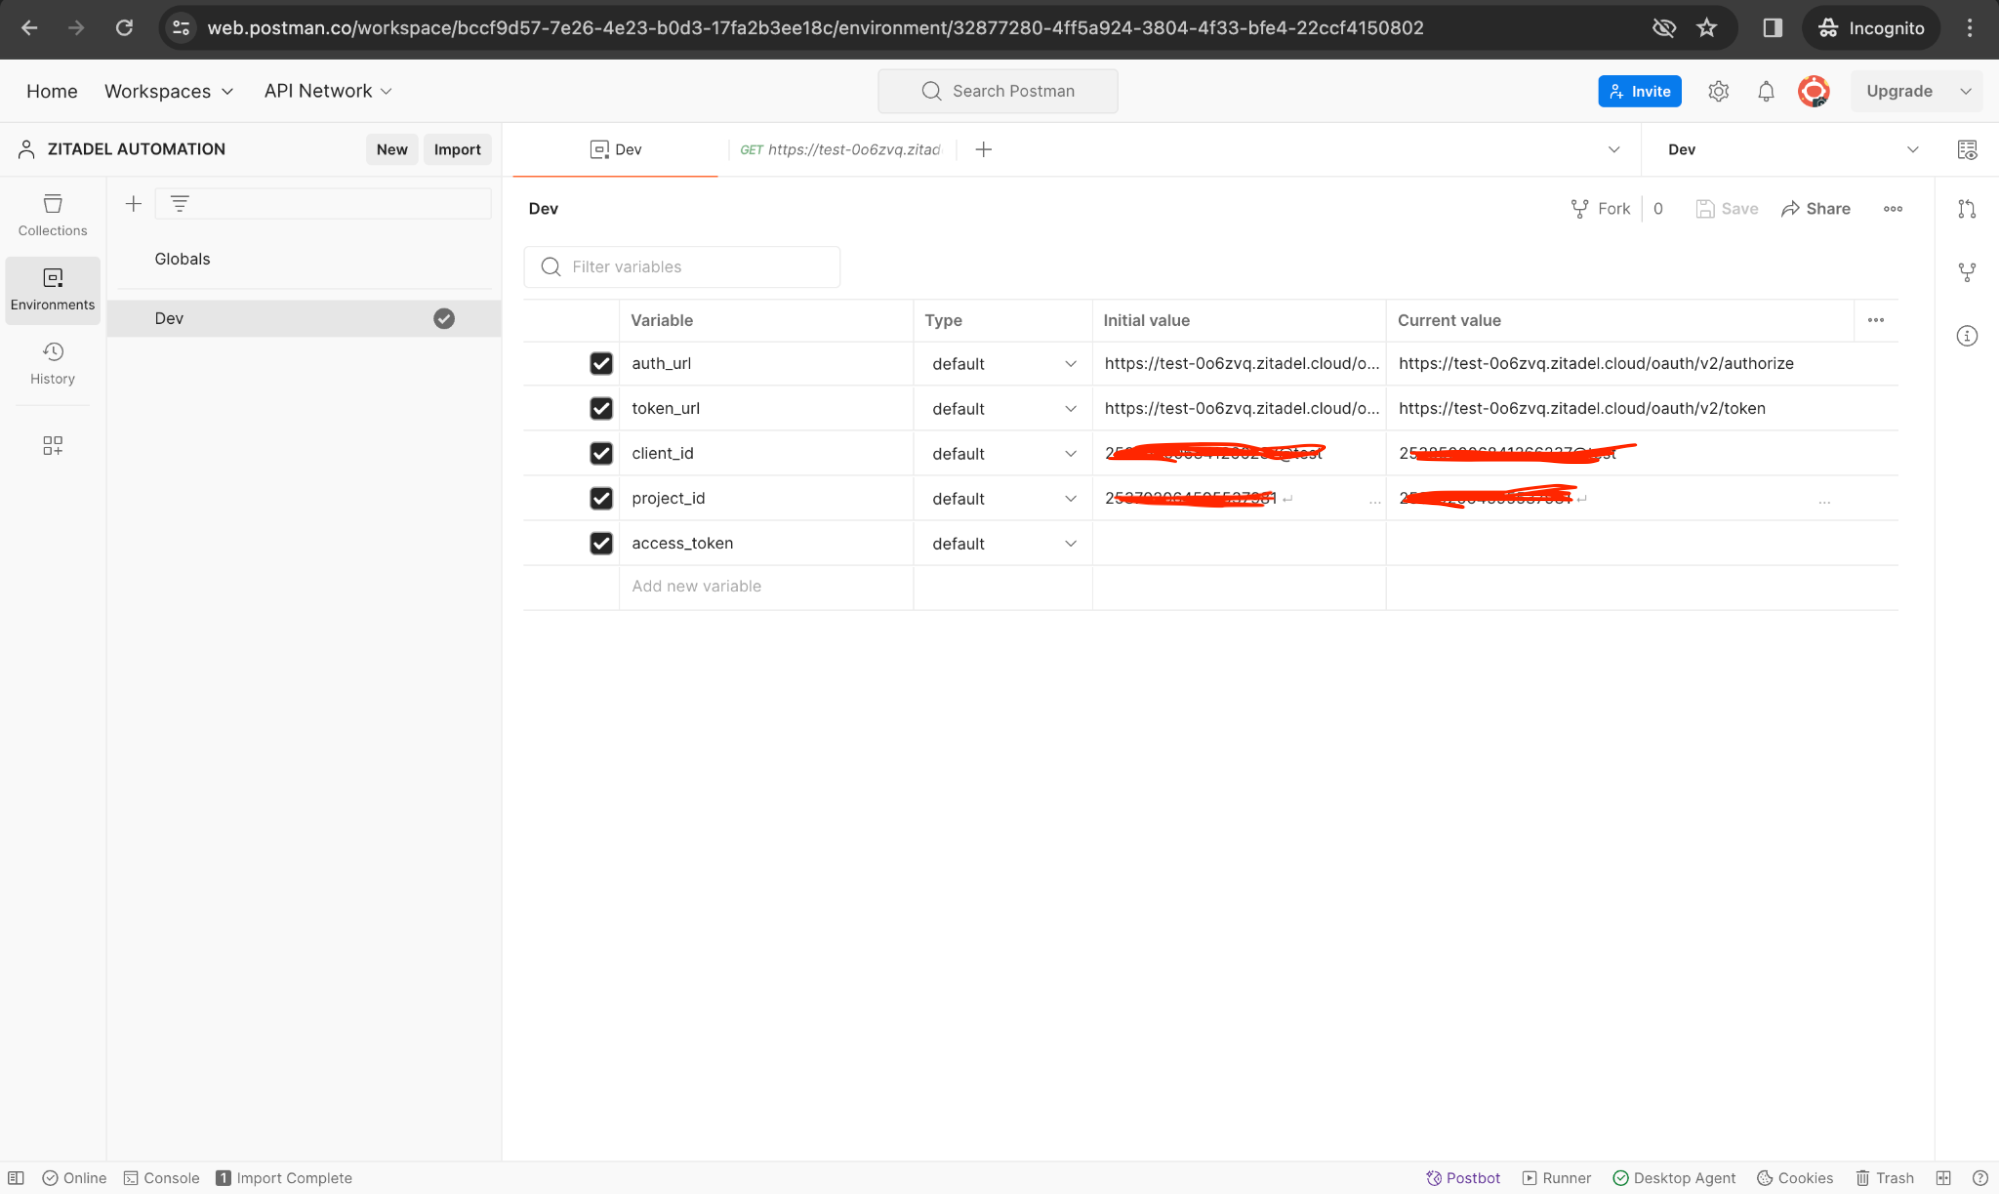
Step 1: Set Up an Active Environment and Environment Variables
We need to reuse the access token generated from the Auth Code PKCE request for our subsequent API requests. We can also store auth_url, token_url, client_id, project_id, and access_token as environment variables. To do this, go to the Environments tab in Postman, add a new Environment (the one listed here is Dev), select the environment as the active environment (black tick), and finally add the variable names and their values as shown below.
Step 2: Set Up Your Postman Collection with the Necessary Requests
We will be using the same requests as we did before with slight changes to include environment variables and a pre-request script in order to use the same access token for all the requests to simulate the typical flow of a user-driven web application.
- Userinfo Endpoint Call: This initial request authenticates the user and obtains an access token to call ZITADEL’s userinfo endpoint. Assume that this is how the user logs in first to the web application. Notice how the environment variables are used.
-
Simple GET Call: A basic request that doesn't require authentication.
-
Protected API Call: Requires the token for authentication. Notice how we have set the Authorization Type to Bearer Token here and refers to the environment variable that we created earlier.
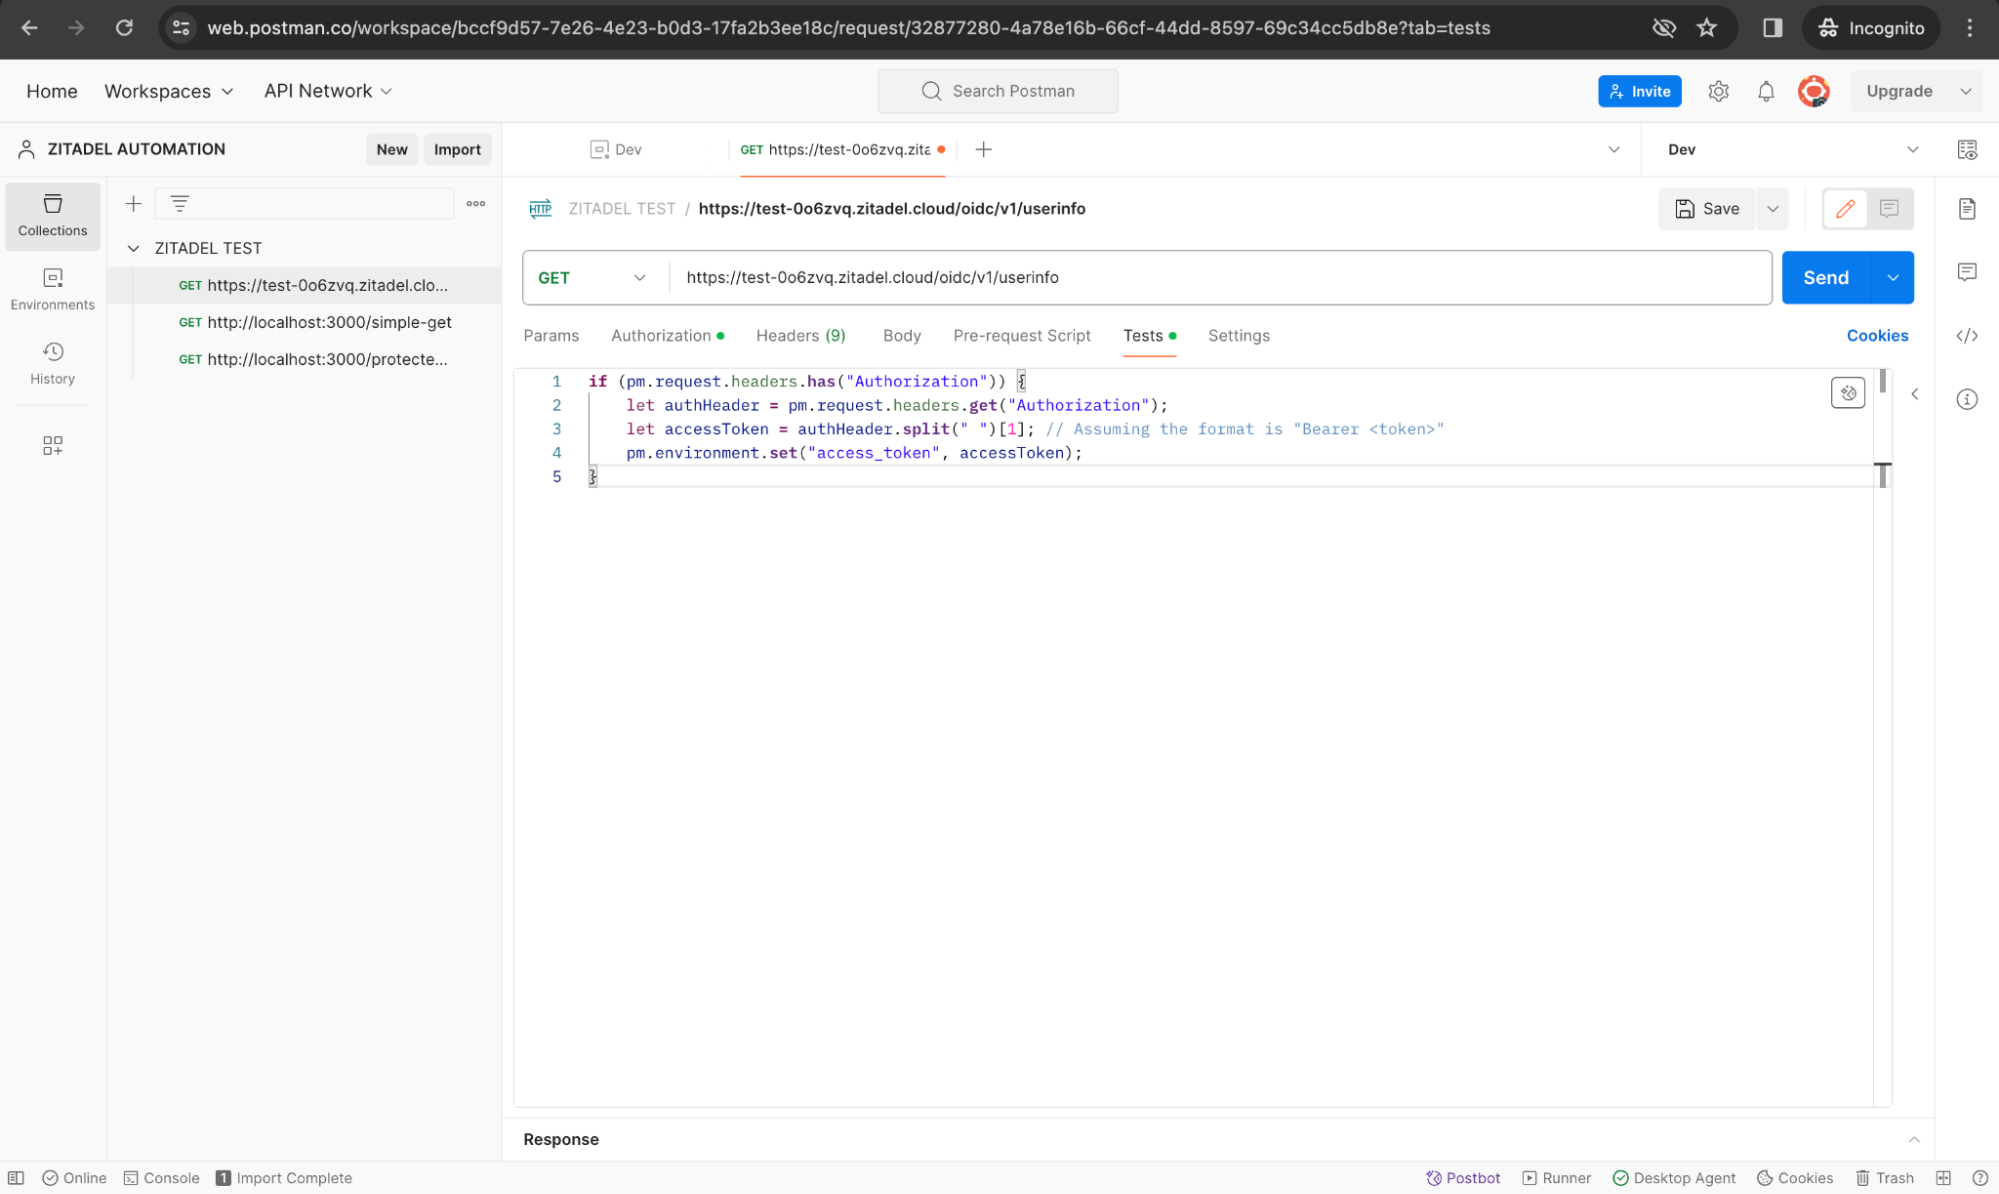
Step 3: Extract and Store the Token
In the Tests tab in your first request (userinfo endpoint call), add the following code to extract the access token from the first request to store it as a variable:
if (pm.request.headers.has("Authorization")) {
   let authHeader = pm.request.headers.get("Authorization");
   let accessToken = authHeader.split(" ")[1]; // Assuming the format is "Bearer <token>"
   pm.environment.set("access_token", accessToken);
}
Test scripts in Postman are written in JavaScript and run after the response is received. Don’t forget to save the script.
Step 4: Run Your Postman Collection
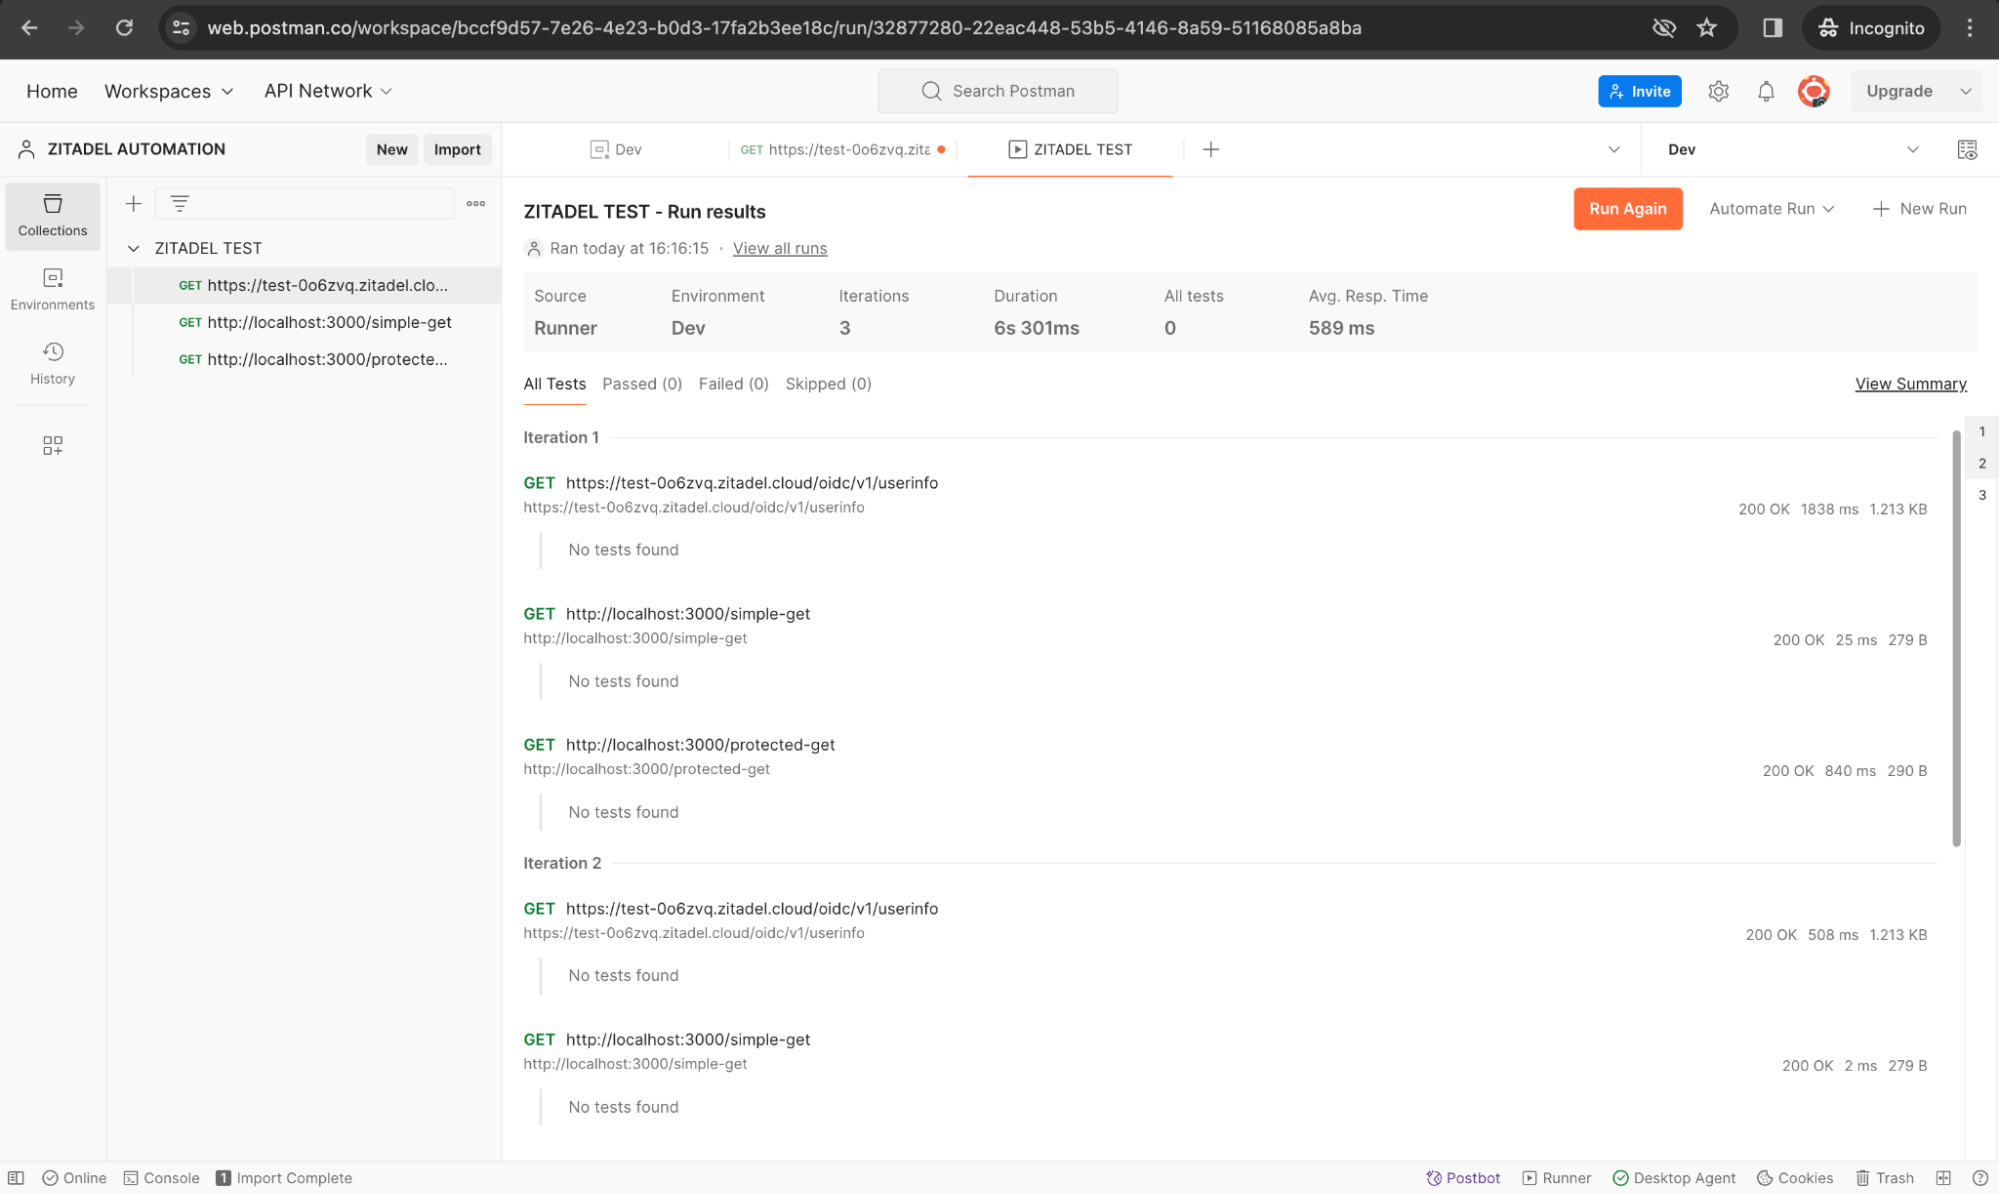
Utilize Postman's Collection Runner to run the entire collection.
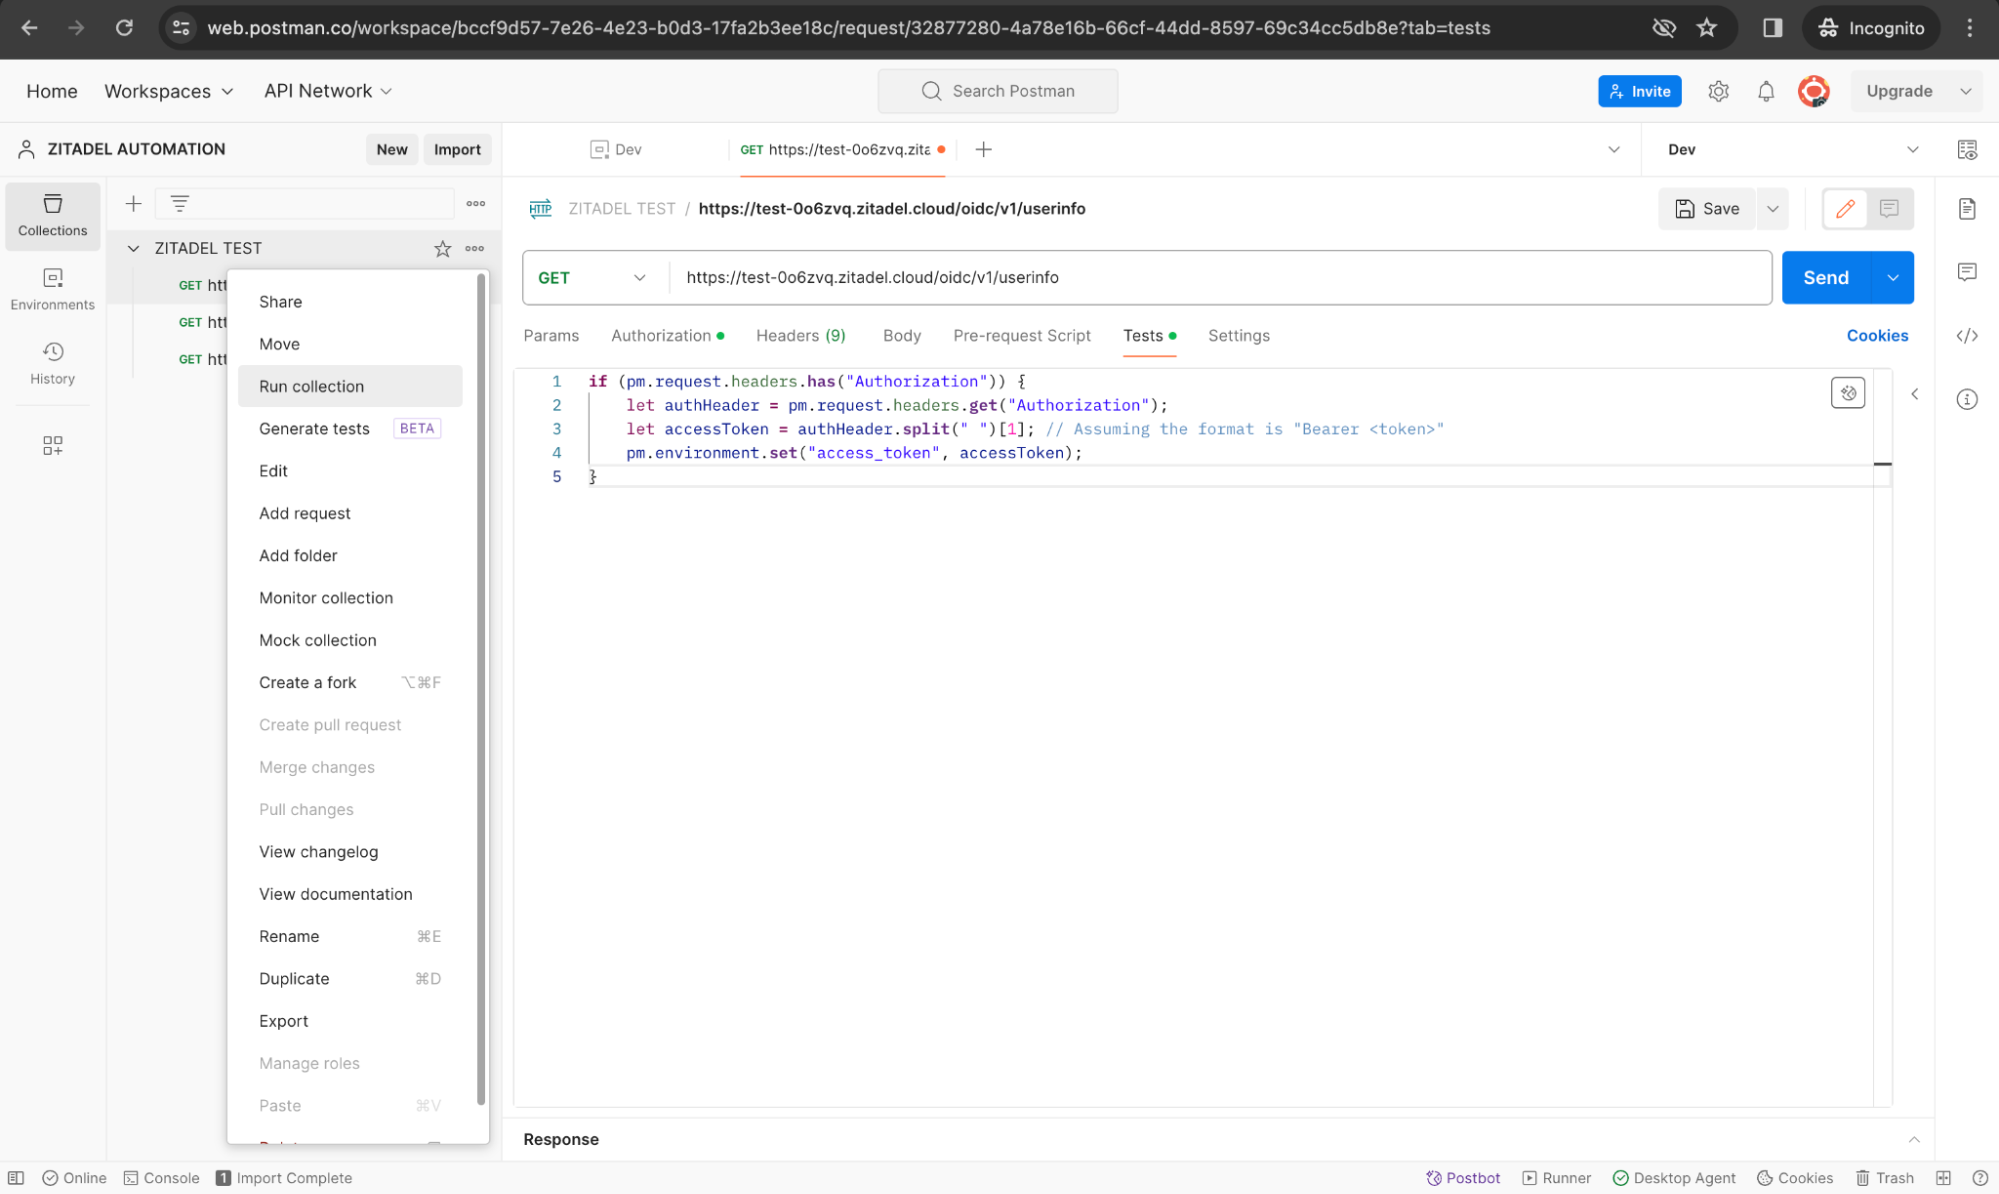
We are going to run the requests manually. Click the Run button to run the test.
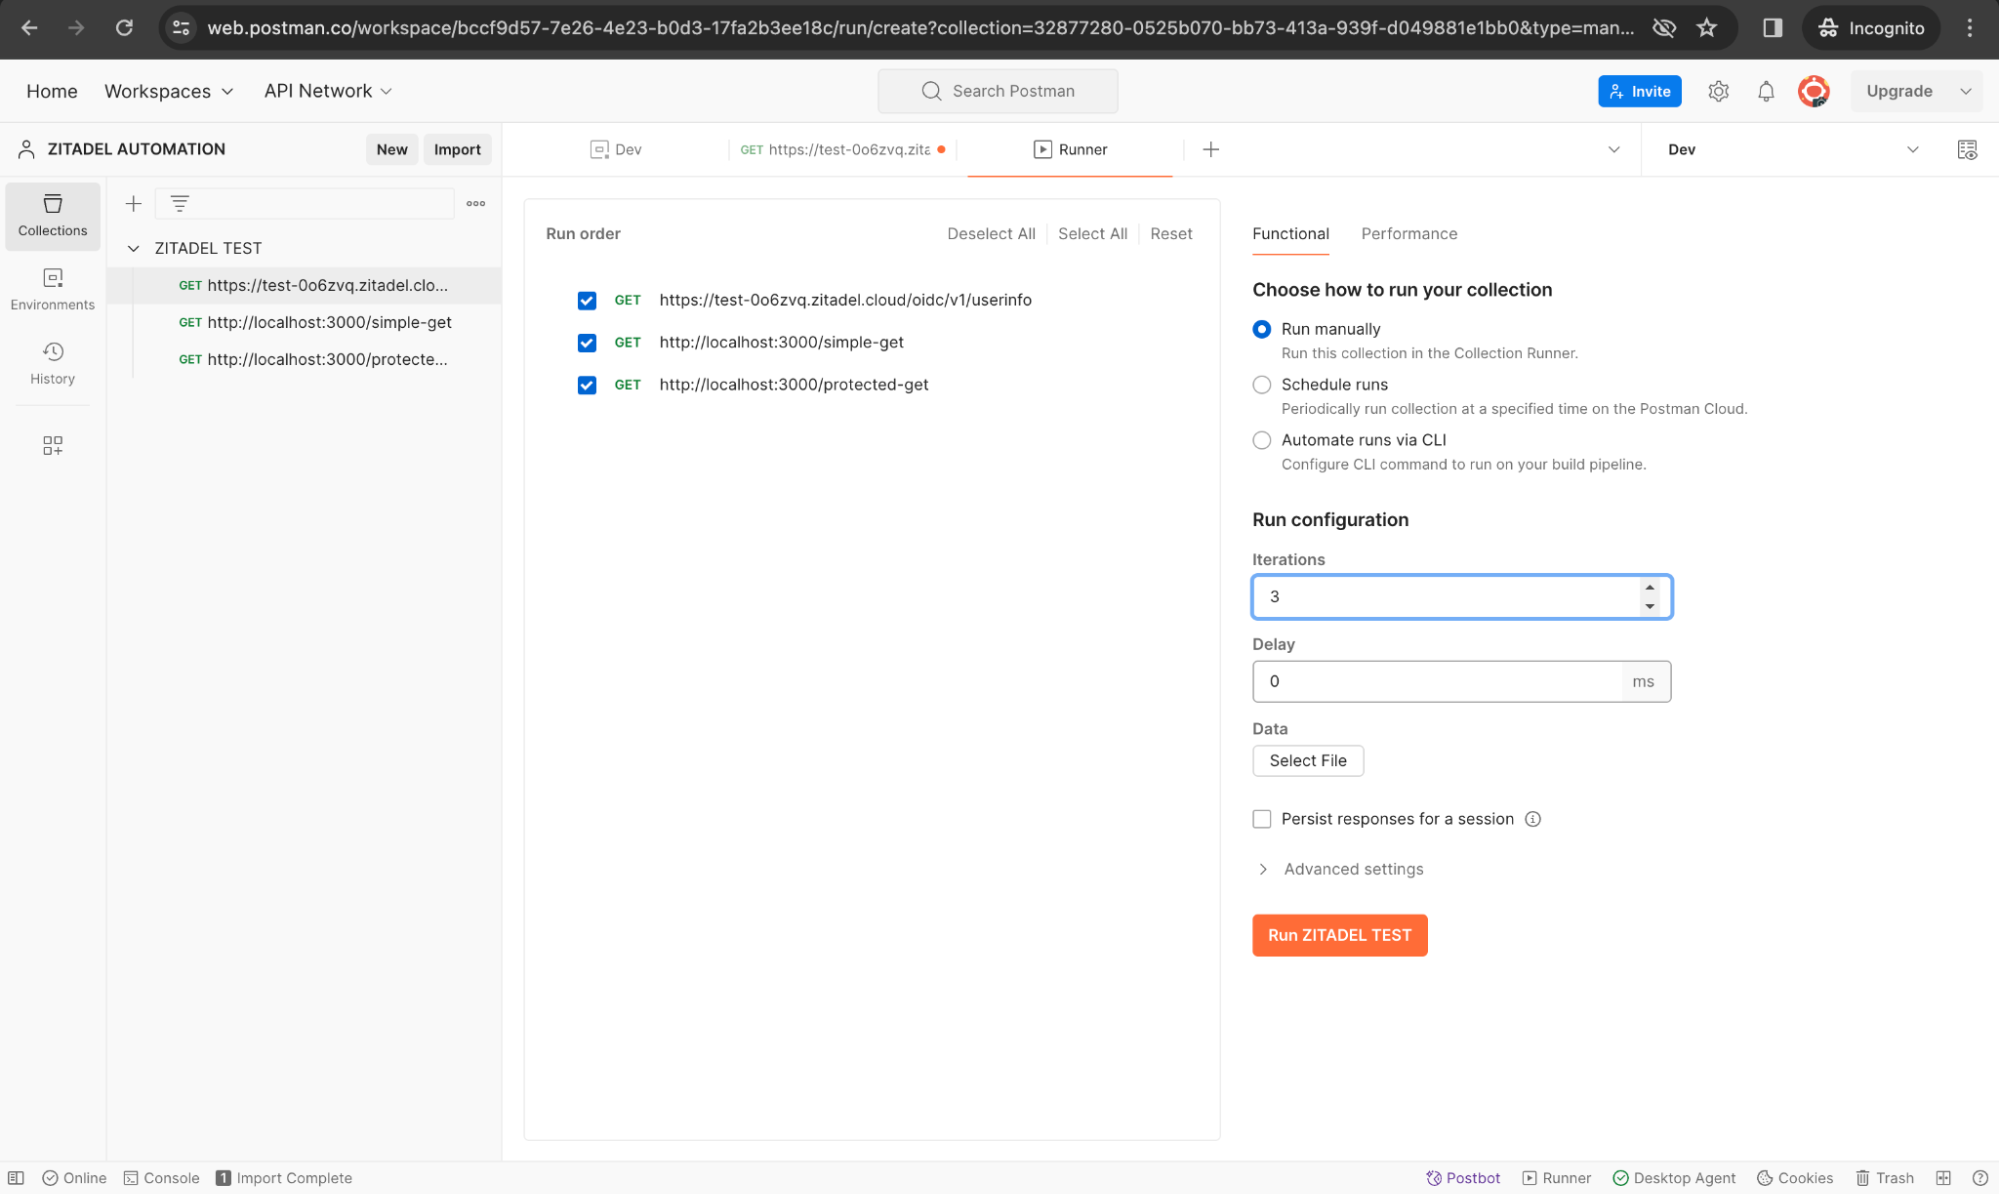
This way you can test the OIDC login flow of your web application along with calling the protected endpoints with the received access token. This approach ensures that you can sequentially execute requests that depend on authentication, and efficiently test both authenticated and non-authenticated endpoints within your Postman collection.
Wrap-up
In this guide, we've taken you through enhancing API security by integrating ZITADEL's API introspection, with a deep dive into Postman for extensive testing. We developed a straightforward API using Node.js and Express, featuring both public and protected endpoints, to showcase how token introspection with ZITADEL can be practically applied and tested using Postman's comprehensive features. Keep an eye out for our upcoming post, where we'll demonstrate setting up ZITADEL programmatically through Postman.