Test User Login Flows in ZITADEL with Postman

Developer Advocate
Introduction
In this post, we'll demonstrate how to leverage Postman, a great tool for API development and testing, to explore and validate the APIs provided by ZITADEL. Postman is renowned among developers and testers for its comprehensive suite of features that facilitate the building, testing, and modification of APIs. Its interface simplifies the process of sending requests and analyzing responses, making it a great tool for debugging and making sure that API functionality aligns with security and operational requirements.
The focus of this post will be on using Postman to interact with ZITADEL's APIs, which are used for tasks such as user authentication and token management. We will begin by examining the user login flow, explaining how to authenticate users on a web application and obtain access tokens.
The objective is to provide developers with practical insights into integrating ZITADEL within their applications. By the end of this post, readers will gain an understanding of ZITADEL's capabilities by making use of the efficiency Postman brings to testing web application security.
Set Up Postman
Getting started with Postman is straightforward, and it begins with setting up an account and familiarizing yourself with its interface and capabilities. Here's a brief guide to kickstart your journey:
Visit Postman to create a new account or log in to an existing one. Once logged in, explore the Postman workspace. The interface is designed to be intuitive, with the primary sections being Collections, Environments, and APIs. Collections are groups of requests that can be organized and run together. To create a collection, click the + button under Collections and give it a name. This is where you'll store the requests you create to test ZITADEL's APIs.
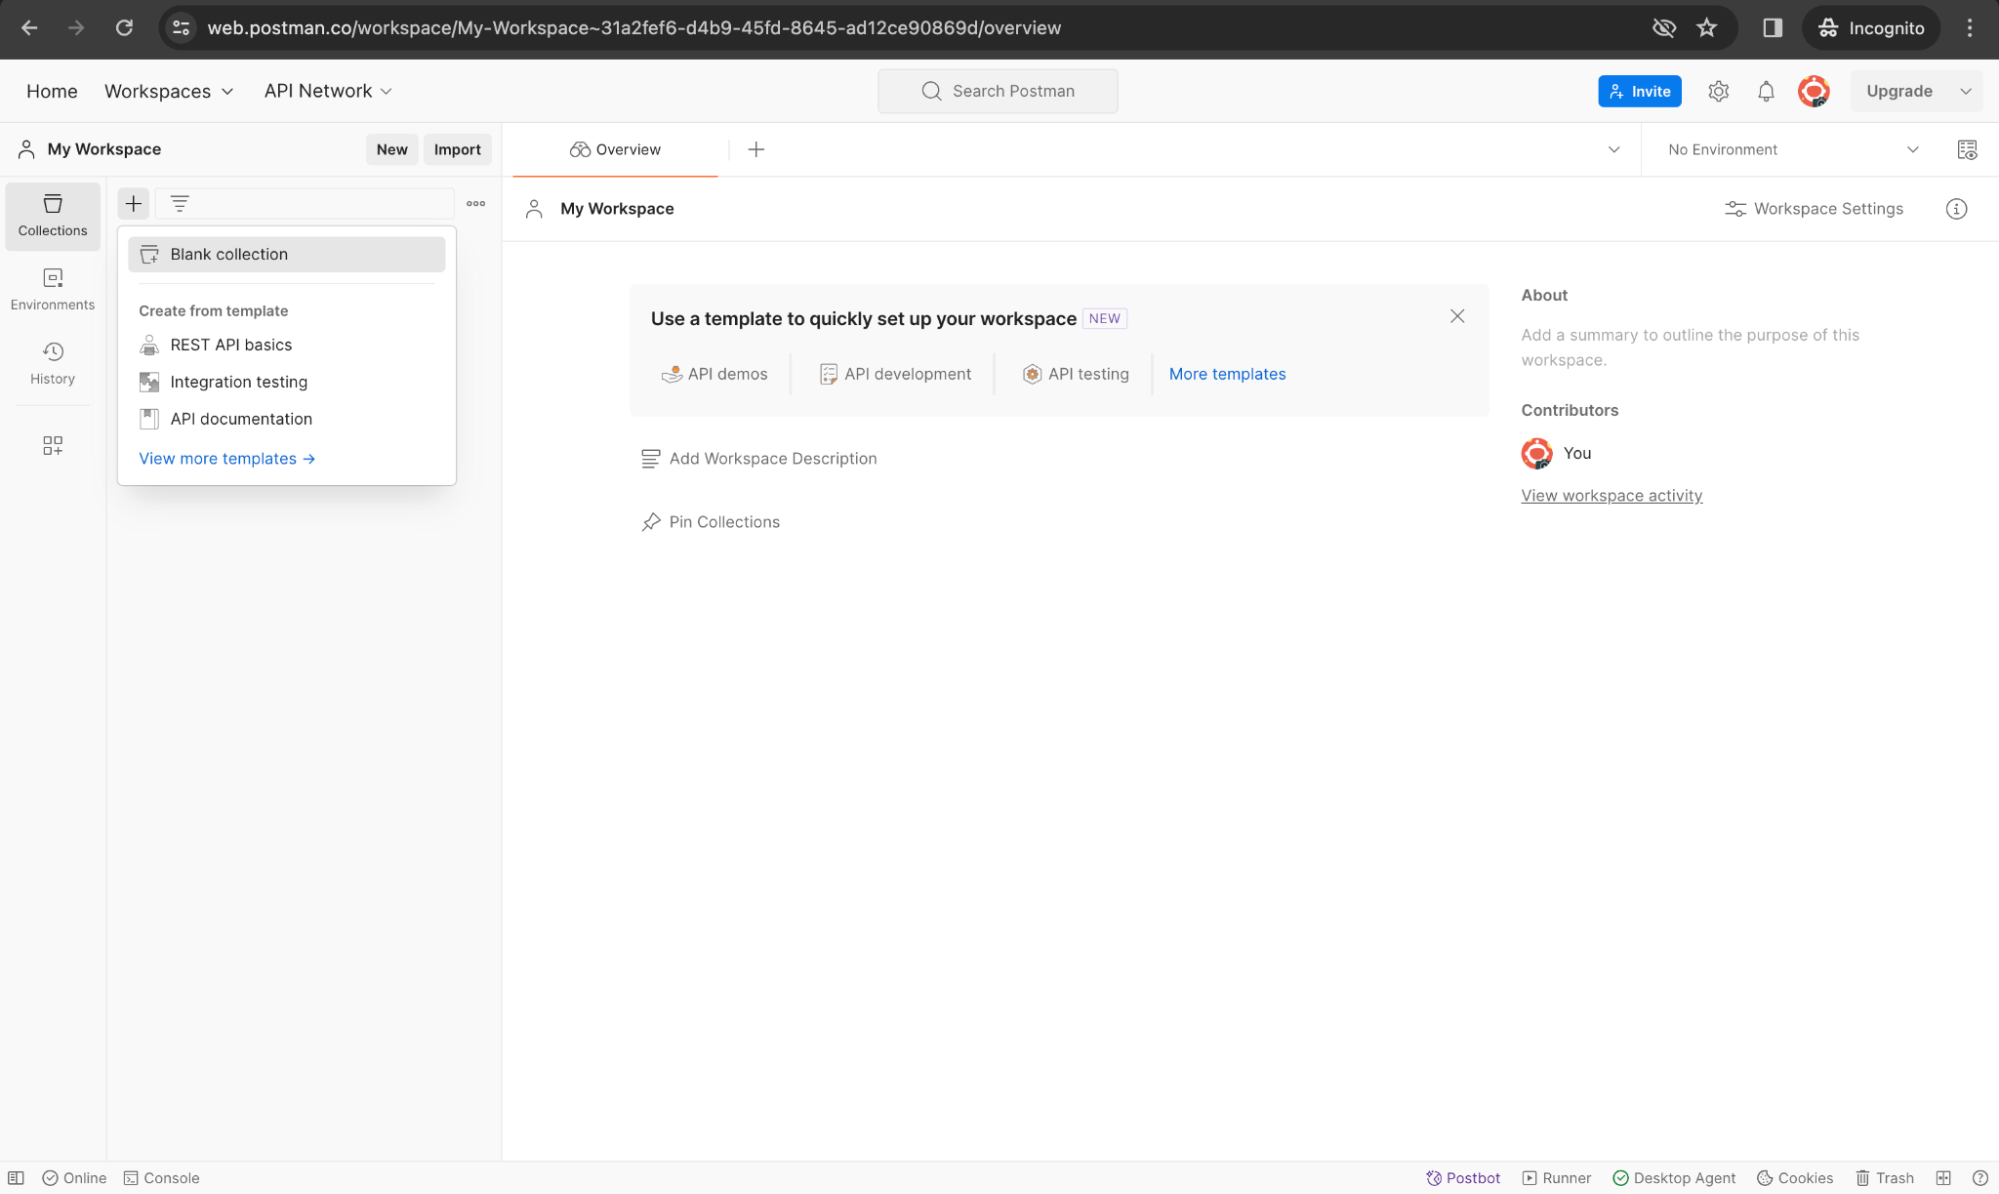
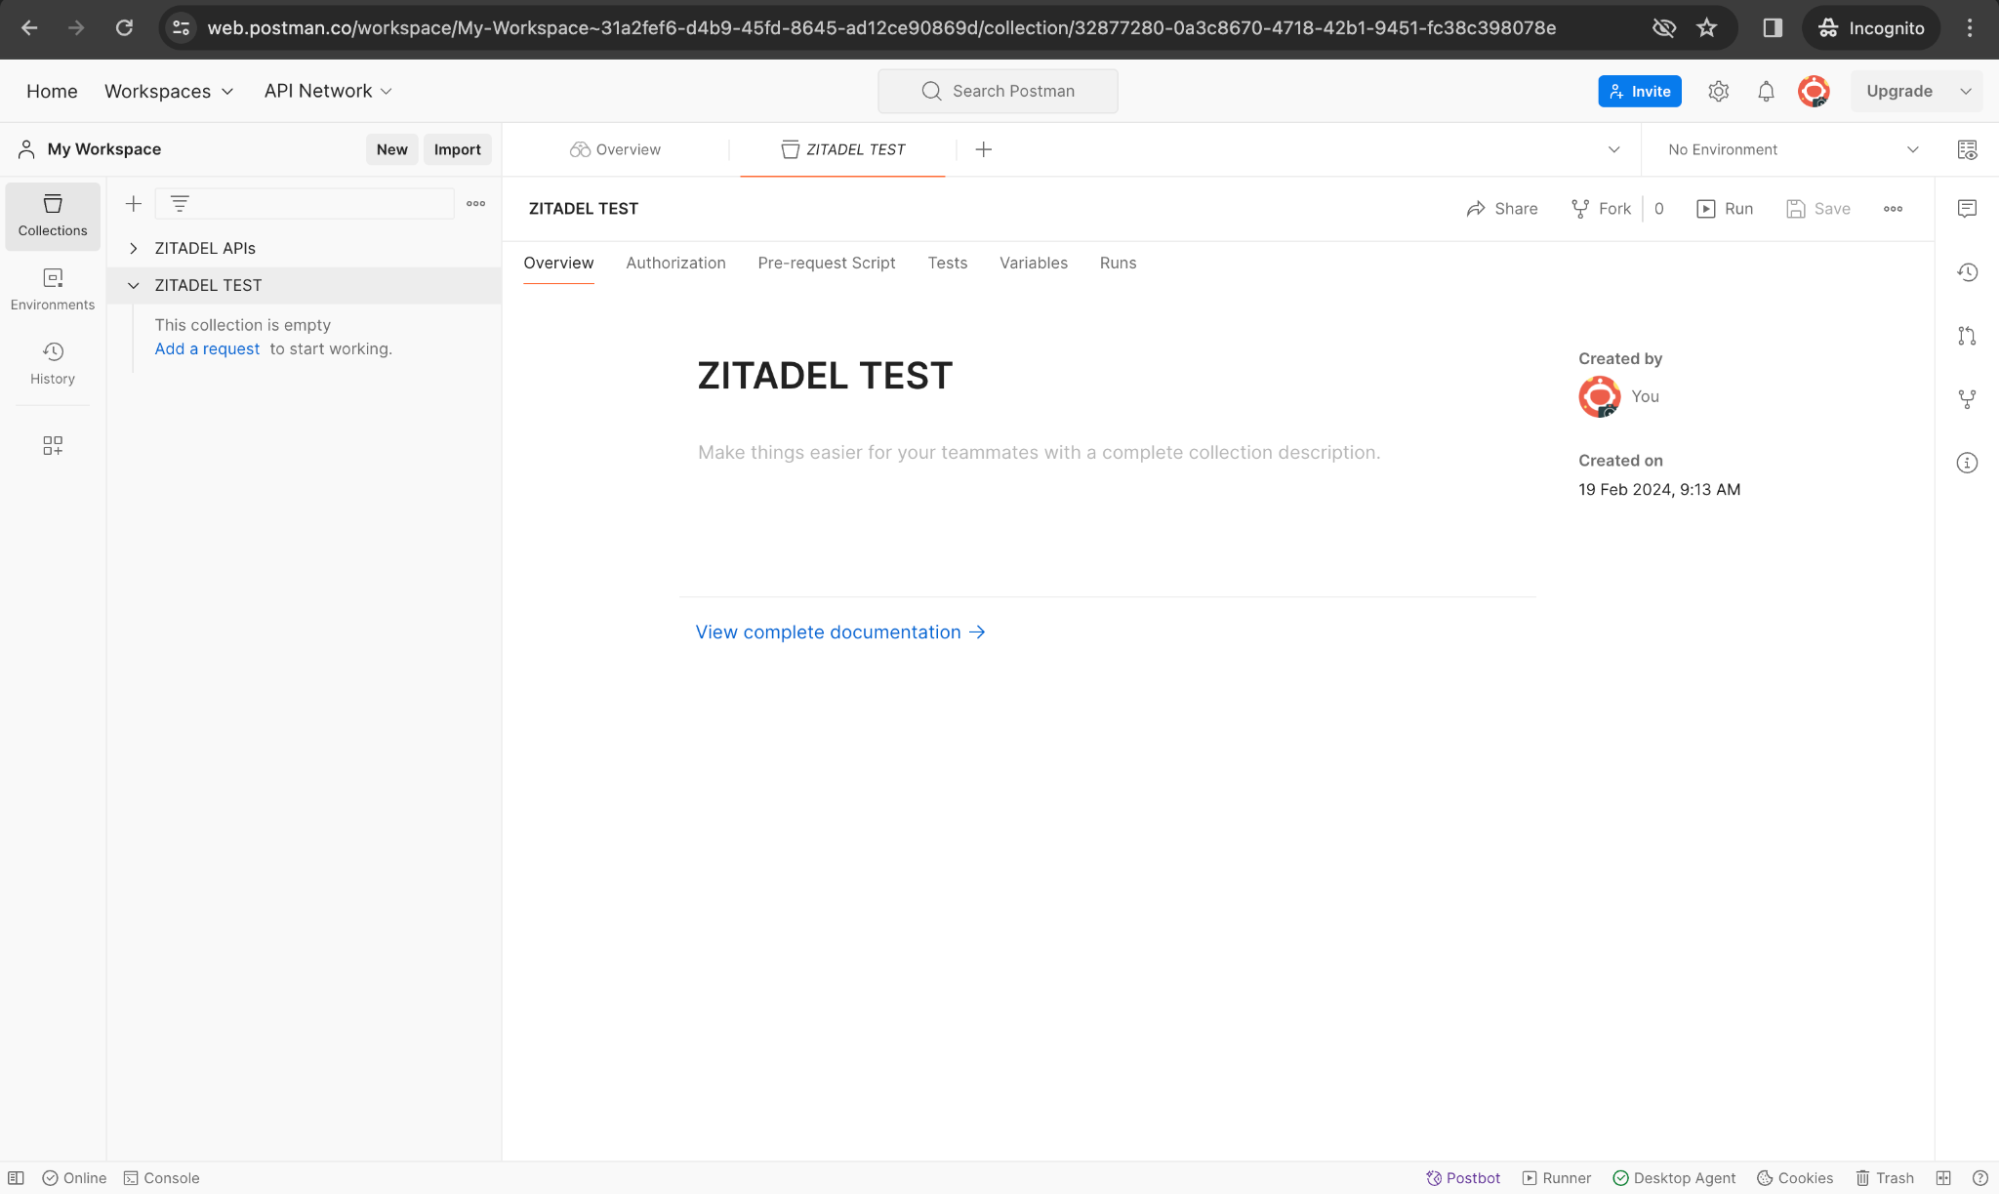
Environments in Postman allow you to use variables, making it easier to switch between different sets of data (such as API keys, tokens, and URLs) without changing your requests manually. We will not be using environments in this setup.
Set Up ZITADEL
To get started with setting up your environment in ZITADEL, including creating instances, projects, and human users, we recommend following the ZITADEL's Quick Start Guide.
Follow the guide to do the following tasks:
- Sign up for the ZITADEL Cloud customer portal and register your organization
- Create your first instance
- Create your first project
- Add a user
If you are interested in integrating these setup processes into DevOps pipelines or automating them, ZITADEL's APIs offer the flexibility to programmatically create and manage these entities.
For detailed API references and guides on doing the above programmatically, you can take a look at ZITADEL's API documentation, such as the Management Service API for creating a project. These resources offer in-depth insights into the specific APIs you'll need to use for each step of the setup and management process.
Secure a Web Application: Test User Login
Set Up a Web Application in ZITADEL
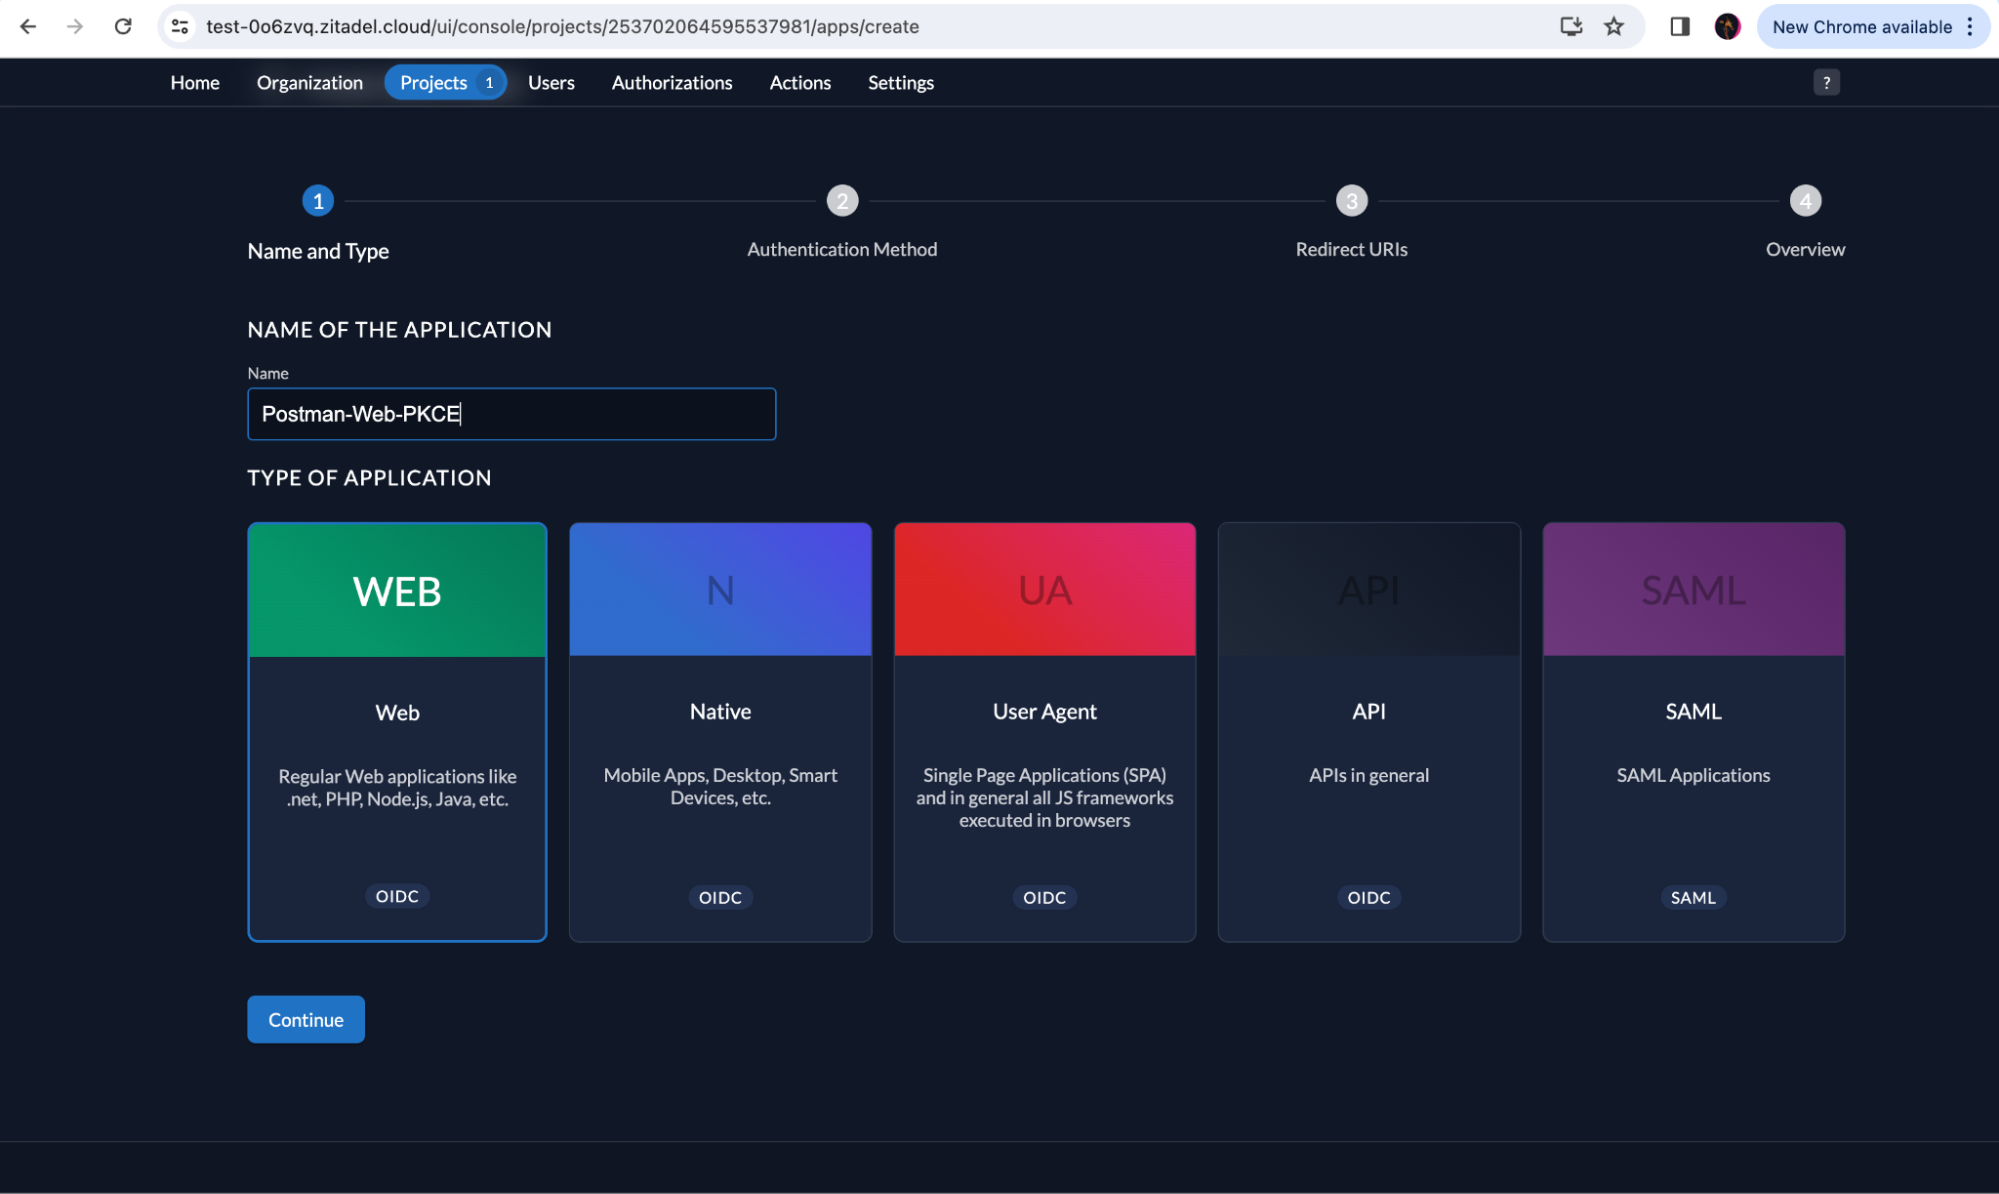
Create a Web Application in your ZITADEL project by selecting WEB. Click Continue.
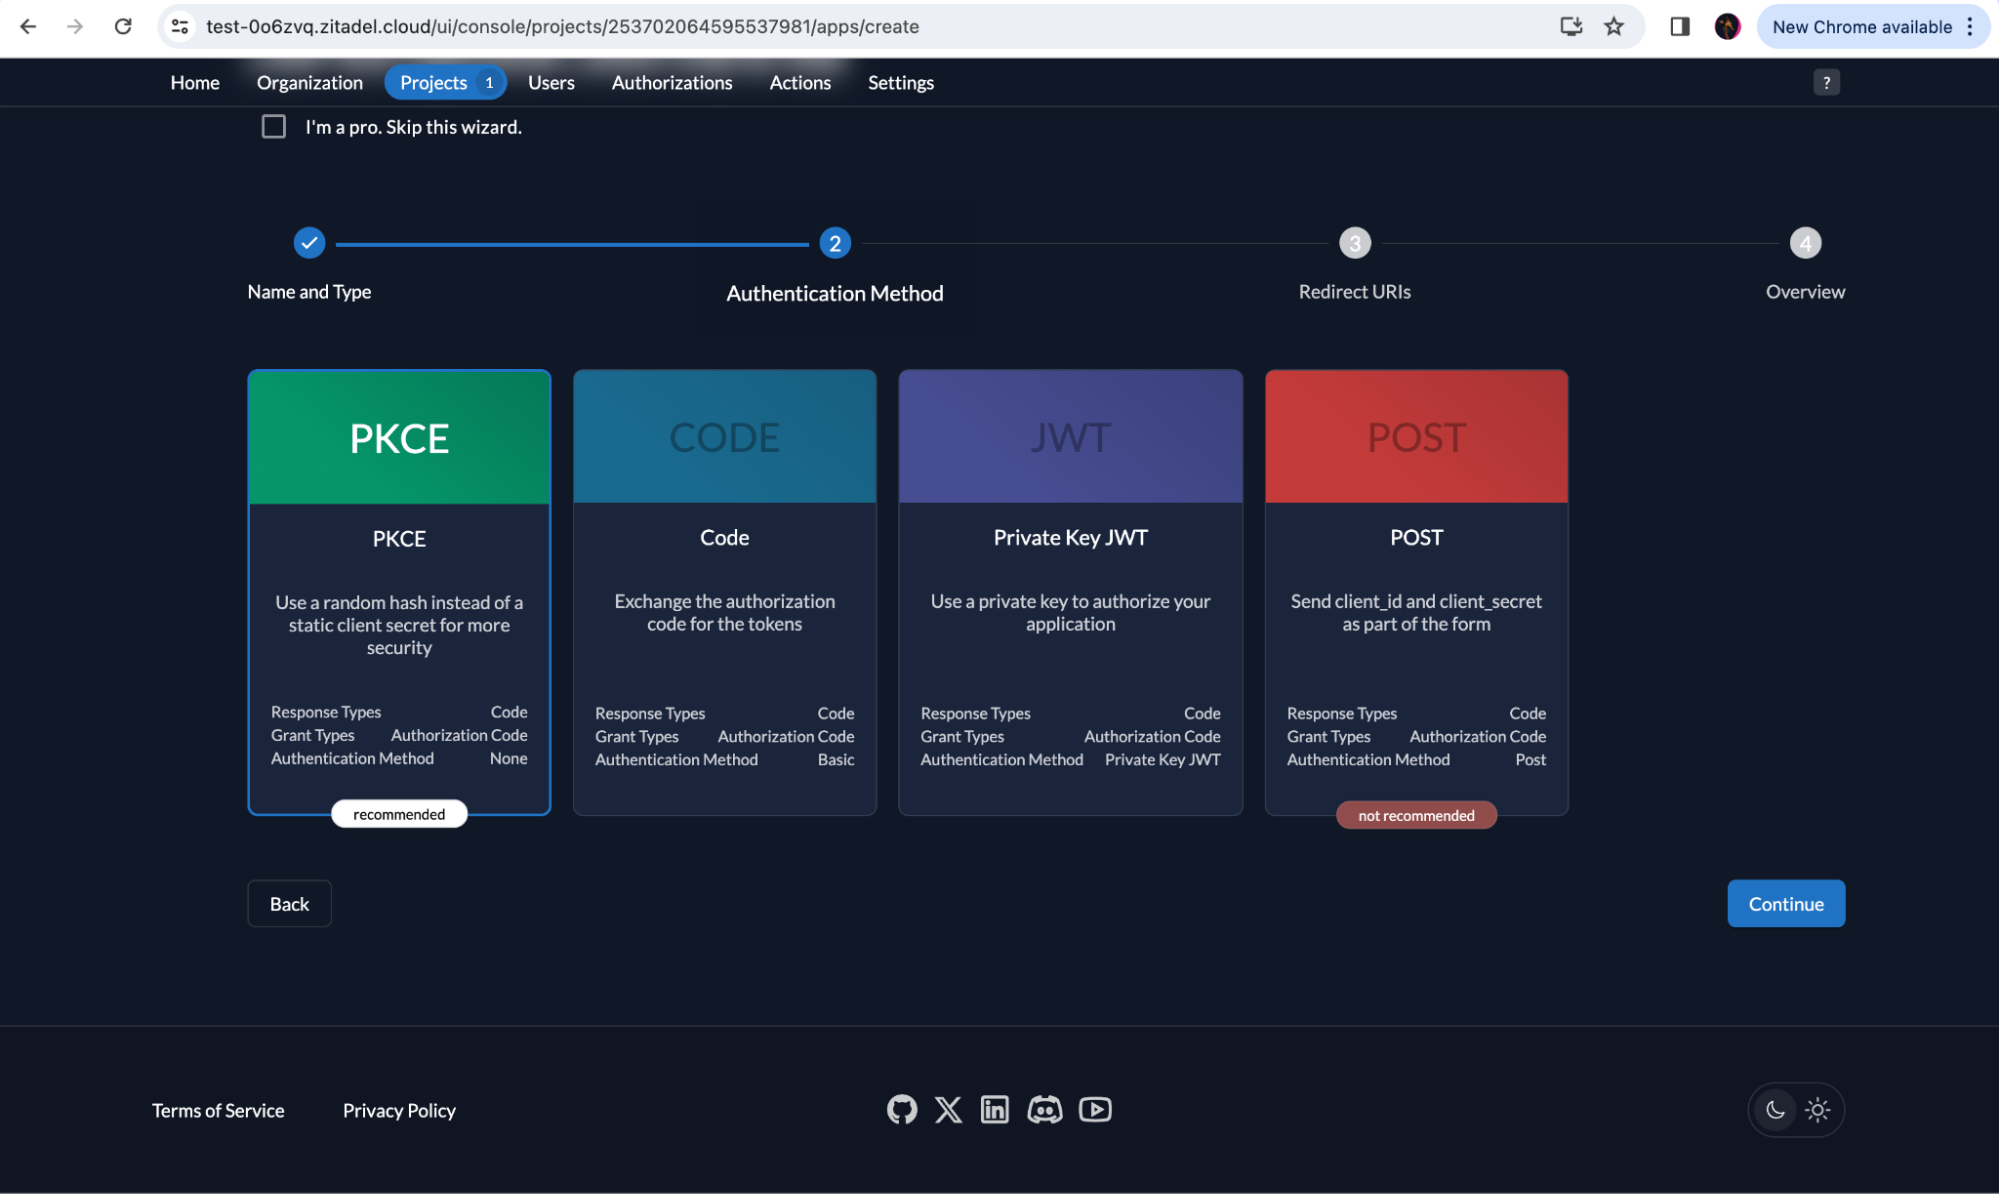
Select PKCE and continue.
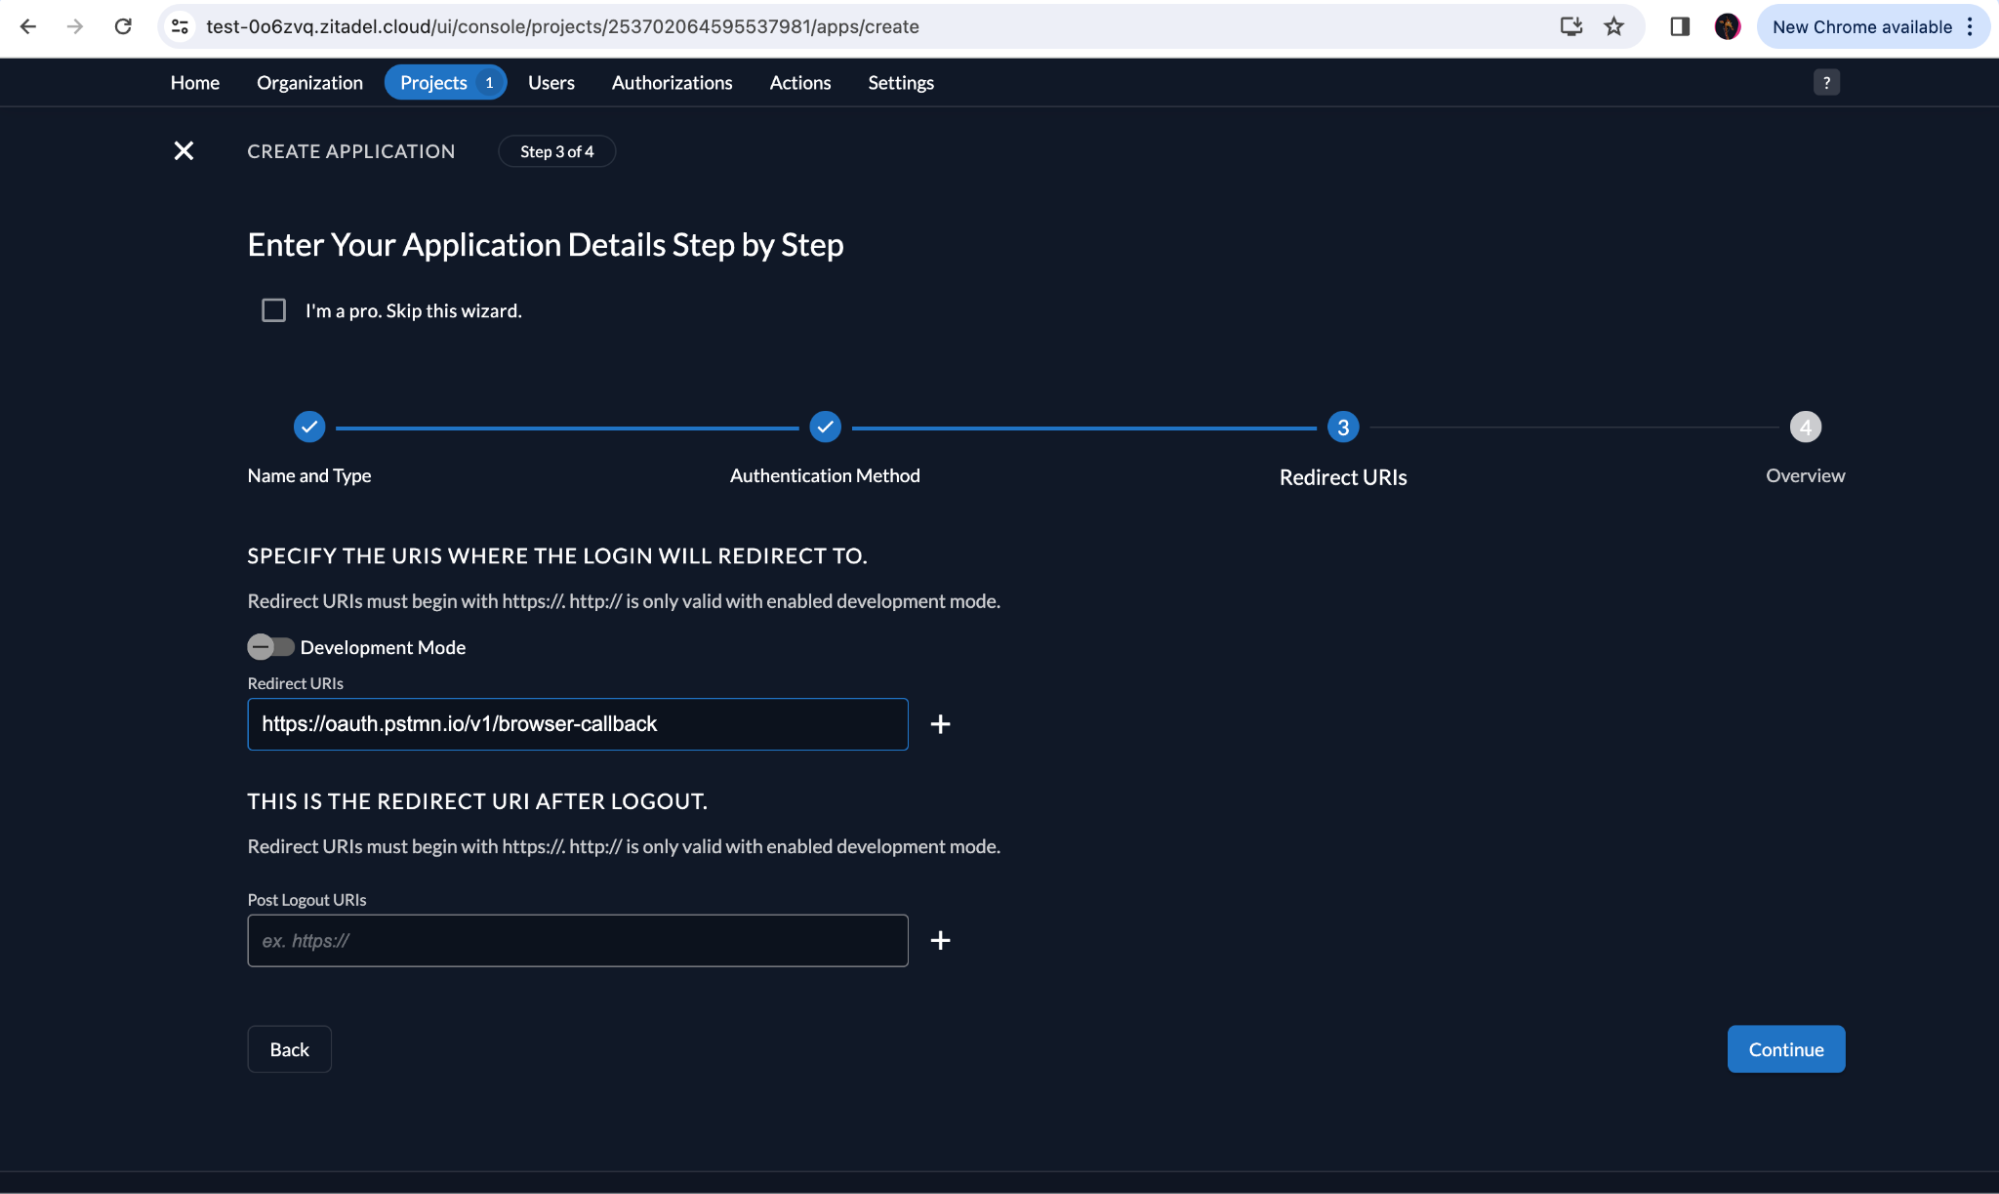
The callback URL needed for this setup is provided by the Postman UI, which is https://oauth.pstmn.io/v1/browser-callback.
Add the callback URL in ZITADEL as shown below:
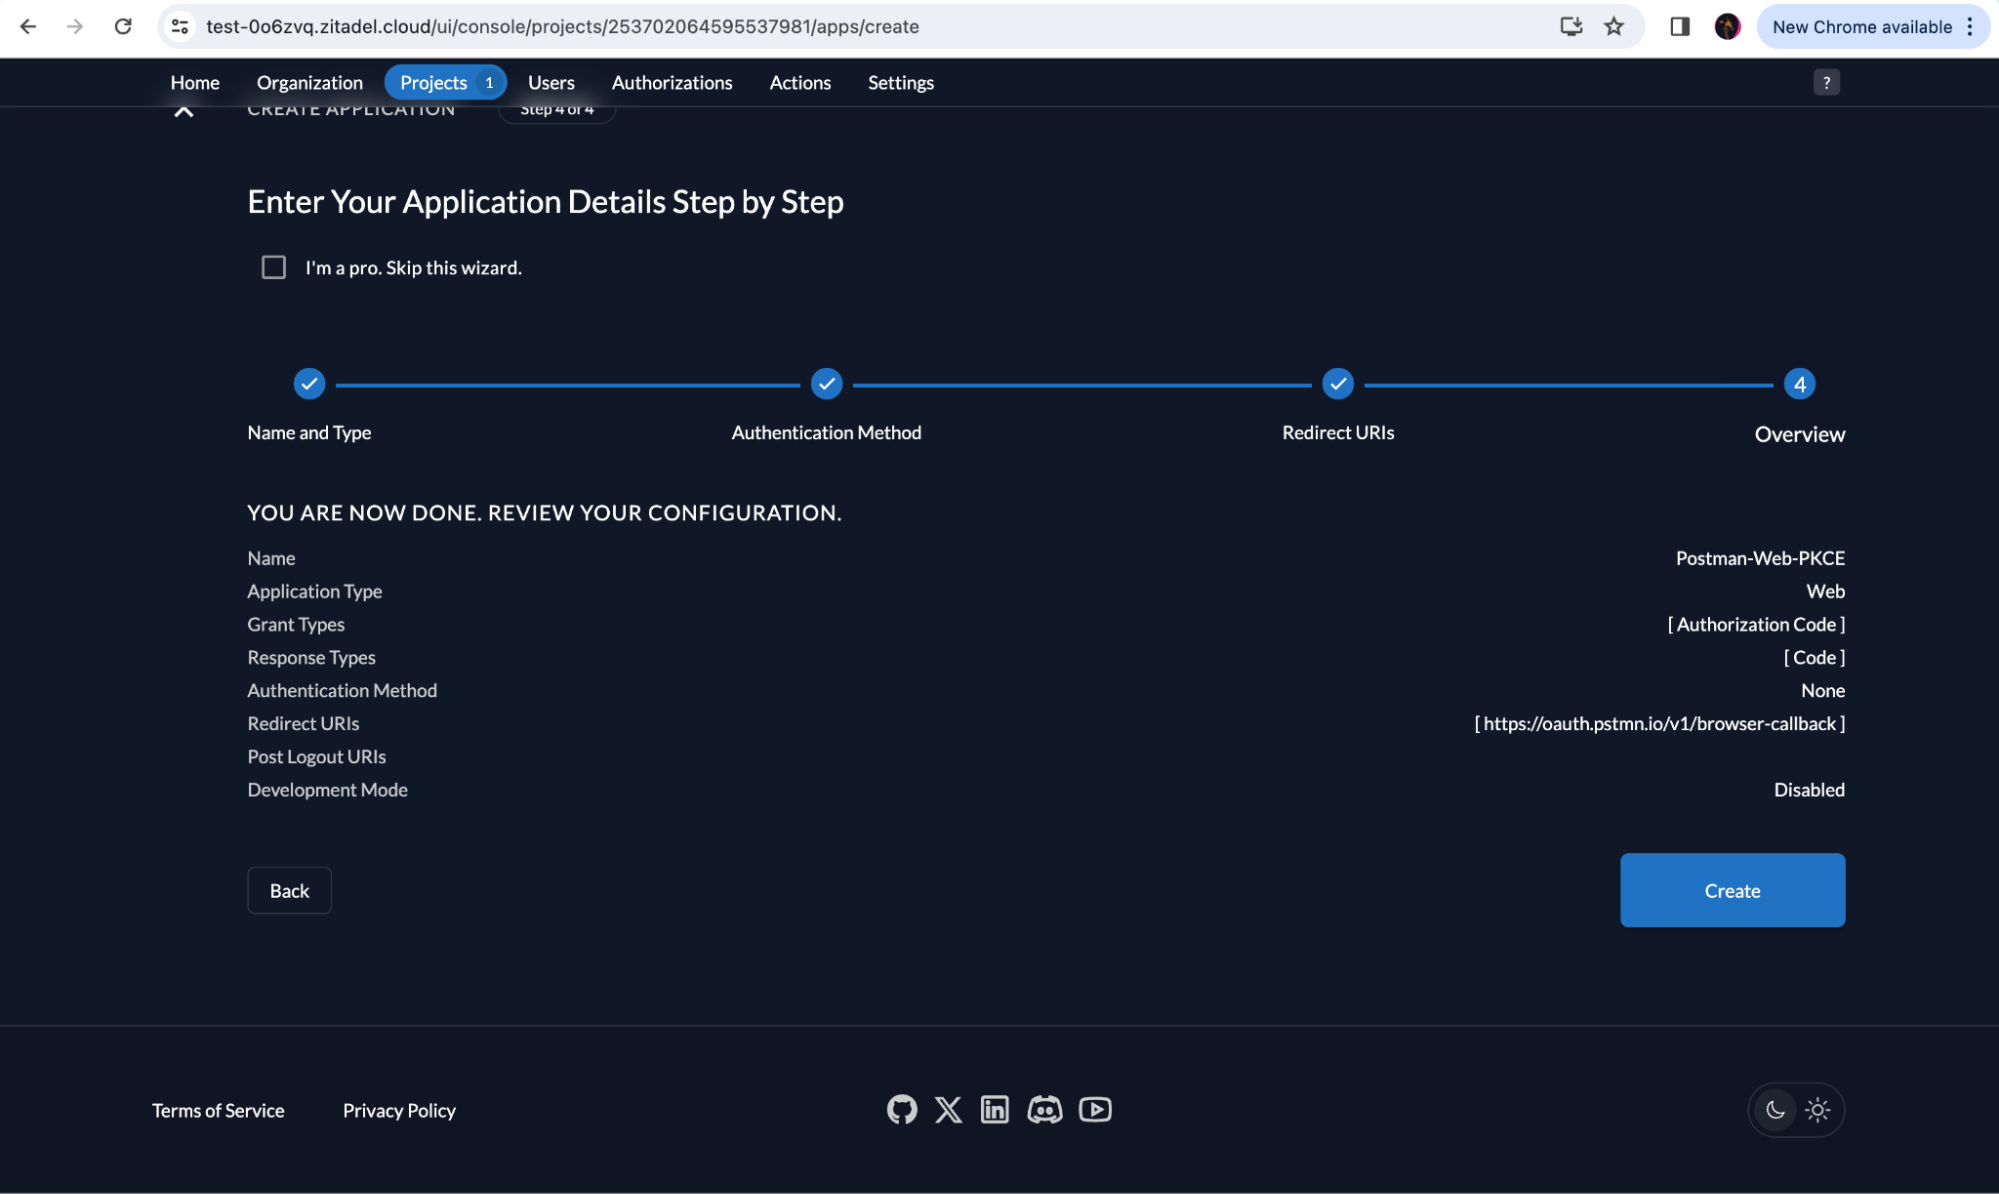
Check if your application details are correct and click Create.
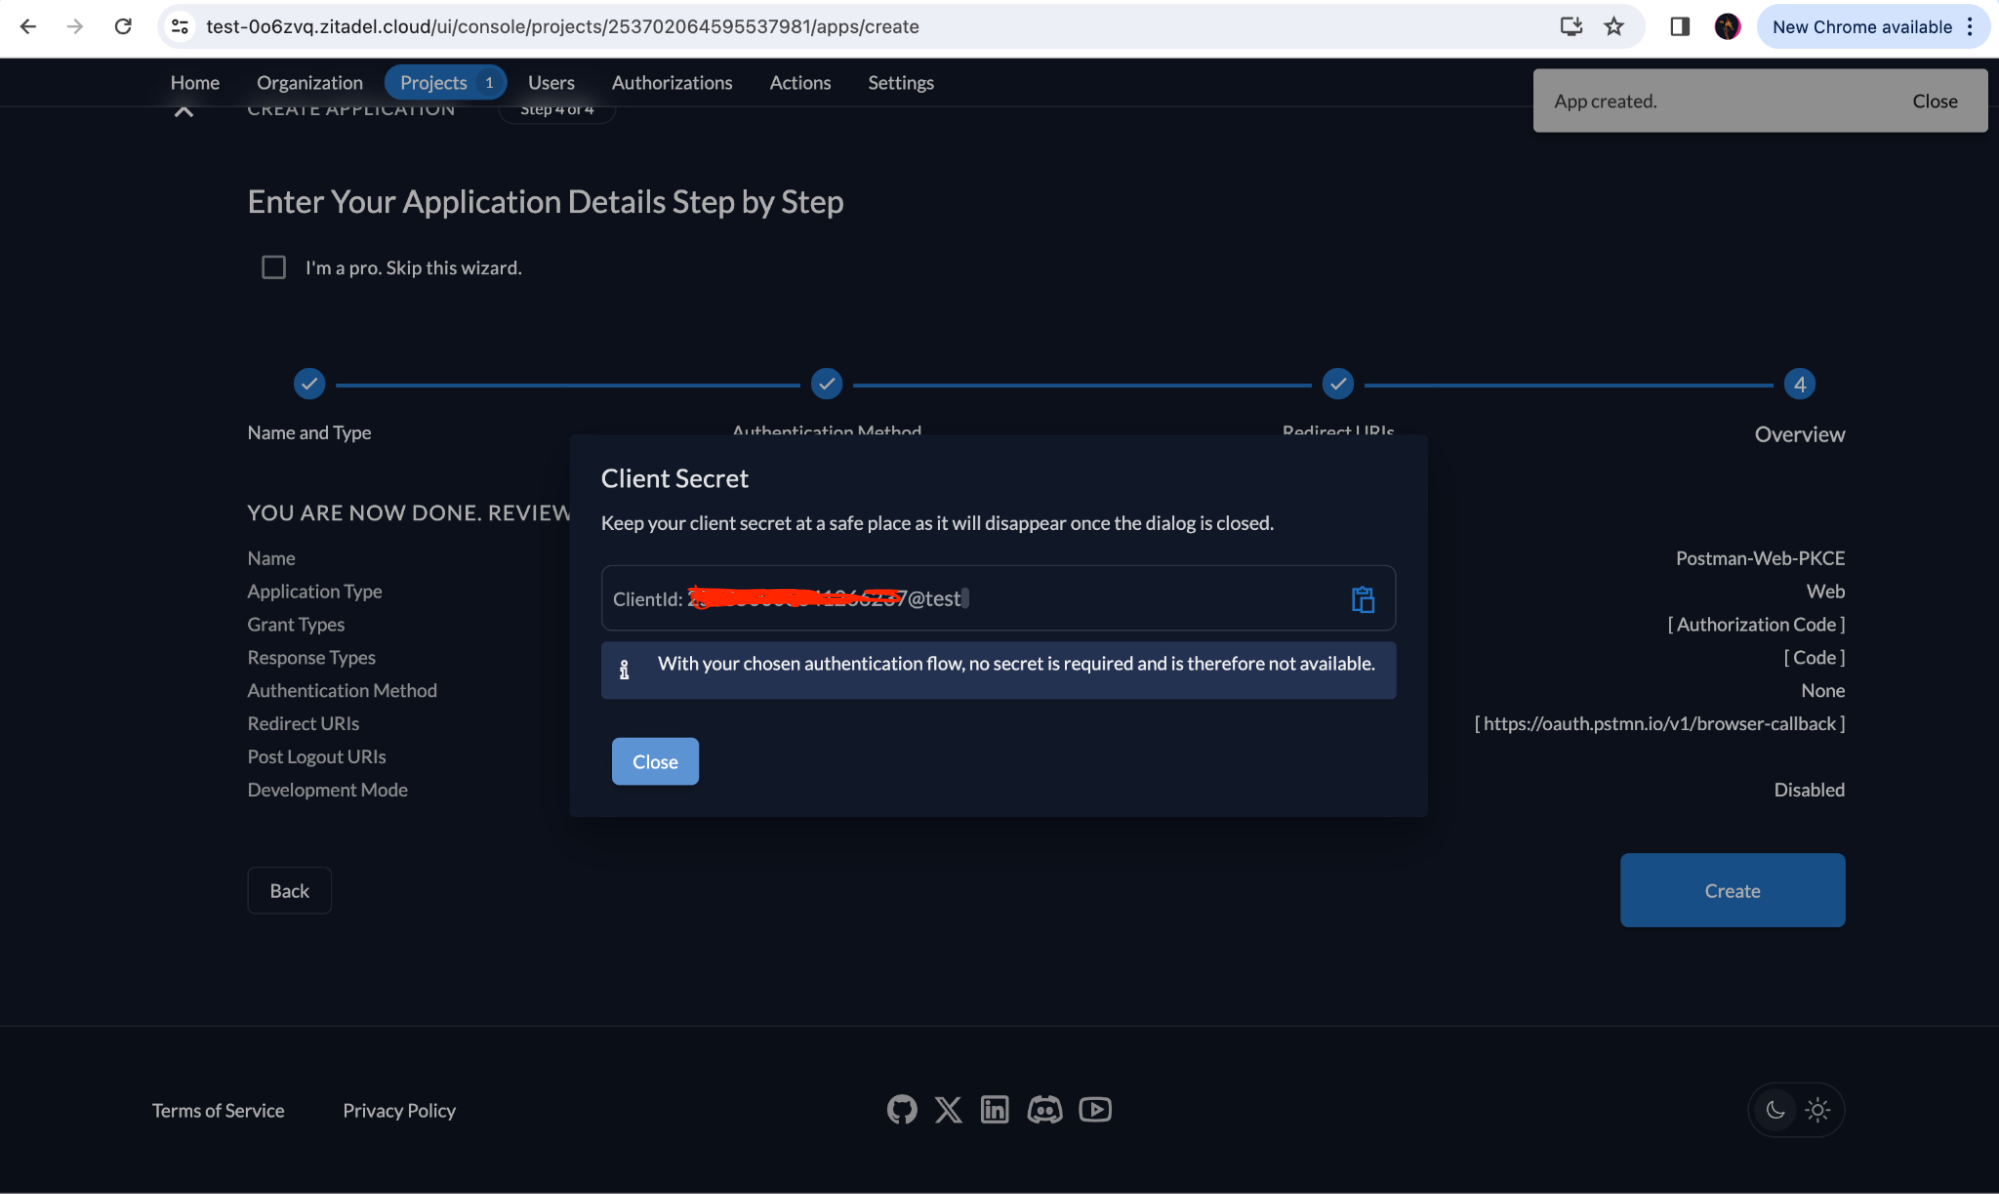
You will thereafter receive the ClientId for your application without the Client Secret because you don’t need it for the Authorization Code with PKCE grant type.
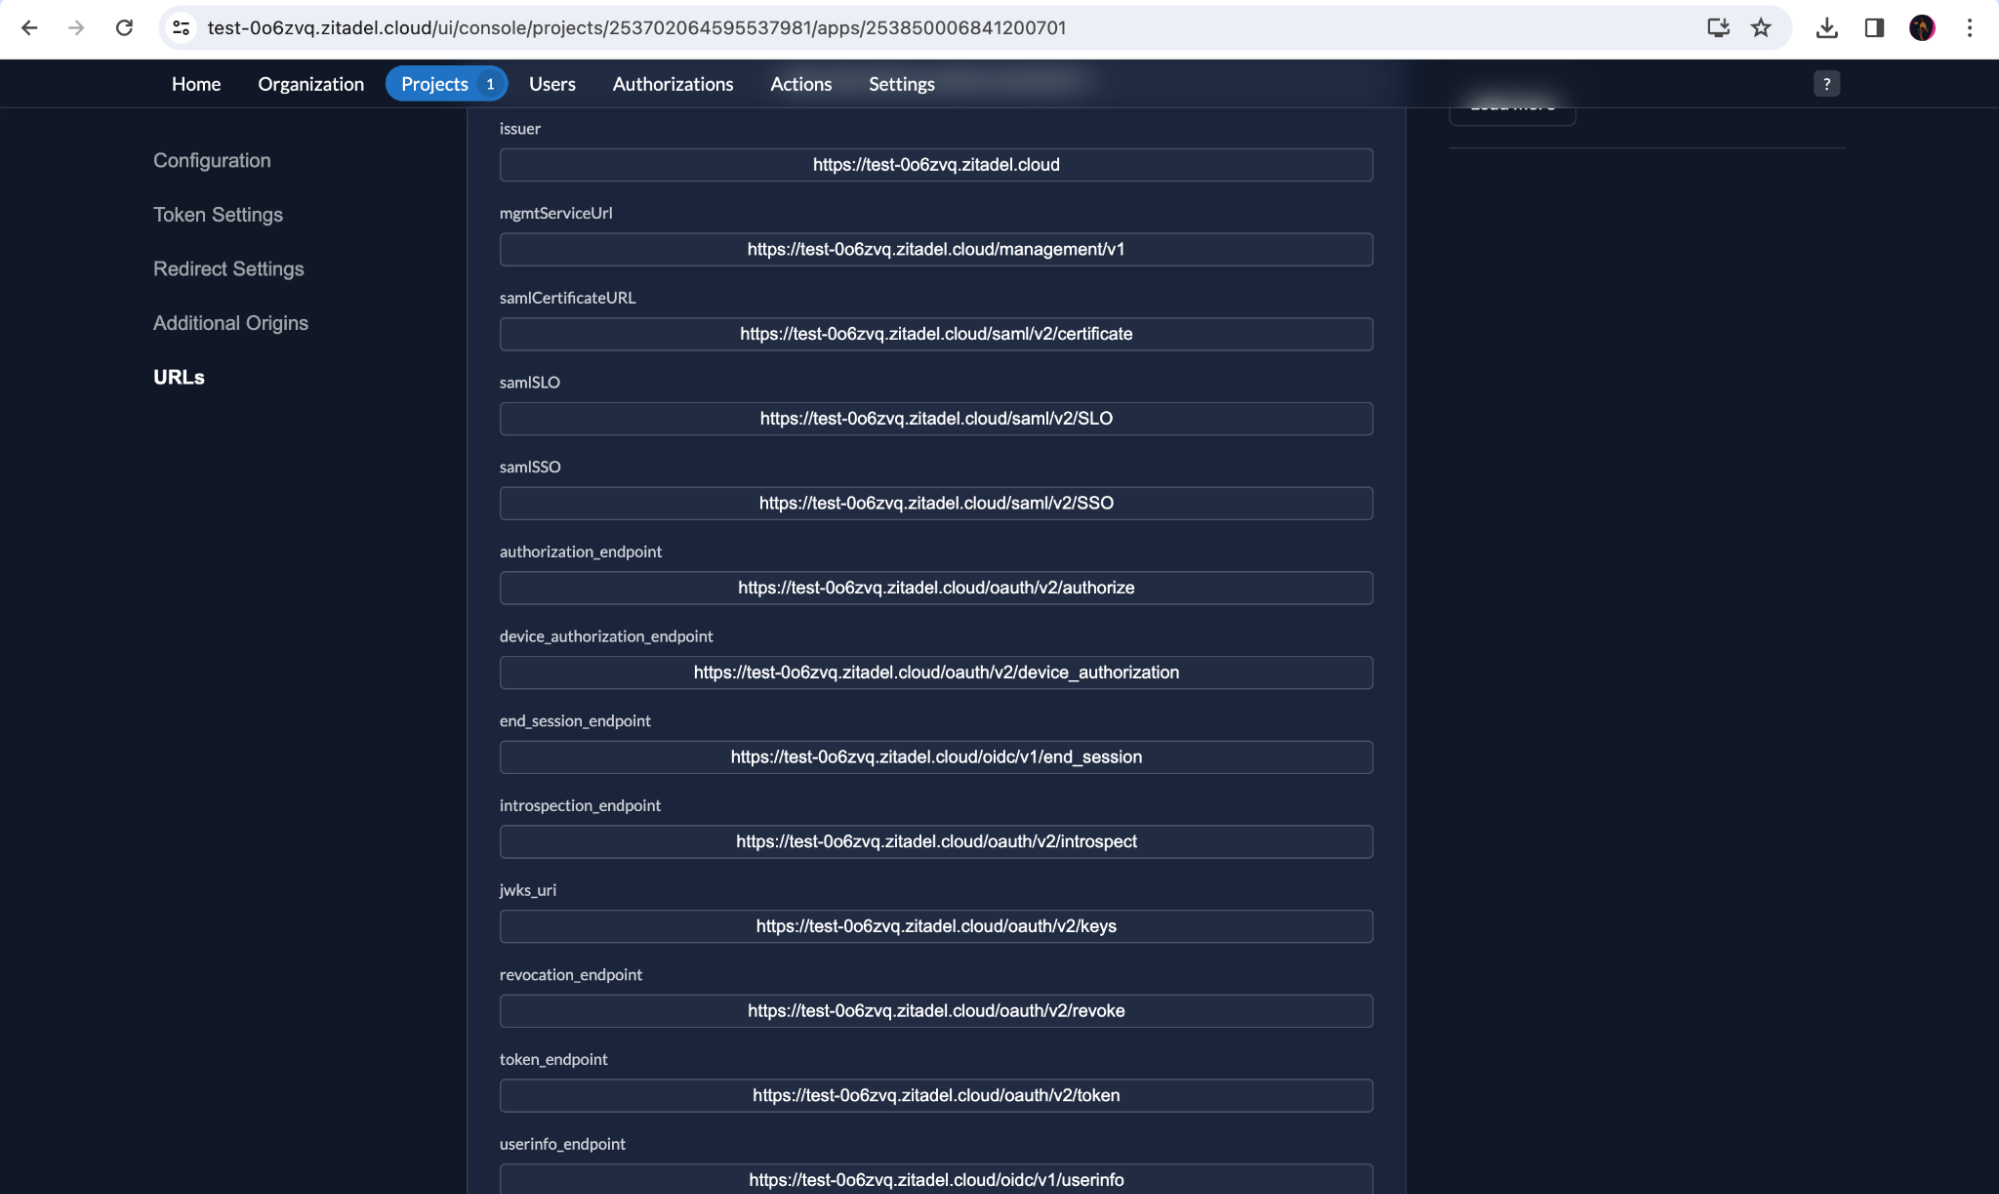
Also note down the token_endpoint, authorization_endpoint and the userinfo_endpoint from the URLs section in your application as shown below:
Test the Flow with Postman
Next, we'll walk through testing this authentication flow using Postman.
Retrieve the Access Token
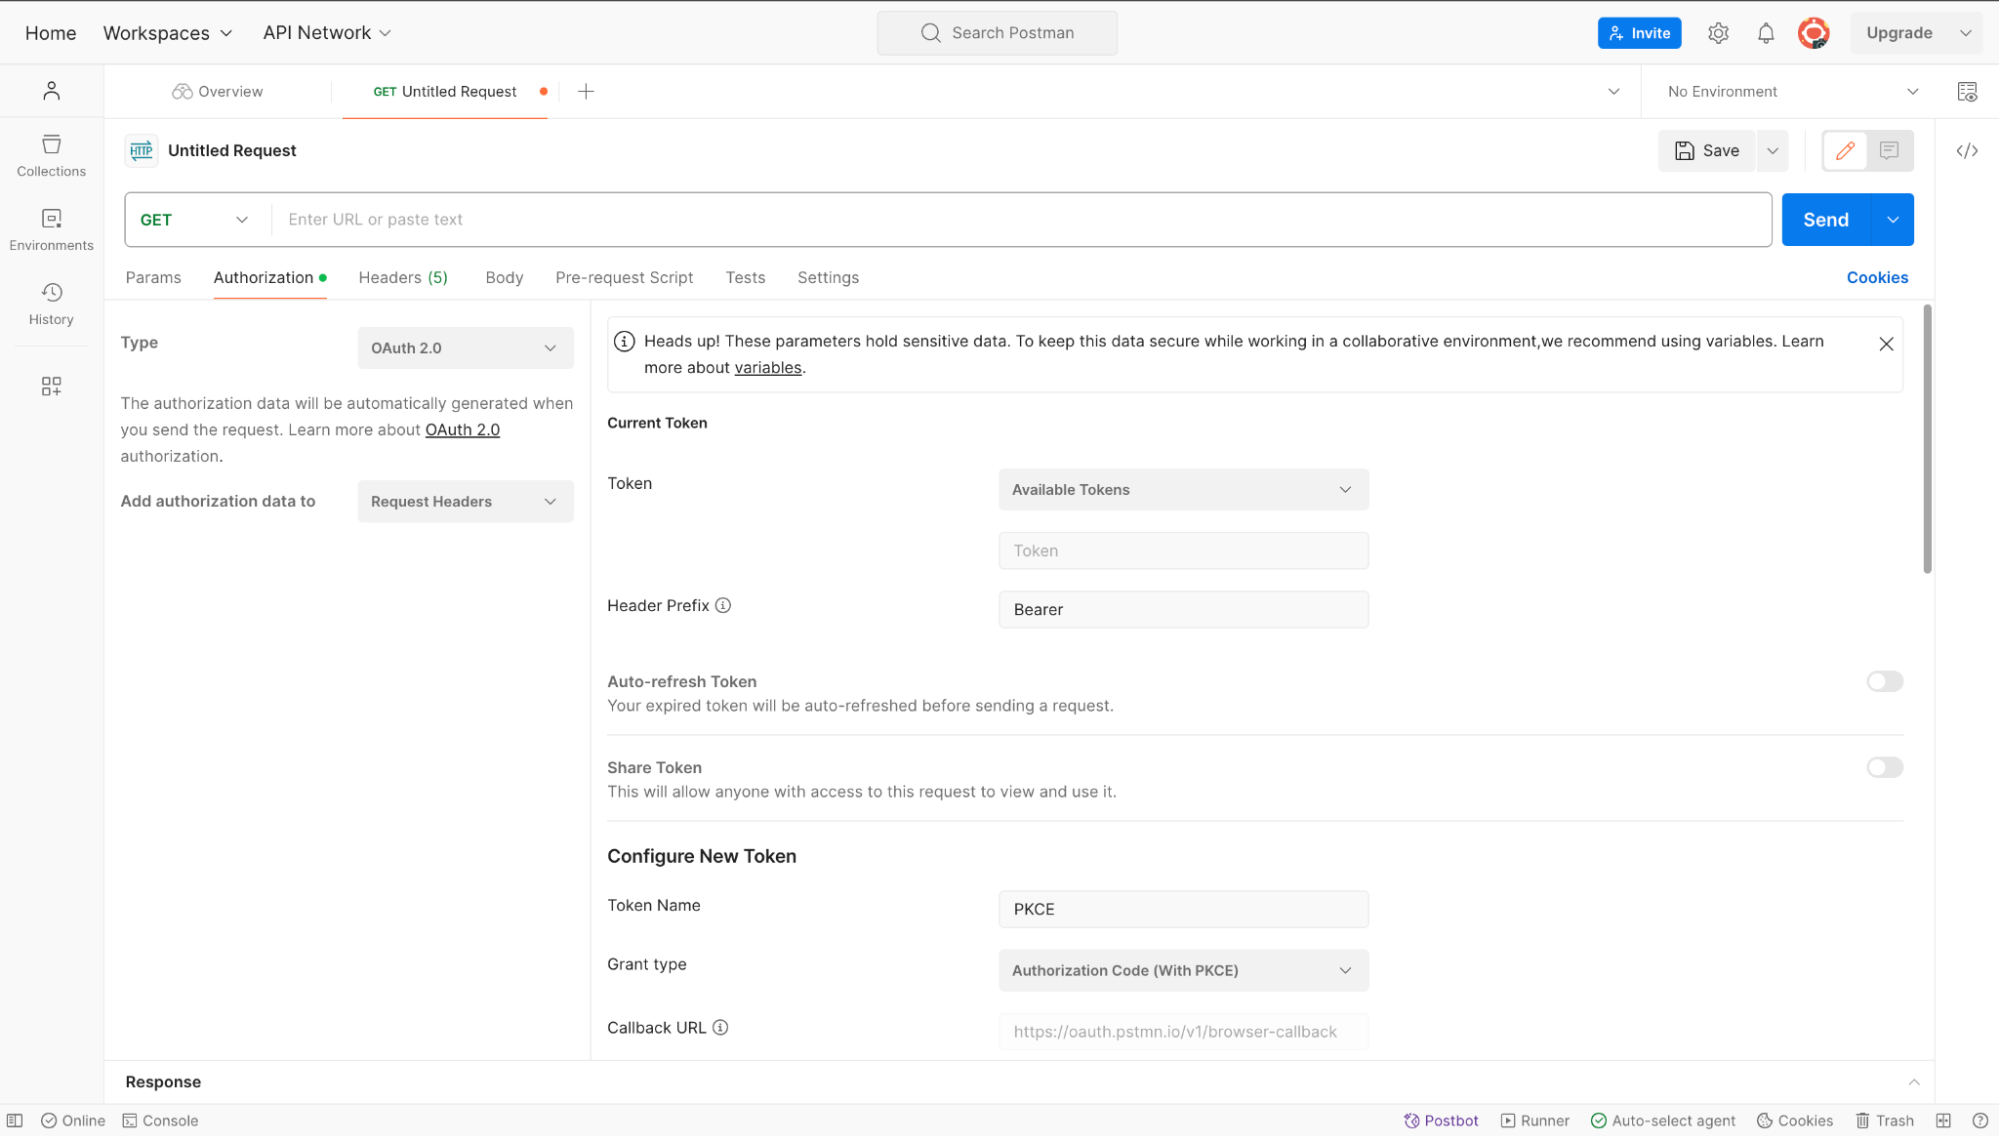
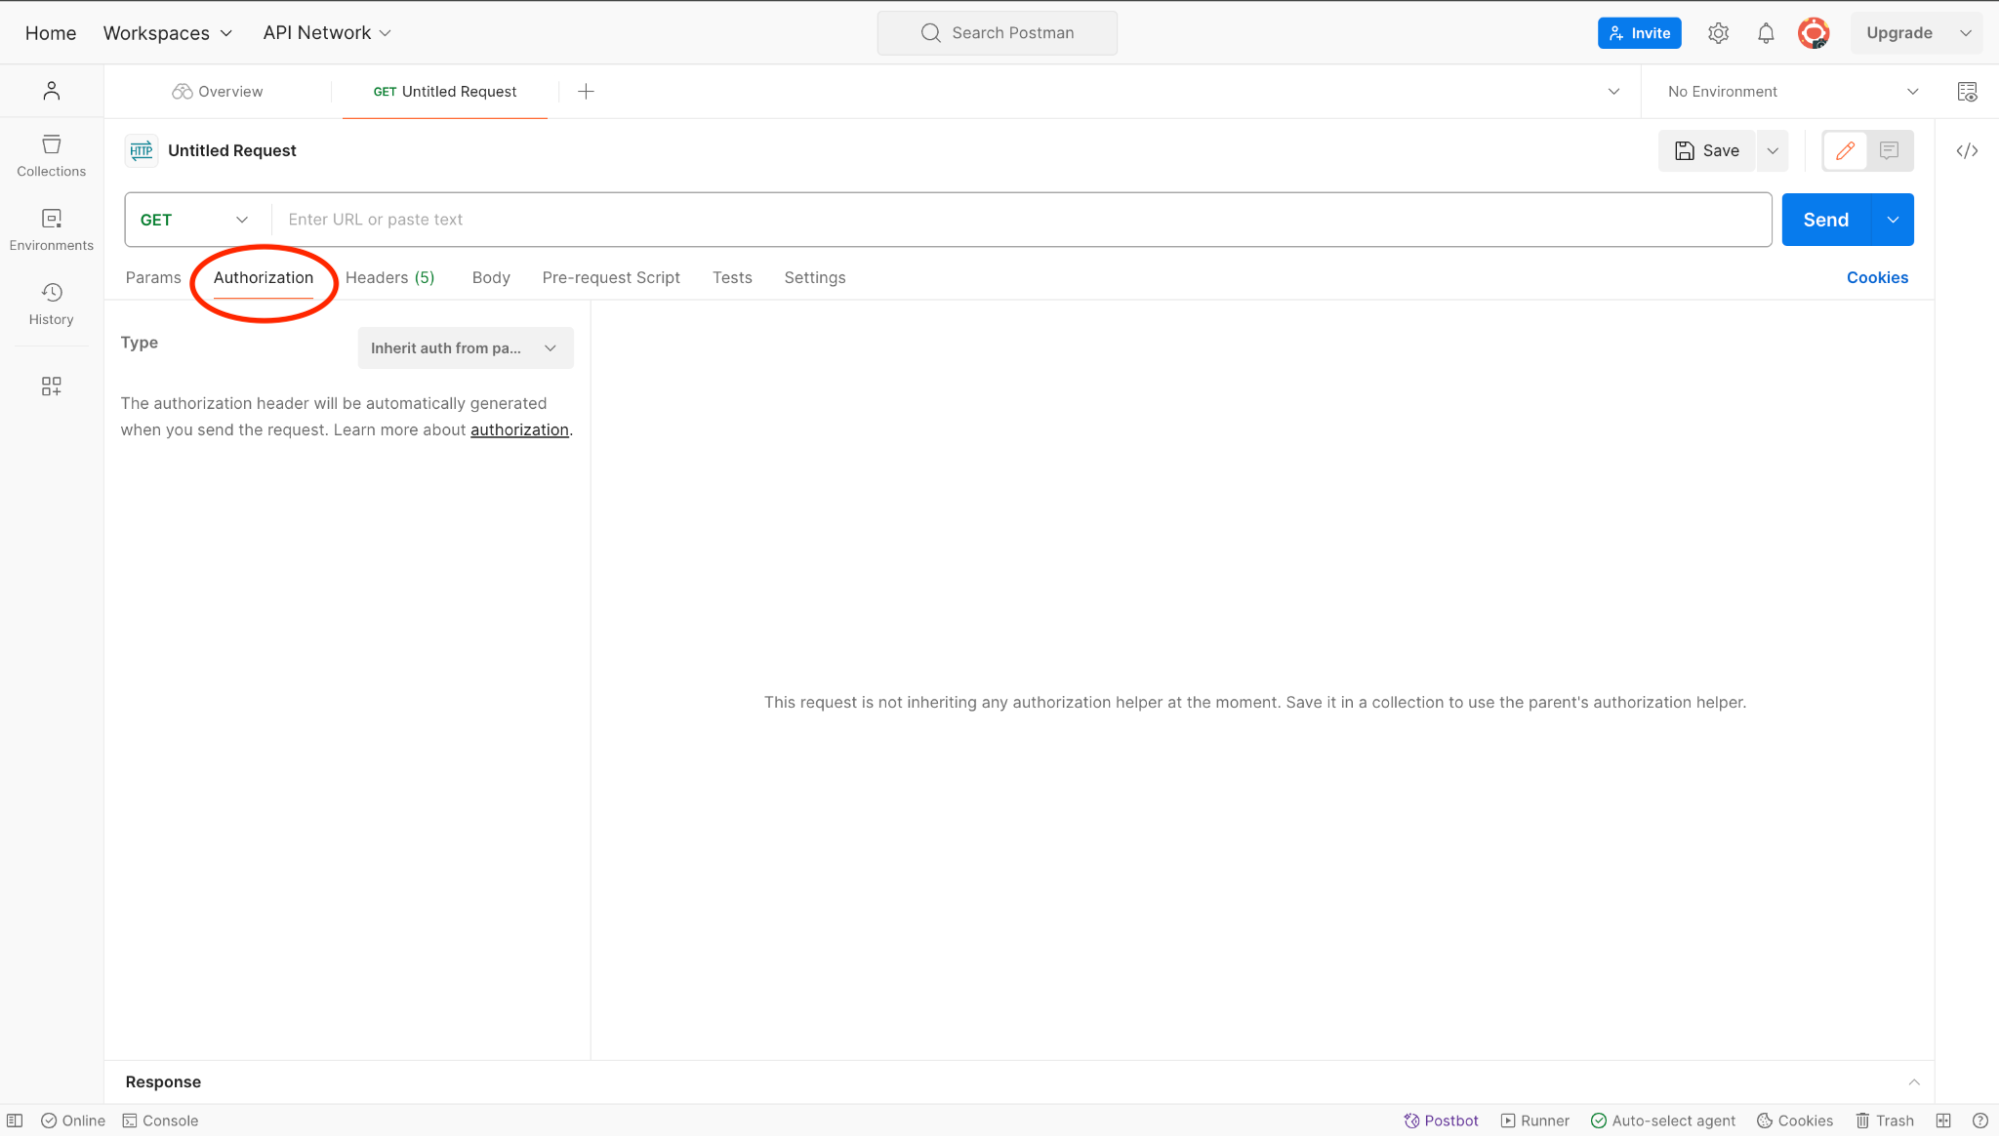
Go to the Postman application and open the Authorization tab.
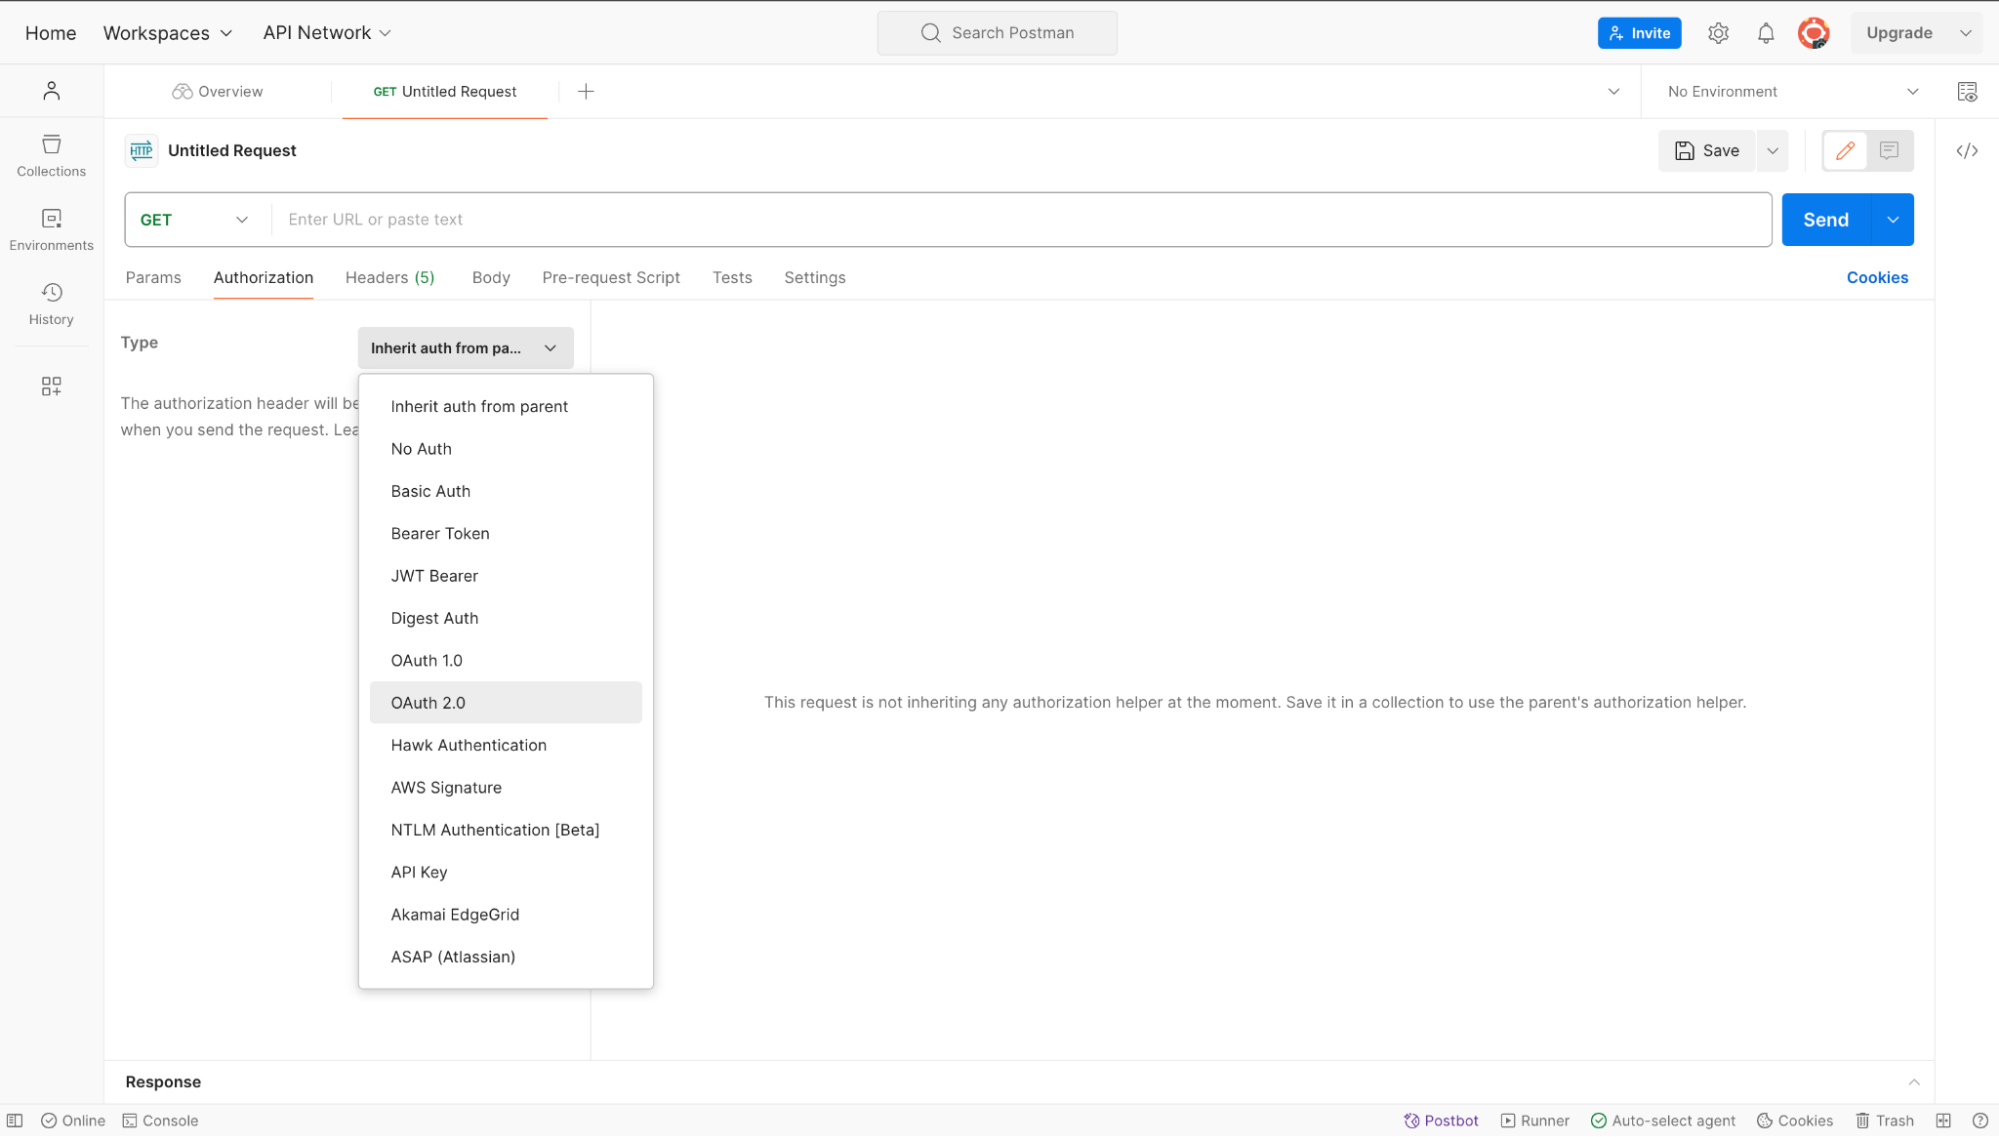
Select OAuth 2.0 authorization from the drop-down.
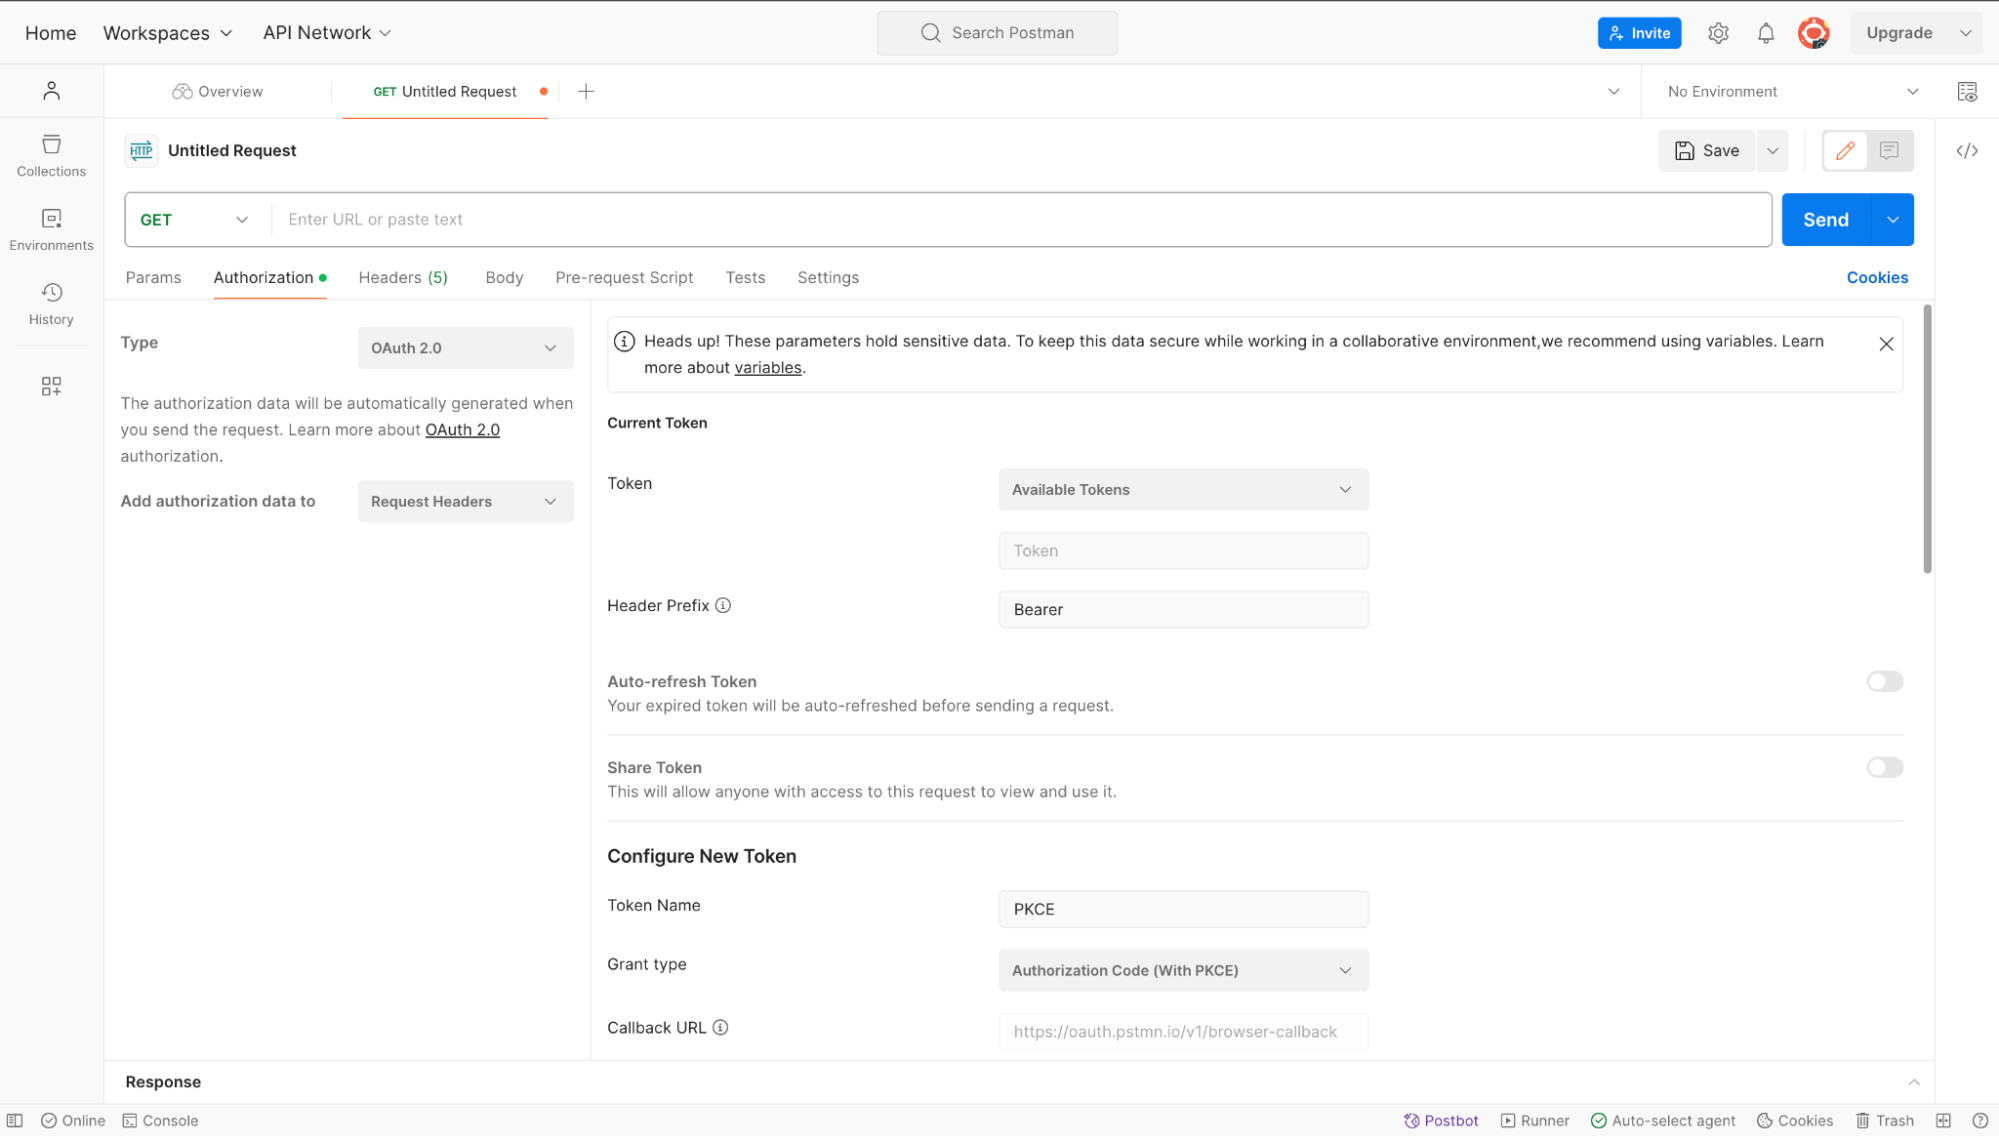
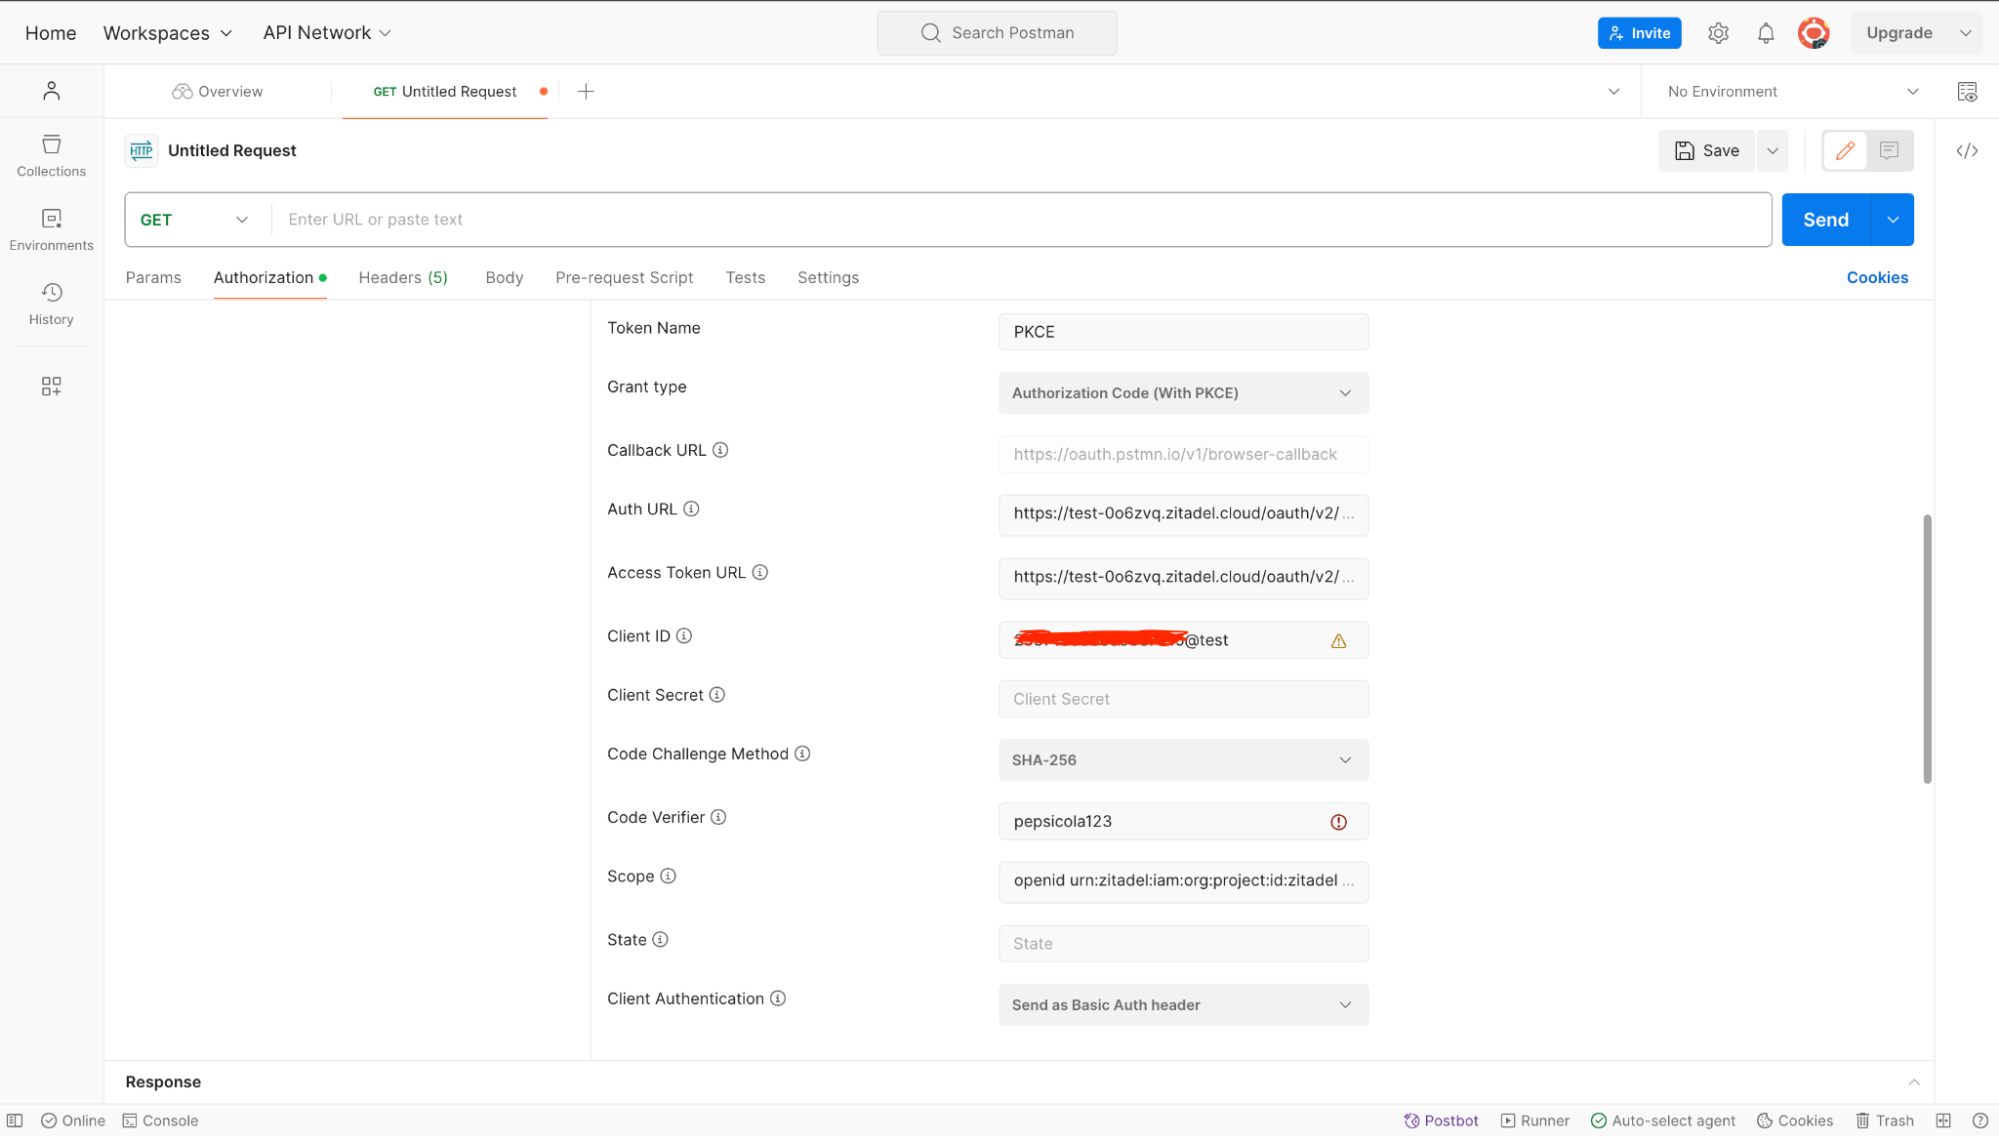
A new panel will be shown with different values. Fill up the values as shown in the image.
- Token: Available Tokens
- Header Profile: Bearer
- Token Name: A name of your choice
- Grant Type: Authorization Code (With PKCE)
- Auth URL: ZITADEL authorization_endpoint you copied earlier
- Access Token URL: ZITADEL token_endpoint you copied earlier
- Client Id: Your app's client_id
- Code Challenge Method: SHA-256
- Code Verifier: Keep it blank or provide any string
- Scope: openid urn:zitadel:iam:org:project:id:zitadel:aud
- Client Authentication: Send as Basic Auth header
Click Get New Access Token.
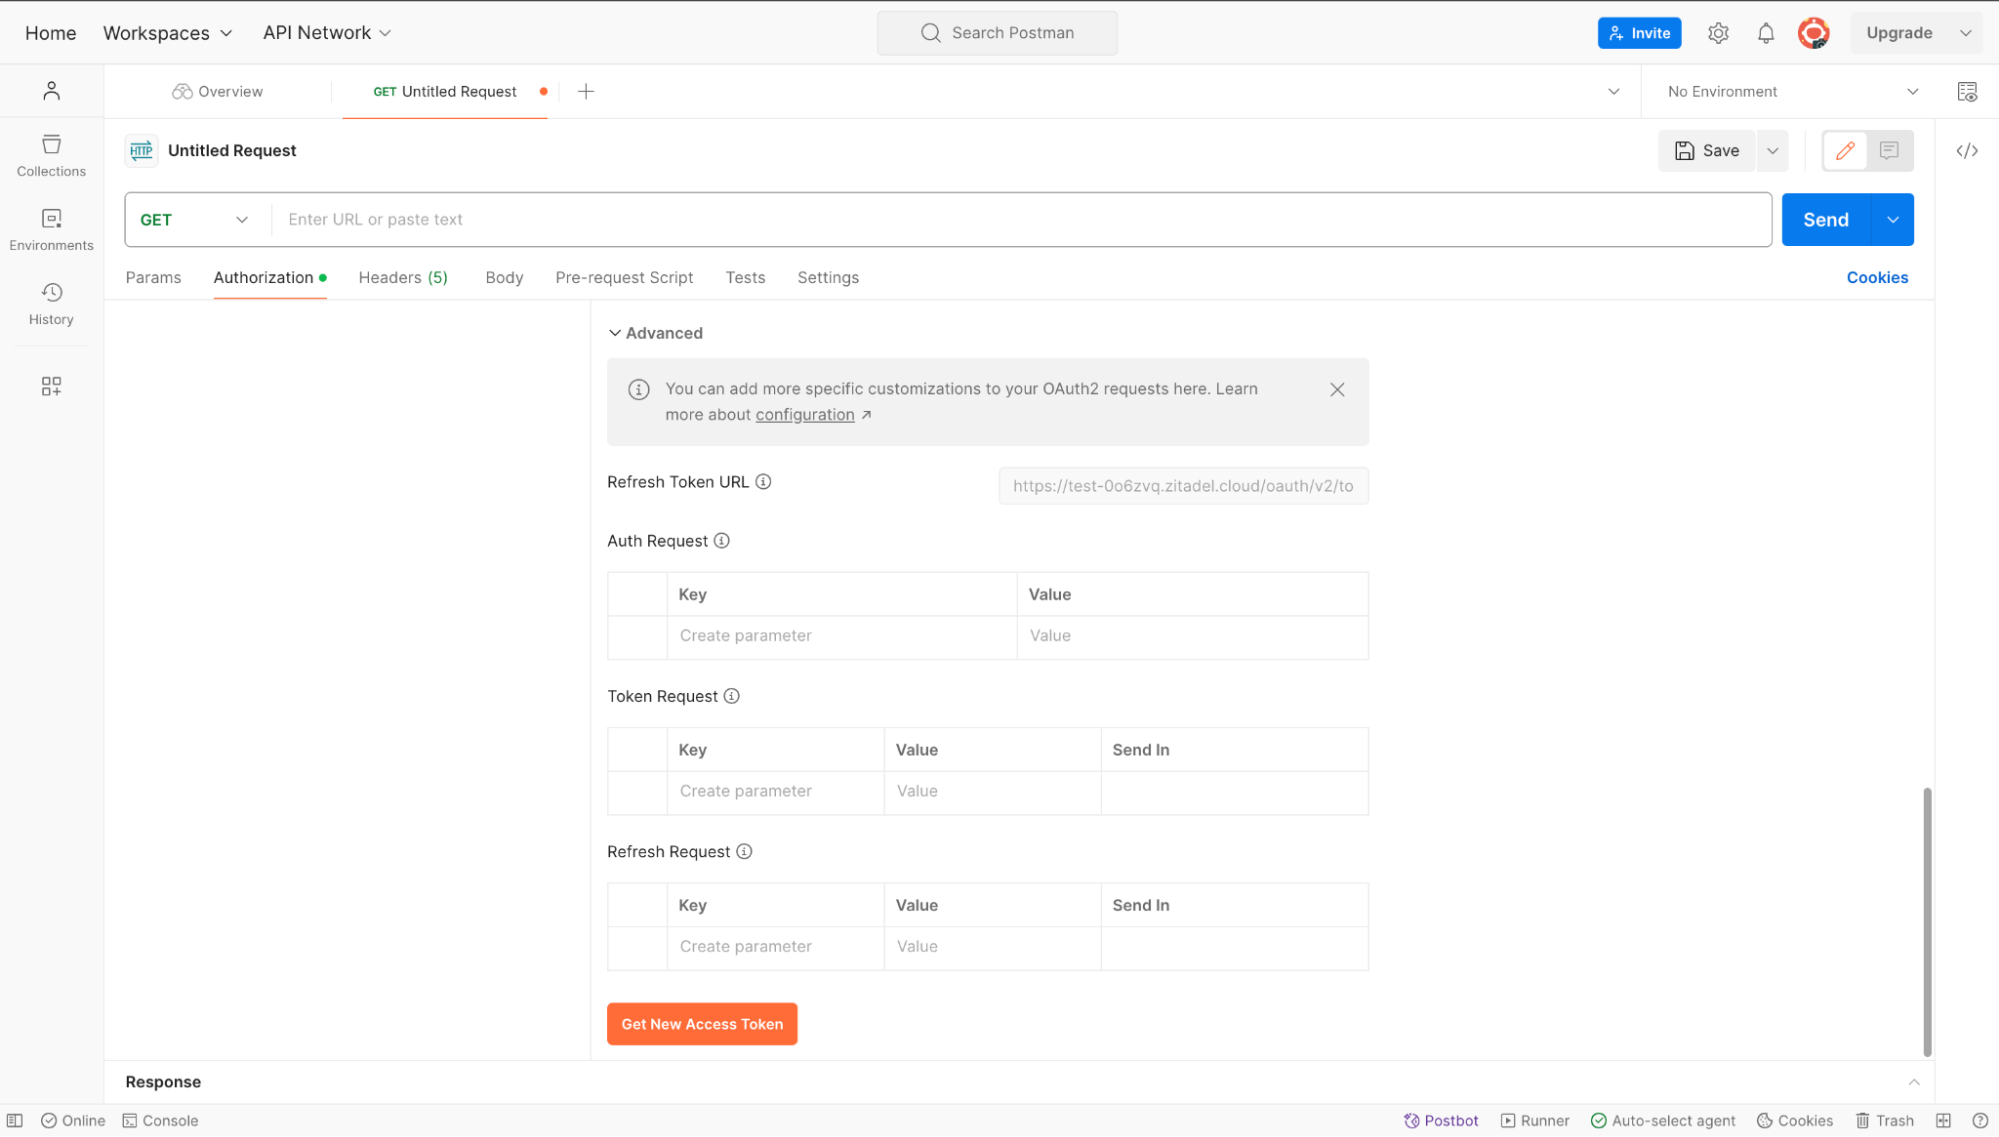
Now, if you haven't logged into ZITADEL yet, you'll be redirected to the ZITADEL login page. This simulates the user login experience. Here, enter your email address.
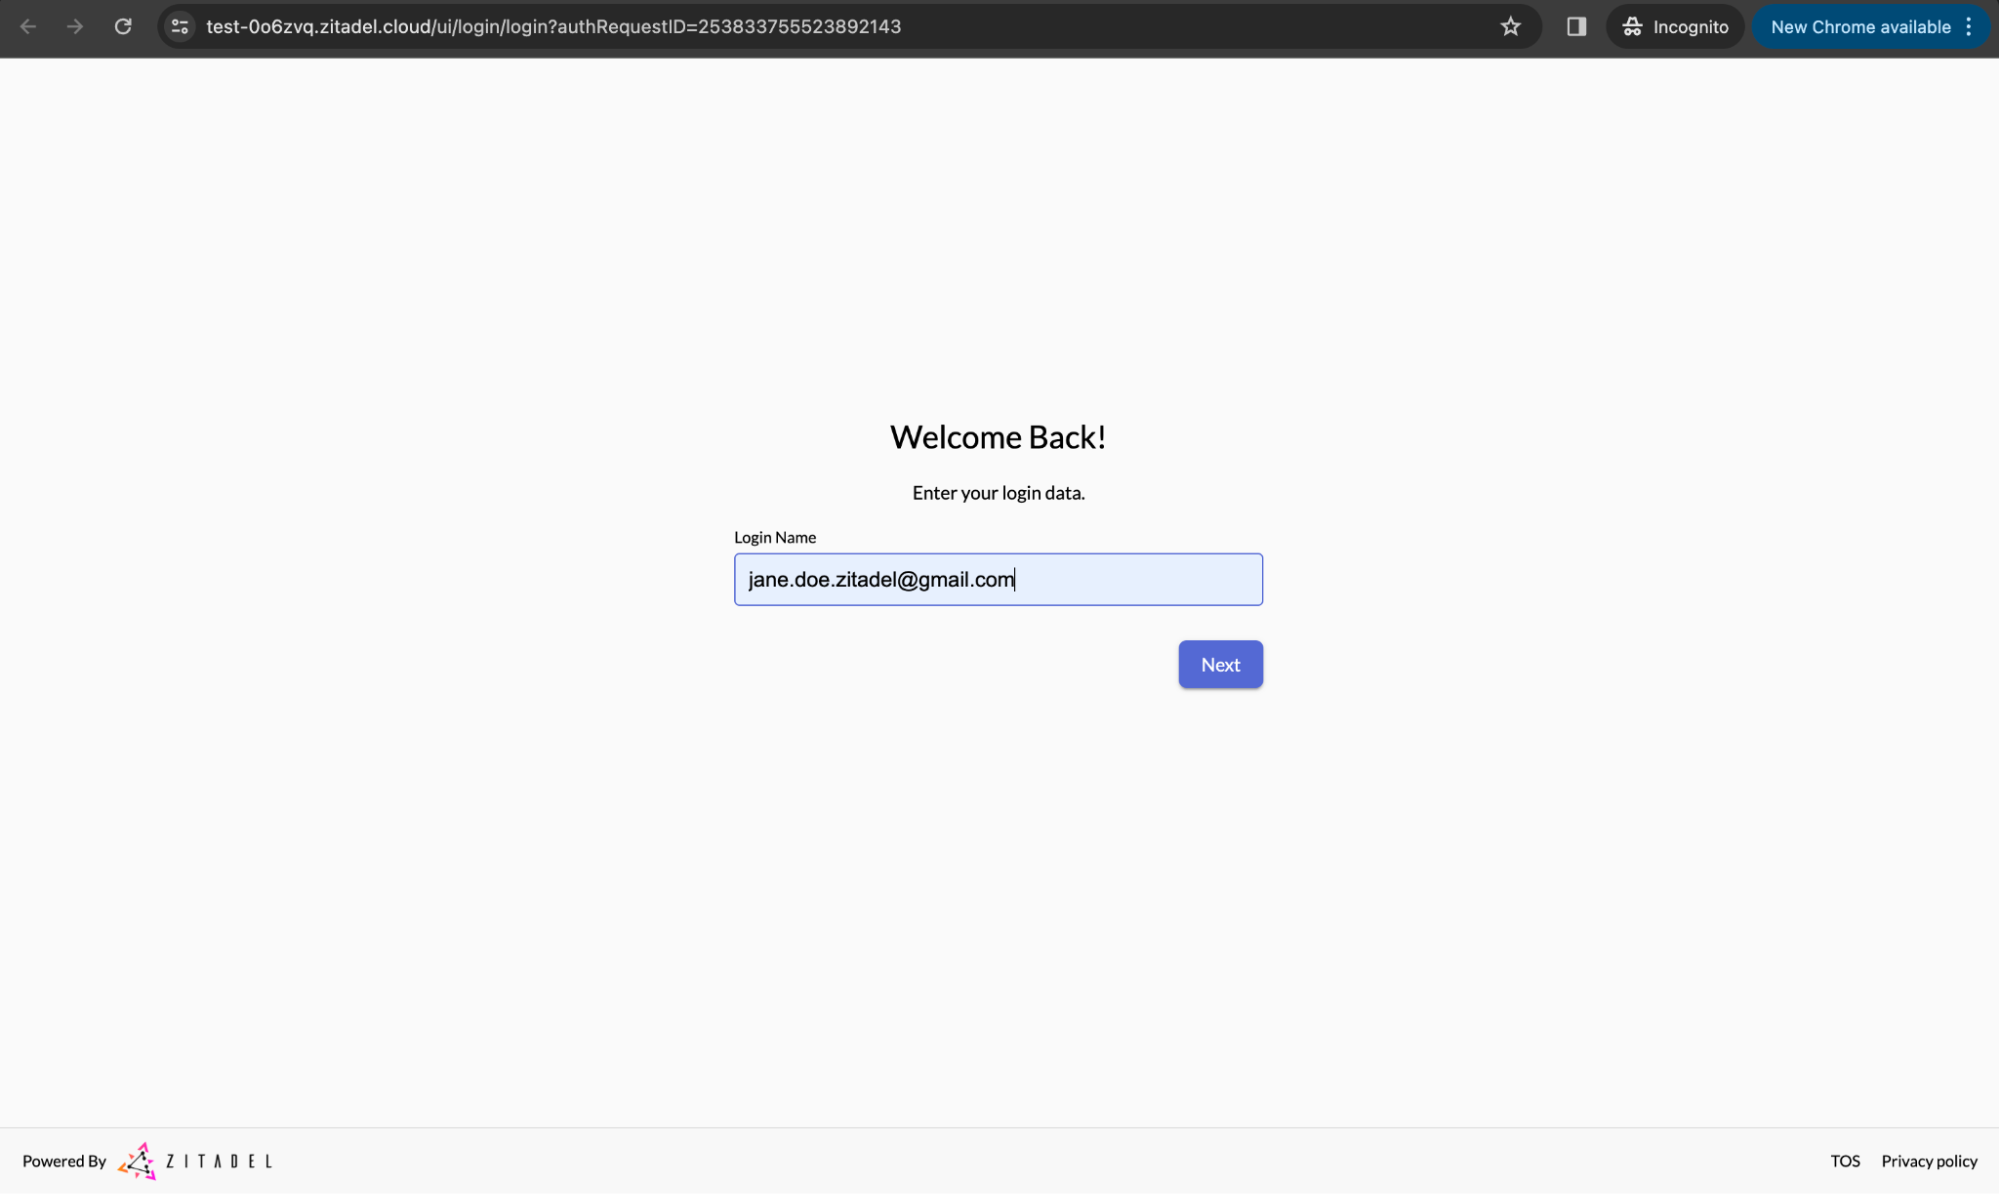
Now enter your password.
New users need to verify their email and set a new password if they haven't done so already.
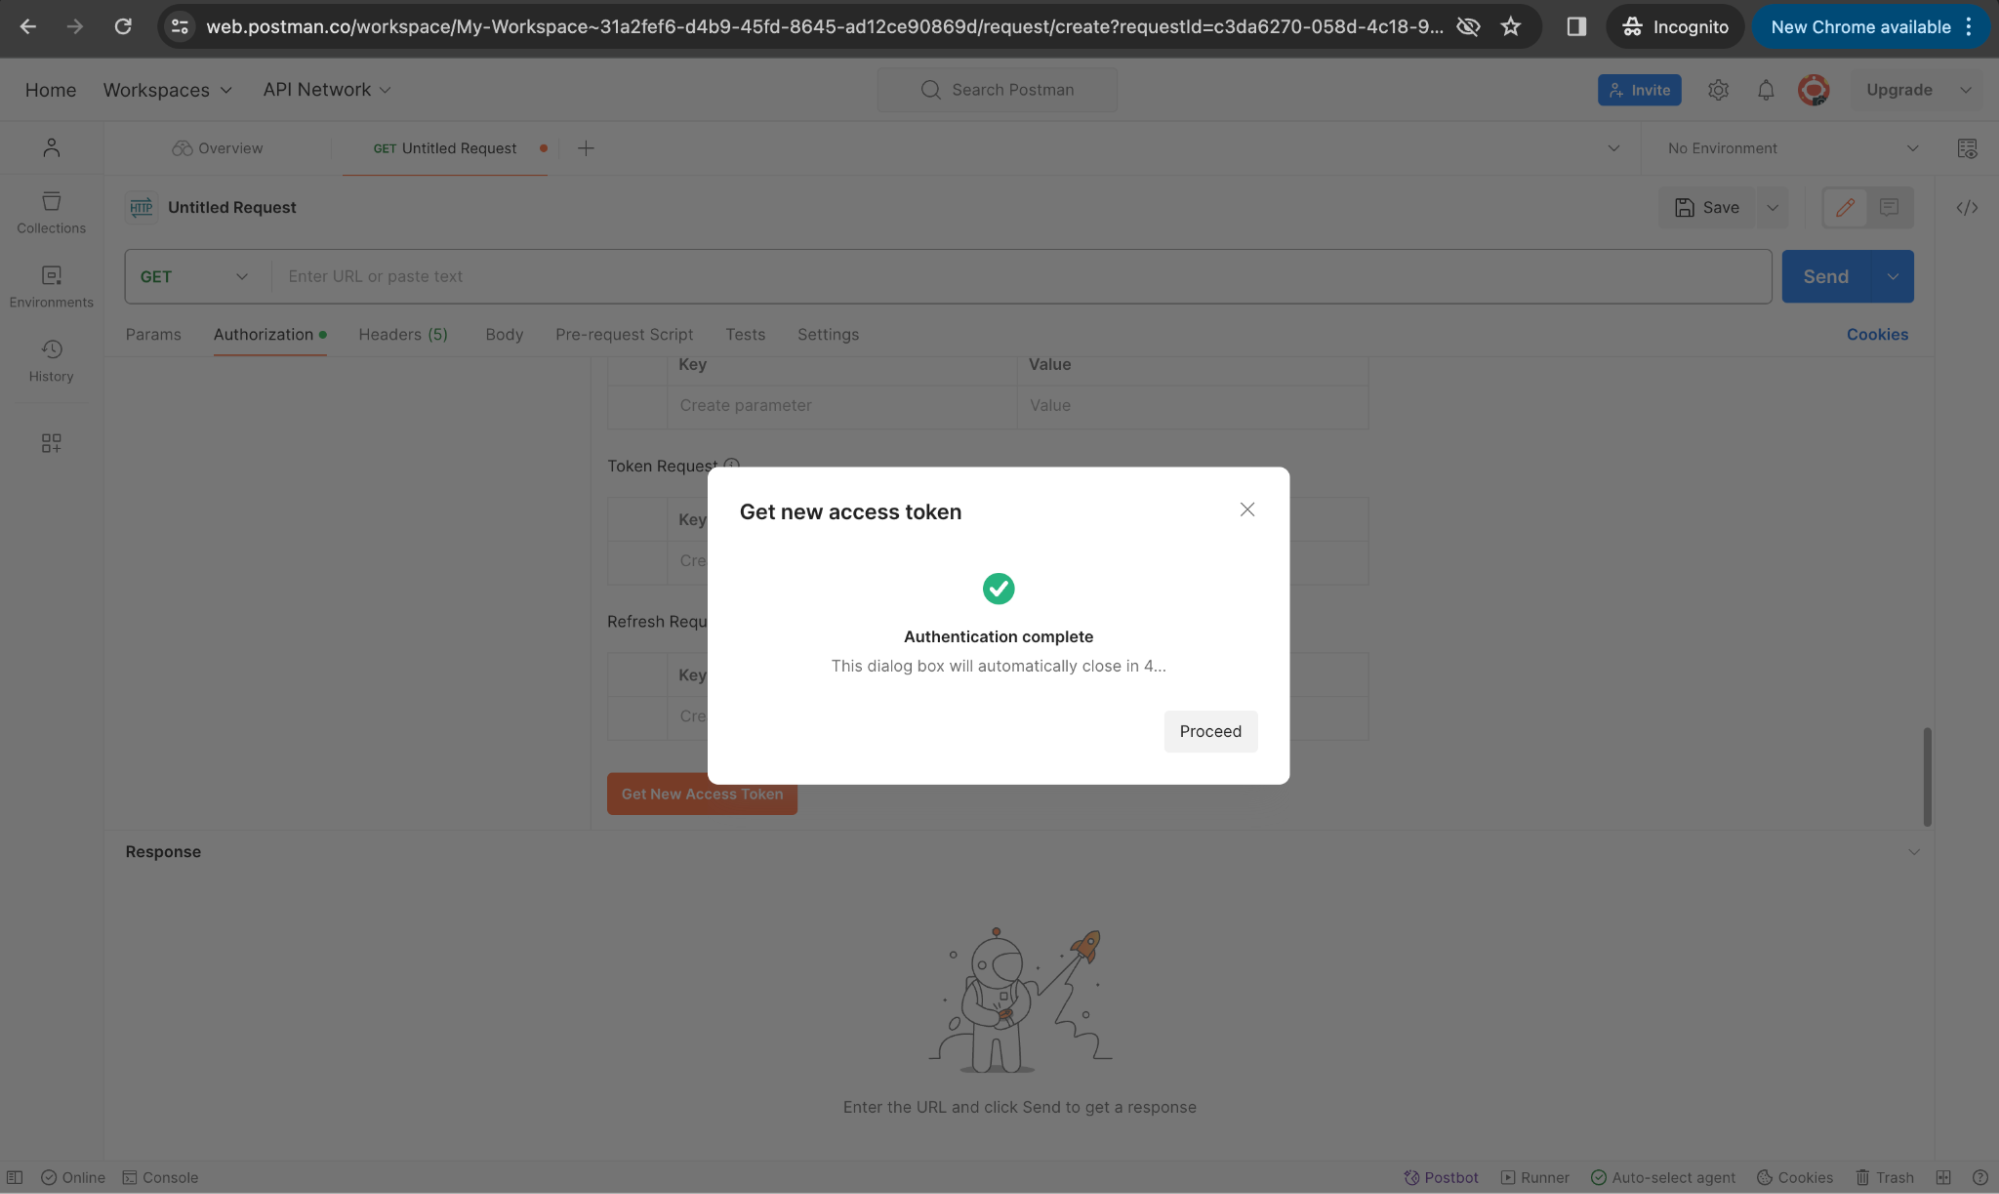
If the authentication is a success, you will receive the token. Click Proceed.
Use the Token
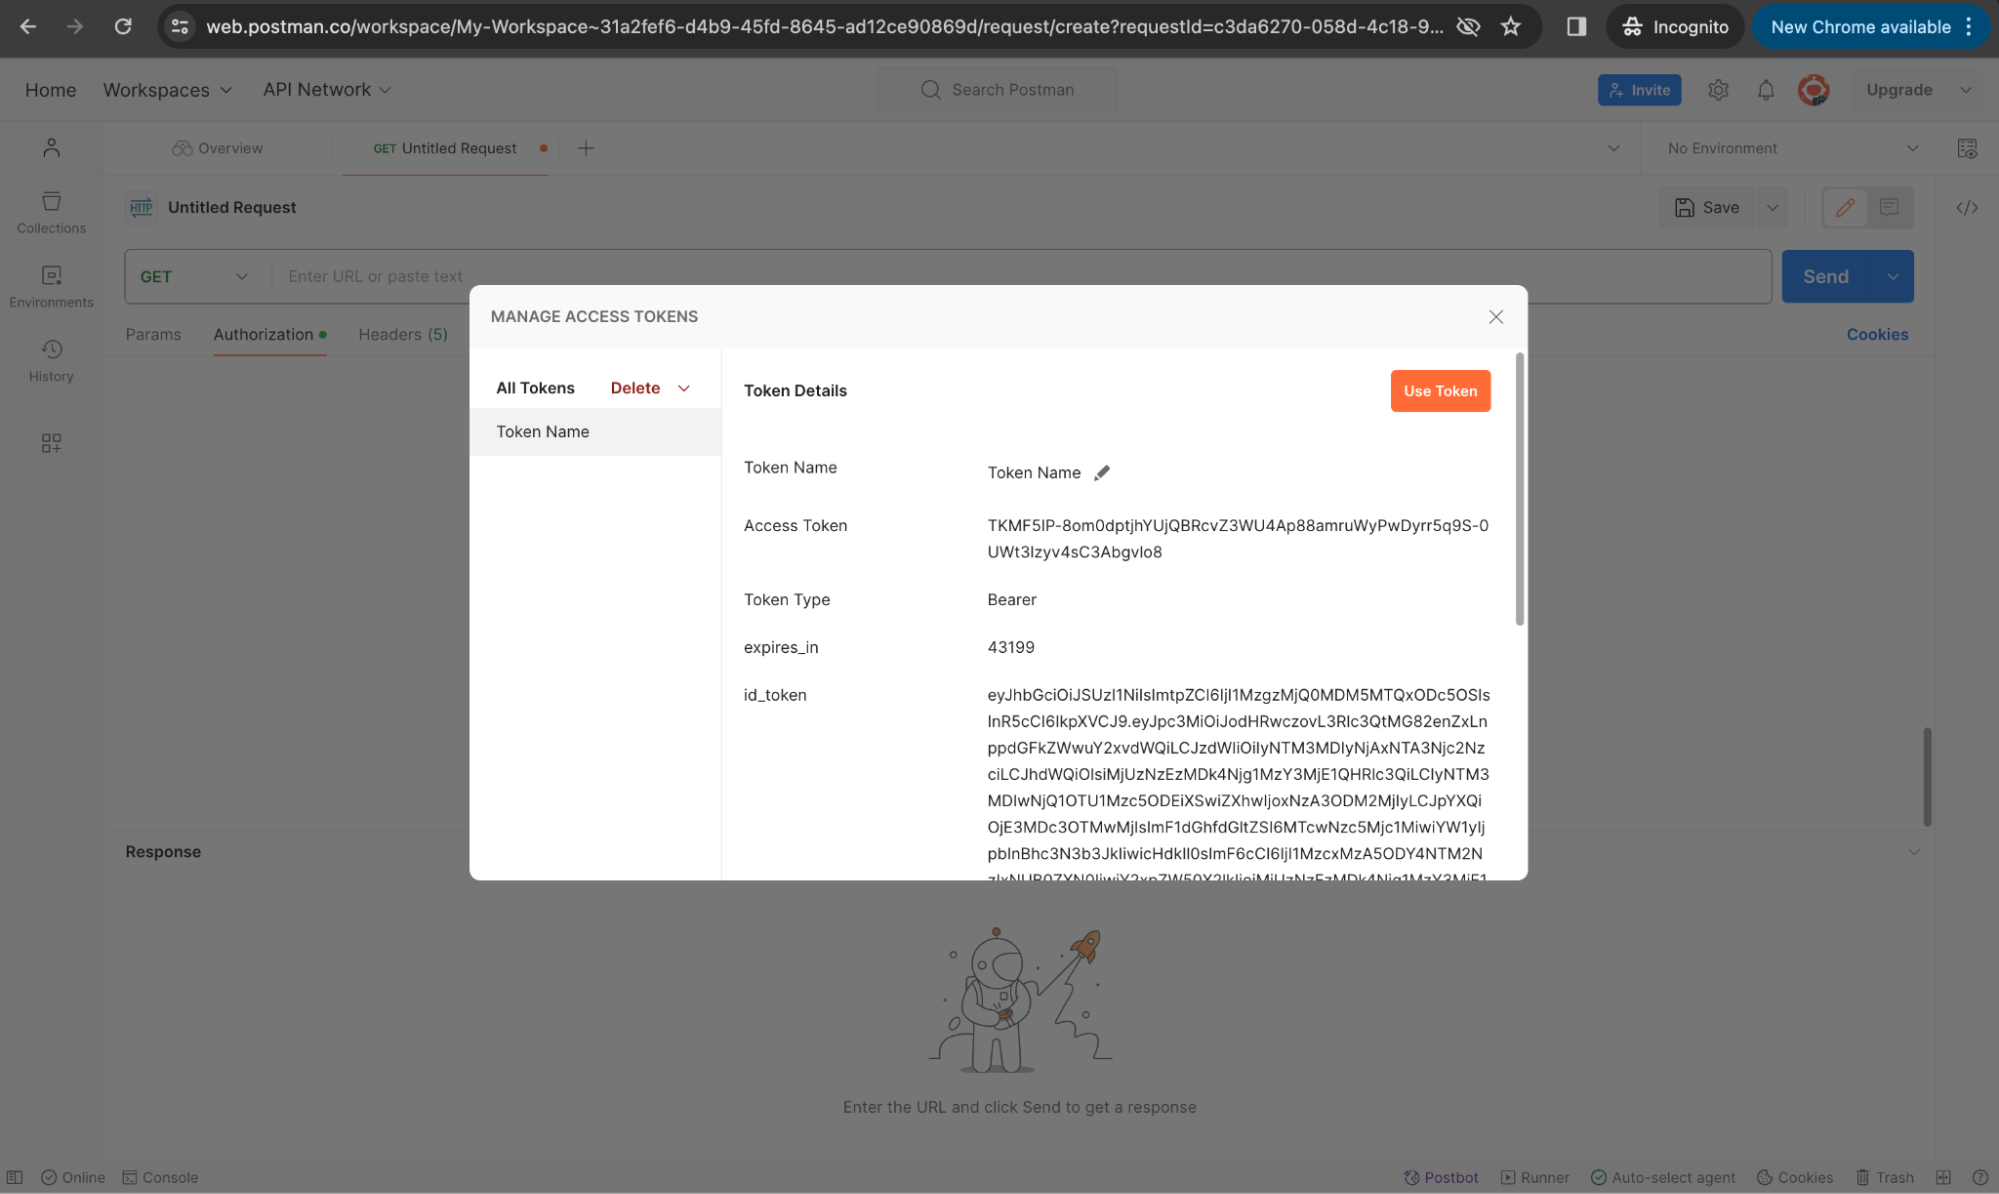
Click Use Token within Postman to apply this token for subsequent API calls. This token enables you to interact with your application's APIs or ZITADEL's, such as fetching user information from the userinfo endpoint.
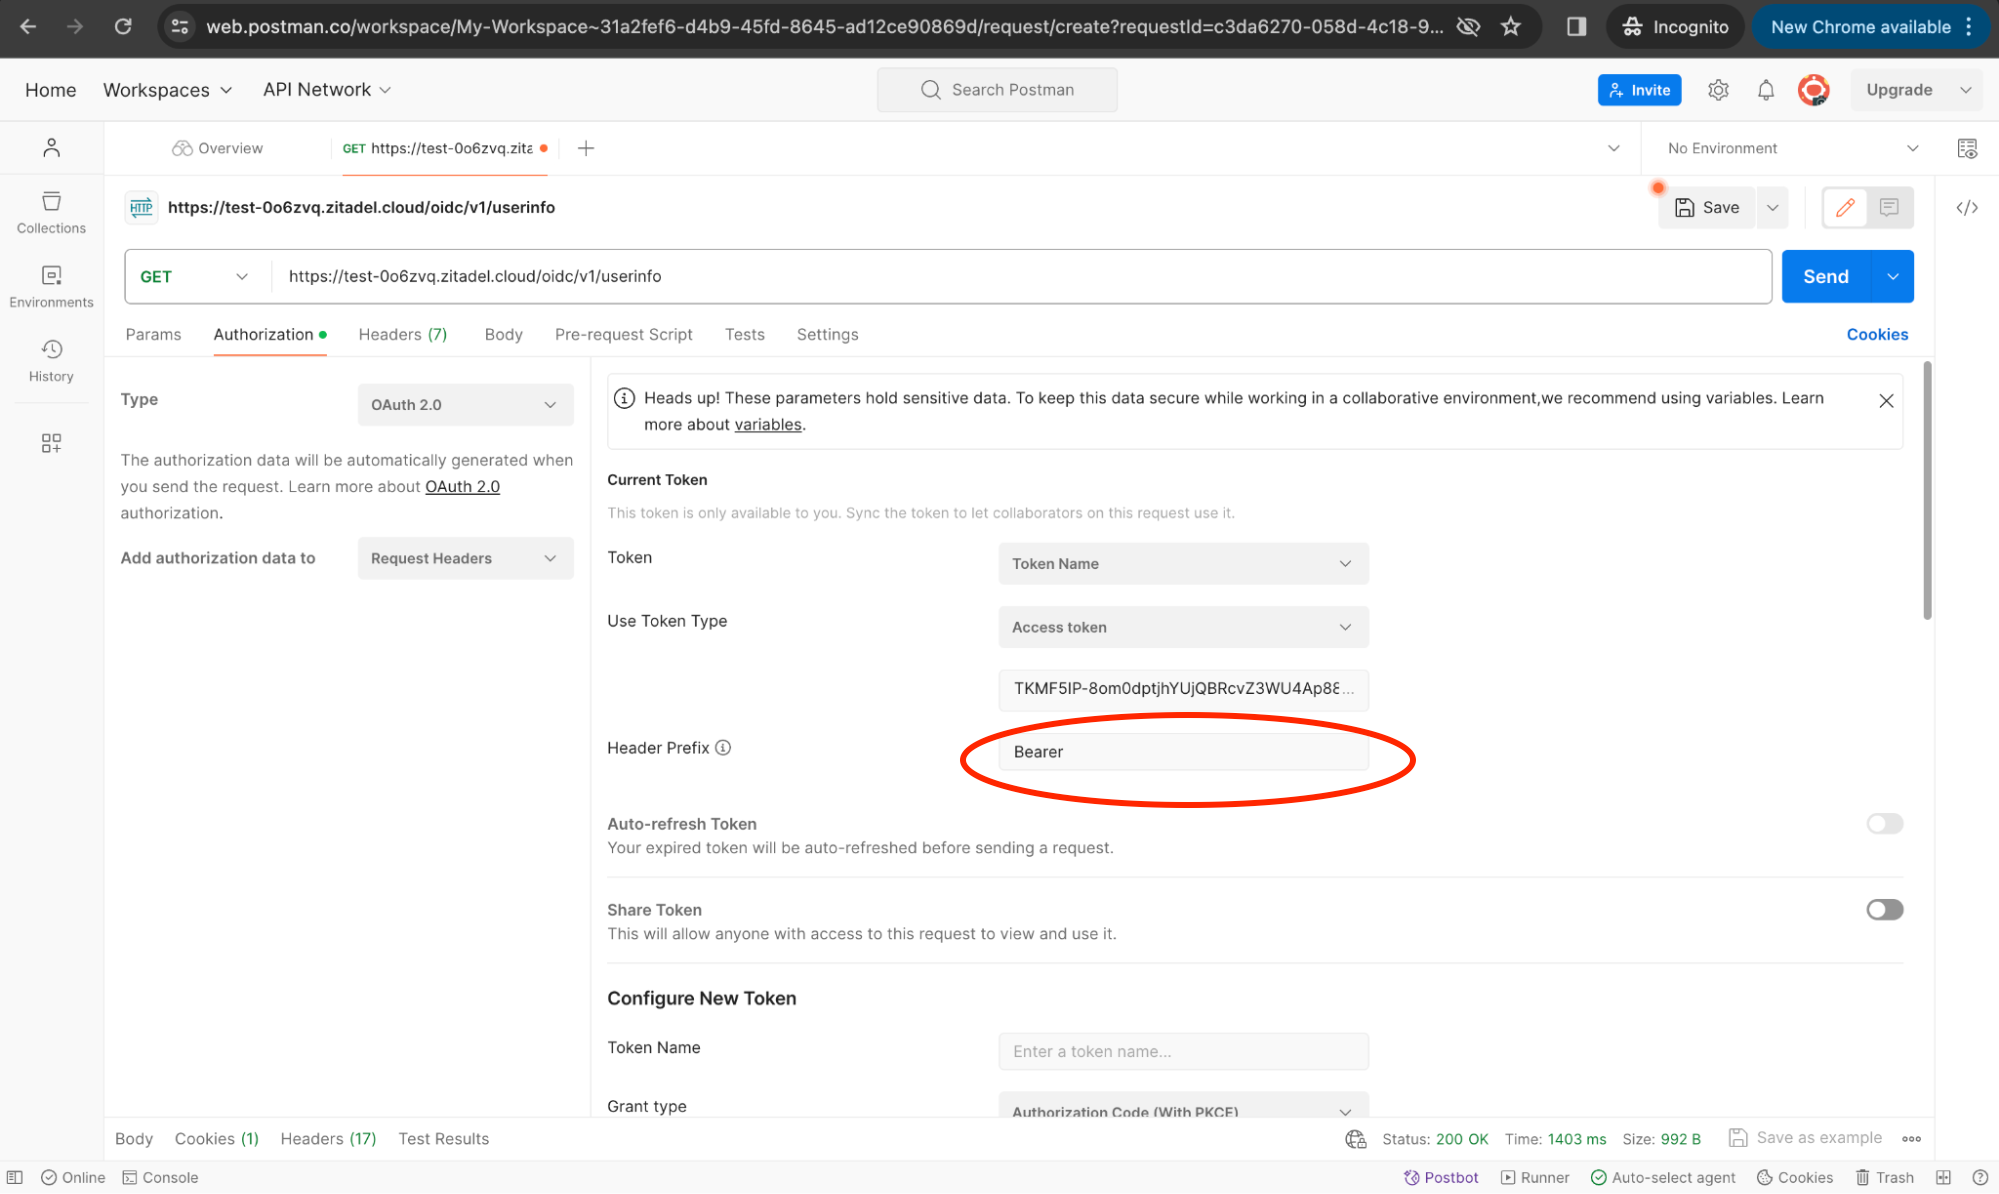
Now (after clicking Use Token), enter the user_info endpoint as the request URL and set Bearer as the Header Prefix for authorization as shown below. Click Send.
The response will be as follows:
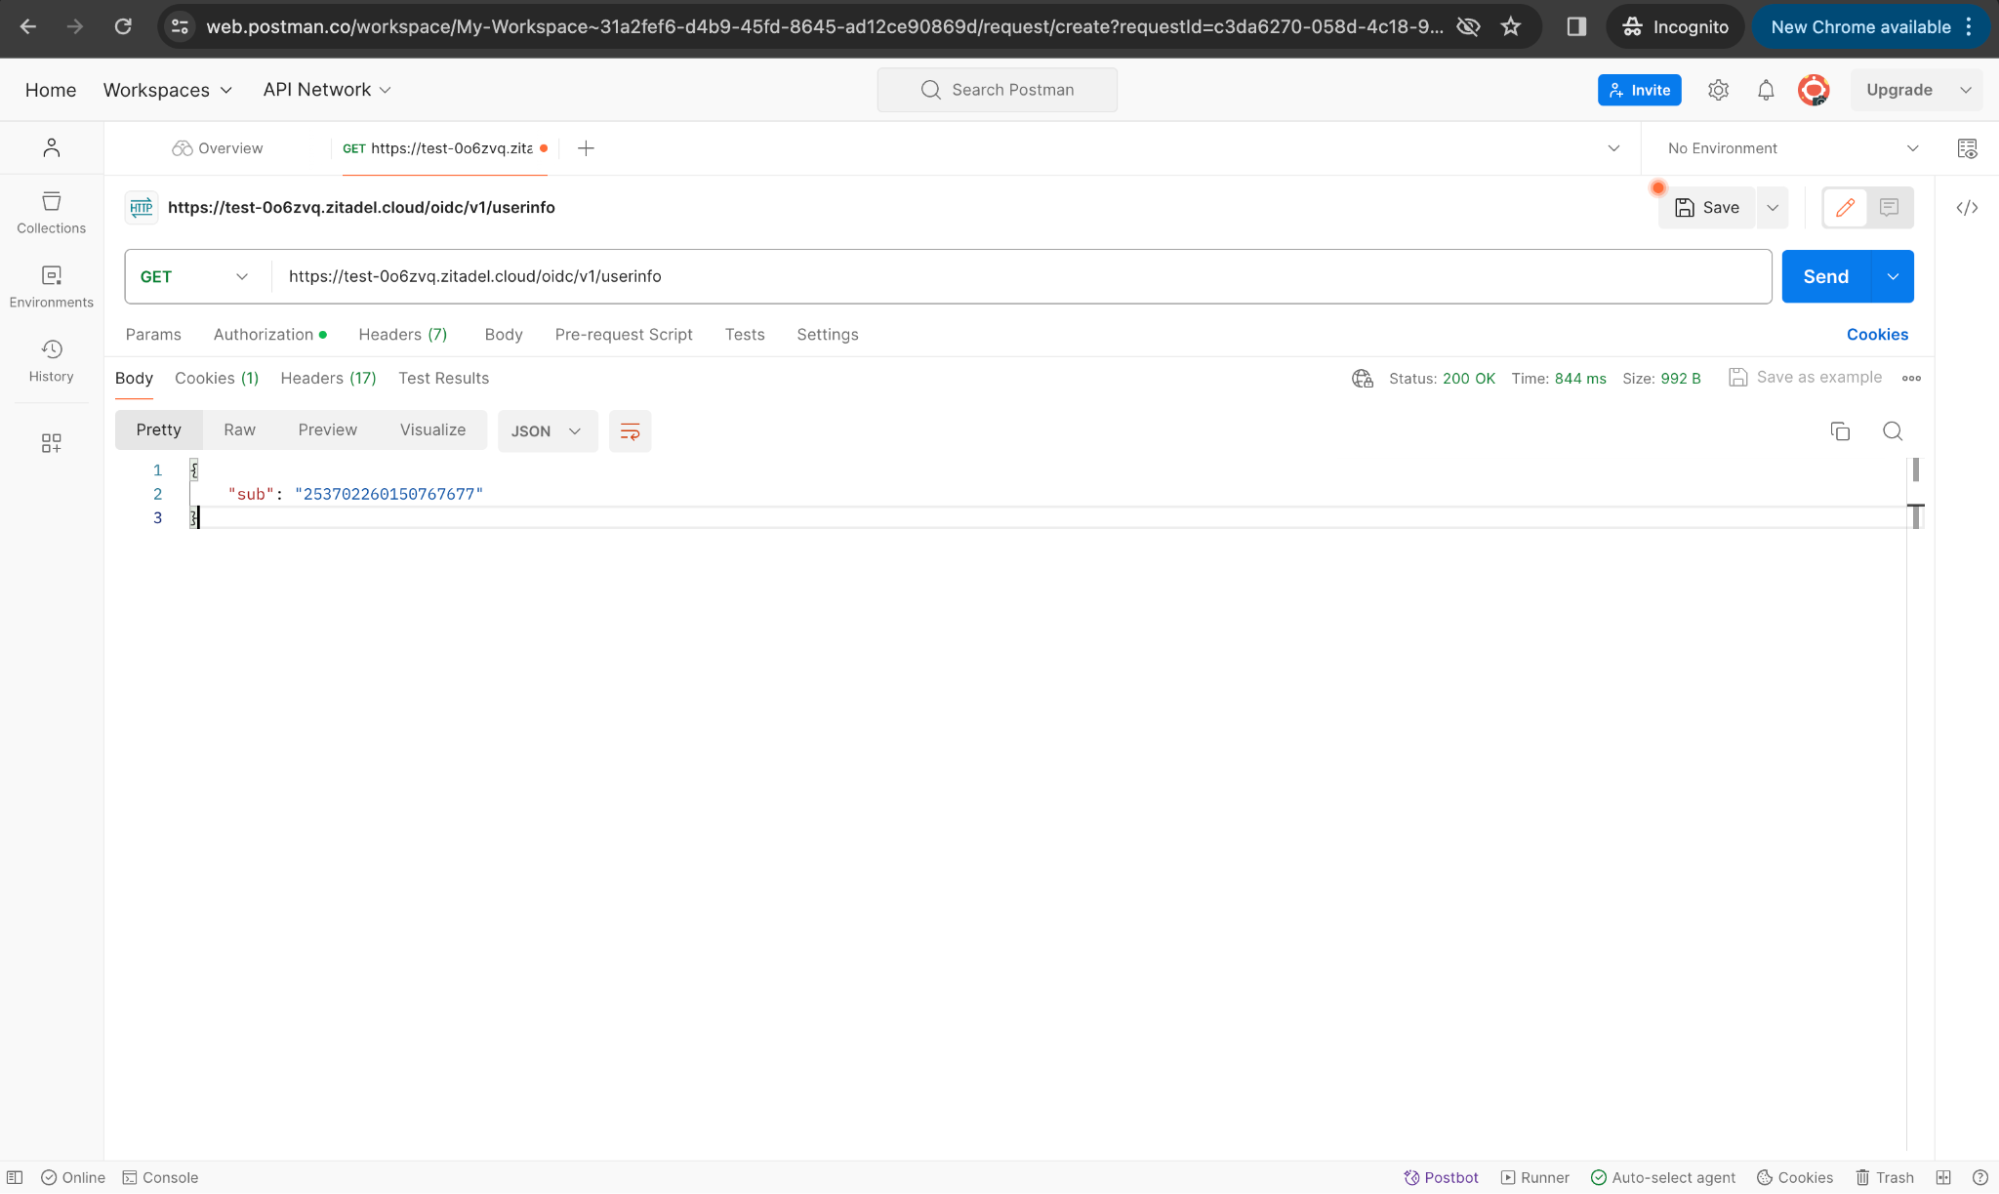
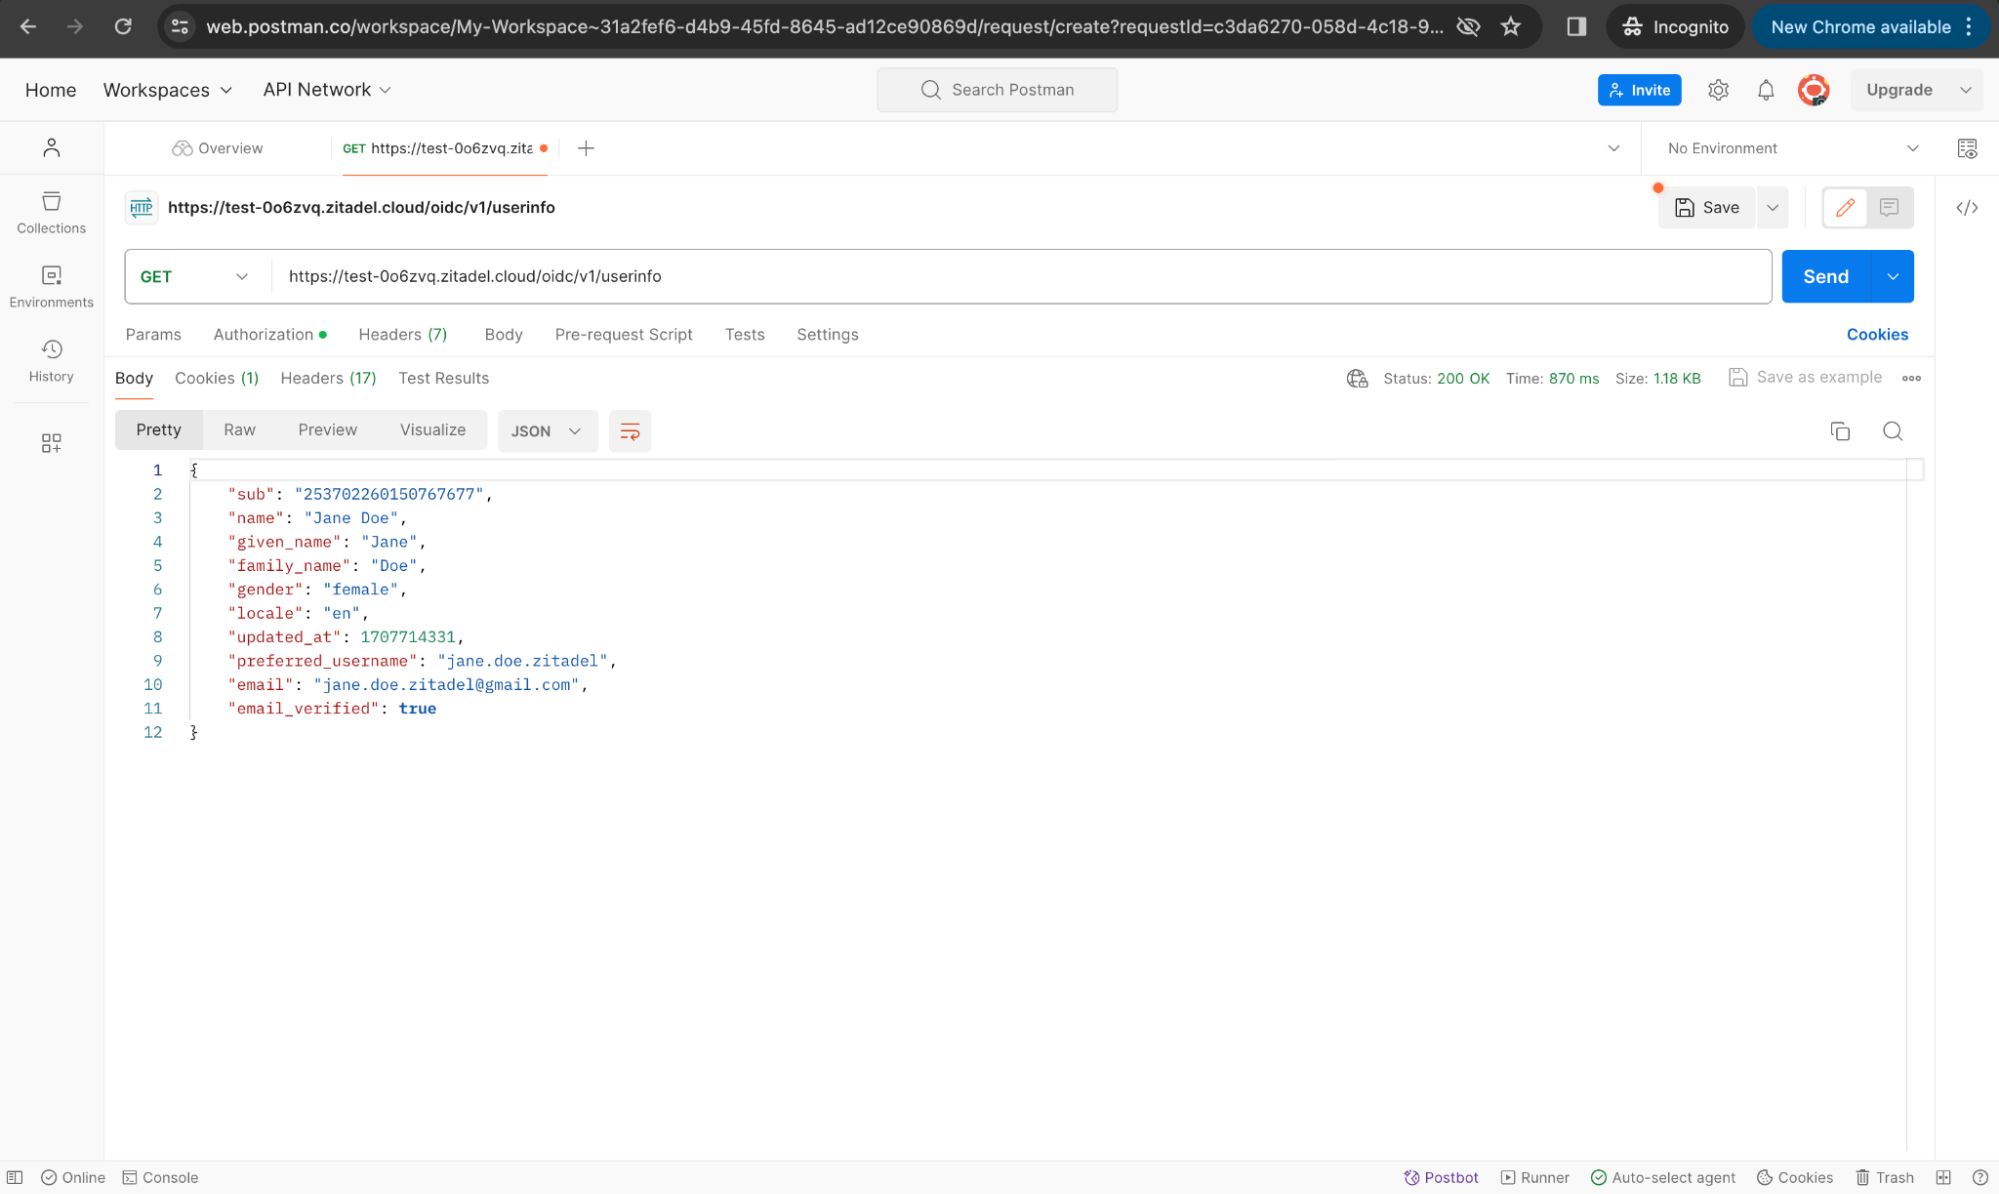
We didn’t receive user information because we did not specify sufficient scopes. Modify the scope field to include profile and email, then obtain a new access token.
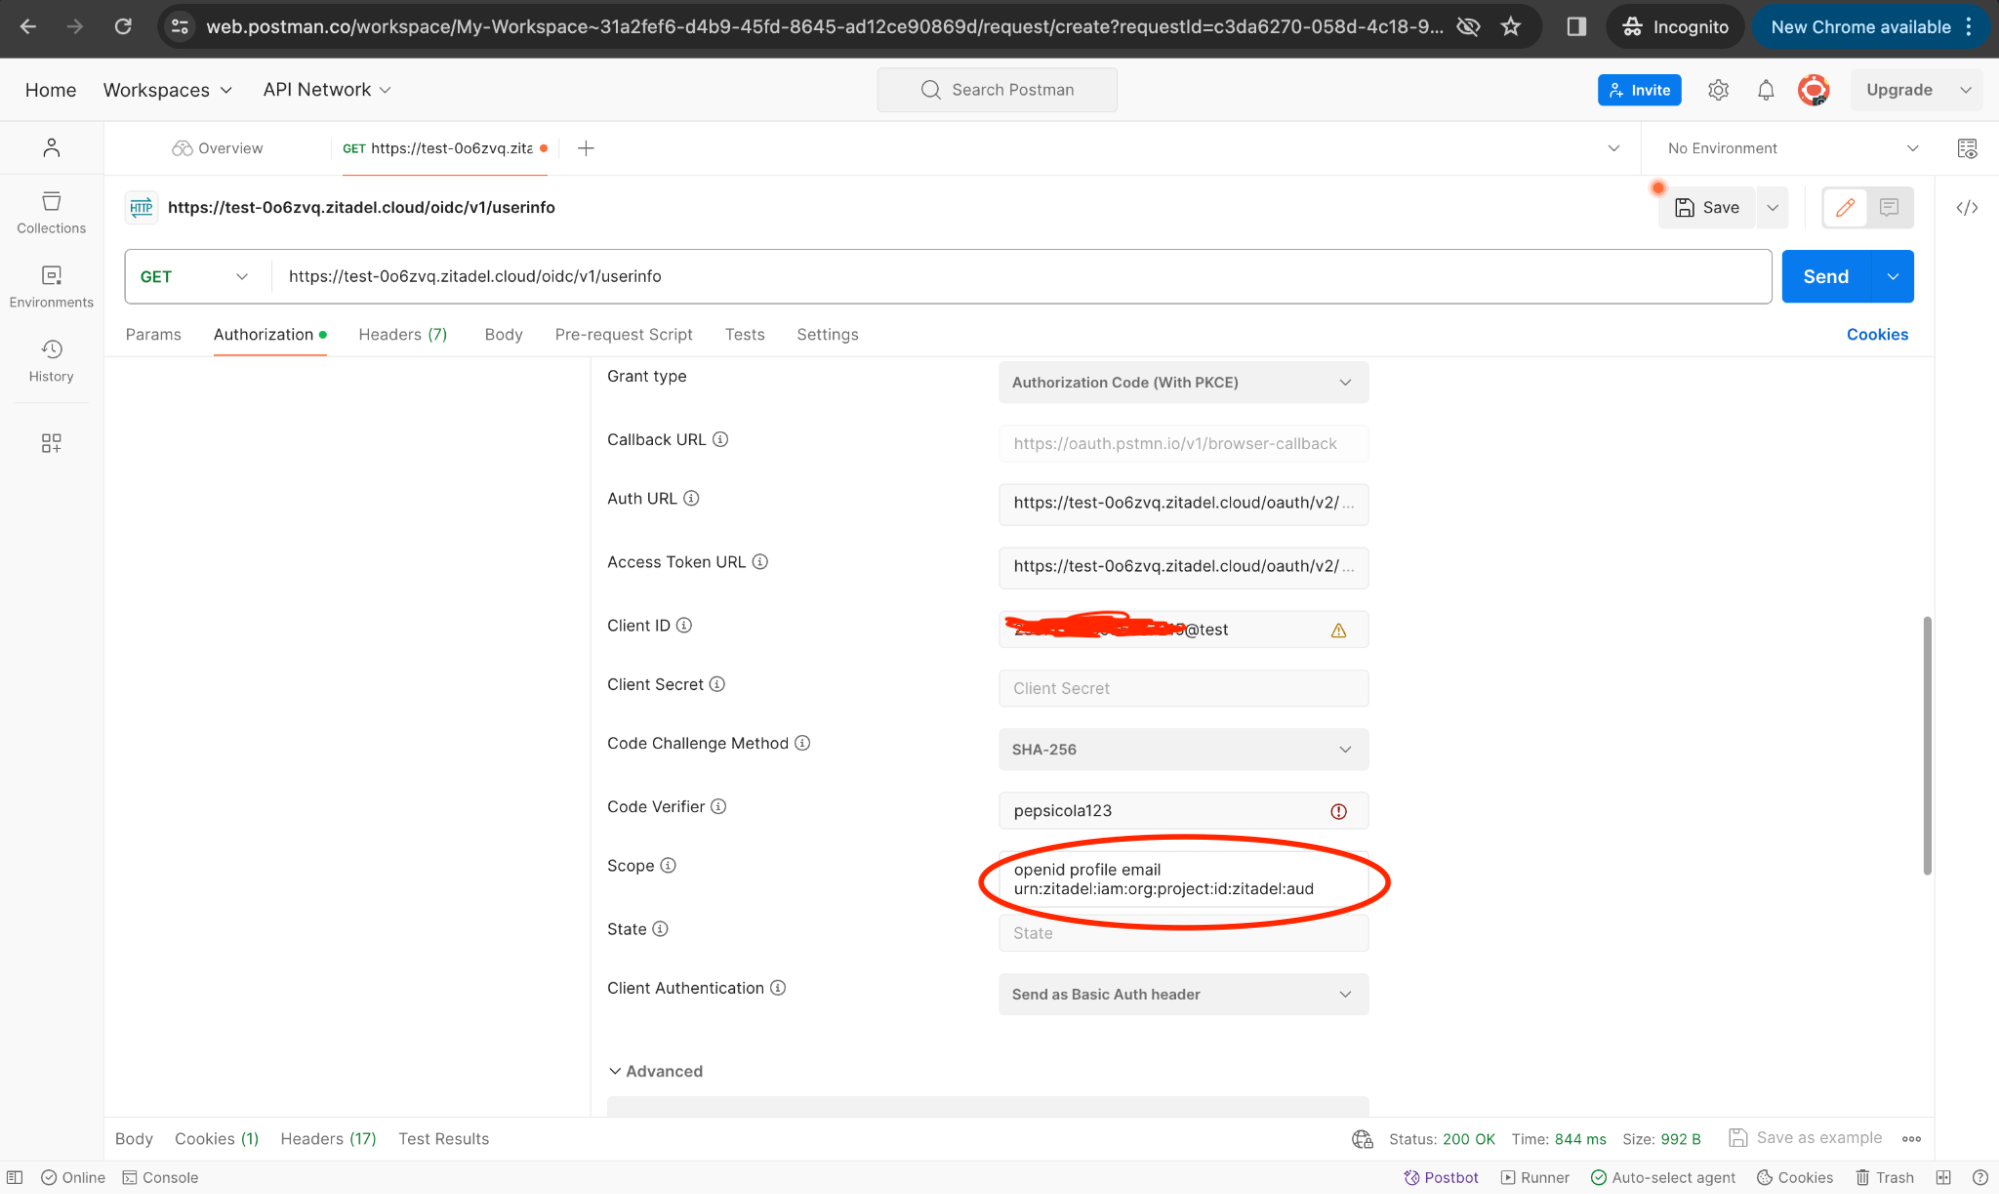
Use the new access token this time. And when you send the request to the userinfo endpoint, you will see the following response.
View User Roles
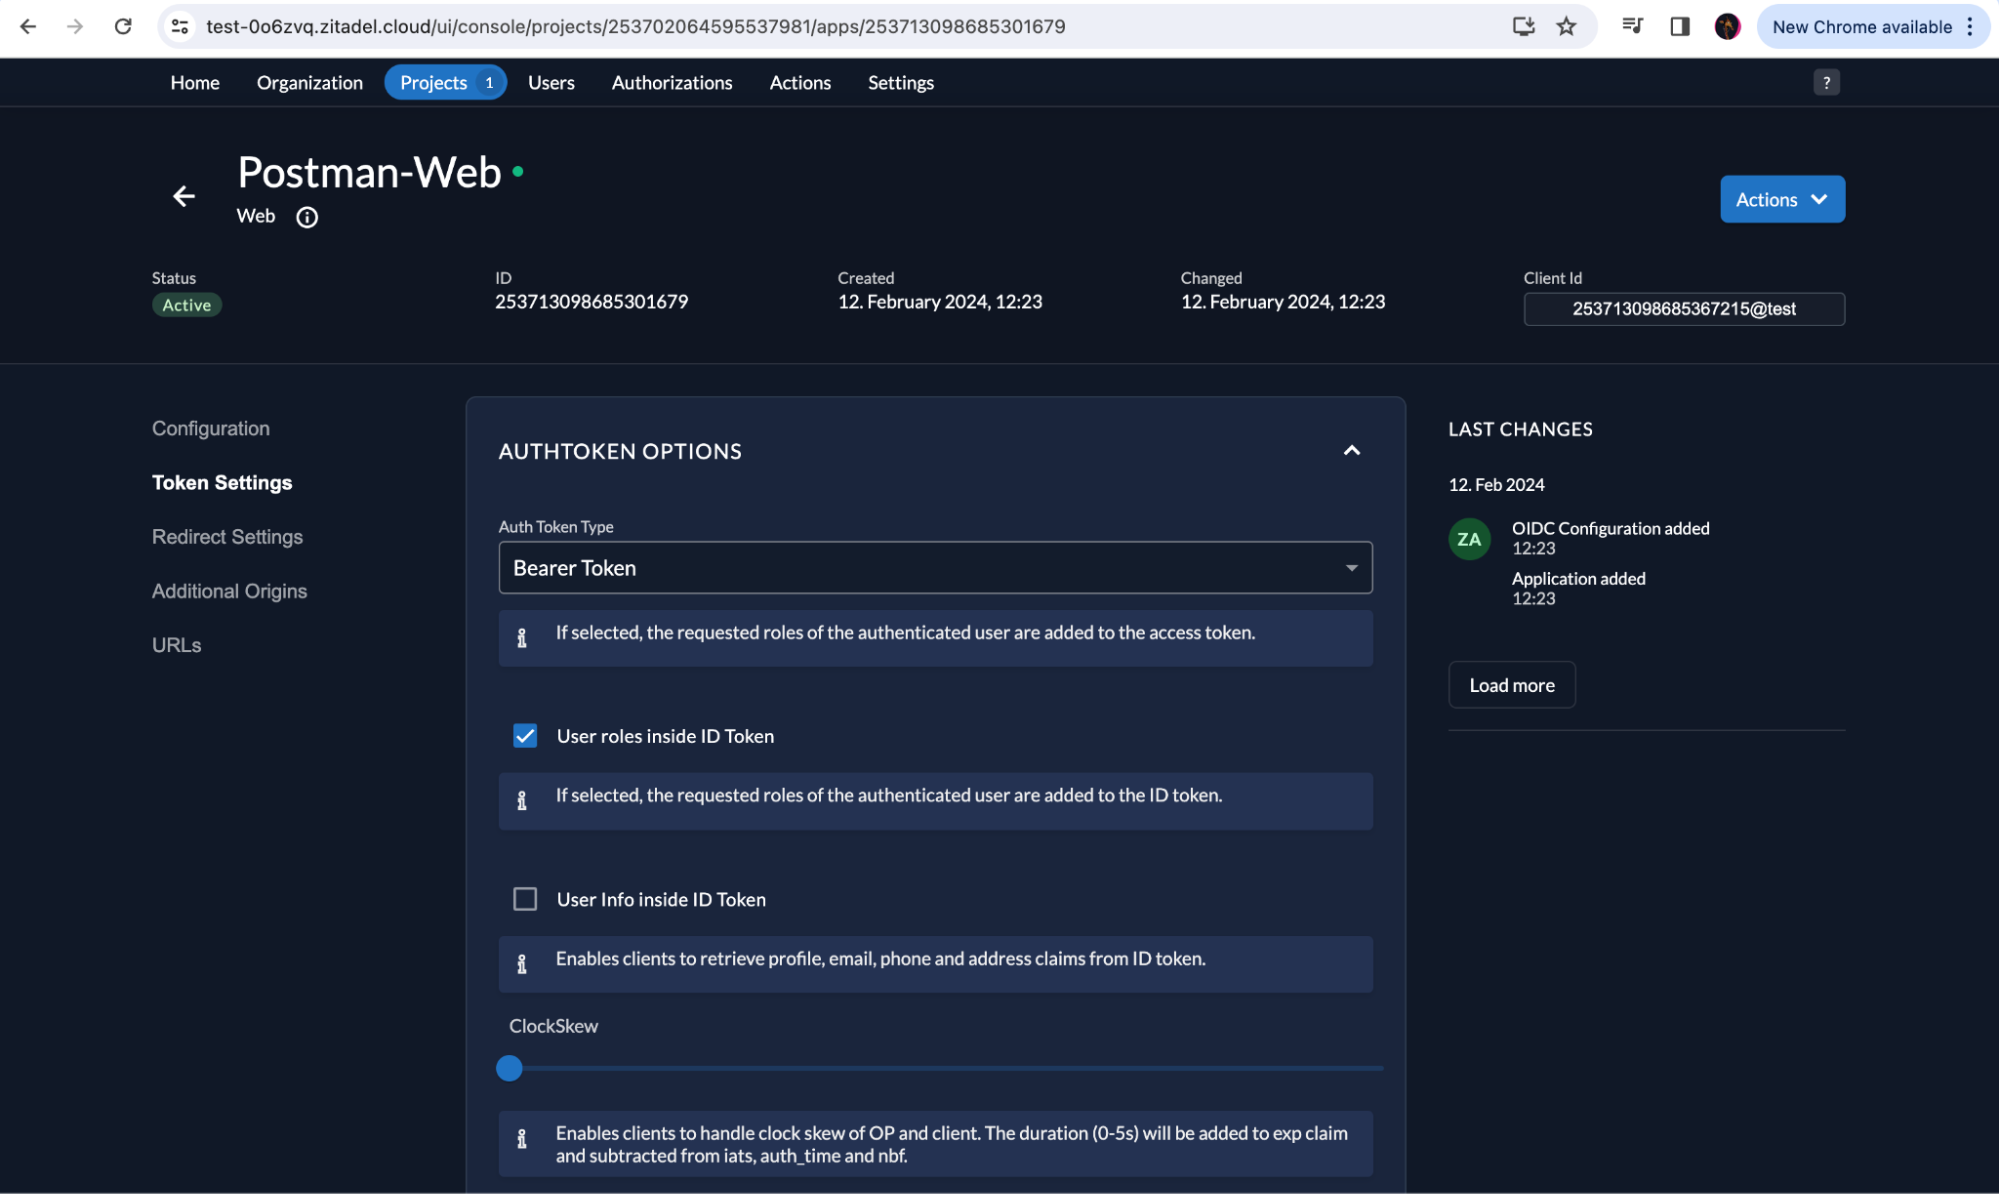
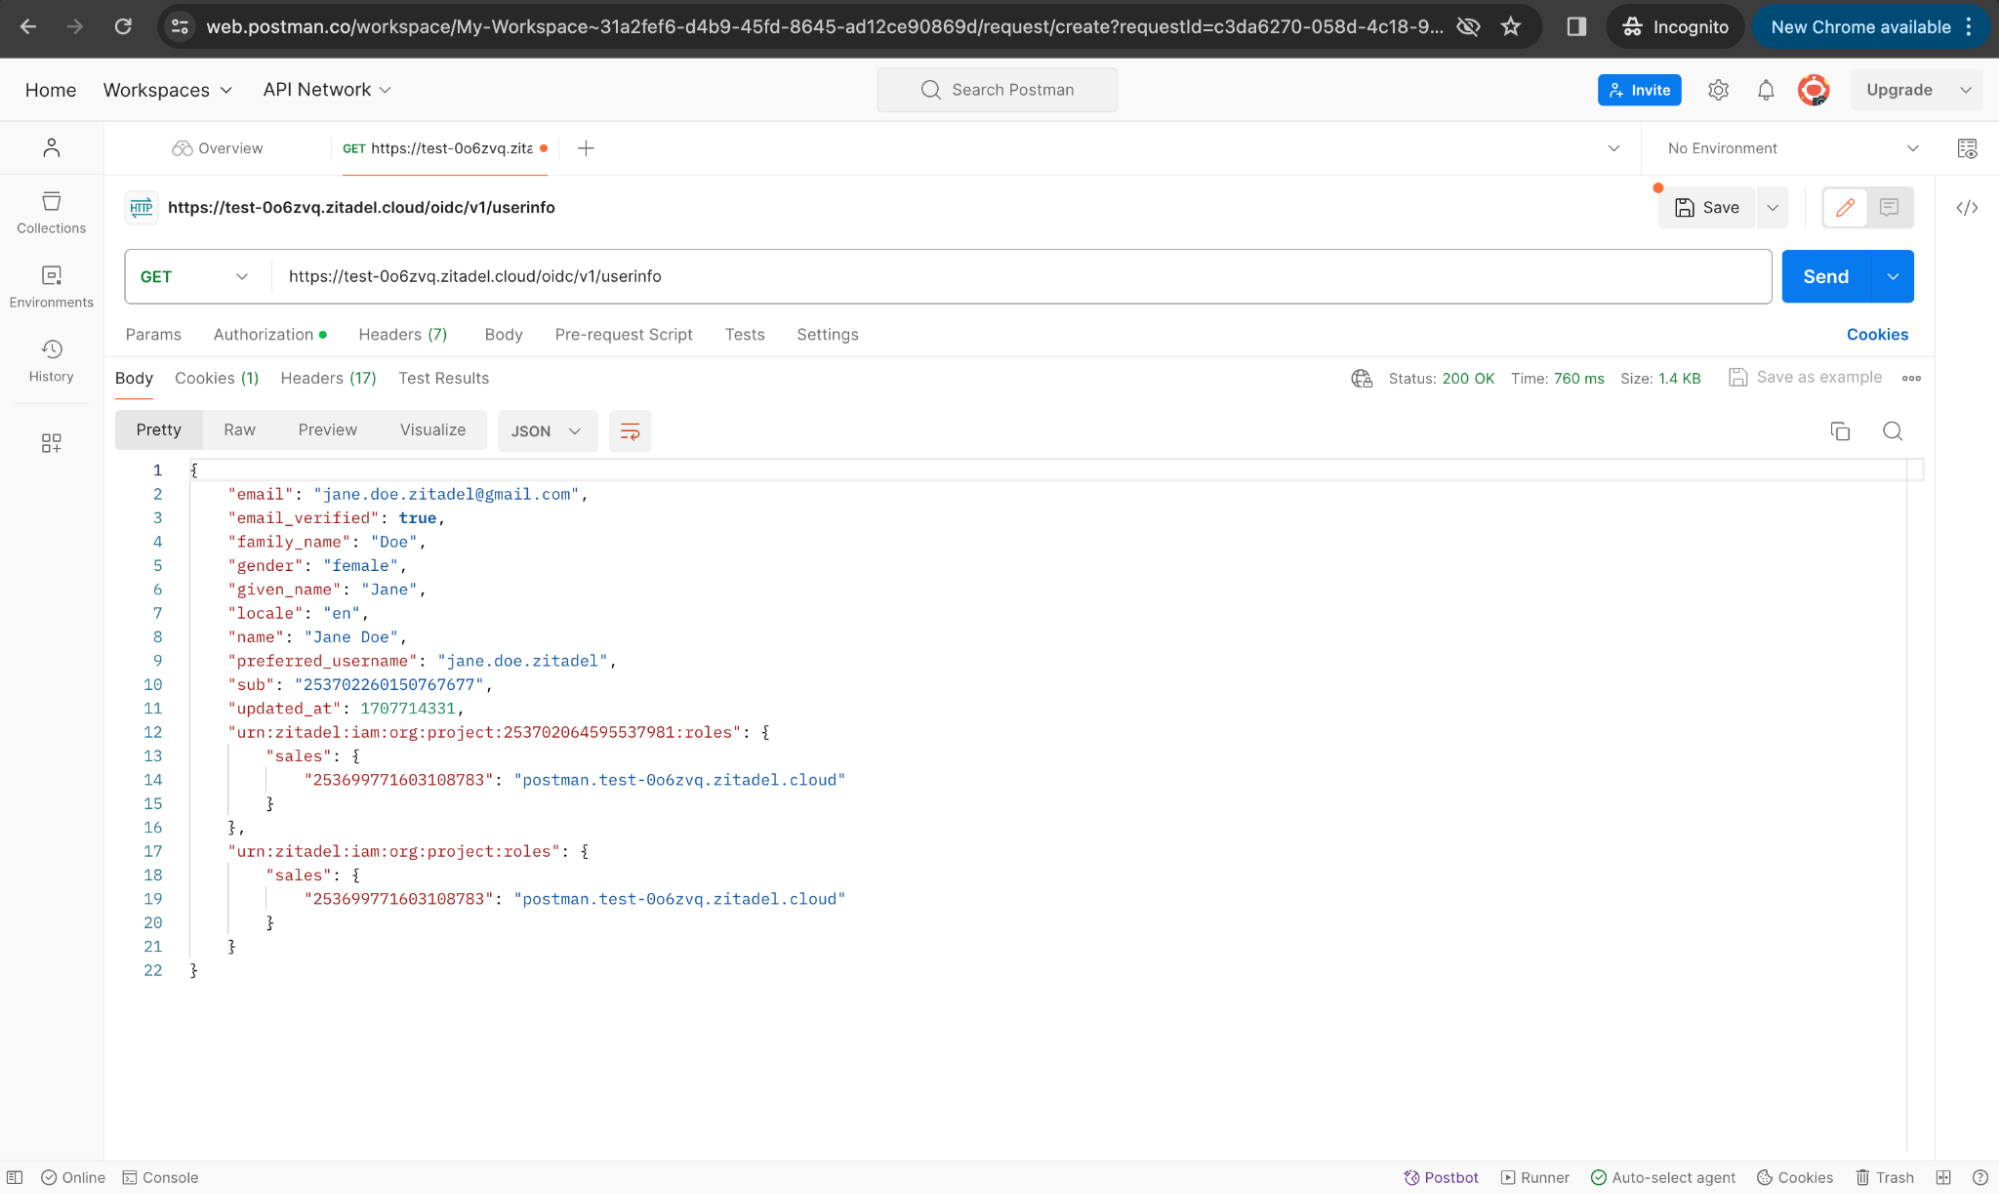
By default, user roles are not included in the userinfo response. To include roles, assign a role to a user. You can add a user, add a role, and add the role to the user by following the Quick Start Guide.
However, to see this role information in the response, you must enable the User roles inside ID Token option under Token Settings in your web application configuration. Click Save.
Now generate a new access token in Postman and send the request. You will now see the role information included in the response.
Wrap-up
Postman's prowess in simplifying API testing, combined with ZITADEL's robust security features, offers a powerful duo for enhancing your web application's authentication process.
Stay tuned for the next installment in our series, where we'll dive into token introspection with ZITADEL and Postman. We'll show you how to verify token validity and understand its scopes, ensuring strong security for your API access.