Terraform in Identity and Access Management
- Key Benefits of using Infrastructure as Code (IaaC) for IAM
- What is Zitadel?
- Why Zitadel?
- Pre-Requisites
- Initialize Terraform
- Using Terraform with Zitadel
- Variables and outputs
- Using Random Passwords with Terraform
- Inspect Terraform State (Optional)
- Terraform Data Source (Optional)
- Destroy the Resources
- Conclusion
- How can I try out and contribute to Zitadel?
- Suggested reading
Using an Infrastructure as Code (IaaC) approach for Identity and Access Management (IAM) offers significant advantages by applying the principles of code-based infrastructure management to the realm of identity and access control. To streamline the management of Zitadel resources, you can leverage the official Zitadel Terraform provider. This integration enables you to automate the provisioning and lifecycle management of users, roles, projects, applications, and other critical IAM components all through code.
Key Benefits of using Infrastructure as Code (IaaC) for IAM
- Automation and Efficiency- IaaC automates the provisioning, modification, and de-provisioning of user identities, roles, and permissions, reducing manual effort and potential for human error. This streamlines onboarding, offboarding, and role changes, leading to greater efficiency.
- Consistency and Standardization- Everything from user creation to role assignment is version-controlled. This eliminates configuration drift and promotes standardized access controls, improving overall security posture.
- Consistent IAM Configuration, Version Control and Auditability- IaaC enables versioning of IAM configurations, allowing for the tracking of IAM changes, rollbacks to previous states, and clear audit trails for compliance and security investigations.
- Scalability and Agility- IaaC facilitates the rapid and consistent deployment of IAM configurations across large and complex environments, supporting scalable growth and enabling quick responses to evolving access requirements.
- Reduced Risk of Human Error- By automating the management of access rights and permissions, IaaC minimizes the risk of misconfigurations and unintended access grants that can arise from manual processes.
- Integration with DevOps Practices- IaaC aligns IAM with modern DevOps methodologies, allowing for the integration of security and access control into the continuous integration and delivery (CI/CD) pipeline.
What is Zitadel?
ZITADEL is an open-source identity and access management (IAM) platform built for modern, cloud-native applications. We help you ship authentication and authorization quickly, securely, and at scale without having to build or maintain complex identity infrastructure. ZITADEL delivers enterprise-grade security, true multi-tenancy, flexible deployment, and a developer-first experience.
Why Zitadel?
Enterprises choose Zitadel as their IAM solution for several key reasons:
- Eliminate expensive infrastructure development: Go self-hosted or cloud, and skip months of building and maintaining crucial functionality.
- Built-in enterprise security features: From Passkeys to one-time passwords, to Single Sign-on, we've got you covered.
- Ready-made compliance controls: Ready-made controls help you meet regulatory requirements.
- Professional support and maintenance: You receive professional assistance and ongoing upkeep.
- More flexible and a transparent pricing model: No surprises, no opaque “enterprise” gates.
- Open-source transparency: Inspect, contribute, or extend without black boxes.
- Native multi-tenancy support: It handles millions of tenants at scale.
- Developer-friendly: Integrate in days, not weeks, with modern APIs and docs.
- Modern, API-first architecture: Provides a modern, API-first approach.
Pre-Requisites
- A self-hosted or cloud instance of Zitadel.
- Terraform has been installed on the client machine.
- A service user with enough authorization to manage the desired resources.
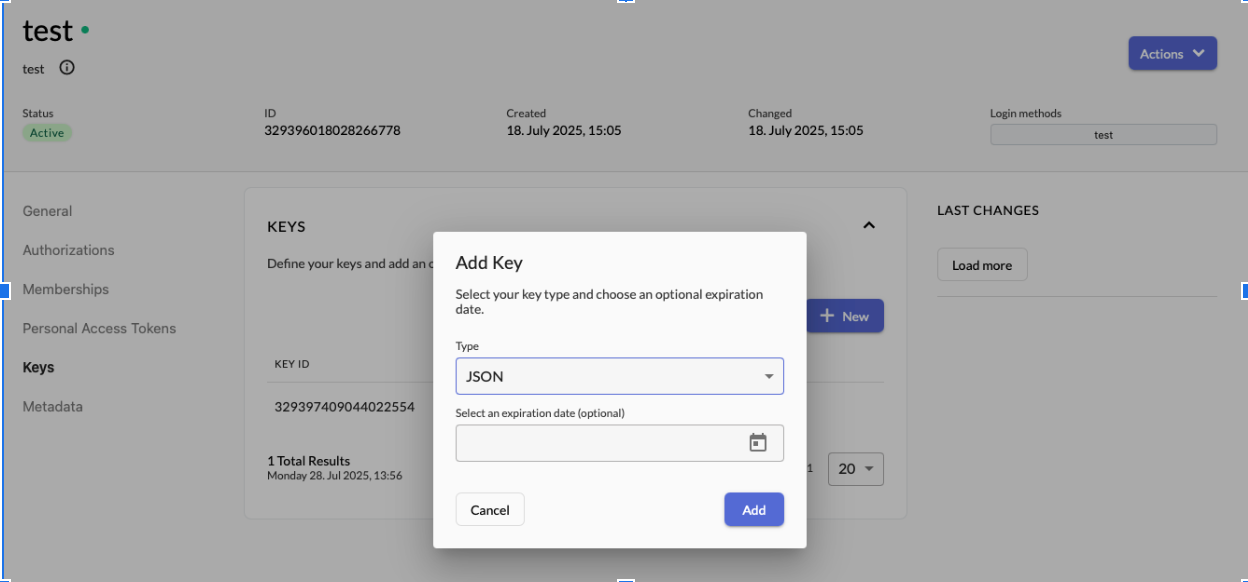
- Download and save the key file in JSON format to be used while setting up the Terraform provider.
Initialize Terraform
- Create a file named main.tf (optional- the name could be anything) and set up the Zitadel Terraform Provider.
- Note that the JSON file has been downloaded in the respective path before we apply the Terraform code.
terraform {
  required_providers {
    zitadel = {
      source  = "zitadel/zitadel"
      version = "1.2.0"
    }
  }
}

provider "zitadel" {
  domain = "test.us1.zitadel.cloud"
  #  insecure         = "true" ##Set this to insecure for development/sandboxed environments only and not for production.
  #  port             = "80"   ##Use this for self-hosted
  jwt_profile_file = "/<path>/<key>.json"
}
- Before you can apply your configuration, you must initialize your Terraform workspace with the terraform init command. As part of initialization, Terraform downloads and installs the providers defined in your configuration in your current working directory.
- Initialize your Terraform workspace.
#terraform init
Initializing the backend...
Initializing provider plugins...
- Reusing previous version of zitadel/zitadel from the dependency lock file
- Using previously-installed zitadel/zitadel v1.2.0

Terraform has been successfully initialized!

You may now begin working with Terraform. Try running "terraform plan" to see
any changes that are required for your infrastructure. All Terraform commands
should now work.

If you ever set or change modules or backend configuration for Terraform,
rerun this command to reinitialize your working directory. If you forget, other
commands will detect it and remind you to do so if necessary.
- Make sure your configuration is syntactically valid and internally consistent by using the terraform validate command.
#terraform validate
Success! The configuration is valid.
- The example configuration provided above is valid, so Terraform returns a success message.
- The validate command helps you identify errors in your configuration. For example, if you mistype a resource name or refer to an argument your resource does not support, Terraform will report an error when you validate your configuration.
- Plan and apply your configuration now with the terraform apply command. Terraform will print out the execution plan and ask you to confirm the changes before it applies them.
terraform apply --auto-approve

Terraform used the selected providers to generate the following execution plan. Resource actions are indicated with the following symbols:
  + create

.
.

Plan: 1 to add, 0 to change, 0 to destroy.
zitadel: Creating...
zitadel: Creation complete after 3s [id=330849836003800350]
zitadel_human_user.default: Creation complete after 3s [id=330849835987023134]

Apply complete! Resources: 1 added, 0 changed, 0 destroyed.
Using Terraform with Zitadel
Adding an OIDC application and creating a human user.
- Creating separate tf files in respective directories is a part of Terraform best practices.
- In this case, the Organization ID and Project ID are known; otherwise, they can be created separately as well (explained in the subsequent steps).
terraform {
  required_providers {
    zitadel = {
      source  = "zitadel/zitadel"
      version = "1.2.0"
    }
  }
}

provider "zitadel" {
  domain = "<test-domain>.us1.zitadel.cloud"
  #  insecure         = "true"
  #  port             = "80"
  jwt_profile_file = "/<path>/<key.json>"
}

resource "zitadel_application_oidc" "default" {
  project_id                  = "326225093250303536"
  org_id                      = "325908855630427886"
  name                        = "mytest"
  redirect_uris               = ["http://oidcdebugger.com/debug"]
  response_types              = ["OIDC_RESPONSE_TYPE_CODE"]
  grant_types                 = ["OIDC_GRANT_TYPE_AUTHORIZATION_CODE", "OIDC_GRANT_TYPE_REFRESH_TOKEN"]
  post_logout_redirect_uris   = ["http://oidcdebugger.com/logout"]
  app_type                    = "OIDC_APP_TYPE_WEB"
  auth_method_type            = "OIDC_AUTH_METHOD_TYPE_NONE"
  version                     = "OIDC_VERSION_1_0"
  clock_skew                  = "0s"
  dev_mode                    = true
  access_token_type           = "OIDC_TOKEN_TYPE_BEARER"
  access_token_role_assertion = false
  id_token_role_assertion     = false
  id_token_userinfo_assertion = false
  additional_origins          = []
}


resource "zitadel_human_user" "default" {
  org_id             = "325908855630427886"
  user_name          = "myuser@localhost.com"
  first_name         = "my"
  last_name          = "user"
  nick_name          = "tme"
  display_name       = "displayname"
  preferred_language = "en"
  gender             = "GENDER_MALE"
  phone              = "+31799999999"
  is_phone_verified  = true
  email              = "myuser@gmail.com"
  is_email_verified  = true
  initial_password   = "Test@123"
}
- Plan and apply your configuration now with the terraform apply command. Terraform will print out the execution plan and ask you to confirm the changes before it applies them.
terraform apply --auto-approve

Terraform used the selected providers to generate the following execution plan. Resource actions are indicated with the following symbols:
  + create

Terraform will perform the following actions:

  #zitadel_application_oidc.default will be created
  + resource "zitadel_application_oidc" "default" {
      + access_token_role_assertion = false
      + access_token_type           = "OIDC_TOKEN_TYPE_BEARER"
      + additional_origins          = []
      + app_type                    = "OIDC_APP_TYPE_WEB"
      + auth_method_type            = "OIDC_AUTH_METHOD_TYPE_NONE"
      + client_id                   = (sensitive value)
      + client_secret               = (sensitive value)
      + clock_skew                  = "0s"
      + dev_mode                    = true
      + grant_types                 = [
          + "OIDC_GRANT_TYPE_AUTHORIZATION_CODE",
          + "OIDC_GRANT_TYPE_REFRESH_TOKEN",
        ]
      + id                          = (known after apply)
      + id_token_role_assertion     = false
      + id_token_userinfo_assertion = false
      + name                        = "mytest"
      + org_id                      = "325908855630427886"
      + post_logout_redirect_uris   = [
          + "http://oidcdebugger.com/logout",
        ]
      + project_id                  = "326225093250303536"
      + redirect_uris               = [
          + "http://oidcdebugger.com/debug",
        ]
      + response_types              = [
          + "OIDC_RESPONSE_TYPE_CODE",
        ]
      + version                     = "OIDC_VERSION_1_0"
    }

  #zitadel_human_user.default will be created
  + resource "zitadel_human_user" "default" {
      + display_name         = "displayname"
      + email                = "myuser@gmail.com"
      + first_name           = "my"
      + gender               = "GENDER_MALE"
      + id                   = (known after apply)
      + initial_password     = (sensitive value)
      + is_email_verified    = true
      + is_phone_verified    = true
      + last_name            = "user"
      + login_names          = (known after apply)
      + nick_name            = "tme"
      + org_id               = "325908855630427886"
      + phone                = "+31799999999"
      + preferred_language   = "en"
      + preferred_login_name = (known after apply)
      + state                = (known after apply)
      + user_name            = "myuser@localhost.com"
    }

Plan: 2 to add, 0 to change, 0 to destroy.
zitadel_application_oidc.default: Creating...
zitadel_human_user.default: Creating...
zitadel_application_oidc.default: Creation complete after 3s [id=330849836003800350]
zitadel_human_user.default: Creation complete after 3s [id=330849835987023134]

Apply complete! Resources: 2 added, 0 changed, 0 destroyed.
You can also create multiple resources using the Zitadel Provider.
- A few of them are listed below, and a full, detailed list is available here.
- Create a Project- Resource representing the project, which can then be granted to different organizations or users directly, containing different applications.
resource "zitadel_project" "tme-zitadel" {
  name = "tme-app"
  org_id = data.zitadel_org.default.id
}
- Assign a Role- Resource representing the project roles, which can be given as authorizations to users.
resource "zitadel_project_role" "default" {
  org_id       = data.zitadel_org.default.id
  project_id   = data.zitadel_project.default.id
  role_key     = "super-user"
  display_name = "display_name2"
  group        = "role_group"
}
- Project Grant- Resource representing the grant of a project to a different organization, also containing the available roles that can be given to the members of the project.
resource "zitadel_project_grant" "default" {
  org_id         = data.zitadel_org.default.id
  project_id     = data.zitadel_project.default.id
  granted_org_id = data.zitadel_org.granted_org.id
  role_keys      = ["super-user"]
}
Variables and outputs
Input variables let you parametrize the behavior of your Terraform configuration. You can also define output values to expose data about the resources you create. Variables and outputs also allow you to integrate your Terraform workspaces with other automation tools by providing a consistent interface to configure and retrieve data about your workspace's infrastructure.
- As an example, we can specify the organization and project IDs as variables and call them in the main.tf file.
variable "zitadel_org_id" {
description = "The ID of the ZITADEL organization."
type = string
}

variable "zitadel_project_id" {
description = "The ID of the ZITADEL project."
type = string
}
Using Random Passwords with Terraform
If you would like to use random passwords while creating your user, you can do that by using random_password as a resource type.
random = {
source = "hashicorp/random"
version = "3.6.2"
}

resource "random_password" "user_password" {
length = 16
special = true
override_special = "_%@" # Optional: specifies which special characters to use
min_upper = 2
min_lower = 2
min_numeric = 2
}
Inspect Terraform State (Optional)
When you applied your configuration, Terraform wrote data about your infrastructure into a file called terraform.tfstate. Terraform stores data about your infrastructure in its state file, which it uses to manage resources over their lifecycle.
#terraform state list

zitadel_application_oidc.default
zitadel_human_user.default
Terraform Data Source (Optional)
Even though the data source is not an actual resource, Terraform tracks it in your state file. Print out your workspace's entire state using the terraform show command.
terraform show
#zitadel_application_oidc.default:
resource "zitadel_application_oidc" "default" {
    access_token_role_assertion = false
    access_token_type           = "OIDC_TOKEN_TYPE_BEARER"
    additional_origins          = []
    app_type                    = "OIDC_APP_TYPE_WEB"
    auth_method_type            = "OIDC_AUTH_METHOD_TYPE_NONE"
    client_id                   = (sensitive value)
    client_secret               = (sensitive value)
    clock_skew                  = "0s"
    dev_mode                    = true
    grant_types                 = [
        "OIDC_GRANT_TYPE_AUTHORIZATION_CODE",
        "OIDC_GRANT_TYPE_REFRESH_TOKEN",
    ]
    id                          = "330849836003800350"
    id_token_role_assertion     = false
    id_token_userinfo_assertion = false
    name                        = "mytest"
    org_id                      = "325908855630427886"
    post_logout_redirect_uris   = [
        "http://oidcdebugger.com/logout",
    ]
    project_id                  = "326225093250303536"
    redirect_uris               = [
        "http://oidcdebugger.com/debug",
    ]
    response_types              = [
        "OIDC_RESPONSE_TYPE_CODE",
    ]
    version                     = "OIDC_VERSION_1_0"
}

#zitadel_human_user.default:
resource "zitadel_human_user" "default" {
    display_name         = "displayname"
    email                = "myuser@gmail.com"
    first_name           = "my"
    gender               = "GENDER_MALE"
    id                   = "330849835987023134"
    initial_password     = (sensitive value)
    is_email_verified    = true
    is_phone_verified    = true
    last_name            = "user"
    login_names          = [
        "myuser@localhost.com",
    ]
    nick_name            = "tme"
    org_id               = "325908855630427886"
    phone                = "+31799999999"
    preferred_language   = "en"
    preferred_login_name = "myuser@localhost.com"
    state                = "USER_STATE_ACTIVE"
    user_name            = "myuser@localhost.com"
}
Destroy the Resources
Removing individual resources in a workspace is a normal part of your infrastructure management workflow. Once you no longer need any of the infrastructure in your workspace, use Terraform to destroy it.
terraform destroy --auto-approve
zitadel_human_user.default: Refreshing state... [id=330849835987023134]
zitadel_application_oidc.default: Refreshing state... [id=330849836003800350]

Terraform used the selected providers to generate the following execution plan. Resource actions are indicated with the
following symbols:
  - destroy

Terraform will perform the following actions:

  #zitadel_application_oidc.default will be destroyed
  - resource "zitadel_application_oidc" "default" {
      - access_token_role_assertion = false -> null
      - access_token_type           = "OIDC_TOKEN_TYPE_BEARER" -> null
      - additional_origins          = [] -> null
      - app_type                    = "OIDC_APP_TYPE_WEB" -> null
      - auth_method_type            = "OIDC_AUTH_METHOD_TYPE_NONE" -> null
      - client_id                   = (sensitive value) -> null
      - clock_skew                  = "0s" -> null
      - dev_mode                    = true -> null
      - grant_types                 = [
          - "OIDC_GRANT_TYPE_AUTHORIZATION_CODE",
          - "OIDC_GRANT_TYPE_REFRESH_TOKEN",
        ] -> null
      - id                          = "330849836003800350" -> null
      - id_token_role_assertion     = false -> null
      - id_token_userinfo_assertion = false -> null
      - name                        = "mytest" -> null
      - org_id                      = "325908855630427886" -> null
      - post_logout_redirect_uris   = [
          - "http://oidcdebugger.com/logout",
        ] -> null
      - project_id                  = "326225093250303536" -> null
      - redirect_uris               = [
          - "http://oidcdebugger.com/debug",
        ] -> null
      - response_types              = [
          - "OIDC_RESPONSE_TYPE_CODE",
        ] -> null
      - version                     = "OIDC_VERSION_1_0" -> null
        #(1 unchanged attribute hidden)
    }

  #zitadel_human_user.default will be destroyed
  - resource "zitadel_human_user" "default" {
      - display_name         = "displayname" -> null
      - email                = "myuser@gmail.com" -> null
      - first_name           = "my" -> null
      - gender               = "GENDER_MALE" -> null
      - id                   = "330849835987023134" -> null
      - initial_password     = (sensitive value) -> null
      - is_email_verified    = true -> null
      - is_phone_verified    = true -> null
      - last_name            = "user" -> null
      - login_names          = [
          - "myuser@localhost.com",
        ] -> null
      - nick_name            = "tme" -> null
      - org_id               = "325908855630427886" -> null
      - phone                = "+31799999999" -> null
      - preferred_language   = "en" -> null
      - preferred_login_name = "myuser@localhost.com" -> null
      - state                = "USER_STATE_ACTIVE" -> null
      - user_name            = "myuser@localhost.com" -> null
    }

Plan: 0 to add, 0 to change, 2 to destroy.
zitadel_human_user.default: Destroying... [id=330849835987023134]
zitadel_application_oidc.default: Destroying... [id=330849836003800350]
zitadel_application_oidc.default: Destruction complete after 2s
zitadel_human_user.default: Destruction complete after 2s

Destroy complete! Resources: 2 destroyed.
Conclusion
Hopefully, this tutorial provided you with a good overview of how to use Terraform and customize the ZITADEL behavior with different parameters based on your organization's needs. We encourage you to explore Zitadel on the cloud or self-hosted environment(s). If you want to learn more before starting, request a demo today. Click the button to get in touch!
How can I try out and contribute to Zitadel?
Read our documentation and learn how you can set up, customise, and integrate authentication and authorisation into your project. We would love to see you be a part of the Zitadel community, and you can reach us at