How to secure your Java application with OpenID Connect

Technical Writer
Many application users want to be able to easily access day-to-day services (ie budget tracking, schedules, fitness data tracking). However, in order to gain access, they need to sign up and sign in to the necessary applications. The most common way to do this is through a third-party authentication provider like ZITADEL.
To avoid identity theft, authentication providers use protocols like OAuth 2.0 and OpenID Connect (OIDC). These protocols provide tokens as a proof of authentication that utility applications can use instead of directly receiving user's details. These tokens are used to grant access to users on utility applications.
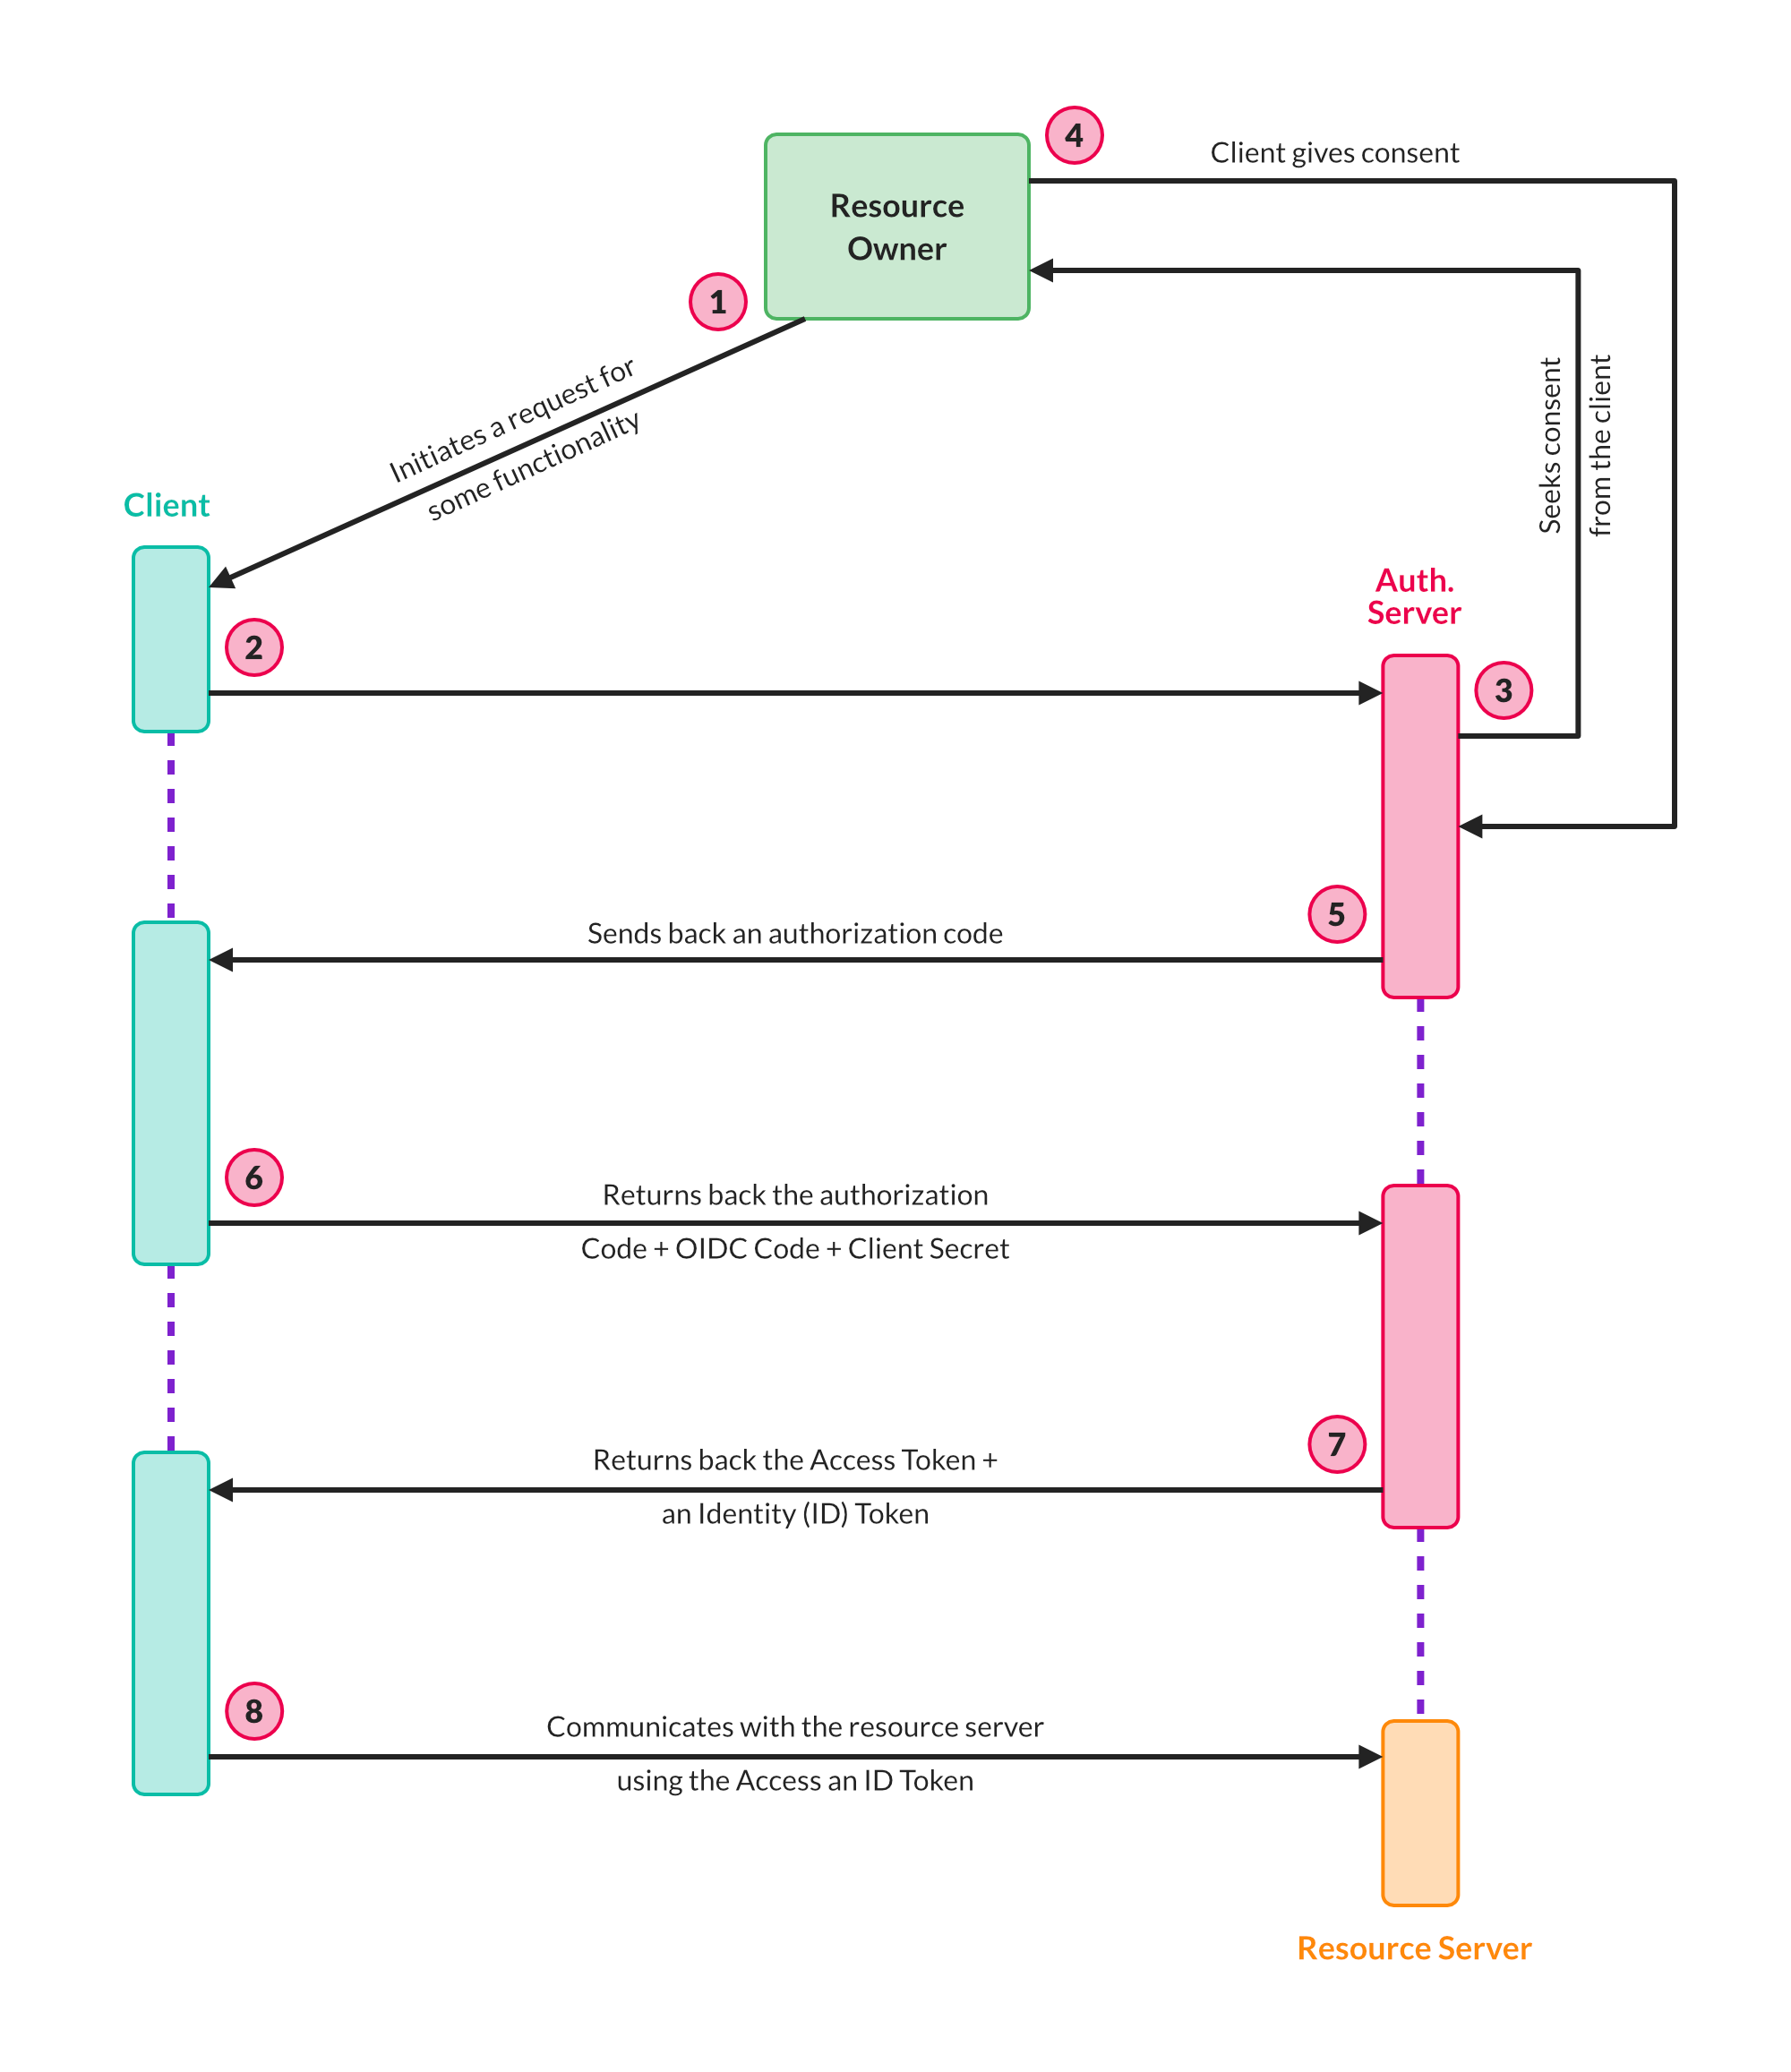
The OAuth 2.0 authorization code grant type, enables a client application to get authorized access to protected resources like web APIs. This authorization code flow provides security benefits such as authenticating the client by exchanging a code for the access token. In addition, the authorization code is temporary and is obtained from the authorization server. When the application requests an access token, the request is authenticated with the client secret which prevents an attacker from intercepting the authorization code. The access token is not visible to the user or their browser, which reduces the risk of having the token exposed.
In this article, you'll learn how to secure your full stack Java application with OIDC. Here, you'll create two simple Spring apps: a client and a resource server where ZITADEL will be used as the authentication provider.
Why Secure Your Application with OIDC
Many users use the same password on multiple cloud applications, and these passwords are usually not administered. This means if a password is leaked or compromised on any application, a hacker can gain access to any of the applications you use. This is where OIDC comes in.
OIDC is based on OAuth 2.0, which is a protocol that sets the requirement of providing tokens as a proof of authentication to applications in order to perform certain activities on your behalf. OIDC minimizes password security risks because passwords aren't shared with any website or third party application. If a password leak does occur, you can simply change the password on the OIDC account that you're using, rather than updating your password on every application.
With OIDC, you can use a single account from providers like Google or Facebook to sign in to thousands of applications without the need to create new credentials. In addition, it accelerates the process by letting you register for new applications in a few simple clicks, making the registration process quick and painless.
What You Need to Secure Your Application with OIDC
Let's take a look at some components involved in the authorization code flow and their terminology associated with OAuth 2.0:
- The resource owner is you, or the user, who, in our earlier example, needs the quotes service. In this tutorial, the words "user" and "resource owner" will be used interchangeably.
- The client is the application that needs your details to perform activities on your behalf.
- The scope is the permissions that the client needs to perform activities on behalf of the resource owner.
- An authorization server is the authentication provider that has the user's details. The client will need to request the keys from the authorization server, and it will then reach out to the resource owner to validate the client's access request and all the scopes needed.
- The resource server is an API that gives the resources to the client. In the previous example, myQuota API is the resource server whereas ZITADEL is the authentication server.
- The redirect URI is the URI that the authorization server will redirect the resource owner's client to (after the client requests validation and grants access or permissions to it).
- The response type is what the client expects to receive from the authorization server. This is usually a code or token.
- The client ID uniquely identifies the client with the authorization server.
- A client secret is the client's password and only the authorization server and the client know what the secret is. The client secret makes the exchange between the client and authorization server private and secure.
- An authorization code is a temporary code created by the server and sent to the client. It's used to gain an access token from the server by the client. This happens when the client sends back this code and its secret to the authorization server. The server will verify the details and generate an access token.
- An access token is a key that the client will use to communicate with each request for accessing resources from the resource server.
OIDC and OAuth 2.0
Because OIDC is a layer built on OAuth 2.0, all features of OAuth 2.0 are available in OIDC.
The key differences between OIDC and OAuth 2.0 are as follows:
- OIDC allows the client to gain more information about the user apart from authorization because OAuth 2.0 doesn't let the client know anything about the user.
- Apart from sending the client secret only (like OAuth 2.0 does), a client using OIDC sends an additional OIDC scope to tell the server that the incoming request is an OIDC one.
- The access token grants access to resources you are trying to access(including user information) whereas the id token provides information about the authentication of a user.
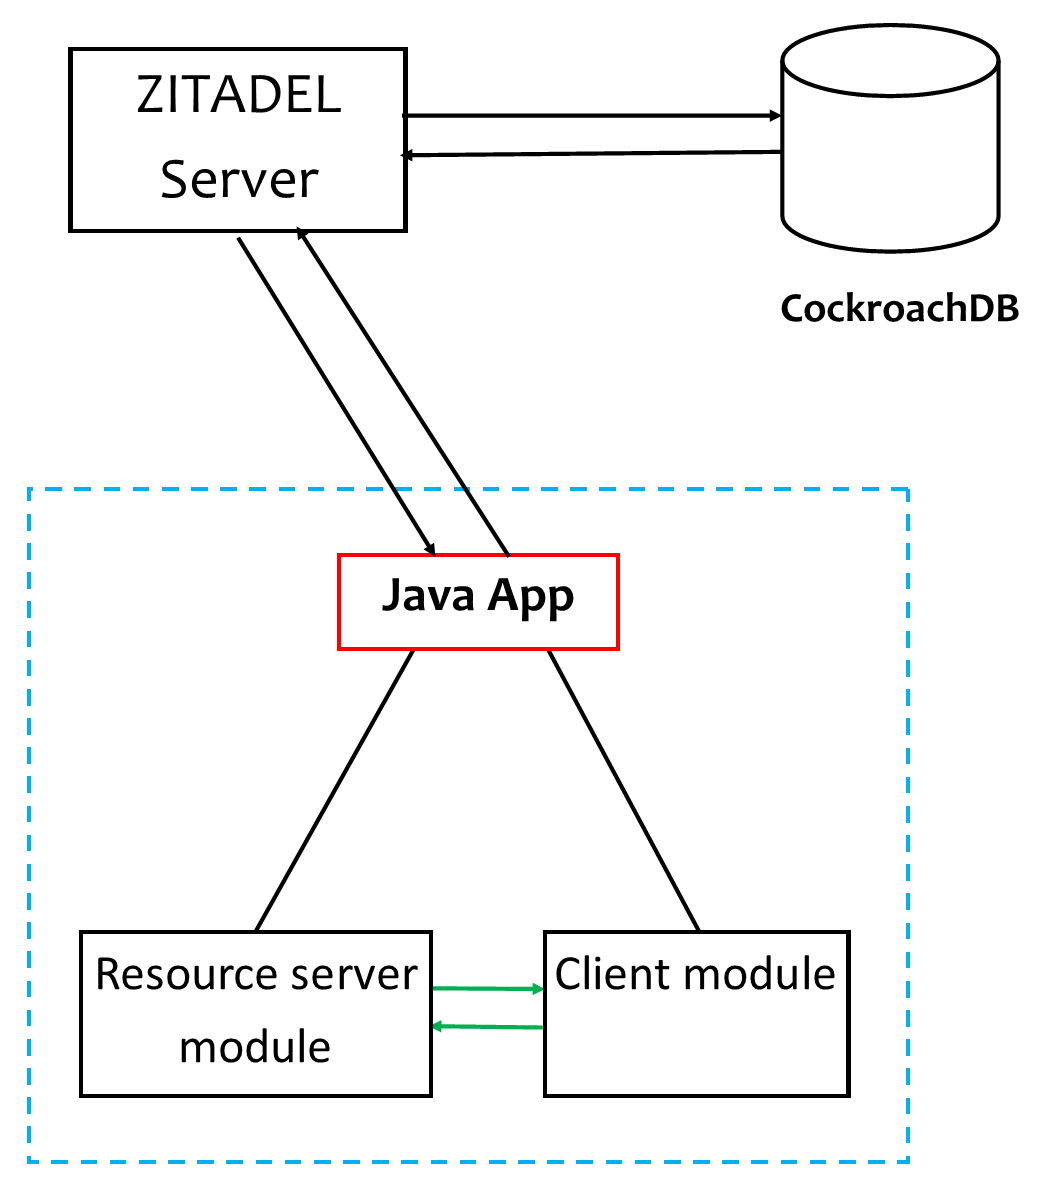
Following is an architecture diagram illustrating the OIDC operation:
Why You Should Use OIDC
As mentioned previously, OIDC can be used to mitigate identity theft and protect a user's identity because only the tokens are utilized for authentication. Other information about the user can be granted by the server depending on the consent given by the user.
OIDC can also be used to manage granular authorization. It helps applications gain access to what they are only required to access and prohibits them from accessing additional info.
In addition, OIDC can be used for third-party integration. Users can easily integrate third-party applications because of the easy sign-in/up process. Remembering multiple passwords is unnecessary, and more importantly, the user's identity and information are secure. With OIDC you can gain secure access to the information you need without the need to implement multi-factor authentication (MFA), passwordless one-time passwords (OTP), or a link sent to your email.
OIDC is a modern standard that works with a broad range of applications such as Web, APIs and mobile applications.
Implementing OIDC in Java Using ZITADEL
In the following sections, you'll learn how to implement OIDC in Java using ZITADEL.
Prerequisites
Before you begin, you need to have an understanding of Java and the Spring framework. You also need to have the Java Development Kit and Apache Maven installed on your operating system to enable you to create Java applications.
Here is a link to all the code that will be used throughout this tutorial.
Setting Up ZITADEL Account
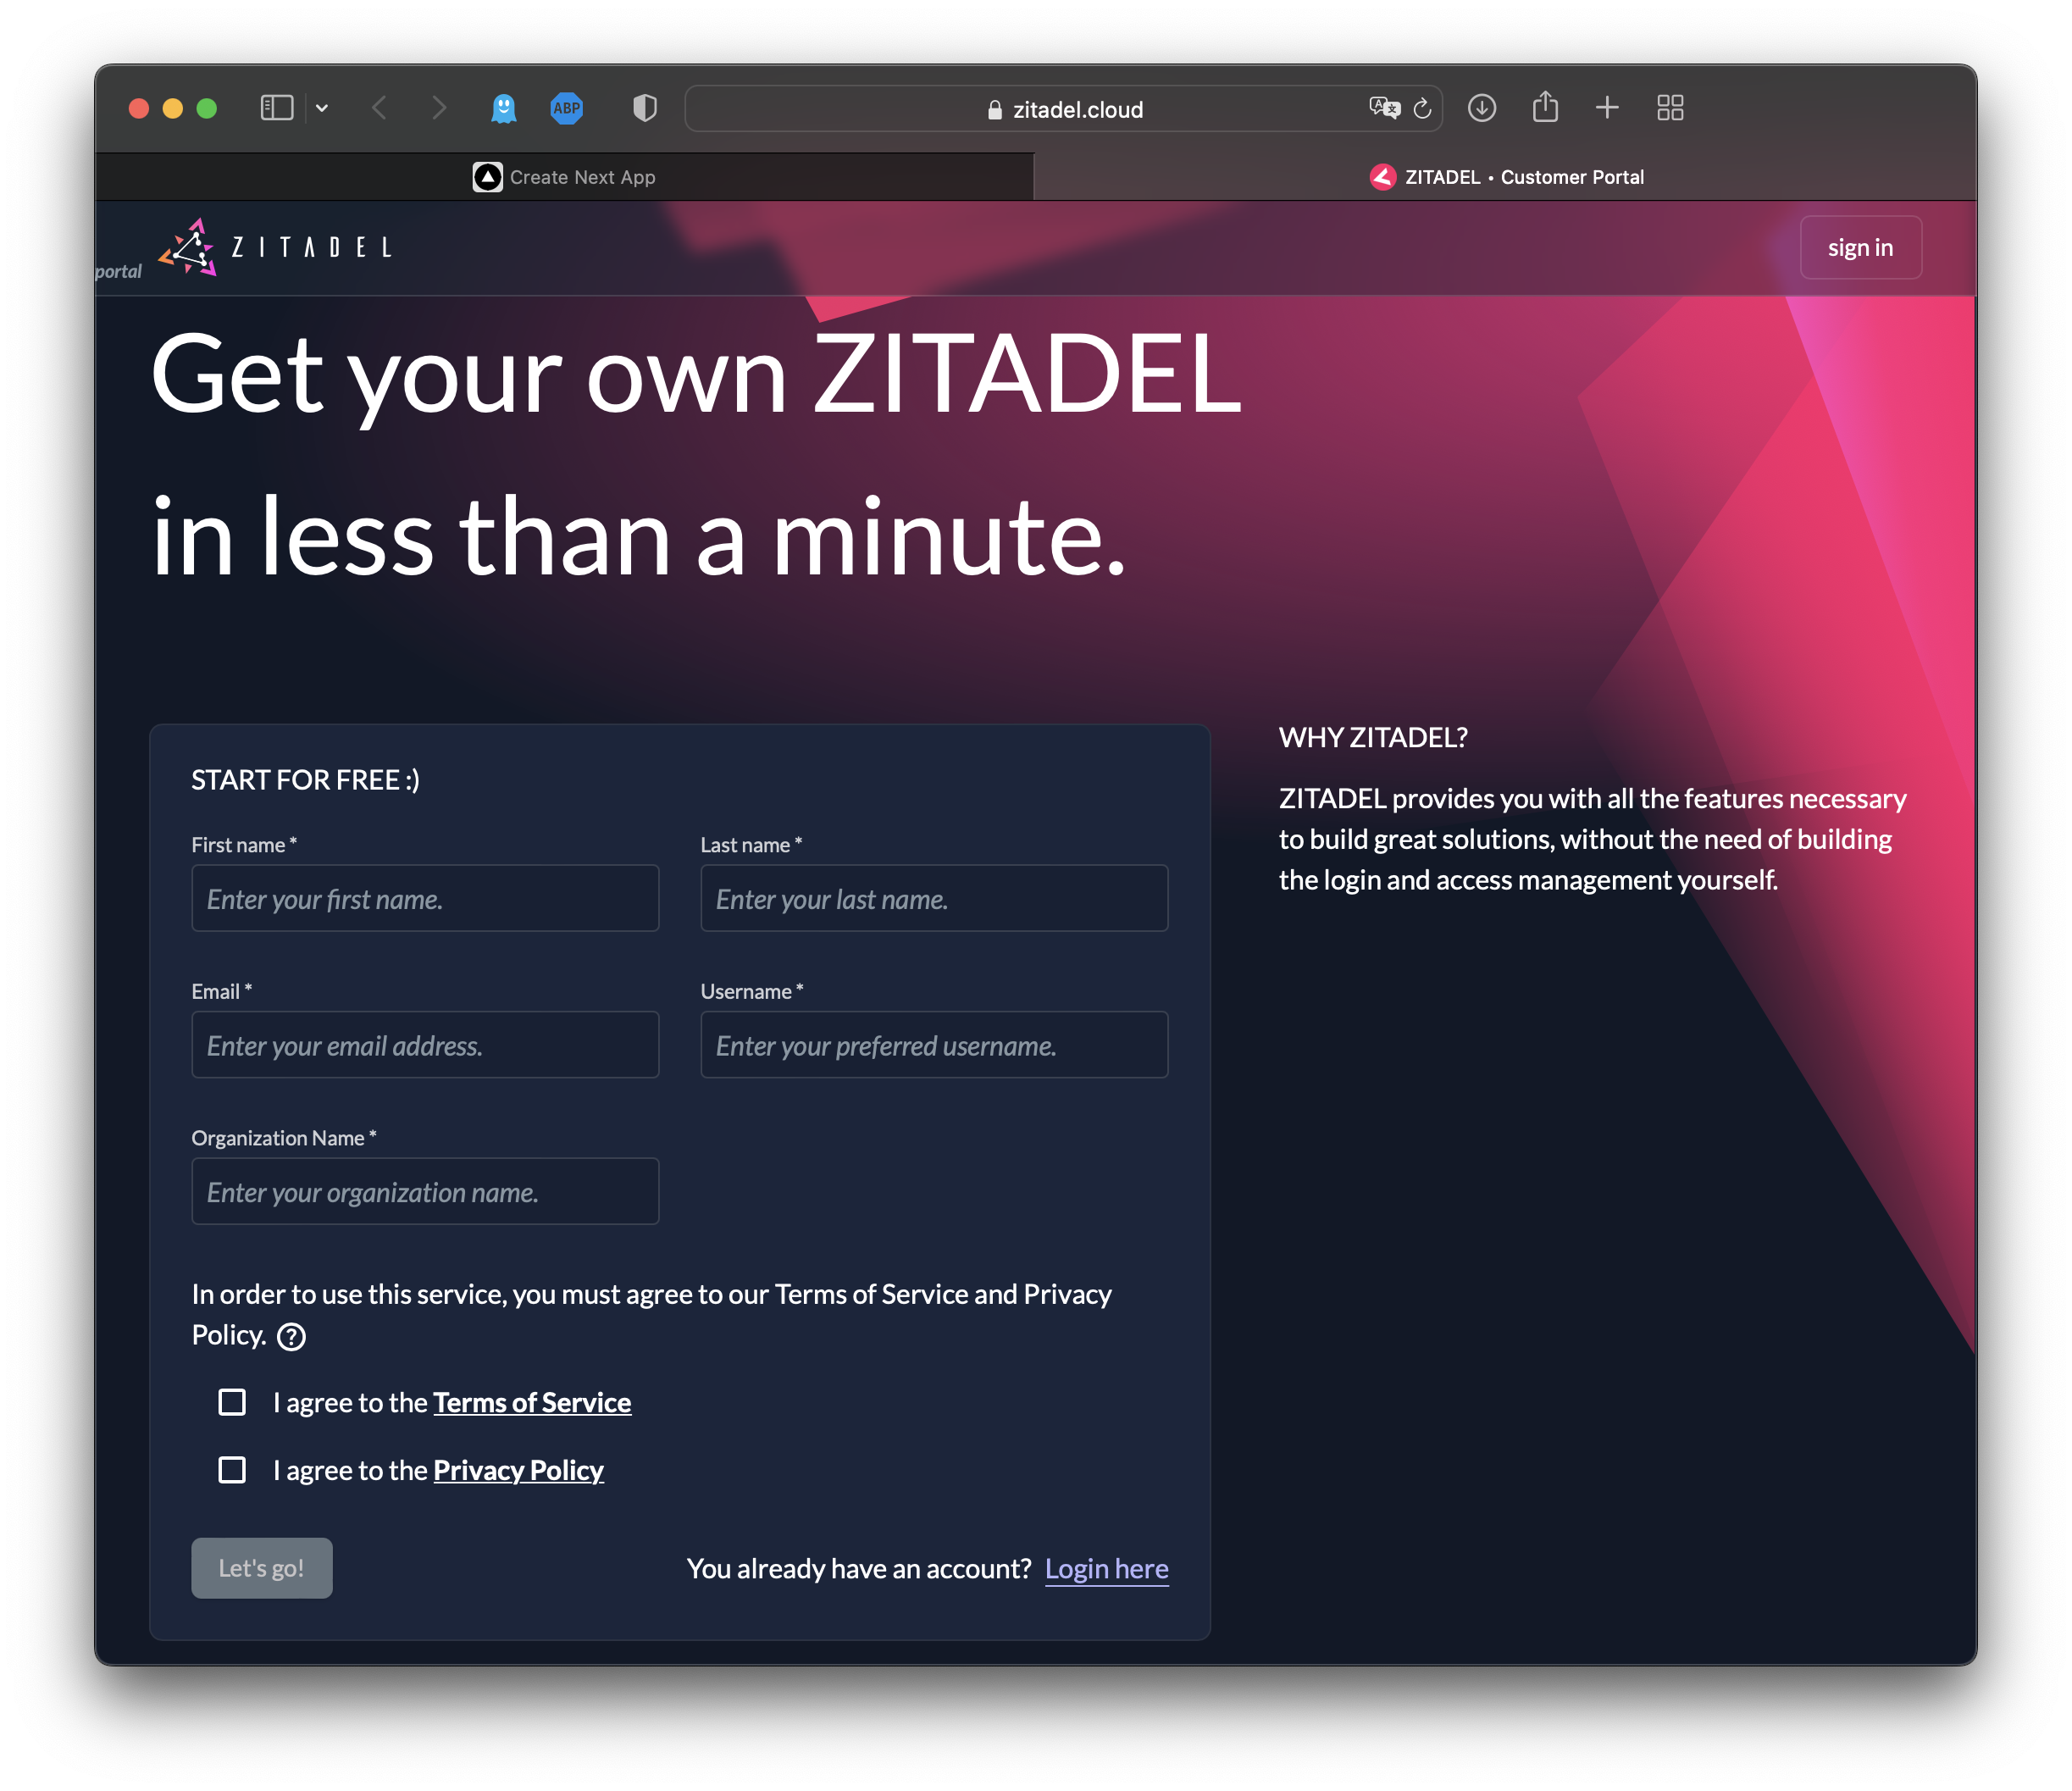
In order to use ZITADEL credential keys in the next section, you need to set up an account (if you don't already have one). To do so, head to https://zitadel.cloud and create a new account by following these steps:
Start by filling out the free trial form:
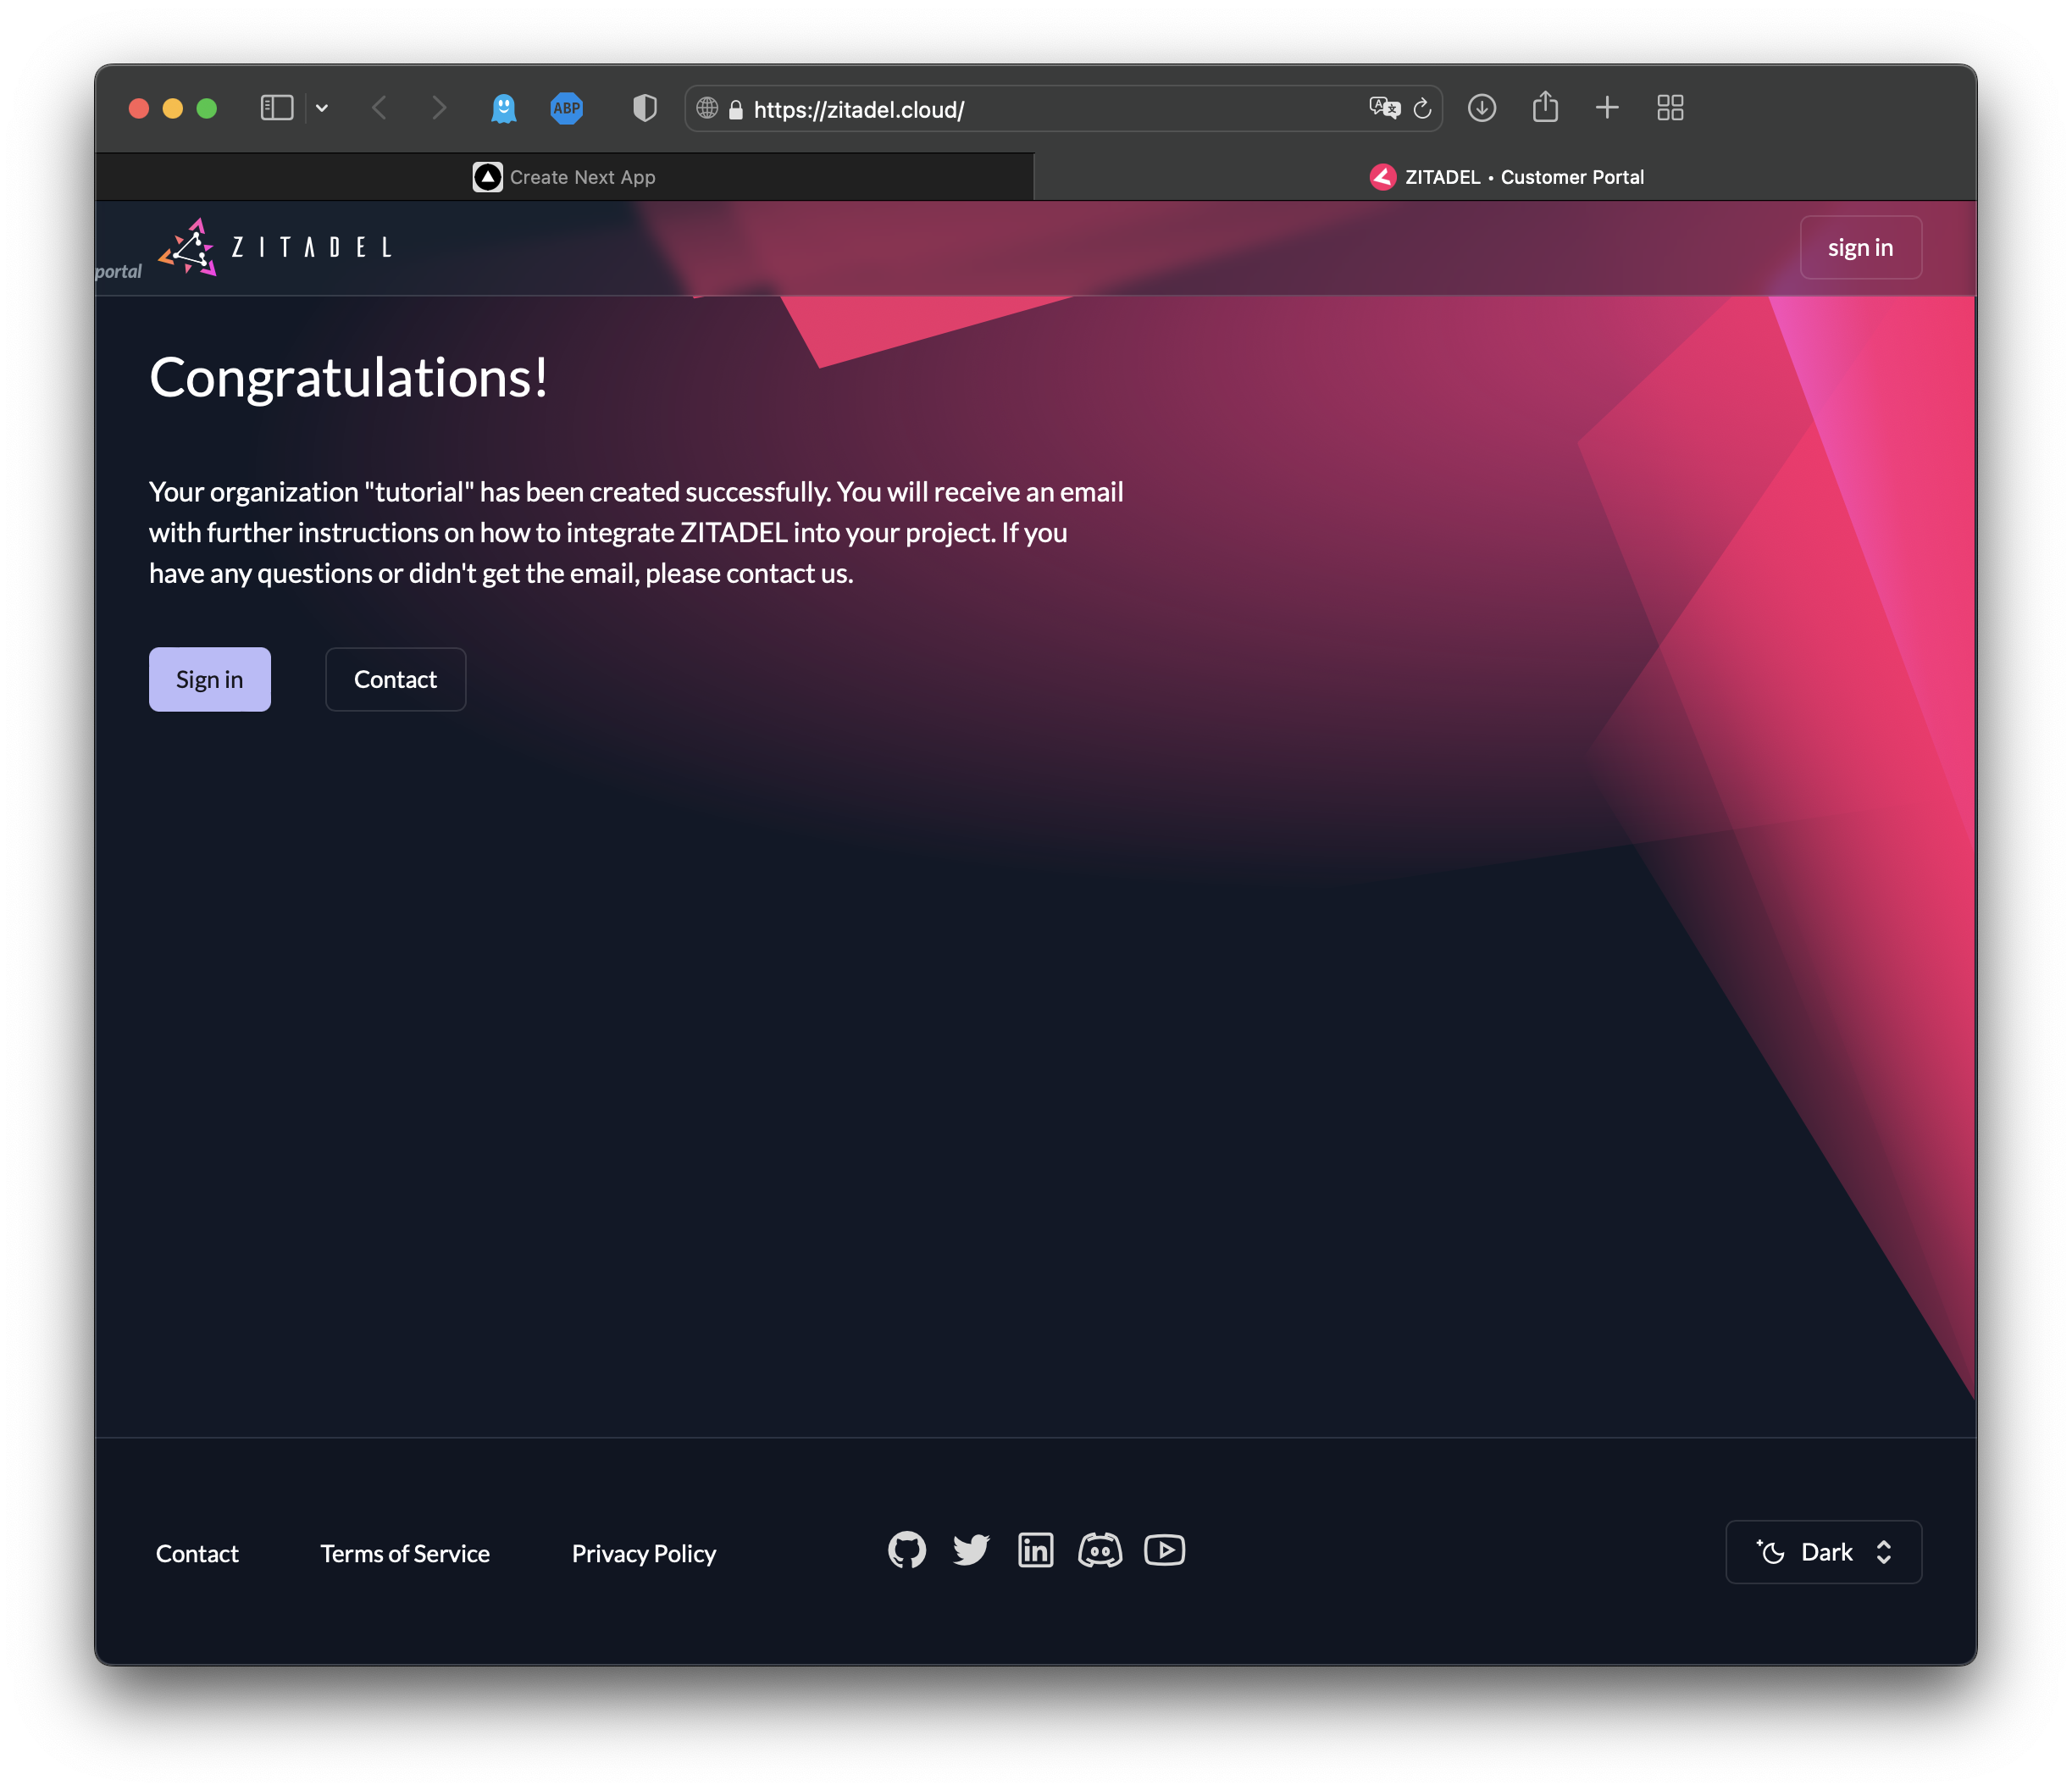
Now you can see that a ZITADEL organization has been created:
Activate your user account by navigating to your email and clicking on the link in the email from ZITADEL:
Now your account has officially been activated:
Please note: You can skip the multifactor setup for now, but you should activate it before going to production:
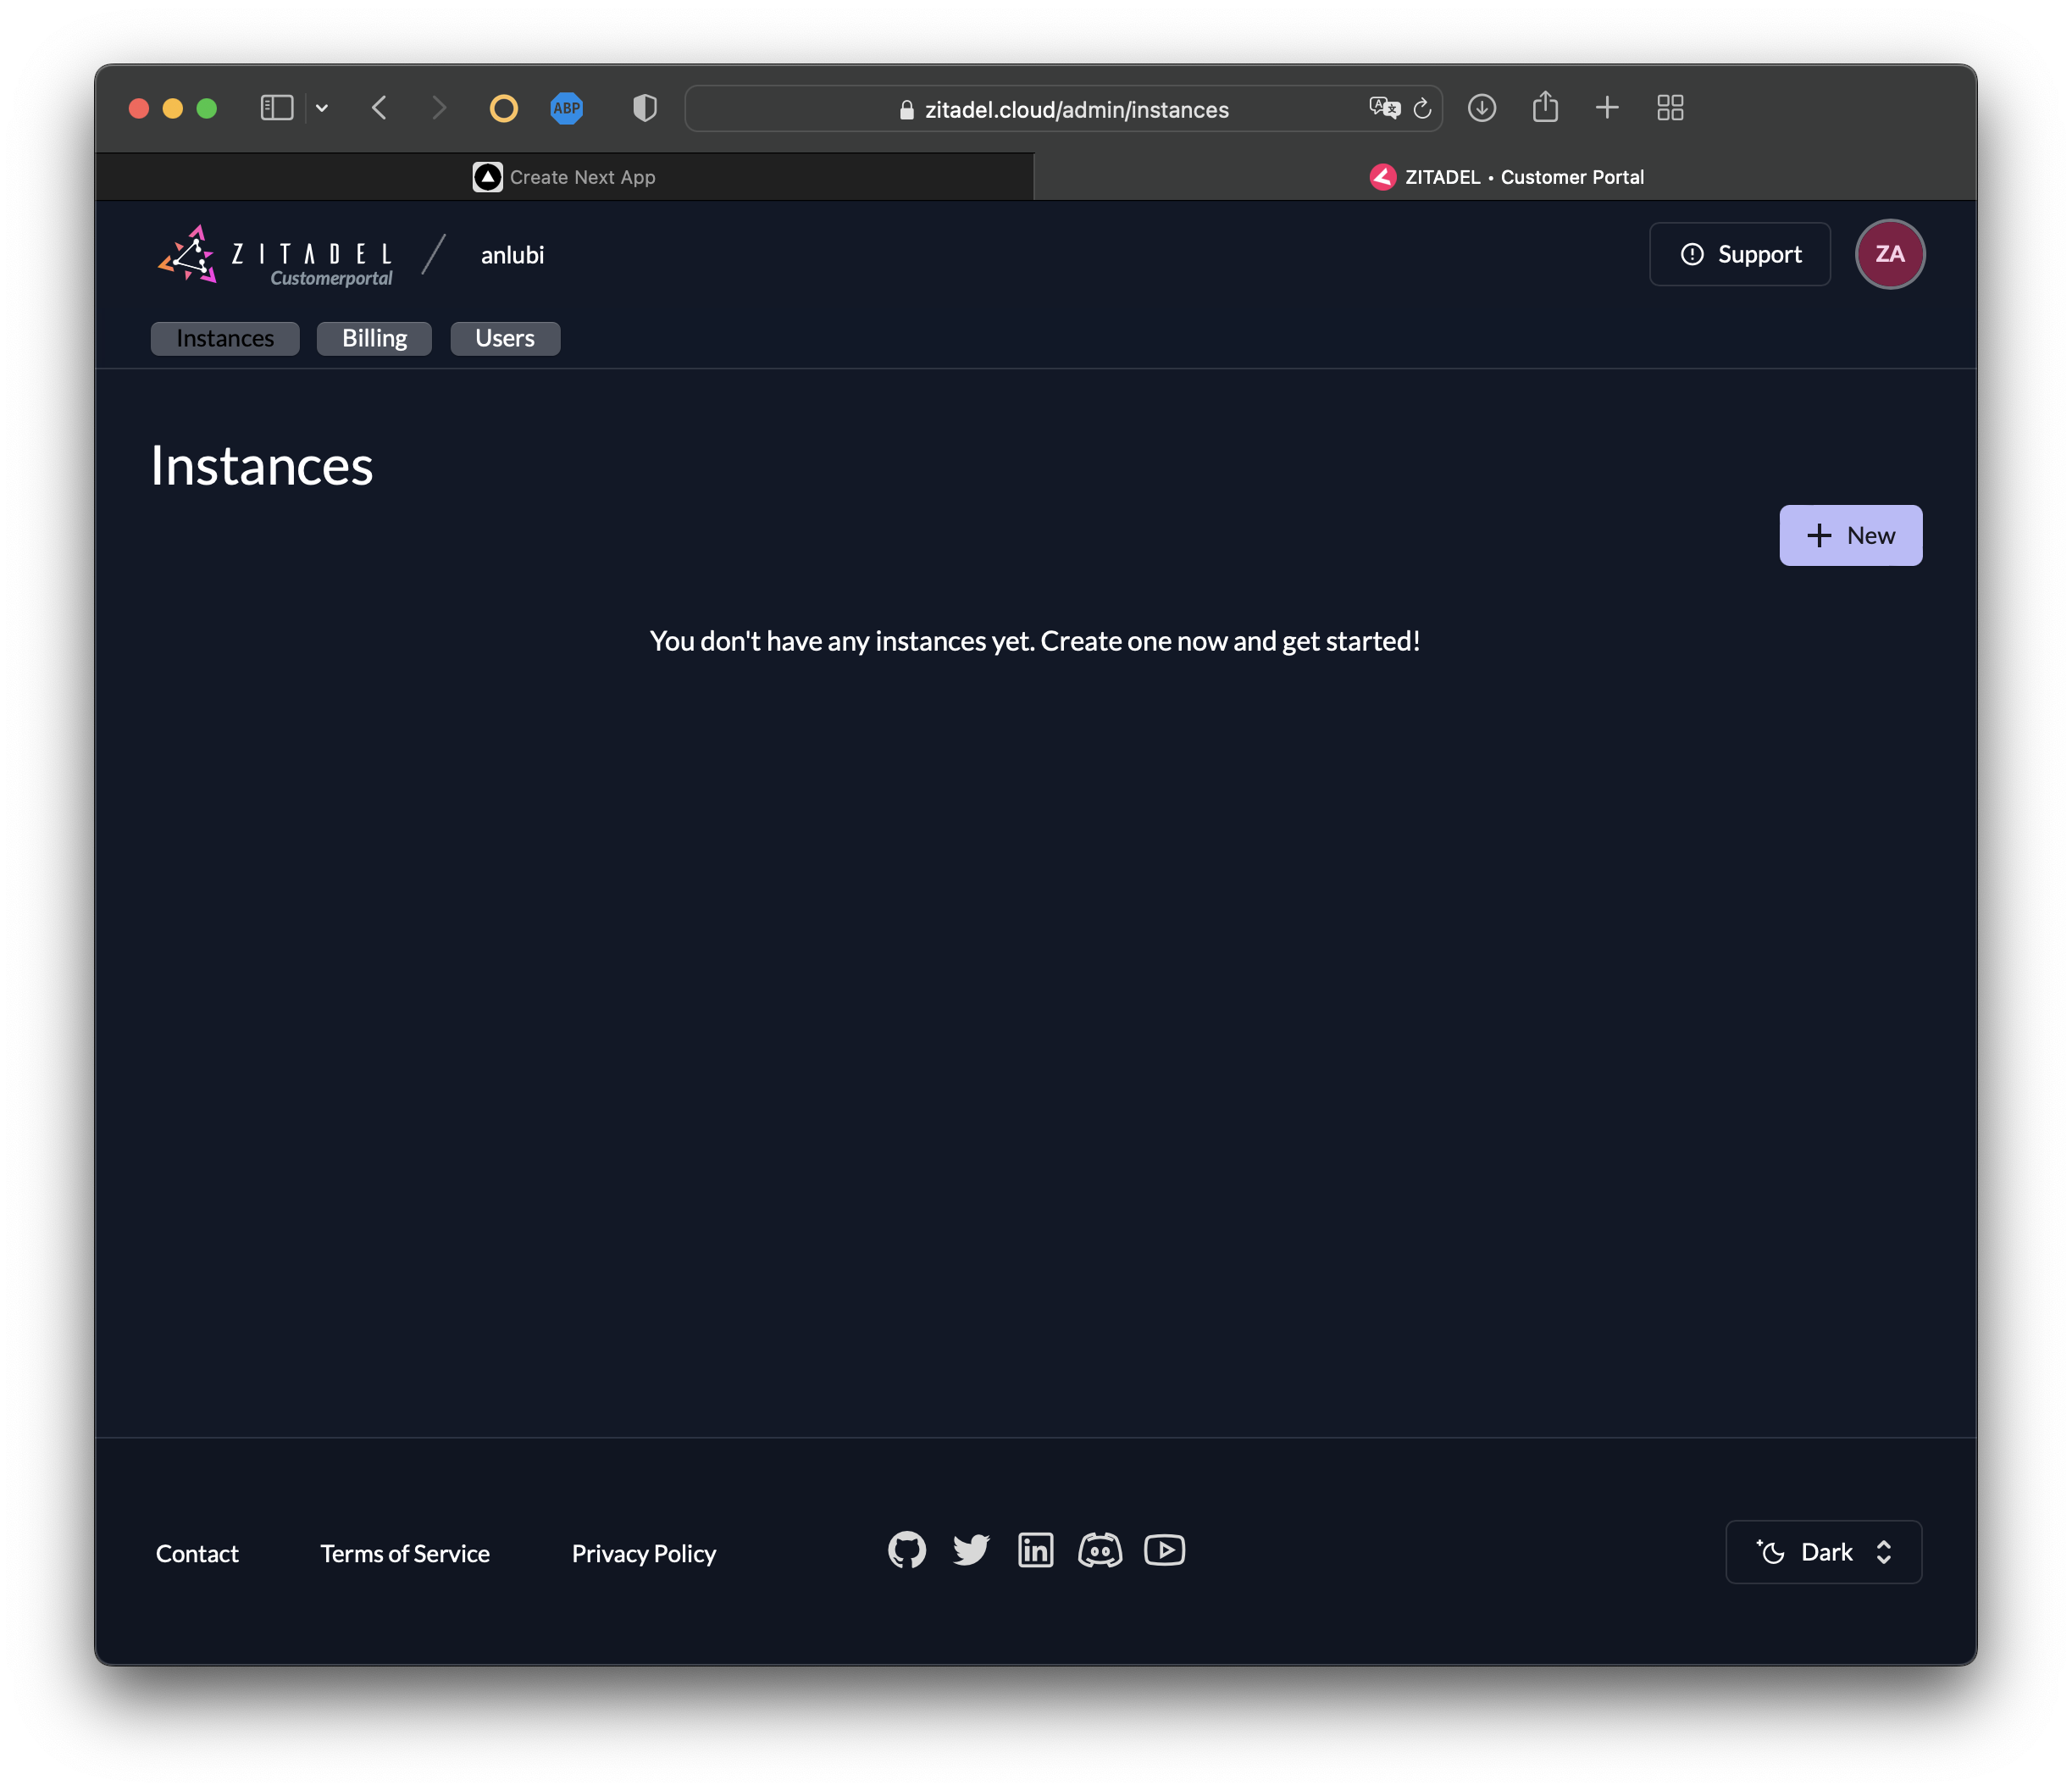
Your view of the ZITADEL dashboard (also referred to as the customer portal) should look like this:
Now it's time to set up your ZITADEL instance. To create a new instance, click on + New:
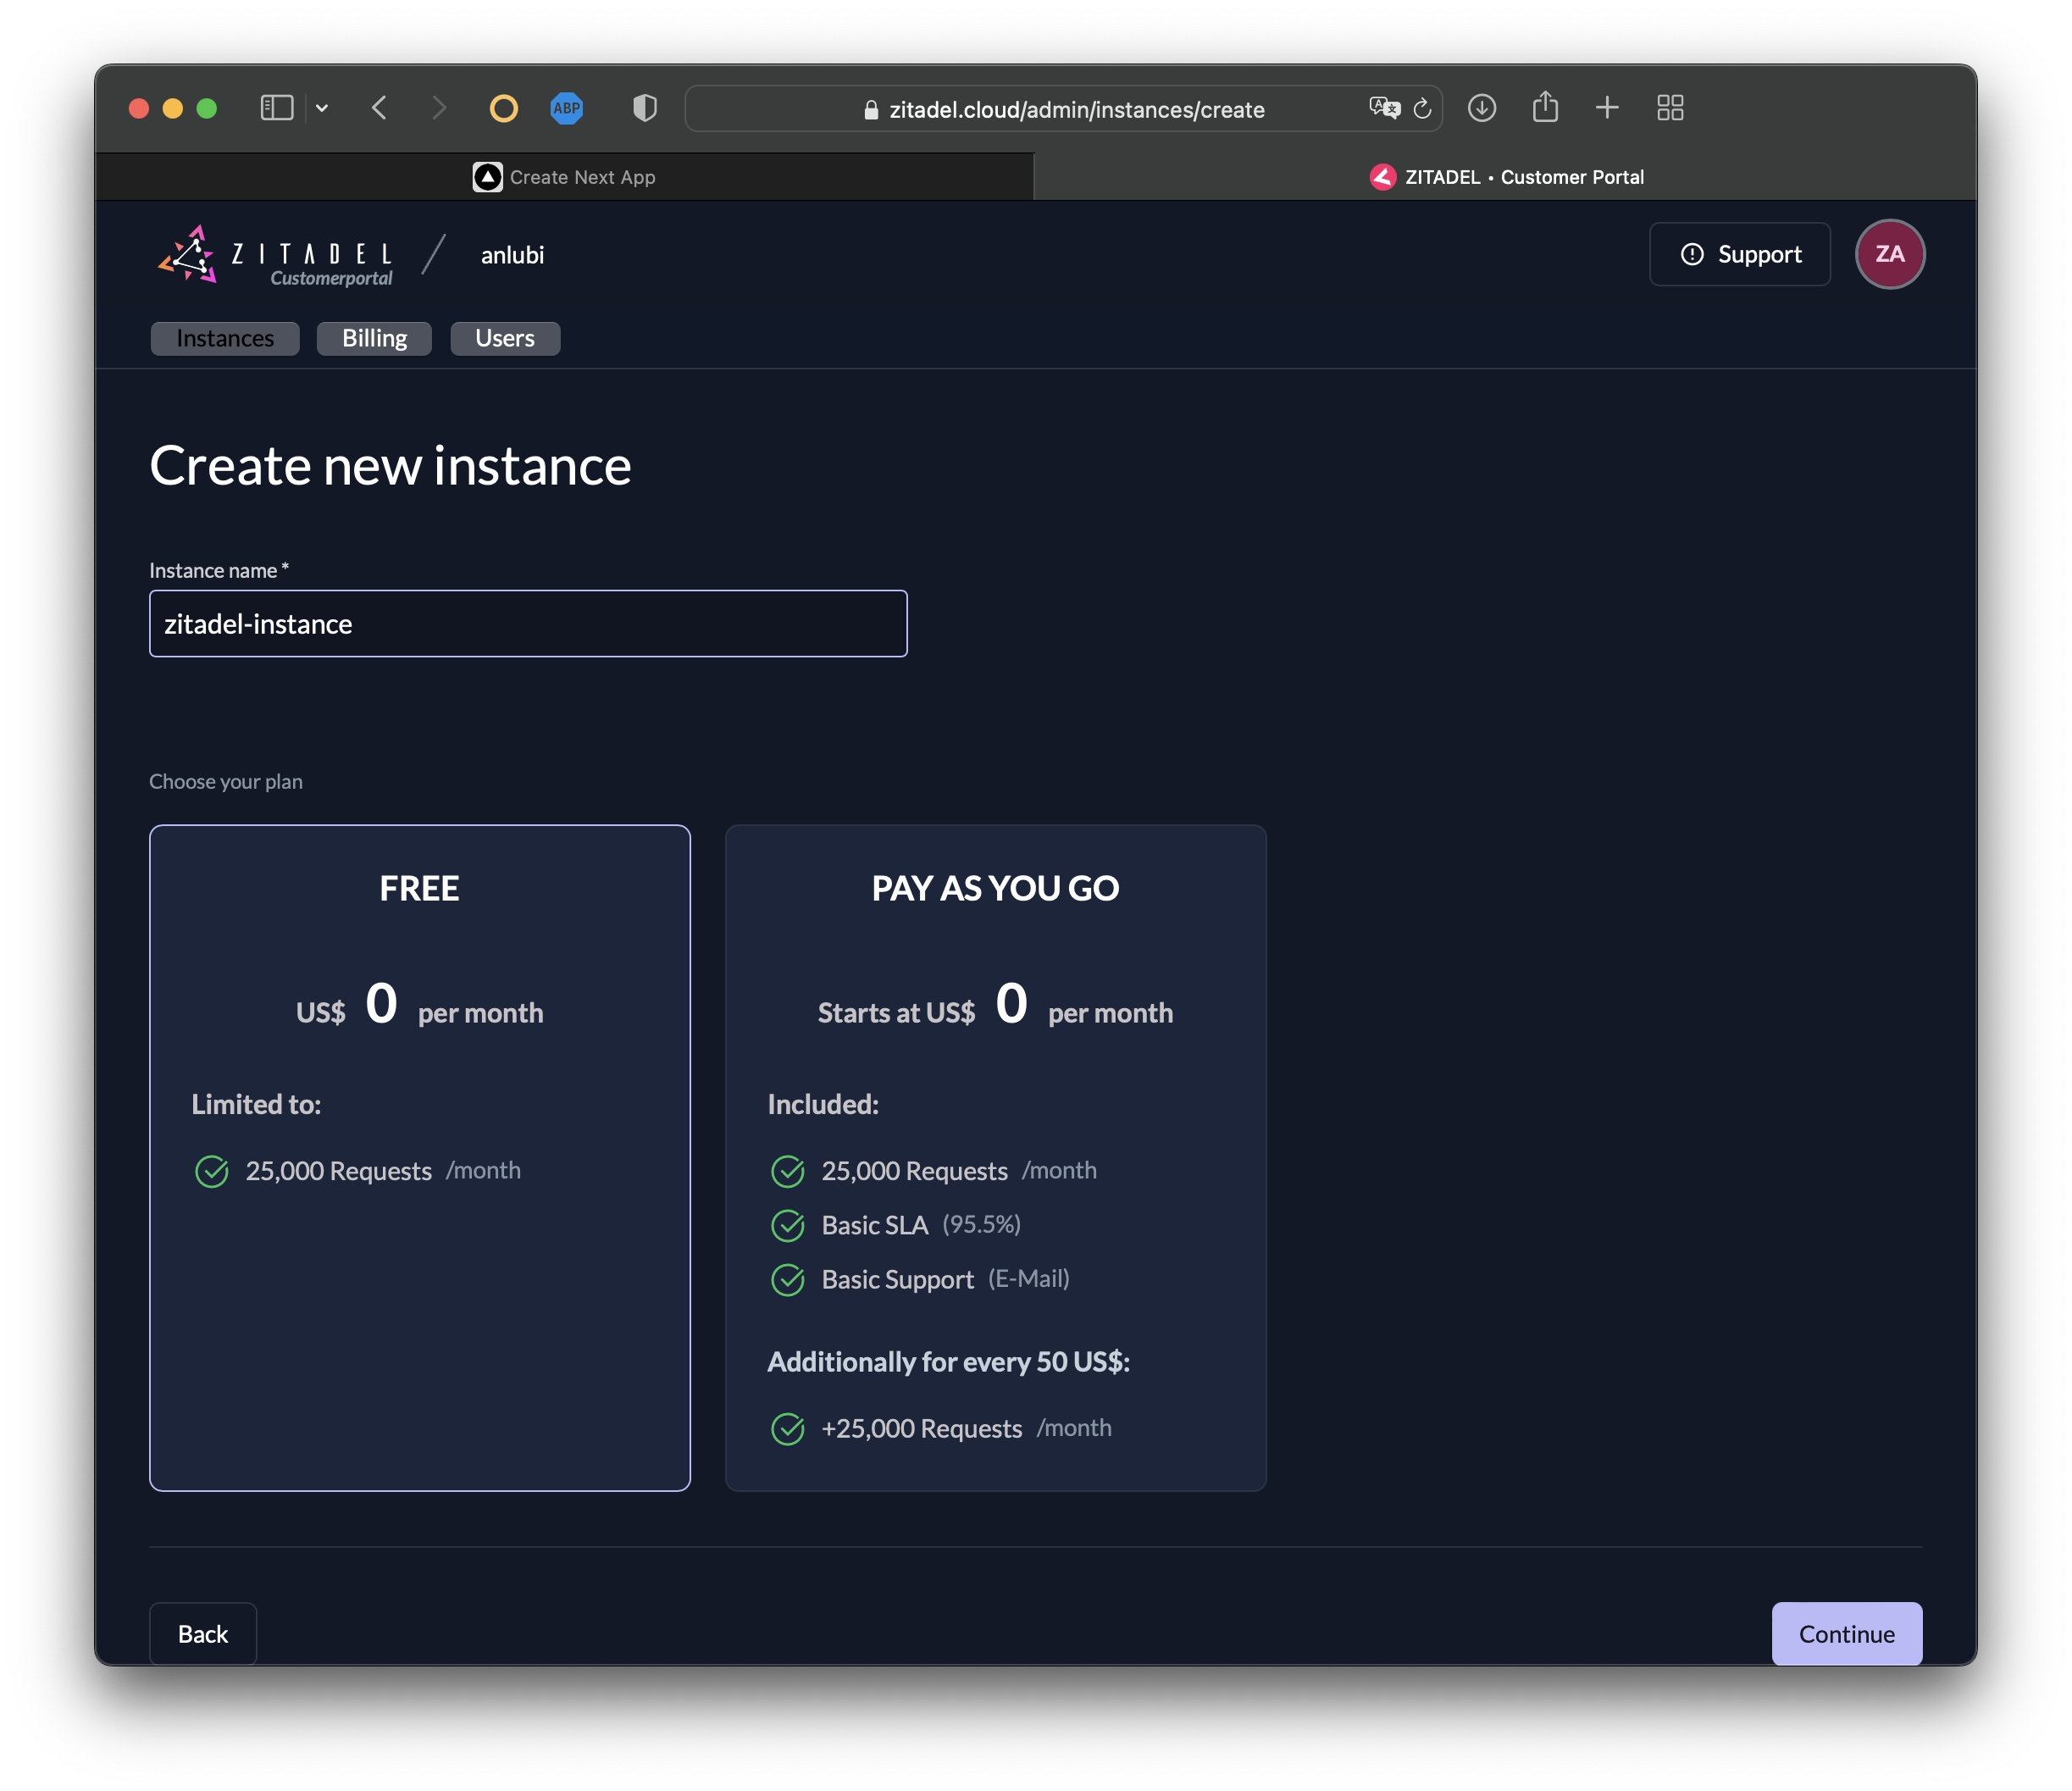
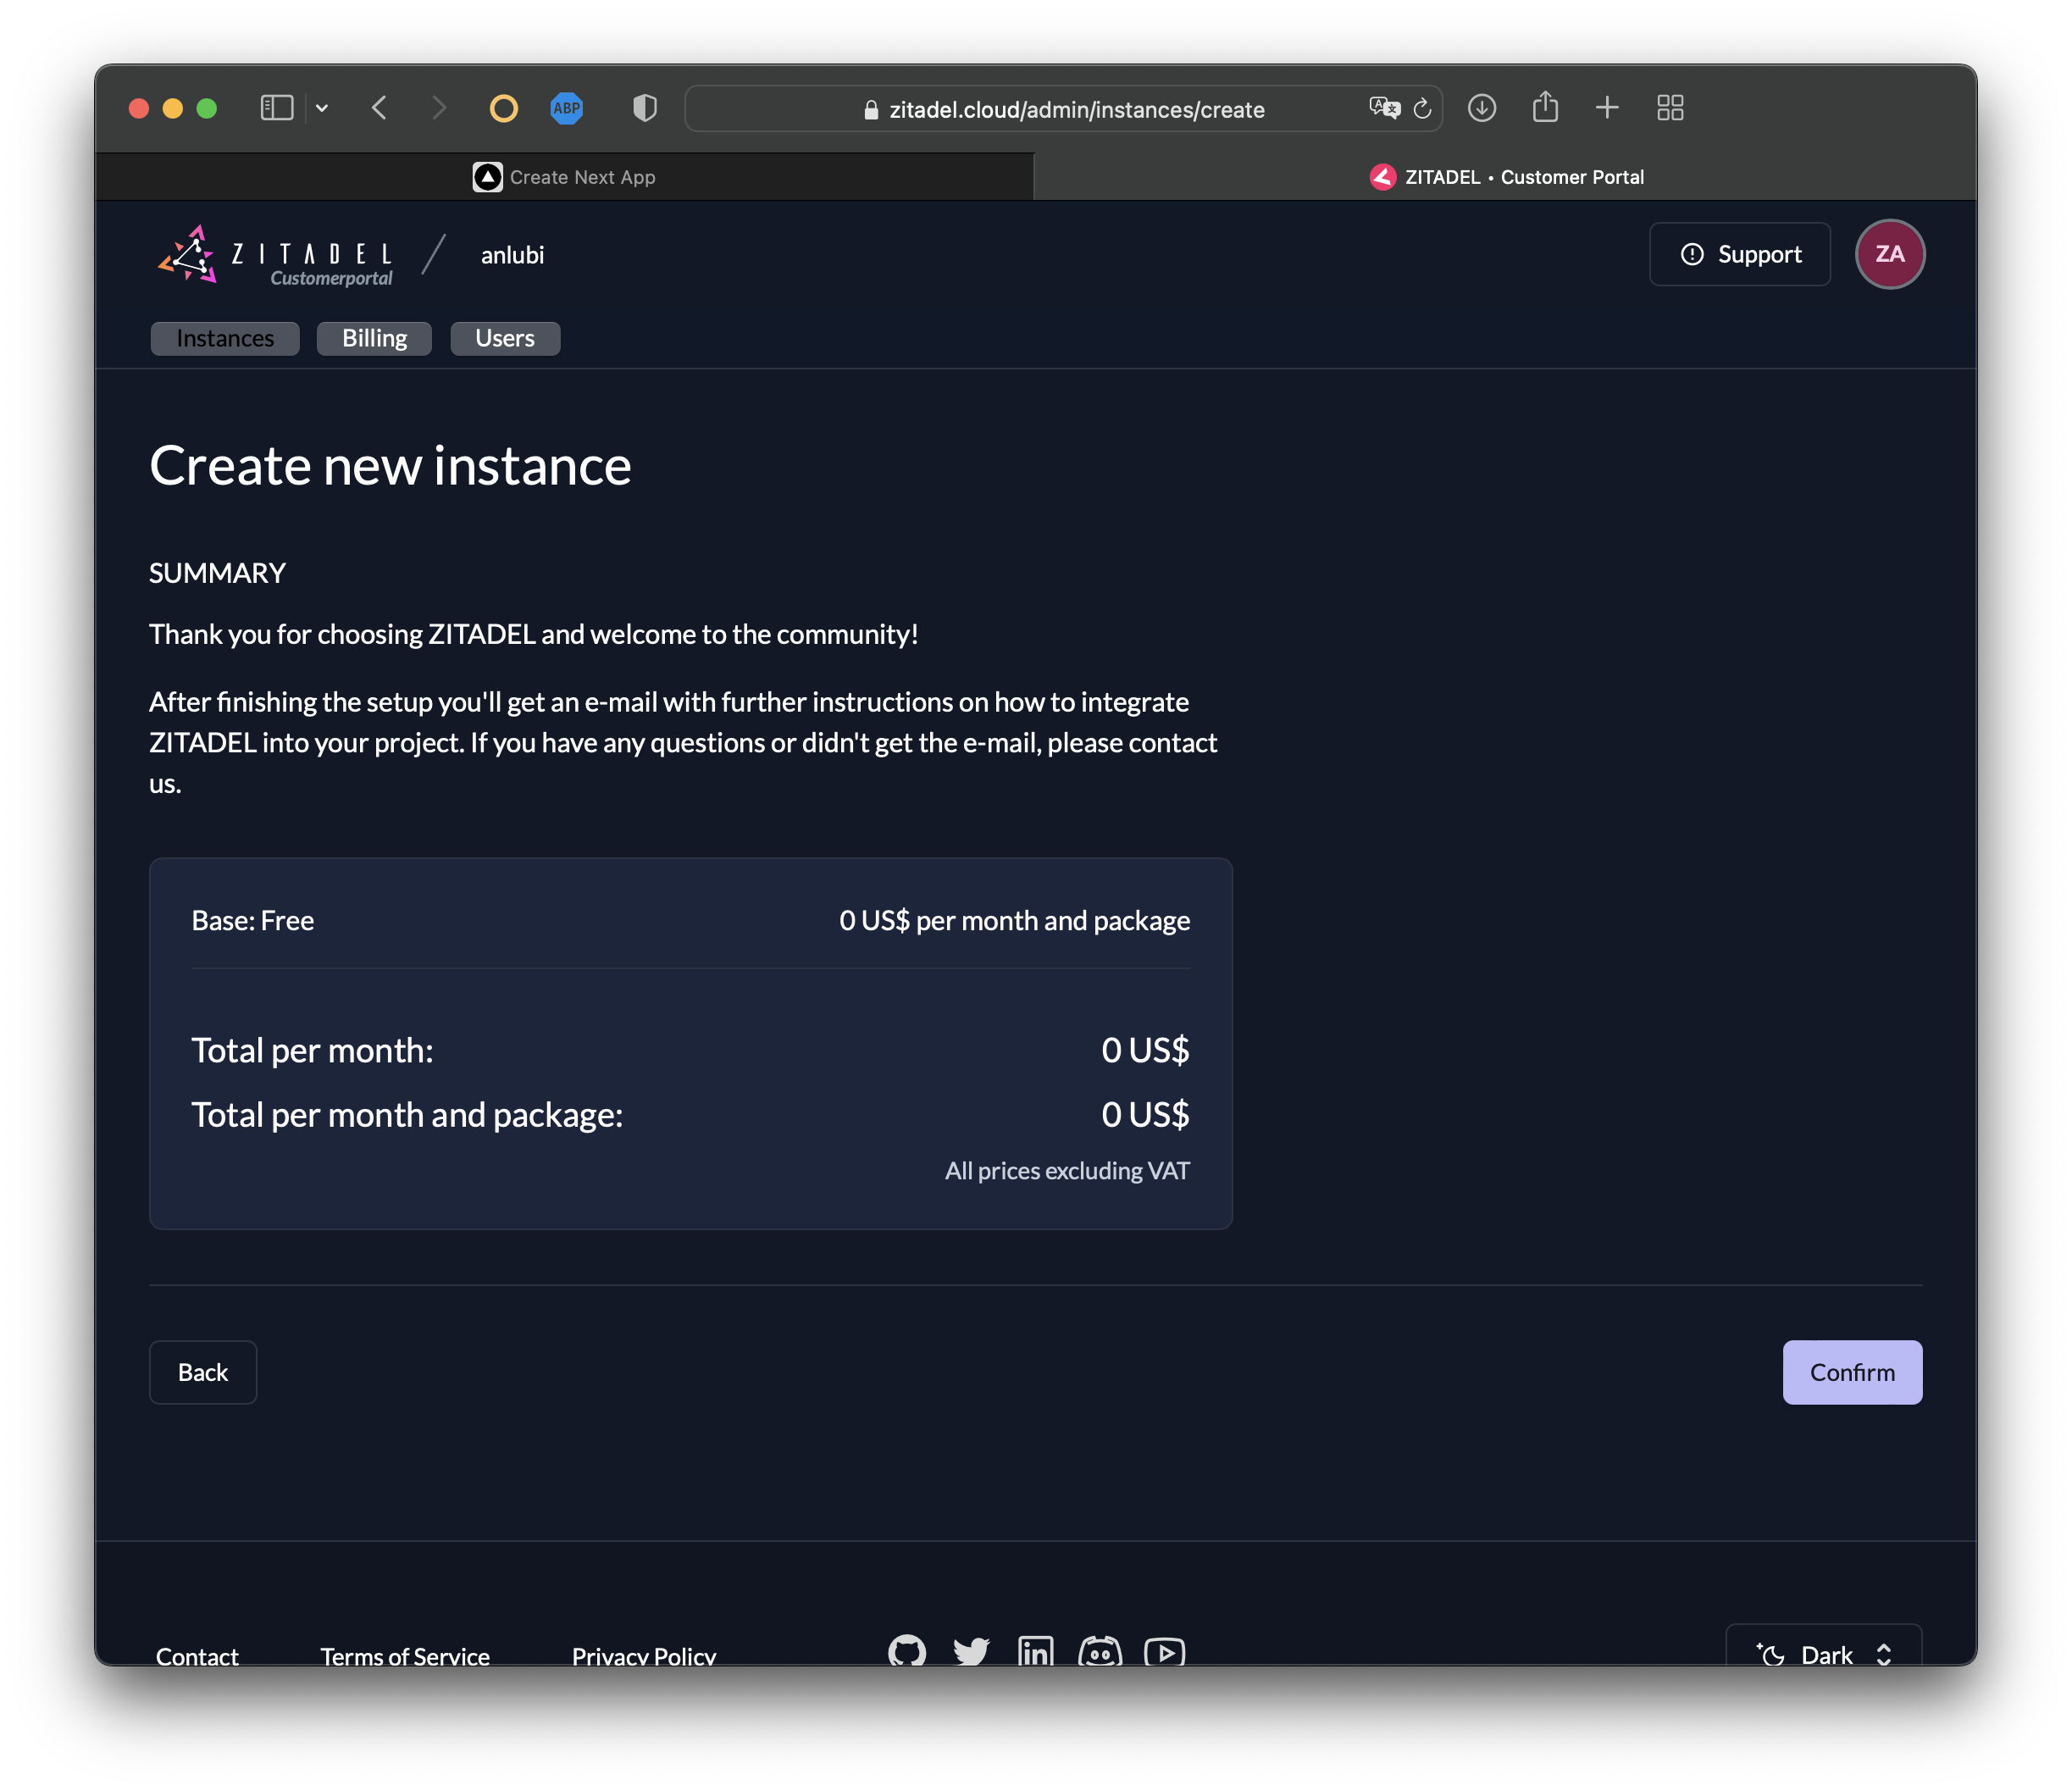
Select Continue then Confirm the creation of a new instance:
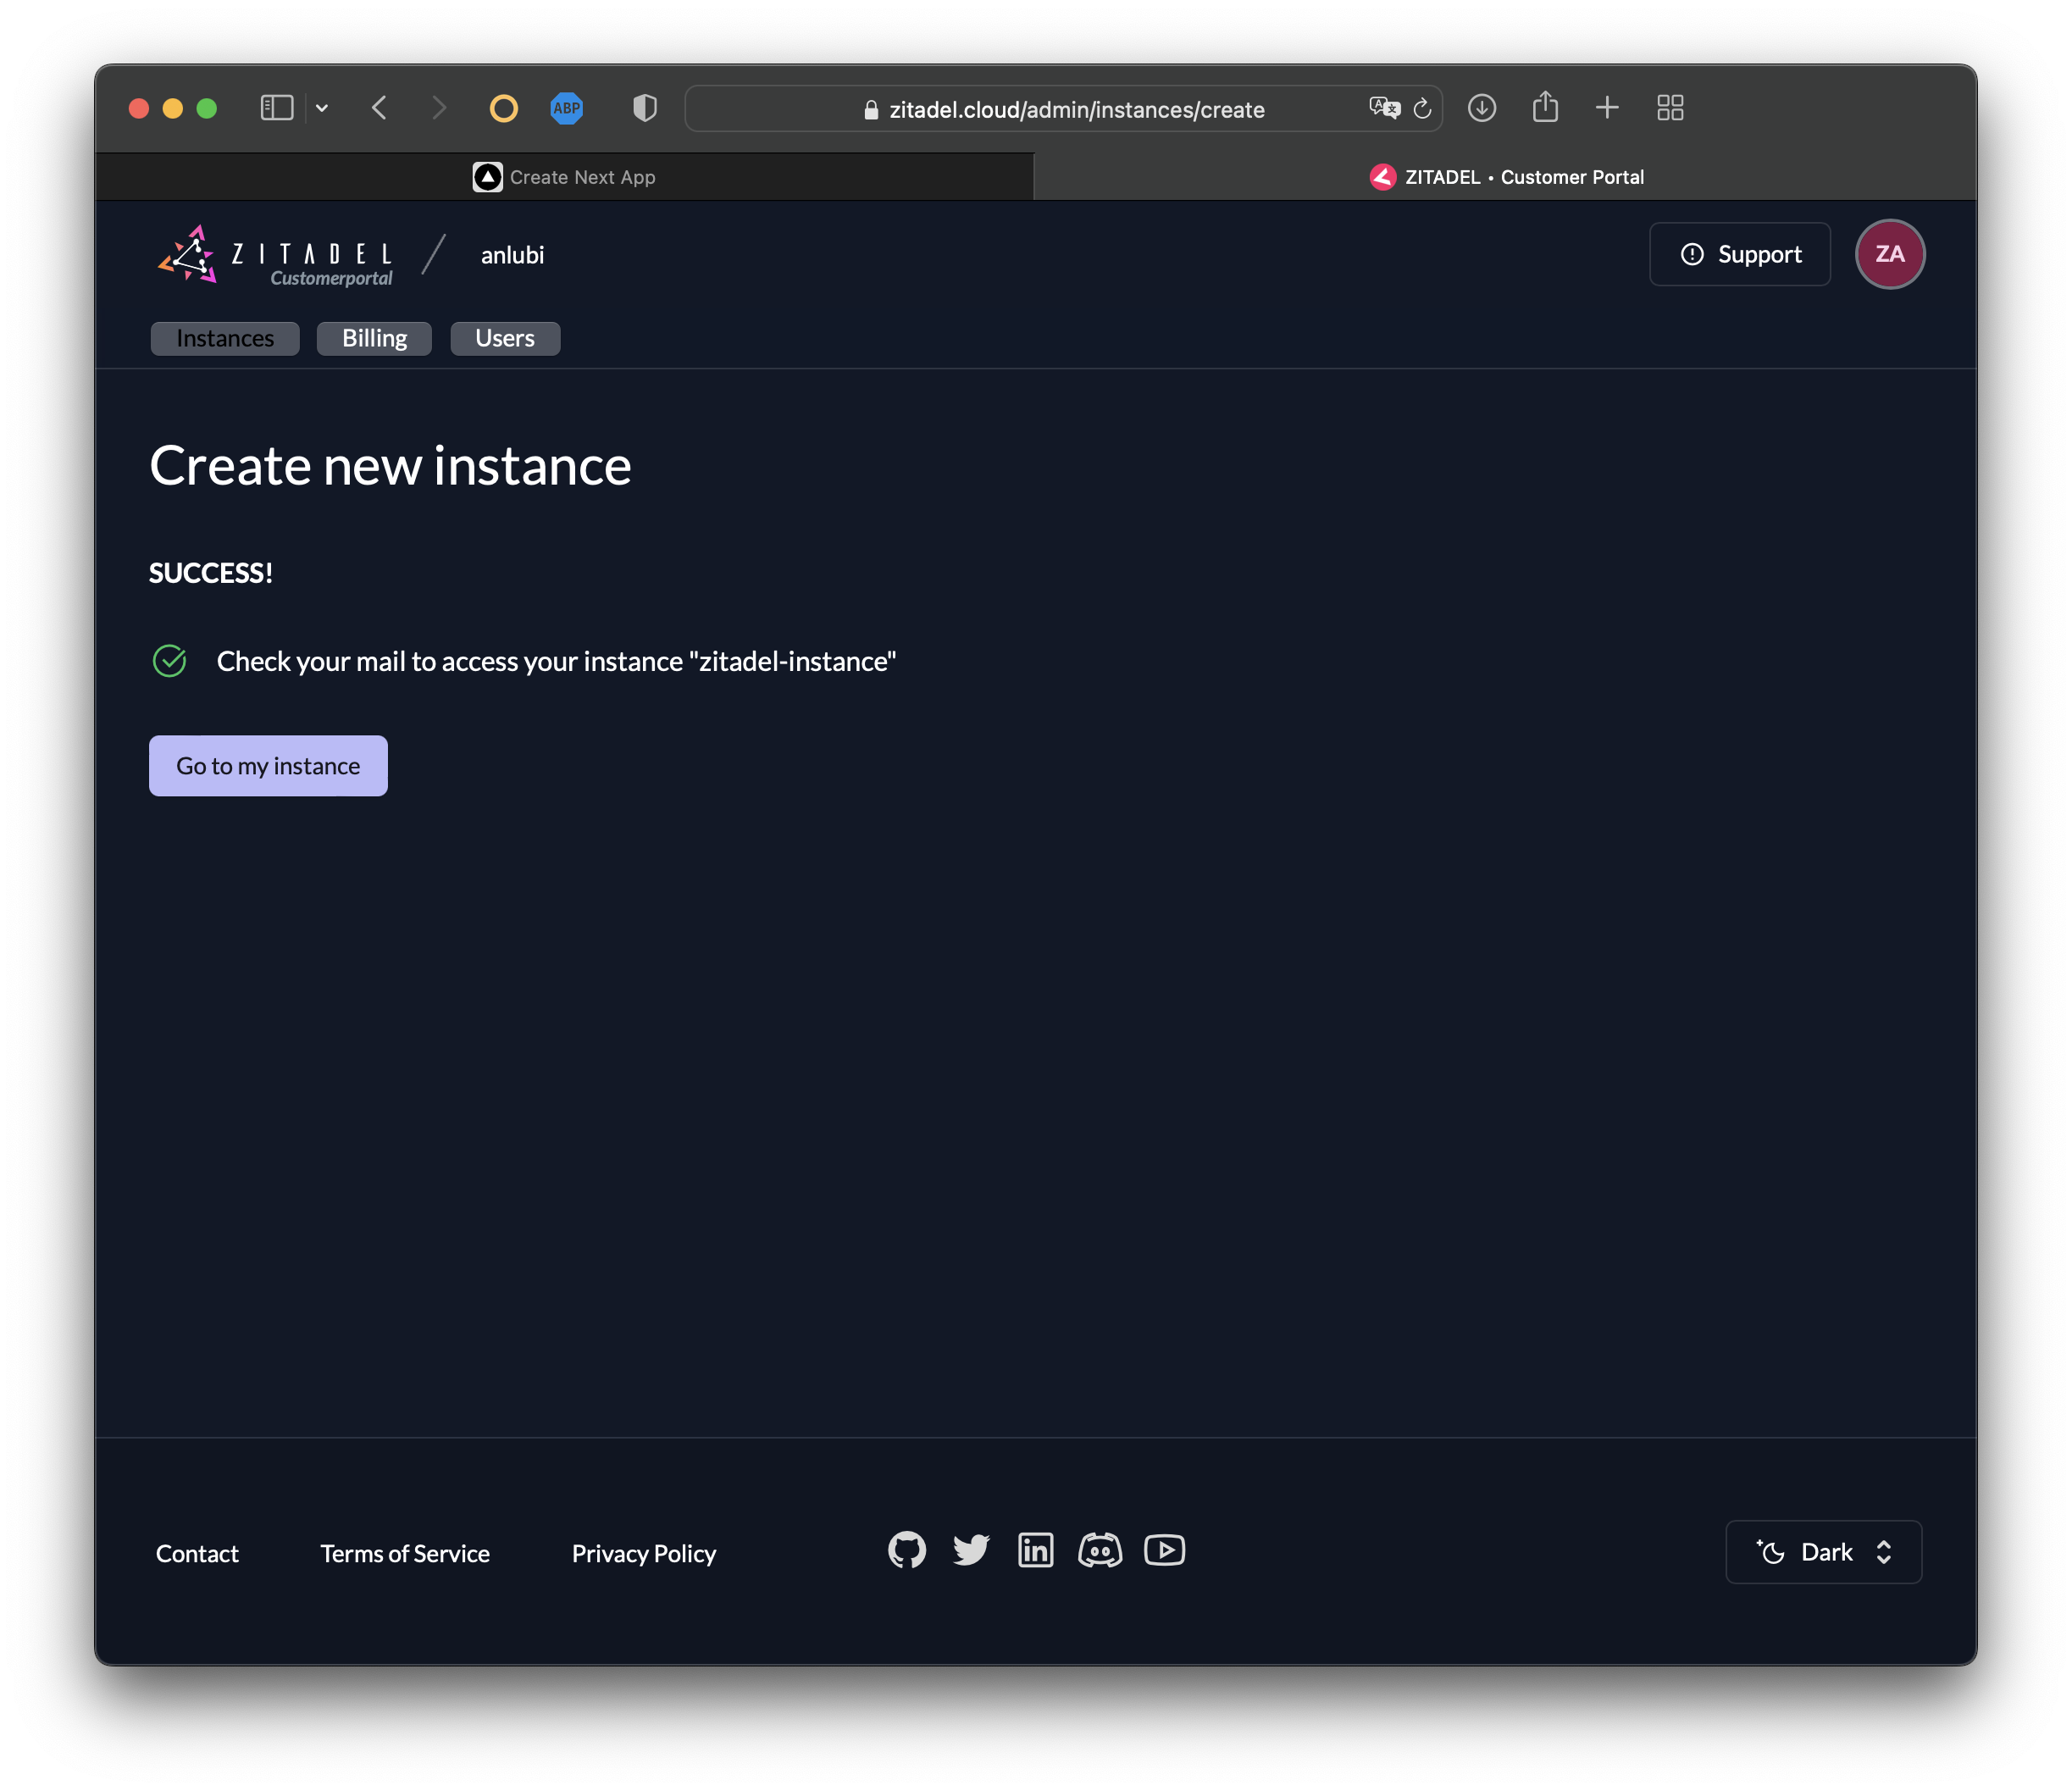
In a few seconds, your ZITADEL instance will be created:
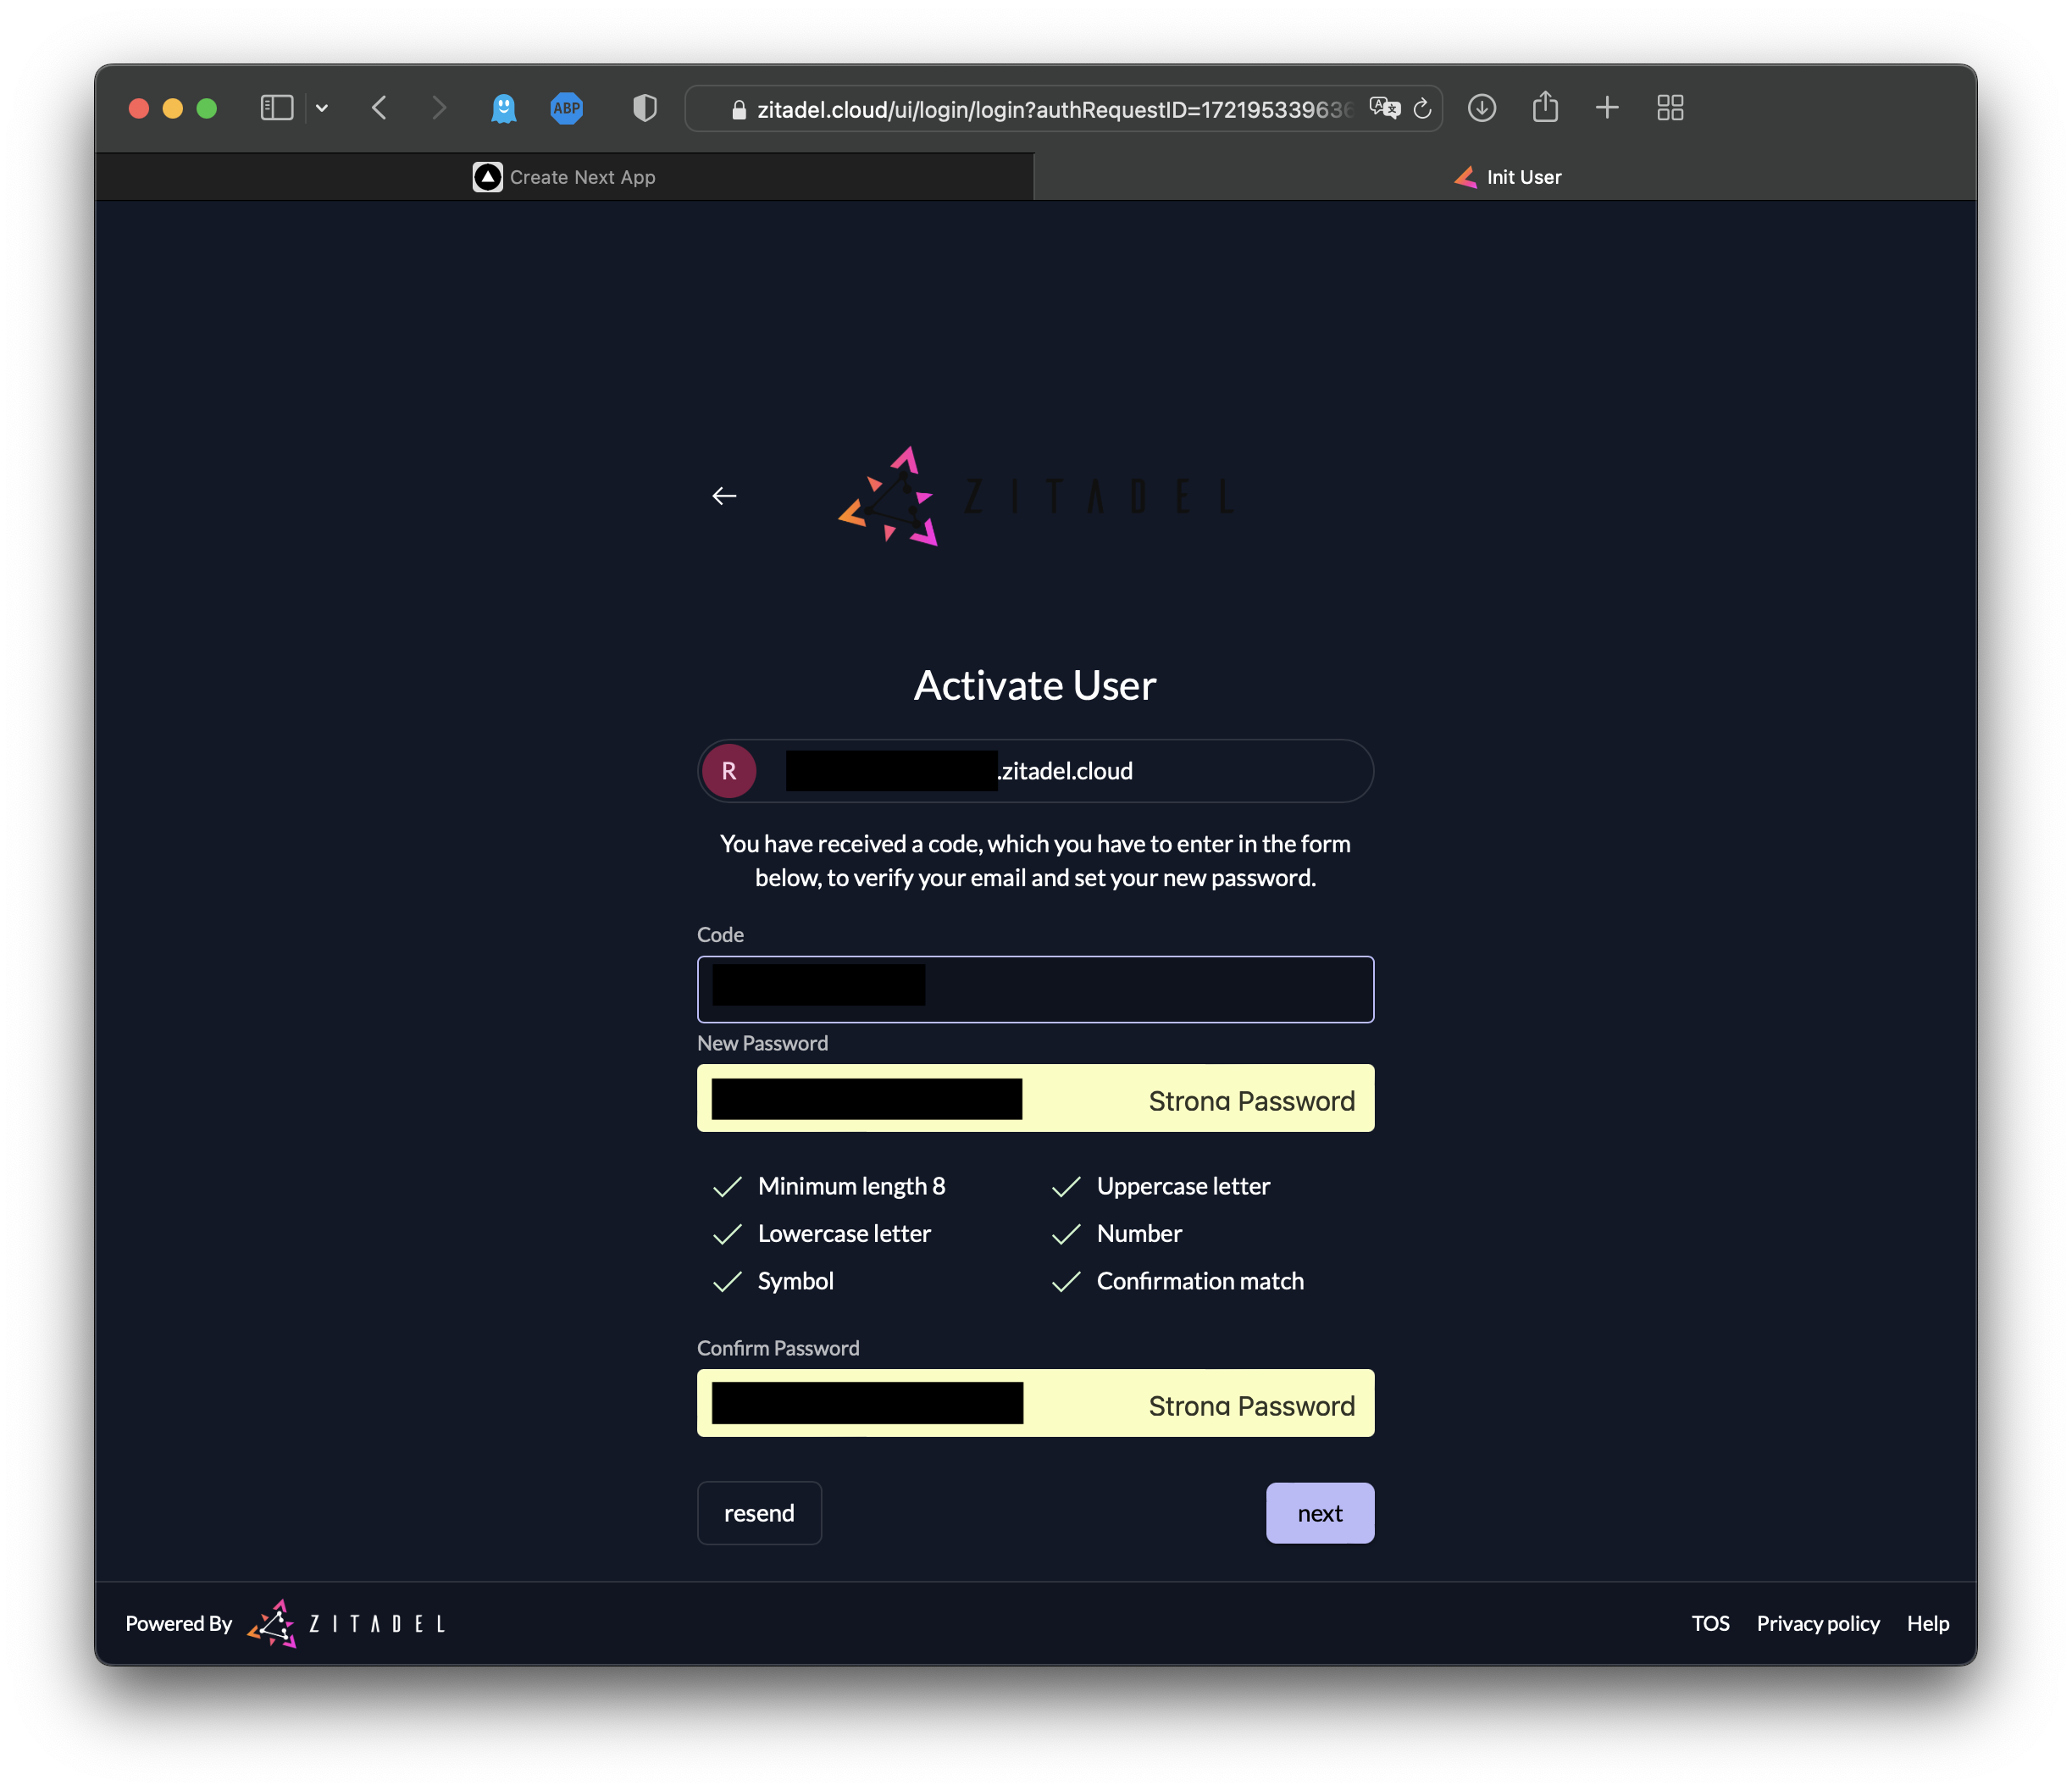
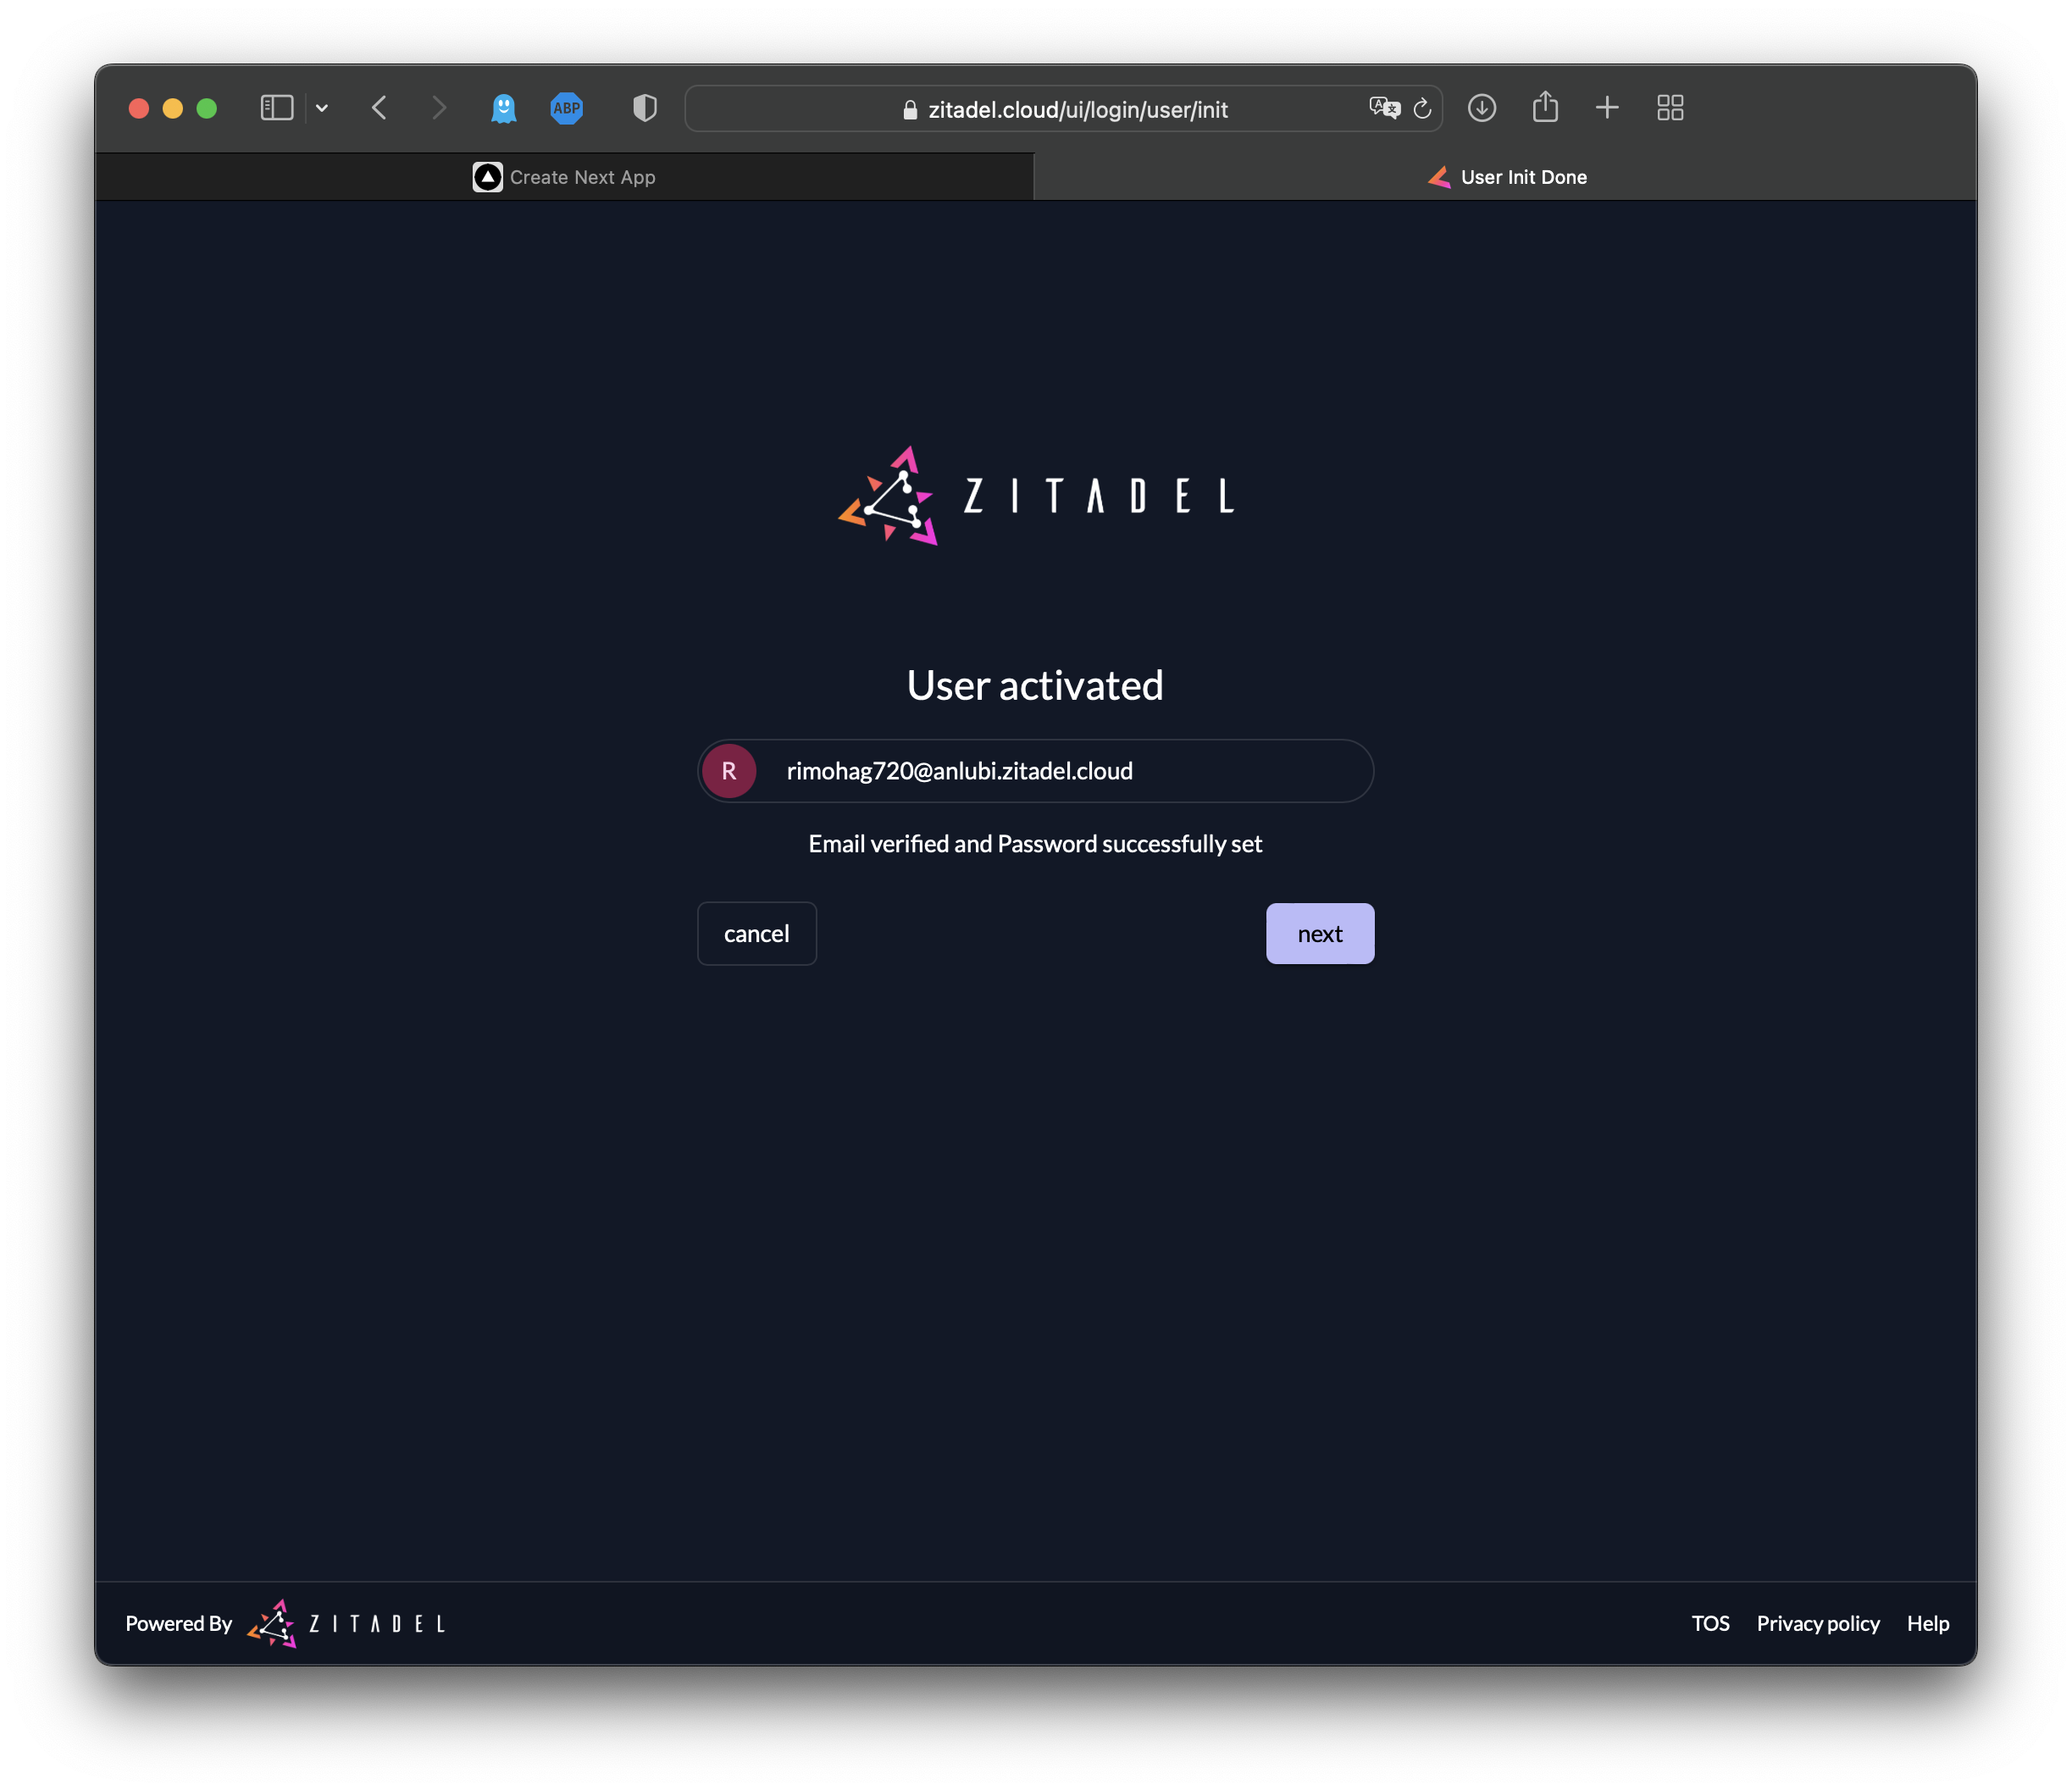
Now you'll receive another email from ZITADEL titled Initialize User. Open the email and select Finish Initialization. You should receive a prompt to create a new password for your ZITADEL instance. Create it, and then click Next.
Follow the prompts to login with your new credentials. Then select skip to skip creating multi-factor authentication.
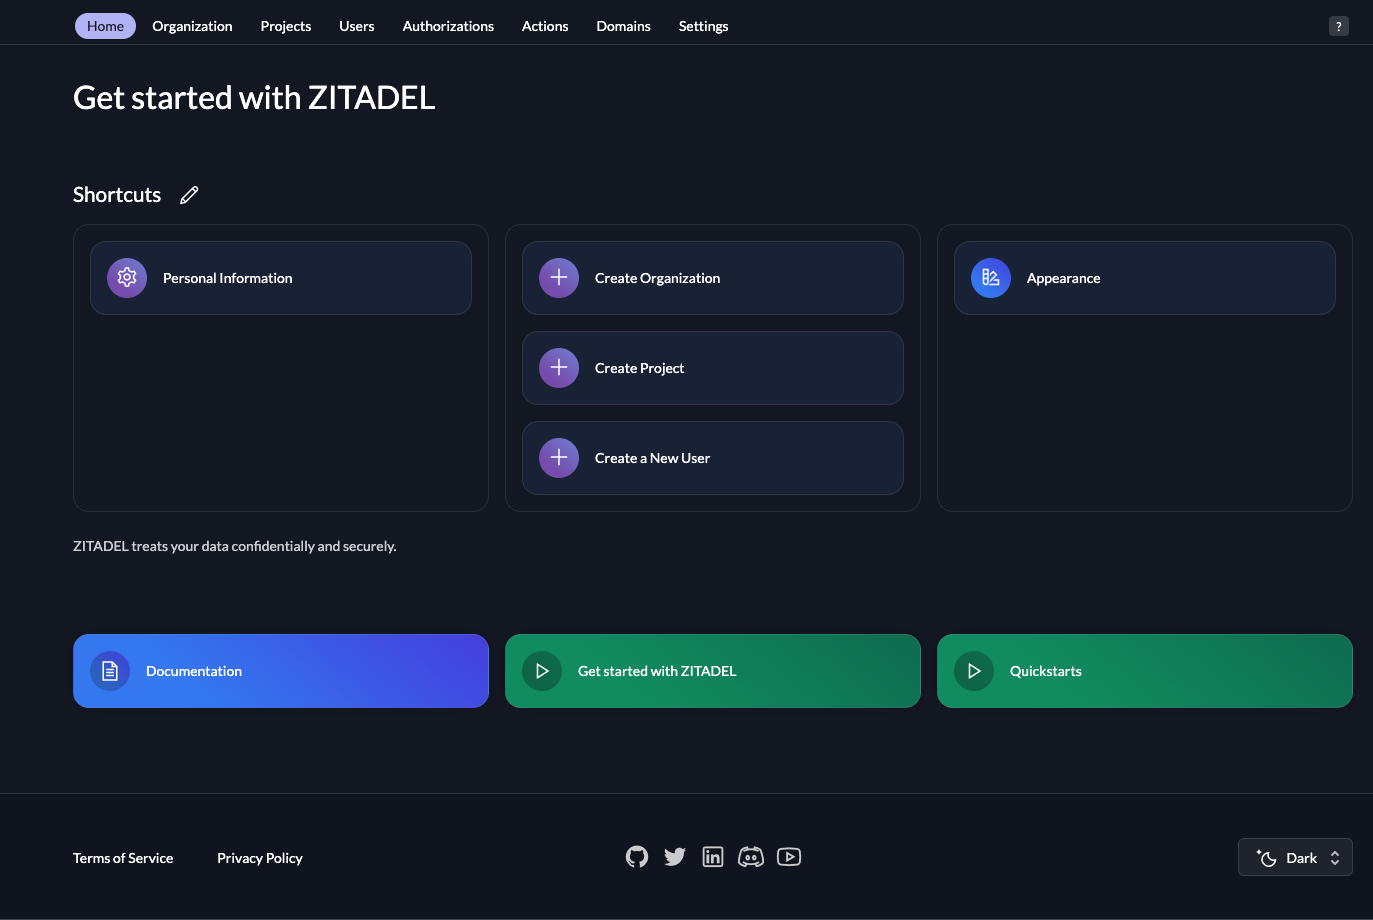
Now you should be logged in to the instance UI console:
Please note: The credentials you created in the first part of this setup differ from the credentials you just created. The first credentials are for the customer portal and the second are for the ZITADEL instance. When working with different environments you can create ZITADEL instances for each environment (ie one instance for development and another one for production environments).
Now that the ZITADEL instance is created, you need to create a ZITADEL project. Click on the Projects tab. Then select Create New Project , and Give your project a name of SpringBoot-Project

Create an Application
It's time to create your SpringBoot application. In this tutorial, your app will be multimodular. One module will be the resource server, and the other will be the client:
** Please note:** The naming of the folders, files, and packages is entirely arbitrary, but for uniformity, it's advised to use the same ones implemented throughout this tutorial.
Create a folder called zitadel-java-oidc, open it, and create a POM file named pom.xml; then paste these contents into it. The two modules in the <modules> element are the ones you need in this scenario:
  <modules>
    <module>resource-server</module>
    <module>client</module>
  </modules>
In the zitadel-java-oidc folder, create two folders: client and resource-server. From this point forward, you'll be using this terminal for creating directories.
Create the Resource Server
Open the resource-server folder and run the following terminal commands to create the folders you need for this module:
mkdir -p src/main/resources
mkdir -p src/main/java/com/example/resourceserver/api
mkdir -p src/main/java/com/example/resourceserver/config
Then add this POM file (pom.xml) to the resource-server root directory. It contains the dependencies and configurations you need for this module.
Add and Configure the YAML File
To add and configure the YAML file, create a file called application.yml in the src/main/resources folder and add the following configurations to it. In the next steps, you'll obtain the client-id and client-secret from the ZITADEL server:
server:
  port: 18090
  servlet:
    context-path: /
  error:
    include-stacktrace: never

spring:
  jackson:
    serialization:
      write-dates-as-timestamps: false
    deserialization:
      # deals with single and multi-valued JWT claims
      accept-single-value-as-array: true
  security:
    oauth2:
      resourceserver:
        jwt:
          issuer-uri: <instance-url>
          jwk-set-uri:  <instance-url>/oauth/v2/keys
        opaquetoken:
          introspection-uri: <instance url>/oauth/v2/introspect
          client-id: '<the-api-client-id>'
          client-secret: '<the-api-client-secret>'

logging:
  level:
    root: info
    demo: debug
    org:
      springframework:
        web: info
        security: debug
This file contains configuration details your Spring module will use. For example, it will use port 18090 and your instance url as the JWT issuer, and it will not include stack traces in error outputs (include-stacktrace: never).
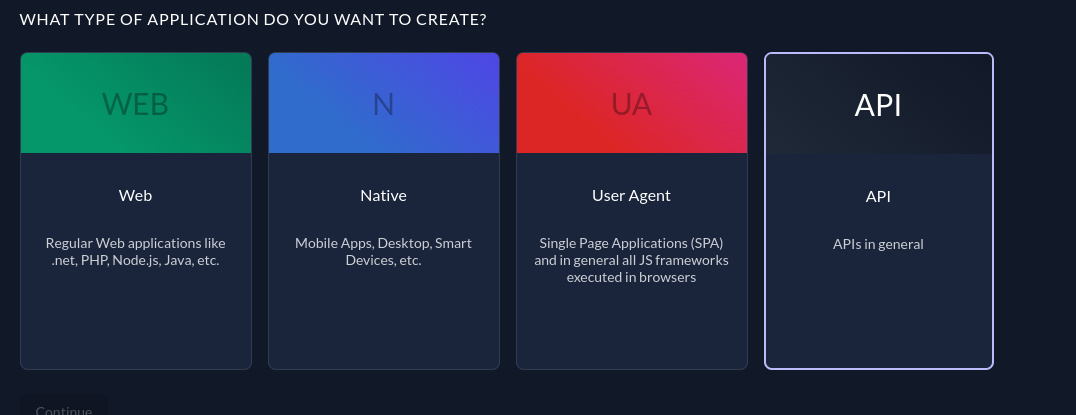
To access the client secret, navigate to <instance-url>/ui/console/ and open the project that you've created. Then create an application and give it your preferred name; for example, "API". Then choose API as the application type since you're going to simulate a resource server that acts as an API to give the client some services:
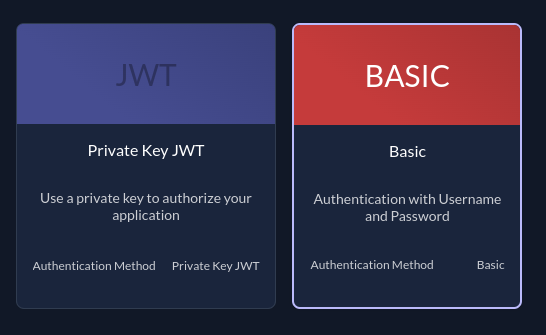
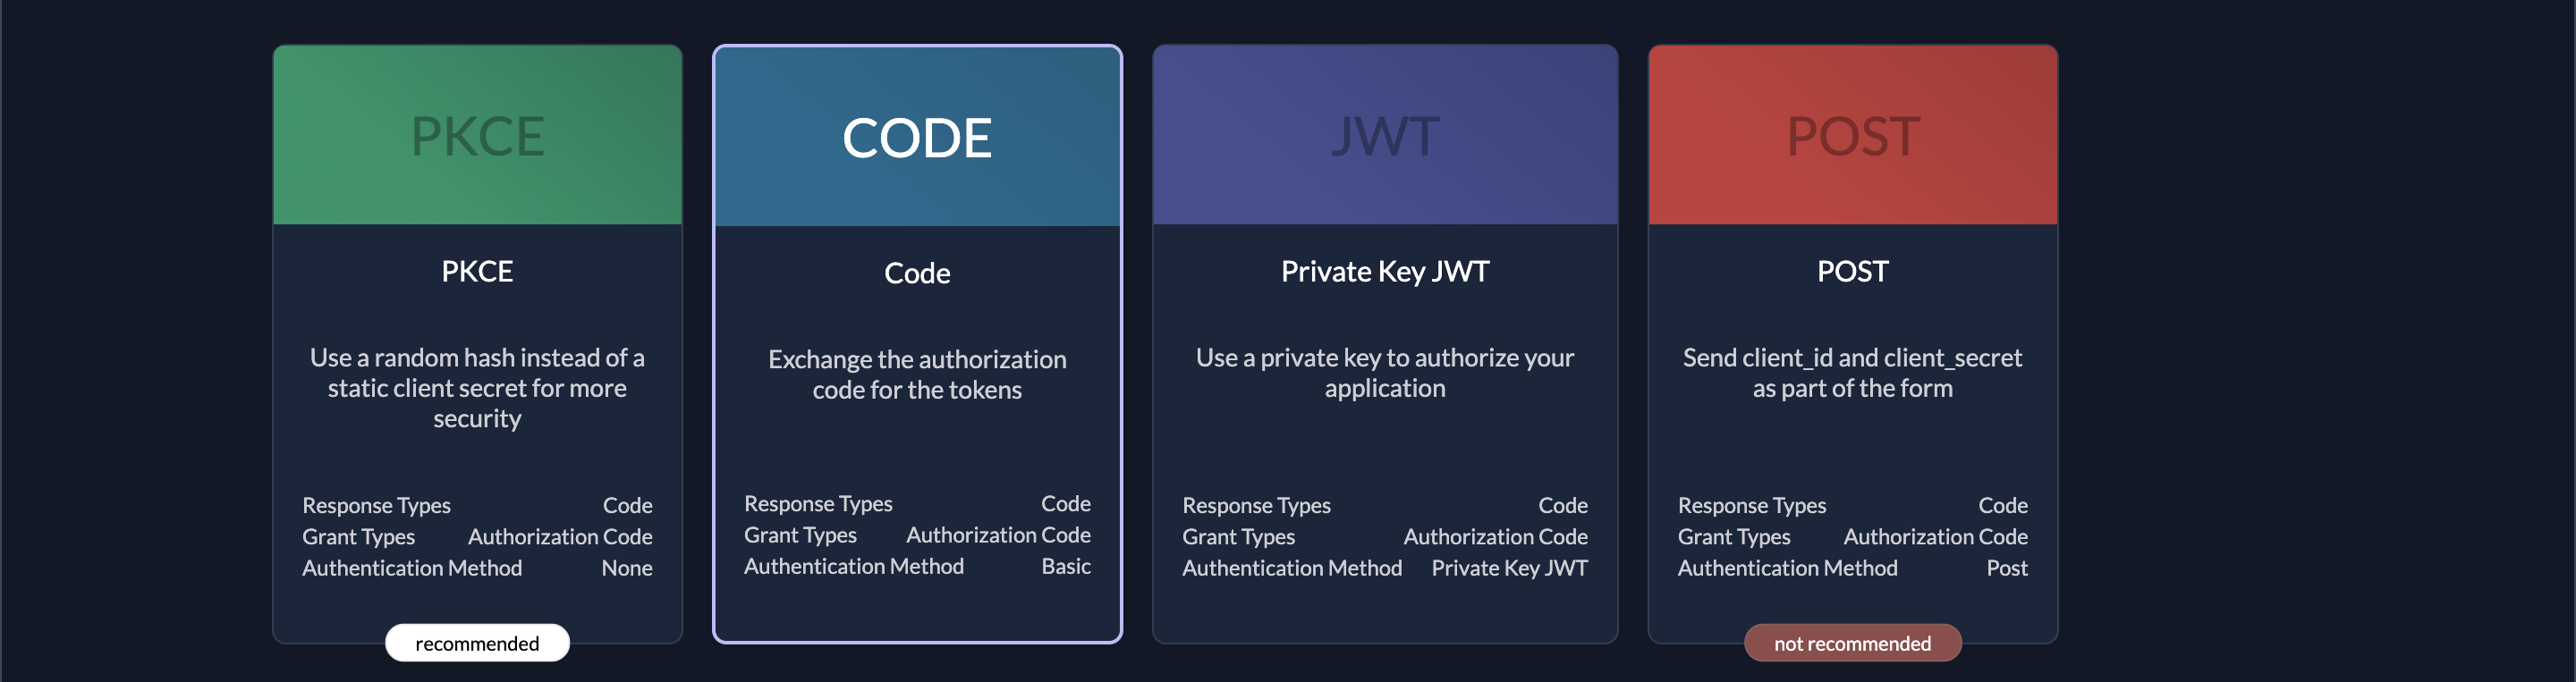
On the next screen, you'll be prompted to choose between BASIC or JWT as the authentication type. In this instance, you want to choose BASIC since you will use the Bearer Token authentication method to communicate with the resource server:
Follow the prompts, and at the end, copy the Client ID and the Secret, and then paste them where they are needed in the YAML file previously created.
In addition replace the instance url with the one related to yours, you can find it under Urls in your application, or from your browser.
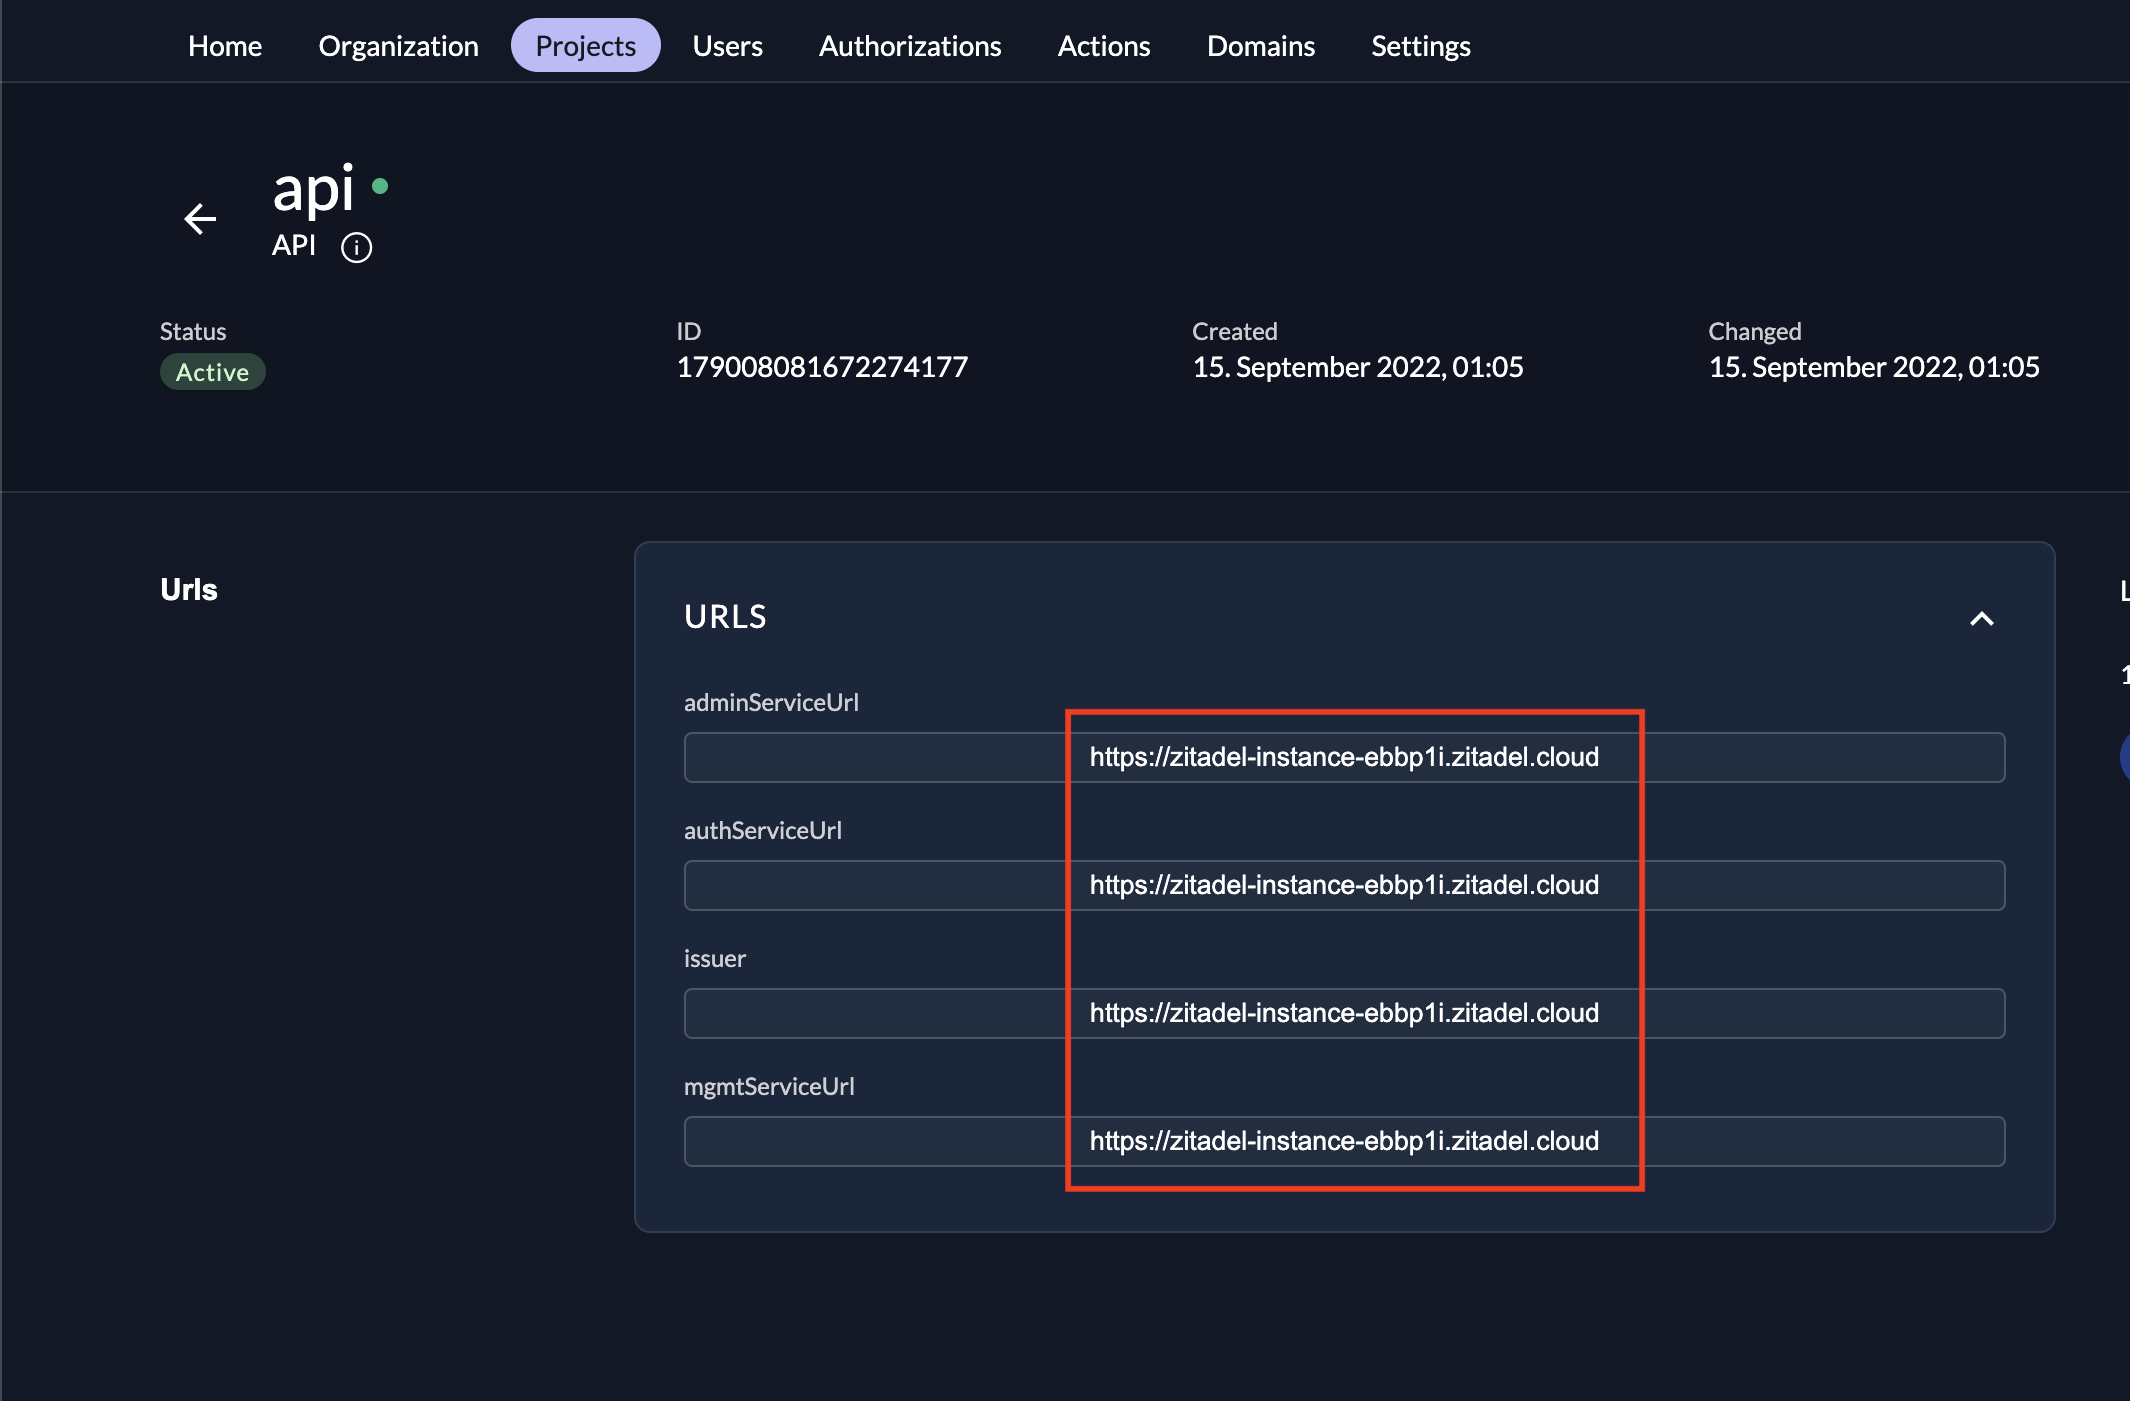
In our case the issuer, admin service, auth service and management service will have the same url. You don't have to worry about it, since they are the same, make sure you replace the <instance url in the .yaml file with yours(for example in this tutorial the instance url is https://zitadel-instance-ebbp1i.zitadel.cloud).
Add the Resource-Server Code
To add the resource-server code, start by configuring the security of each HTTP session using a filter chain. Spring allows you to set several security configurations that are chained together using a certain order (as specified in the previous link).
For the resource server, you need to configure the app to keep a stateless session, authorize URLs based on security filters, and set an opaque token. You can add filters to fit your specific needs. Create a new file called ApiSecurityConfig.java in the src/main/java/com/example/resourceserver/config folder and add the following code to it:
package com.example.resourceserver.config;

import lombok.RequiredArgsConstructor;
import org.springframework.context.annotation.Bean;
import org.springframework.context.annotation.Configuration;
import org.springframework.security.config.annotation.web.builders.HttpSecurity;
import org.springframework.security.config.http.SessionCreationPolicy;
import org.springframework.security.web.SecurityFilterChain;

@Configuration
@RequiredArgsConstructor
class ApiSecurityConfig {

    @Bean
    public SecurityFilterChain securityChain(HttpSecurity httpSecurity) throws Exception {

        httpSecurity.sessionManagement(it -> {
            it.sessionCreationPolicy(SessionCreationPolicy.STATELESS);
        });

        httpSecurity.authorizeRequests(it -> {
            it.mvcMatchers("/api/**").authenticated();
            // add additional routes
            it.anyRequest().authenticated();
        });
        httpSecurity.oauth2ResourceServer().opaqueToken();

        return httpSecurity.build();
    }

}
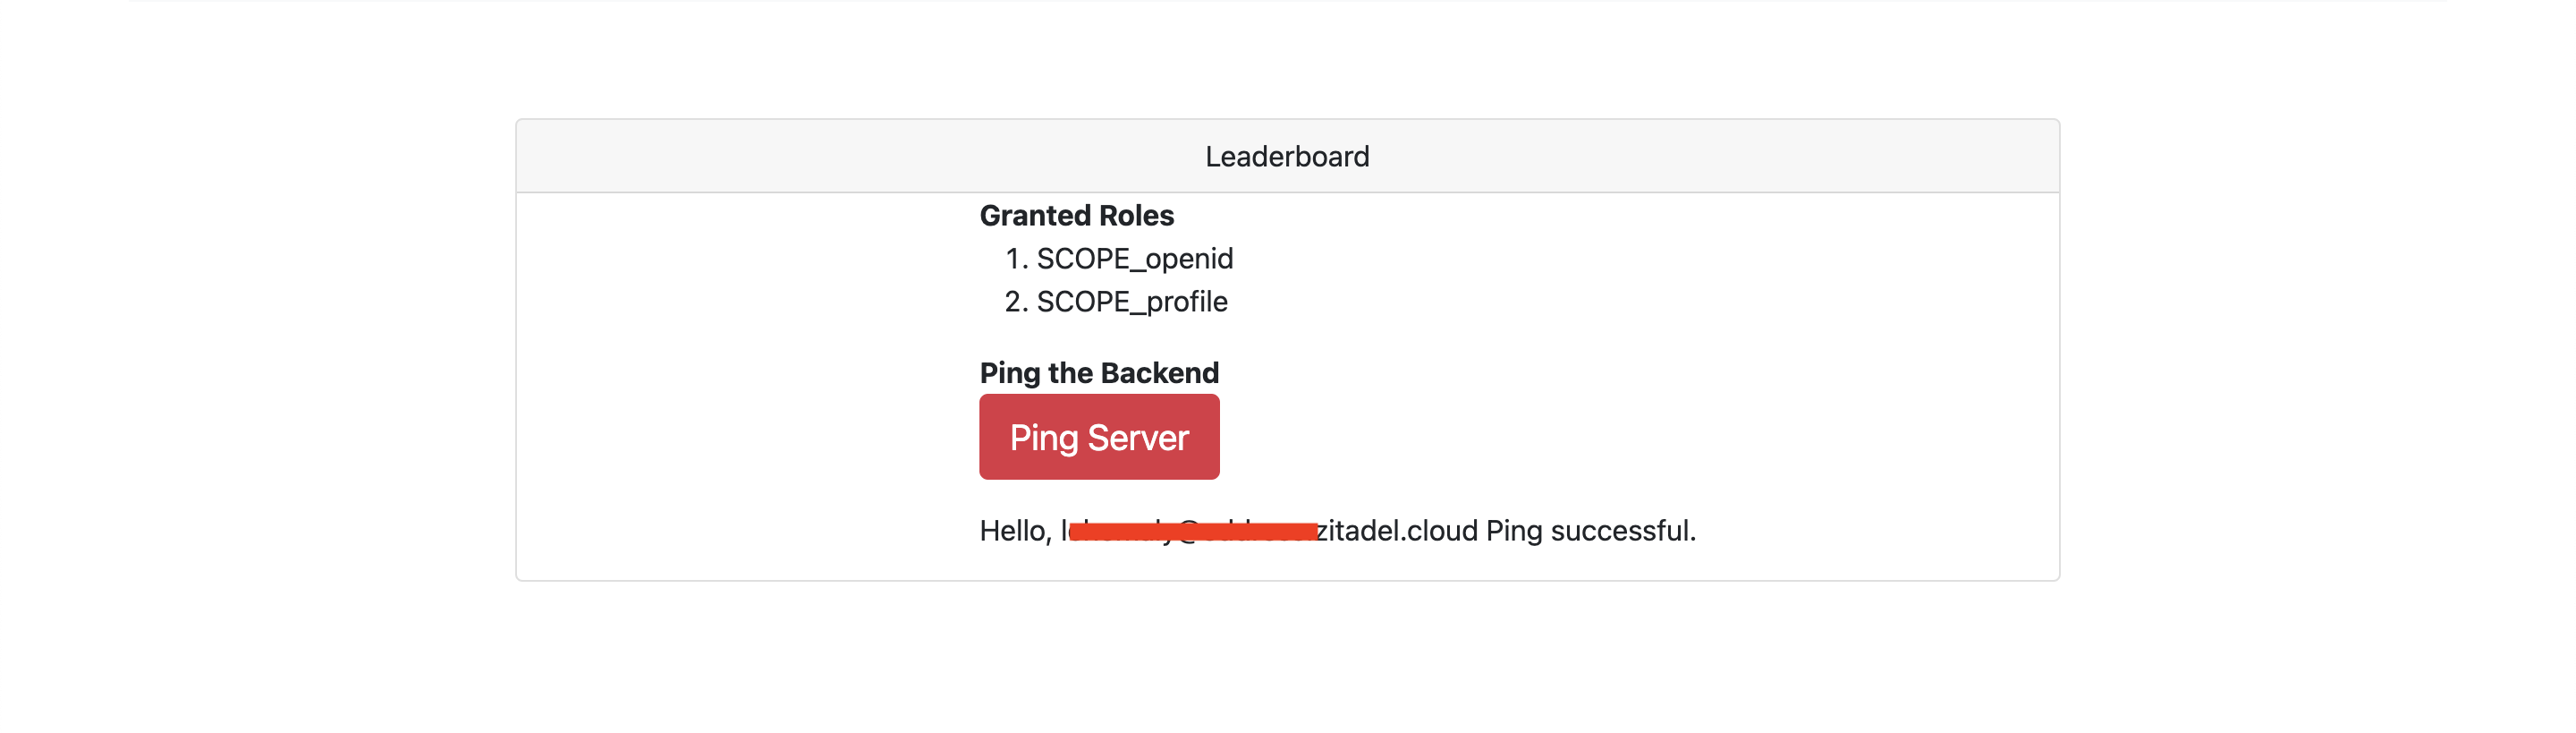
Then to demonstrate that OIDC allows clients to access user details, you need to create a controller. The controller will extract the ZITADEL username from the client access token and return it as a message.
Create a file called PingController.java in the src/main/java/com/example/resourceserver/api folder and add the following code:
package com.example.resourceserver.api;

import org.springframework.security.core.Authentication;
import org.springframework.security.oauth2.core.oidc.StandardClaimNames;
import org.springframework.security.oauth2.server.resource.authentication.BearerTokenAuthentication;
import org.springframework.web.bind.annotation.GetMapping;
import org.springframework.web.bind.annotation.RestController;

import java.util.Map;

@RestController
class PingController {

    @GetMapping("/api/ping/me")
    Object pingMe(Authentication auth) {
        var tokenDetails = ((BearerTokenAuthentication) auth).getTokenAttributes();
        var pingEcho = "Hello, " + tokenDetails.get(StandardClaimNames.PREFERRED_USERNAME) + " Ping successful.";
        return Map.of("ping_echo", pingEcho);
    }
}
Finally, you need to create the main class, which will be the entry point for the Spring app. This is usually generated by Java IDEs, such as IntelliJ IDEA, but since you're not using the IDE approach, you need to create it.
In the src/main/java/com/example/resourceserver folder, create a file called ResourceServerApplication.java and add this code:
package com.example.resourceserver;

import org.springframework.boot.SpringApplication;
import org.springframework.boot.autoconfigure.SpringBootApplication;

@SpringBootApplication
public class ResourceServerApplication {

    public static void main(String[] args) {
        SpringApplication.run(ResourceServerApplication.class, args);
    }

}
Now that you've added the resource-server code, it's time to create and implement the client.
Create the Client
Creating the client is very similar to creating the resource server. Make sure you're in the client folder. Then add the pom.xml file to the root of the client folder, just like you did for the resource-server. Then create the required folders using the terminal:
mkdir -p src/main/resources
mkdir -p src/main/resources/templates
mkdir -p src/main/java/com/example/client/config
mkdir -p src/main/java/com/example/client/web
mkdir -p src/main/java/com/example/client/helper
mkdir -p src/main/java/com/example/client/helper/zitadel
Now you need to add and configure the YAML. To do this, create a new file called application.yml to the src/main/resources folder and add the following configuration scripts:
server:
  port: 18080
  servlet:
    context-path: /webapp
  error:
    include-stacktrace: never

spring:
  thymeleaf:
    cache: false
  security:
    oauth2:
      client:
        provider:
          zitadel:
            issuerUri: `<instance url>’
            user-name-attribute: preferred_username
        registration:
          zitadel:
            client-id: '<webapp-client-id>'
            client-secret: '<webapp-client-secret>'
            client-authentication-method: client_secret_basic
            authorizationGrantType: authorization_code
            redirect-uri: '{baseUrl}/login/oauth2/code/{registrationId}'
            scope: ["openid", "profile"]

logging:
  level:
    root: info
    demo: debug
    org:
      springframework:
        web: info
        security: debug
Note the array pointing to scope. It shows the scope/roles the client has access to in the user account. When using OIDC, the openid scope is needed. The profile scope is used to request the profile details of the user. For more information about ZITADEL scopes, check out this documentation.
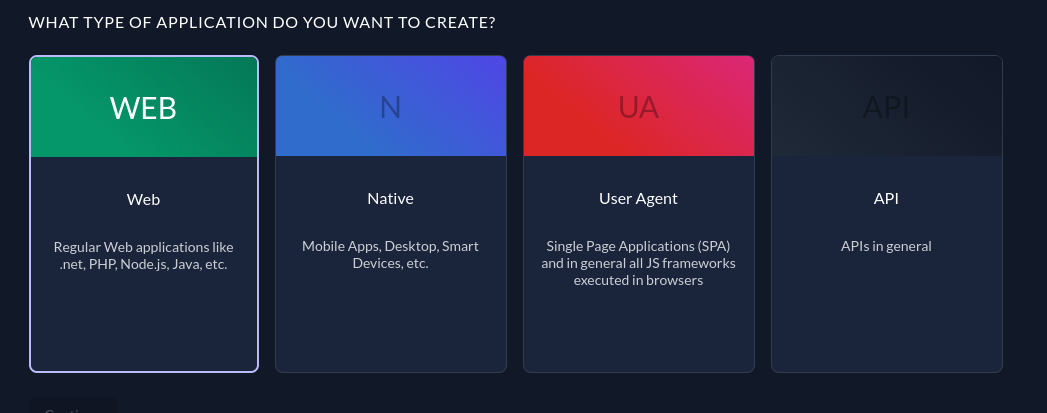
Now you need to obtain the client ID and secret by creating a web application in the ZITADEL console. Head to <instance-url>/ui/console/ and open the project then create a new web app called Web in your project. For the type, select WEB because you're creating a web application:
Then select CODE for the authentication method. The reason for this is the same as discussed in the previous resource-server section:
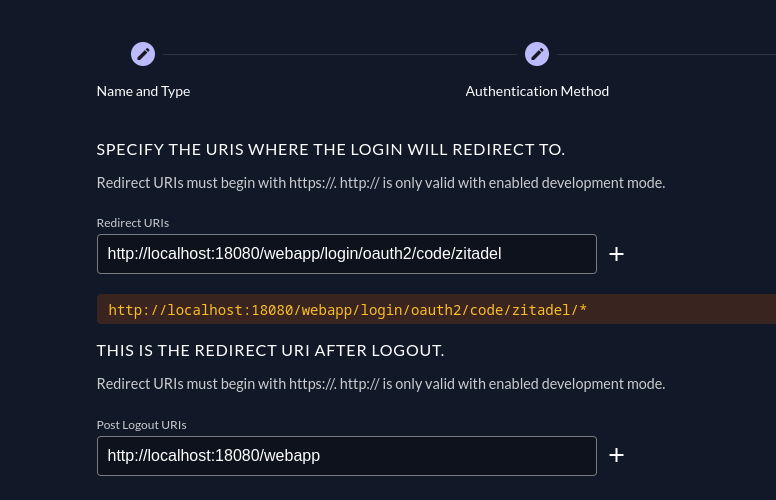
Now, you'll be prompted to select the setting for the redirect URIs. Add http://<span because=”breaks the link”></span>localhost:18080/webapp/login/oauth2/code/zitadel/* to the redirect URIs and http://<span because=”breaks the link”></span>localhost:18080/webappto the Post Logout URIs.
Finish the prompts, copy the client ID and the client secrete then paste it into the appropriate places in your YAML. In addition replace the <instance url> with yours, same as the previous steps.
Add the Client Code
Start by setting the security and web configurations. Create two files in the src/main/java/com/example/client/config directory: ClientSecurityConfig.java and ClientWebConfig.java. For the security configurations, you will set chains for URL access filters, an OAuth 2.0 authorization request resolver, as well as login and logout handlers:
package com.example.client.config;

import com.example.client.helper.zitadel.ZitadelGrantedAuthoritiesMapper;
import com.example.client.helper.zitadel.ZitadelLogoutHandler;
import lombok.RequiredArgsConstructor;
import org.springframework.context.annotation.Bean;
import org.springframework.context.annotation.Configuration;
import org.springframework.security.config.annotation.web.builders.HttpSecurity;
import org.springframework.security.core.authority.mapping.GrantedAuthoritiesMapper;
import org.springframework.security.oauth2.client.registration.ClientRegistrationRepository;
import org.springframework.security.oauth2.client.web.DefaultOAuth2AuthorizationRequestResolver;
import org.springframework.security.oauth2.client.web.OAuth2AuthorizationRequestRedirectFilter;
import org.springframework.security.web.SecurityFilterChain;

@Configuration
@RequiredArgsConstructor
class ClientSecurityConfig {

    private final ZitadelLogoutHandler zitadelLogoutHandler;

    @Bean
    public SecurityFilterChain securityChain(HttpSecurity httpSecurity, ClientRegistrationRepository clientRegistrationRepository) throws Exception {

        httpSecurity.authorizeRequests(it -> {
            it.antMatchers("/webjars/**", "/resources/**", "/css/**").permitAll();
            it.anyRequest().fullyAuthenticated();
        });

        httpSecurity.oauth2Client(it -> {
            var oauth2AuthRequestResolver = new DefaultOAuth2AuthorizationRequestResolver(
                    clientRegistrationRepository,
                    OAuth2AuthorizationRequestRedirectFilter.DEFAULT_AUTHORIZATION_REQUEST_BASE_URI //
            );

            it.authorizationCodeGrant().authorizationRequestResolver(oauth2AuthRequestResolver);
        });

        httpSecurity.oauth2Login(it -> {
            it.userInfoEndpoint().userAuthoritiesMapper(zitadelMapper());
        });
        httpSecurity.logout(it -> {
            it.addLogoutHandler(zitadelLogoutHandler);
        });

        return httpSecurity.build();
    }

    private GrantedAuthoritiesMapper zitadelMapper() {
        return new ZitadelGrantedAuthoritiesMapper();
    }
}
You will need helper classes for the security configurations, which will be added shortly.
To set web configurations for URLs in the client app, you need to set an access token interceptor. Create a file called ClientWebConfig.java in the src/main/java/com/example/client/config directory and add the following code:
package com.example.client.config;

import com.example.client.helper.AccessTokenInterceptor;
import com.example.client.helper.TokenAccessor;
import lombok.RequiredArgsConstructor;
import org.springframework.beans.factory.annotation.Qualifier;
import org.springframework.boot.web.client.RestTemplateBuilder;
import org.springframework.context.annotation.Bean;
import org.springframework.context.annotation.Configuration;
import org.springframework.web.client.RestTemplate;

@Configuration
@RequiredArgsConstructor
class ClientWebConfig {

    private final TokenAccessor tokenAccessor;

    @Bean
    @Qualifier("zitadel")
    RestTemplate restTemplate() {
        return new RestTemplateBuilder()
                .interceptors(new AccessTokenInterceptor(tokenAccessor))
                .build();
    }
}
Add the Helper Classes
The helper classes files will be housed in the src/main/java/com/example/client/helper folder. Their key functionalities are as follows:
- Retrieve the access token from the authorization server (ie
TokenAccessor.java). - Add the access token to the Bearer authentication header (ie
AccessTokenInterceptor.java). - Map the authorities the client has (ie
ZitadelGrantedAuthoritiesMapper.java). - Handle the logout logic (ie
ZitadelLogoutHandler.java). To do this, it uses the ID token and a post-logout redirect URI generated from a request. Make sure you replace the END_SESSION_ENDPOINT with<instance url> /oidc/v1/end_session, the instance url is the same one that we used previously.
You can find the four files in this GitHub repo.
That marks the completion of the client module. Now you need to add the REST controllers.
Add the REST Controllers
In order to send the client-granted roles to the web application and then communicate with the resource server to retrieve the name, you need two controllers. For the first function, you will use one called UiController, and for the latter, you will use one called ApiController.
Create two files,ApiController.java and UiController.java, in the src/main/java/com/example/client/web folder. Then add the following code to the ApiController.java file:
package com.example.client.web;

import lombok.RequiredArgsConstructor;
import org.springframework.beans.factory.annotation.Qualifier;
import org.springframework.security.core.Authentication;
import org.springframework.web.bind.annotation.GetMapping;
import org.springframework.web.bind.annotation.RequestMapping;
import org.springframework.web.bind.annotation.RestController;
import org.springframework.web.client.RestTemplate;

import java.util.Map;

@RestController
@RequestMapping("/api")
@RequiredArgsConstructor
class ApiController {

    @Qualifier("zitadel")
    private final RestTemplate restTemplate;

    @GetMapping("/pings/me")
    Object pingServer(Authentication auth) {
        var response = restTemplate.getForObject("http://localhost:18090/api/ping/me", Map.class);
        return response;
    }
}
Next, add the following to the UiController.java file:
package com.example.client.web;


import org.springframework.security.core.Authentication;
import org.springframework.security.core.GrantedAuthority;
import org.springframework.stereotype.Controller;
import org.springframework.ui.Model;
import org.springframework.web.bind.annotation.GetMapping;

import java.util.stream.Collectors;

@Controller
class UiController {

    @GetMapping("/")
    public String showIndex(Model model, Authentication auth) {
        var grantedRoles = auth.getAuthorities().stream().map(GrantedAuthority::getAuthority).collect(Collectors.toList());
        model.addAttribute("grantedRoles", grantedRoles);
        return "index";
    }
}
In the src/main/resources/templates folder, you need to add two user interface files for displaying the interface to the user. You can access them on this GitHub page and add them to the folder.
Lastly, create the main class, ClientApplication.java, in the src/main/java/com/example/client folder and add the following code:
package com.example.client;

import org.springframework.boot.SpringApplication;
import org.springframework.boot.autoconfigure.SpringBootApplication;

@SpringBootApplication
public class ClientApplication {

    public static void main(String[] args) {
        SpringApplication.run(ClientApplication.class, args);
    }
}
Run the Application
To run your application, in the zitadel-java-oidc directory, run the following command to compile the files:
mvn clean package -DskipTests
Then run the resource server:
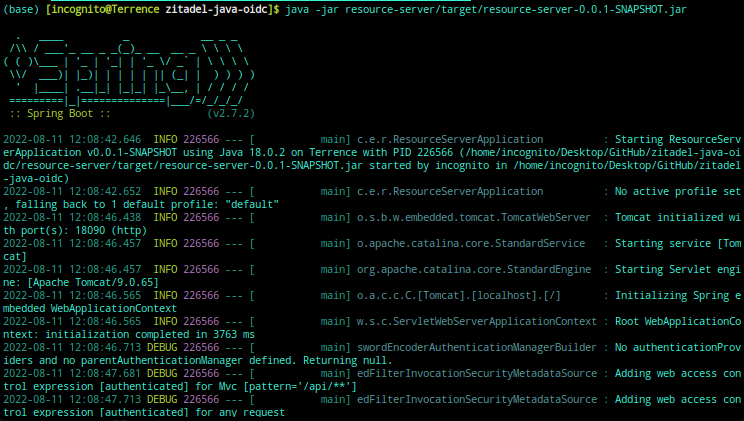
java -jar resource-server/target/resource-server-0.0.1-SNAPSHOT.jar
Your terminal output should look like this:
Now, run the client application:
java -jar client/target/client-0.0.1-SNAPSHOT.jar
When the message shown in the image below appears, then you can go ahead and try the application in the browser at http://localhost:18080/webapp:

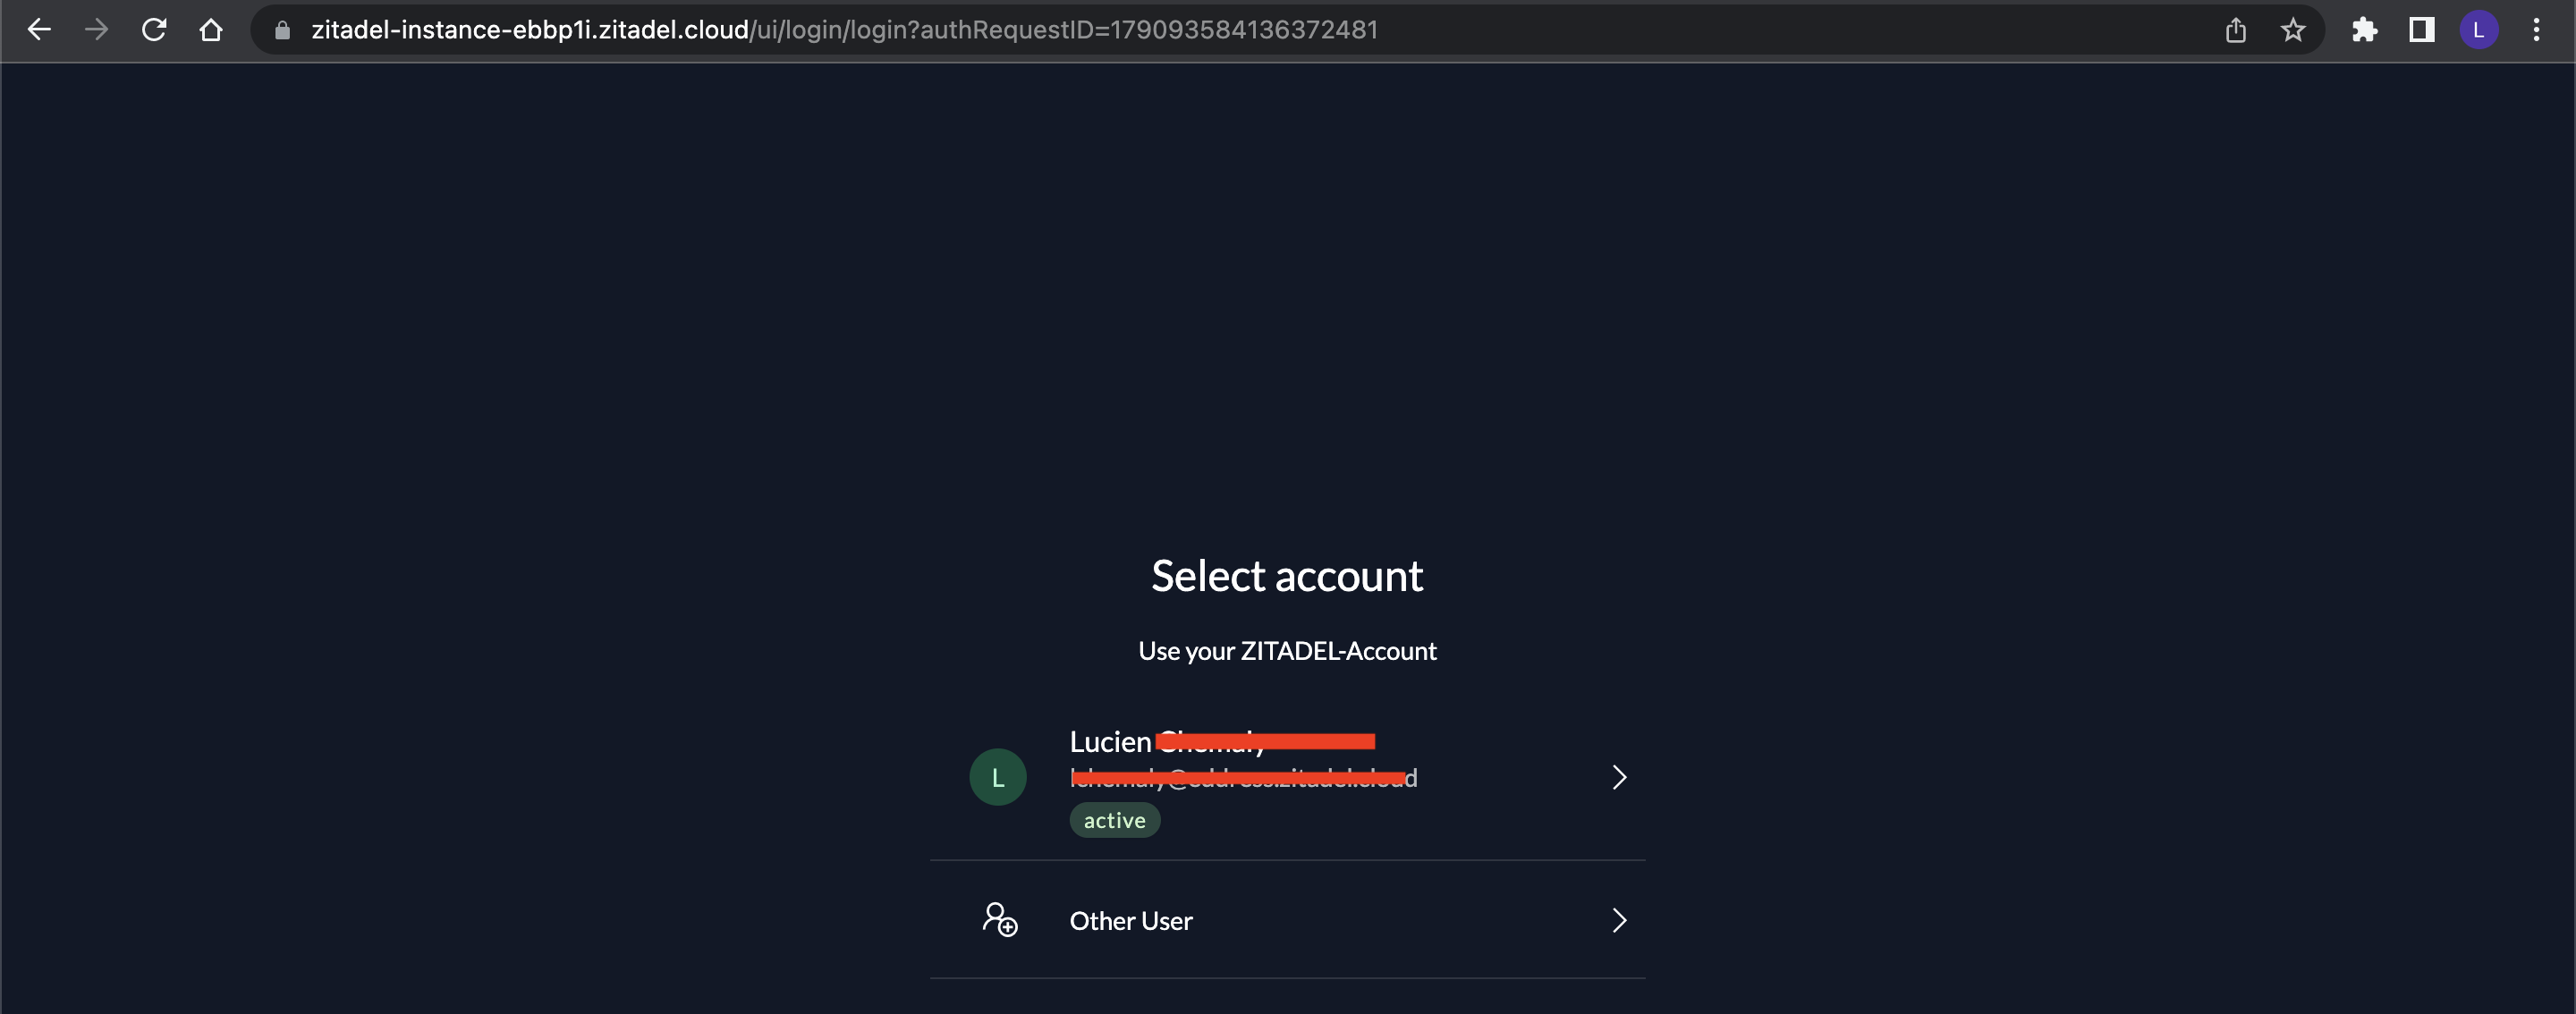
You should be redirected to your ZITADEL account login page, where you should log into your account:
After the authentication process, you'll be redirected to the client's web page:

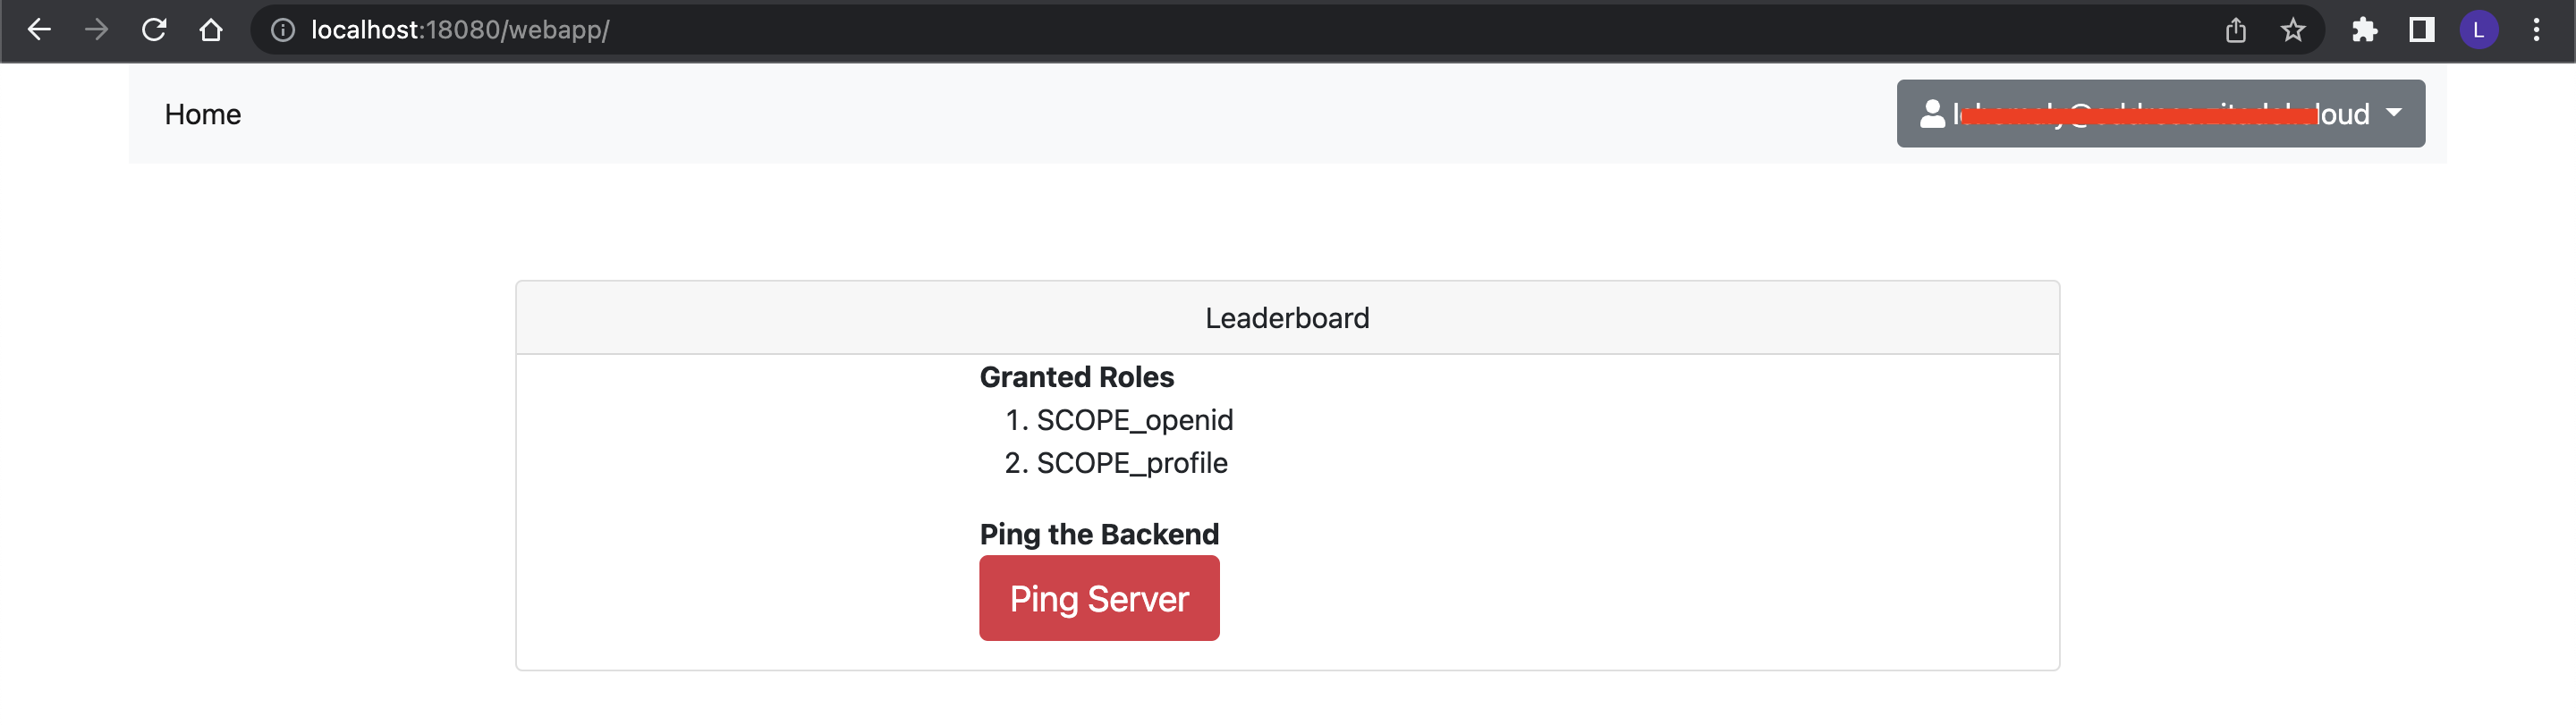
You should be able to see the scopes and a button for pinging the resource server. Click the button to retrieve your username from the resource server:
You should try logging out by clicking on the drop-down at the top-right of your screen. You will be logged out of the app and taken to the ZITADEL login page. From there, you can log into the client app again:
Now that you've successfully implemented an OIDC security feature in Spring, you can try building more sophisticated products.
Conclusion
In this tutorial, you learned the theory behind OIDC, its use cases, and how to use it in your Java app with ZITADEL as the OIDC authentication provider.
ZITADEL is an open source identity management platform that provides you with a wide range of features like OpenID Connect, SAML 2.0, OAuth 2, FIDO2, OTP, and an unlimited audit trail. With ZITADEL, you can solve all your authentication and authorization needs. Check out our repo and give us a GitHub star. We appreciate the feedback.
This article was contributed by Terrence Aluda.