ZITADEL with Flutter
Flutter Web App
This guide demonstrates how you integrate ZITADEL into a Flutter app. It refers to our example on GitHub
At the end of the guide you have a mobile application for Android, iOS and Web with the ability to authenticate users via ZITADEL.
If you need any other information about Flutter, head over to the documentation.
Setup Application
Before we can start building our application, we have to do a few setup steps in ZITADEL Console. You will need to provide some information about your app. We recommend creating a new app to start from scratch. Navigate to your Project, then add a new application at the top of the page. Select Native application type and continue.
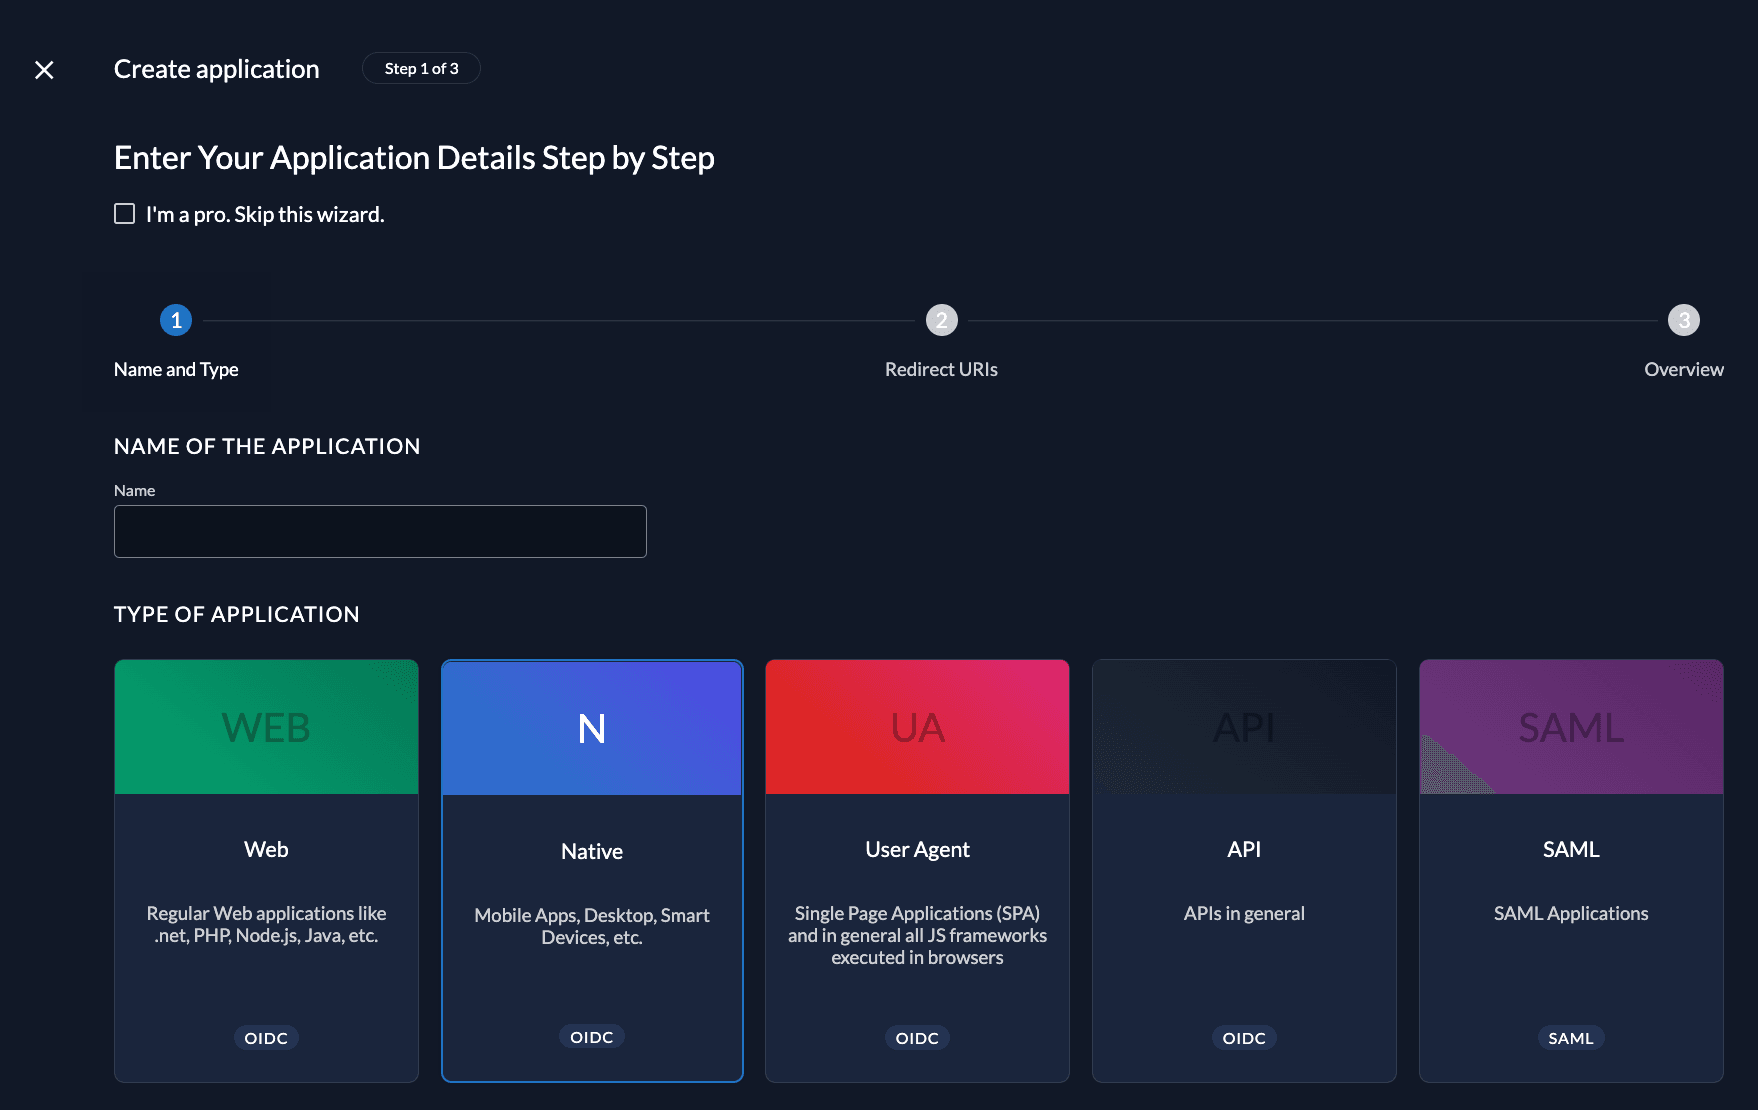
Redirect URIs
With the Redirect URIs field, you tell ZITADEL where it is allowed to redirect users to after authentication. As our application will also support web, we have to make sure to set redirects for http and https, as well as a custom-scheme for our native Android and IOS Setup.
For our local web development, add a redirectURI for http://localhost:4444/auth.html with your custom port. For Android and IOS, add your custom scheme. In our case it is com.example.zitadelflutter.
Use Custom Redirect URI!
Your custom scheme has to be compliant with the OAuth 2.0 authentication for mobile devices (RFC 8252 specification). Otherwise your app might get rejected.
For development, you need to set dev mode to true to enable insecure HTTP and redirect to a localhost URI.
If you want to redirect the users back to a route on your application after they have logged out, add an optional redirect in the Post Logout URIs field.
Continue and create the application.
After creation, go to token settings and check the refresh token checkbox. This allows us to request a refresh_token via offline_access scope.
Make sure to save the application.
Client ID
After successful app creation, a pop-up will appear, showing the app's client ID. Copy the client ID, as you will need it to configure your Flutter application.
Flutter Prerequisites
To move further in this quickstart, you'll need the following things prepared:
- Have Flutter (and Dart) installed (how-to)
- Have an IDE set up for developing Flutter (how-to)
- Create a basic Flutter app (how-to)
- Create a "Native" application in ZITADEL
After you created the starter Flutter app, the app will show a simple, templated Flutter app.
Install Dependencies
To authenticate users with ZITADEL in a mobile application, some specific packages are needed. The RFC 8252 specification defines how OAUTH2.0 for mobile and native apps works. Basically, there are two major points in this specification:
- It recommends to use PKCE
- It does not allow third party apps to use an embedded web view for the login process, the app must open the login page within the default browser
First install http a library for making HTTP calls,
then flutter_web_auth_2 and a secure storage to store the auth / refresh tokens flutter_secure_storage.
To install run:
flutter pub add http
flutter pub add oidc
flutter pub add oidc_default_store
Setup for Android
Navigate to your AndroidManifest.xml at <projectRoot>/android/app/src/main/AndroidManifest.xml and add the following activity with your custom scheme.
</activity> <!-- Don't delete the meta-data below. This is used by the Flutter tool to generate GeneratedPluginRegistrant.java --> <meta-data android:name="flutterEmbedding" android:value="2" /> </application></manifest>Furthermore, for secure_storage, you need to set the minimum SDK version to 18
in <projectRoot>/android/app/src/build.gradle.
Add Authentication
To reduce the commented default code, we will modify the main.dart file.
First, the MyApp class: it remains a stateless widget:
? Uri.base.replace(path: 'auth.html') : Uri(scheme: callbackUrlScheme, path: '/');late final OidcUserManager userManager;late Future<void> initFuture;Future<void> main() async { WidgetsFlutterBinding.ensureInitialized(); try { await dotenv.load(fileName: '.env'); } on Exception { throw StateError( '.env file not found. Copy .env.example to .env and configure it.', ); }Second, the MyHomePage class will remain a stateful widget with
its title, we don't change any code here.
final zitadelDomain = dotenv.env['ZITADEL_DOMAIN'];final zitadelClientId = dotenv.env['ZITADEL_CLIENT_ID'];if (zitadelDomain == null || zitadelDomain.isEmpty) { throw StateError('ZITADEL_DOMAIN is not set. Check your .env file.');}if (zitadelClientId == null || zitadelClientId.isEmpty) { throw StateError('ZITADEL_CLIENT_ID is not set. Check your .env file.');}What we'll change now, is the _MyHomePageState class to enable
authentication via ZITADEL and remove the counter button of the starter application. We'll show the username of the authenticated user.
We define the needed elements for our state:
var _busy = false;
var _authenticated = false;
var _username = '';
final storage = const FlutterSecureStorage();
Then the builder method, which does show the login button if you're not authenticated, a loading bar if the login process is going on and your name if you are authenticated:
OidcUser? get _currentUser => userManager.currentUser;Future<void> _authenticate() async { setState(() { latestError = null; _busy = true; }); try { final user = await userManager.loginAuthorizationCodeFlow(); if (user == null) { //it wasn't possible to login the user. return; } } catch (e) { latestError = e; } setState(() { _busy = false; });}Future<void> _logout() async { setState(() { latestError = null; _busy = true; }); try { await userManager.logout(); } catch (e) { latestError = e; } setState(() { _busy = false; });}@overrideWidget build(BuildContext context) { return Scaffold( appBar: AppBar(title: Text(widget.title)), body: Center(And finally the _authenticate method which calls the authorization endpoint,
then fetches the user info and stores the tokens into the secure storage.
redirectUri: redirectUri, postLogoutRedirectUri: redirectUri, scope: ['openid', 'profile', 'email', 'offline_access'], ), ); initFuture = userManager.init(); runApp(const MyApp());}class MyApp extends StatelessWidget { const MyApp({super.key}); // This widget is the root of your application. @override Widget build(BuildContext context) { return MaterialApp( title: 'Flutter Demo', theme: ThemeData(primarySwatch: Colors.blue), builder: (context, child) { // Show a loading widget while the app is initializing. // This can be used to show a splash screen for example. return FutureBuilder( future: initFuture, builder: (context, snapshot) { if (snapshot.hasError) { return ErrorWidget(snapshot.error.toString()); } if (snapshot.connectionState != ConnectionState.done) { return const Material( child: Center(child: CircularProgressIndicator.adaptive()), ); } return child!; }, ); }, home: const MyHomePage(title: 'Flutter ZITADEL Quickstart'), ); }}class MyHomePage extends StatefulWidget { const MyHomePage({super.key, required this.title}); final String title; @override State<MyHomePage> createState() => _MyHomePageState();}class _MyHomePageState extends State<MyHomePage> { bool _busy = false; Object? latestError; /// Test if there is a logged in user. bool get _authenticated => _currentUser != null; /// To get the access token. String? get accessToken => _currentUser?.token.accessToken; /// To get the id token. String? get idToken => _currentUser?.idToken; /// To access the claims. String? get _username { final currentUser = _currentUser; if (currentUser == null) { return null; } final claims = currentUser.aggregatedClaims; return '${claims['given_name']} ${claims['family_name']}'; }Note that we have to use our http redirect URL for web applications or otherwise use our custom scheme for Android and iOS devices. To setup other platforms, read the documentation of the Flutter Web Auth.
To ensure our application catches the callback URL, you have to create a auth.html file in the /web
folder with the following content:
<!-- This HTML page works as a redirect_uri, post_logout_redirect_uri, frontchannel_logout_uri but for frontchannel_logout_uri to work, it must be called like this: /redirect.html?requestType=front-channel-logout--><!DOCTYPE html><html lang="en"><head> <meta charset="utf-8"> <title>Authentication complete</title> <meta name="viewport" content="width=device-width, initial-scale=1.0"> <script type="text/javascript"> const stateNamespace = 'state'; const stateResponseNamespace = 'response.state'; const requestNamespace = 'request'; const requestBroadcastChannel = 'oidc_flutter_web/request'; const redirectBroadcastChannel = 'oidc_flutter_web/redirect'; //if the OP isn't requesting logout, handle redirect. if (!handleFrontChannelLogout()) { handleRedirect(); } function handleRedirect() { // For supported browsers: https://caniuse.com/broadcastchannel var bc = new BroadcastChannel(redirectBroadcastChannel); bc.postMessage(window.location.toString()); bc.close(); let dataSrc; dataSrc = new URLSearchParams(window.location.search); var state = dataSrc.get('state'); if (!state) { if (window.location.hash) { dataSrc = new URLSearchParams( window.location.hash.substring(1) ); state = dataSrc.get('state'); } } if (!state) { return; } const stateDataRaw = getLocalStorage(stateNamespace, state); if (!stateDataRaw) { console.error('state not found, key: ' + state); return; } setLocalStorage(stateResponseNamespace, state, window.location.toString()); //we call JSON.parse twice, since shared_preferences double encodes json strings for some reason. const parsedStateString = JSON.parse(stateDataRaw); if (!parsedStateString) { console.error('parsed state is null'); return; } // Read the mode from the state. const webLaunchMode = parsedStateString.options?.webLaunchMode; if (!webLaunchMode) { console.error('webLaunchMode not found in parsed state.'); return; } if (webLaunchMode != 'samePage') { window.close(); return; } const original_uri = parsedStateString.original_uri; if (!original_uri) { console.warn("it's preferred that original_uri is used when webLaunchMode is samePage."); return; } window.location.assign(original_uri); } function handleFrontChannelLogout() { const queryParams = new URLSearchParams(window.location.search); if (queryParams.get('requestType') == 'front-channel-logout') { // For supported browsers: https://caniuse.com/broadcastchannel var bc = new BroadcastChannel(requestBroadcastChannel); bc.postMessage(window.location.toString()); bc.close(); // this puts a marker for the flutter app that the user wants to logout. // // in the flutter app, if this marker exists, // we don't auth the cached user in `UserManager.init()`, and we clear the cached data. setLocalStorage(requestNamespace, 'front-channel-logout', window.location.toString()); return true; } return false; } function getLocalStorage(namespace, key) { const rawRes = localStorage.getItem('oidc.' + namespace + '.' + key); if (!rawRes) { return null; } return rawRes; } function setLocalStorage(namespace, key, value) { const keysEntryKey = 'oidc.keys.' + namespace; var keys = localStorage.getItem(keysEntryKey); if (!keys) { keys = "[]"; } const parsedKeys = JSON.parse(keys); if (!(parsedKeys instanceof Array)) { console.error('parsedKeys is not an array.', parsedKeys); } parsedKeys.push(key); localStorage.setItem(keysEntryKey, JSON.stringify(parsedKeys)); localStorage.setItem('oidc.' + namespace + '.' + key, value); } </script></head><body> <h3>Authentication is complete. If this does not happen automatically, please close the window.</h3></body></html>Now, you can run your application for iOS and Android devices with
flutter runor by directly selecting your device
flutter run -d iphoneFor Web make sure you run the application on your fixed port such that it matches your redirect URI in your ZITADEL application. We used 4444 as port before so the command would look like this:
flutter run -d chrome --web-port=4444Our Android and iOS Application opens ZITADEL's login within a custom tab, on Web a new tab is opened.
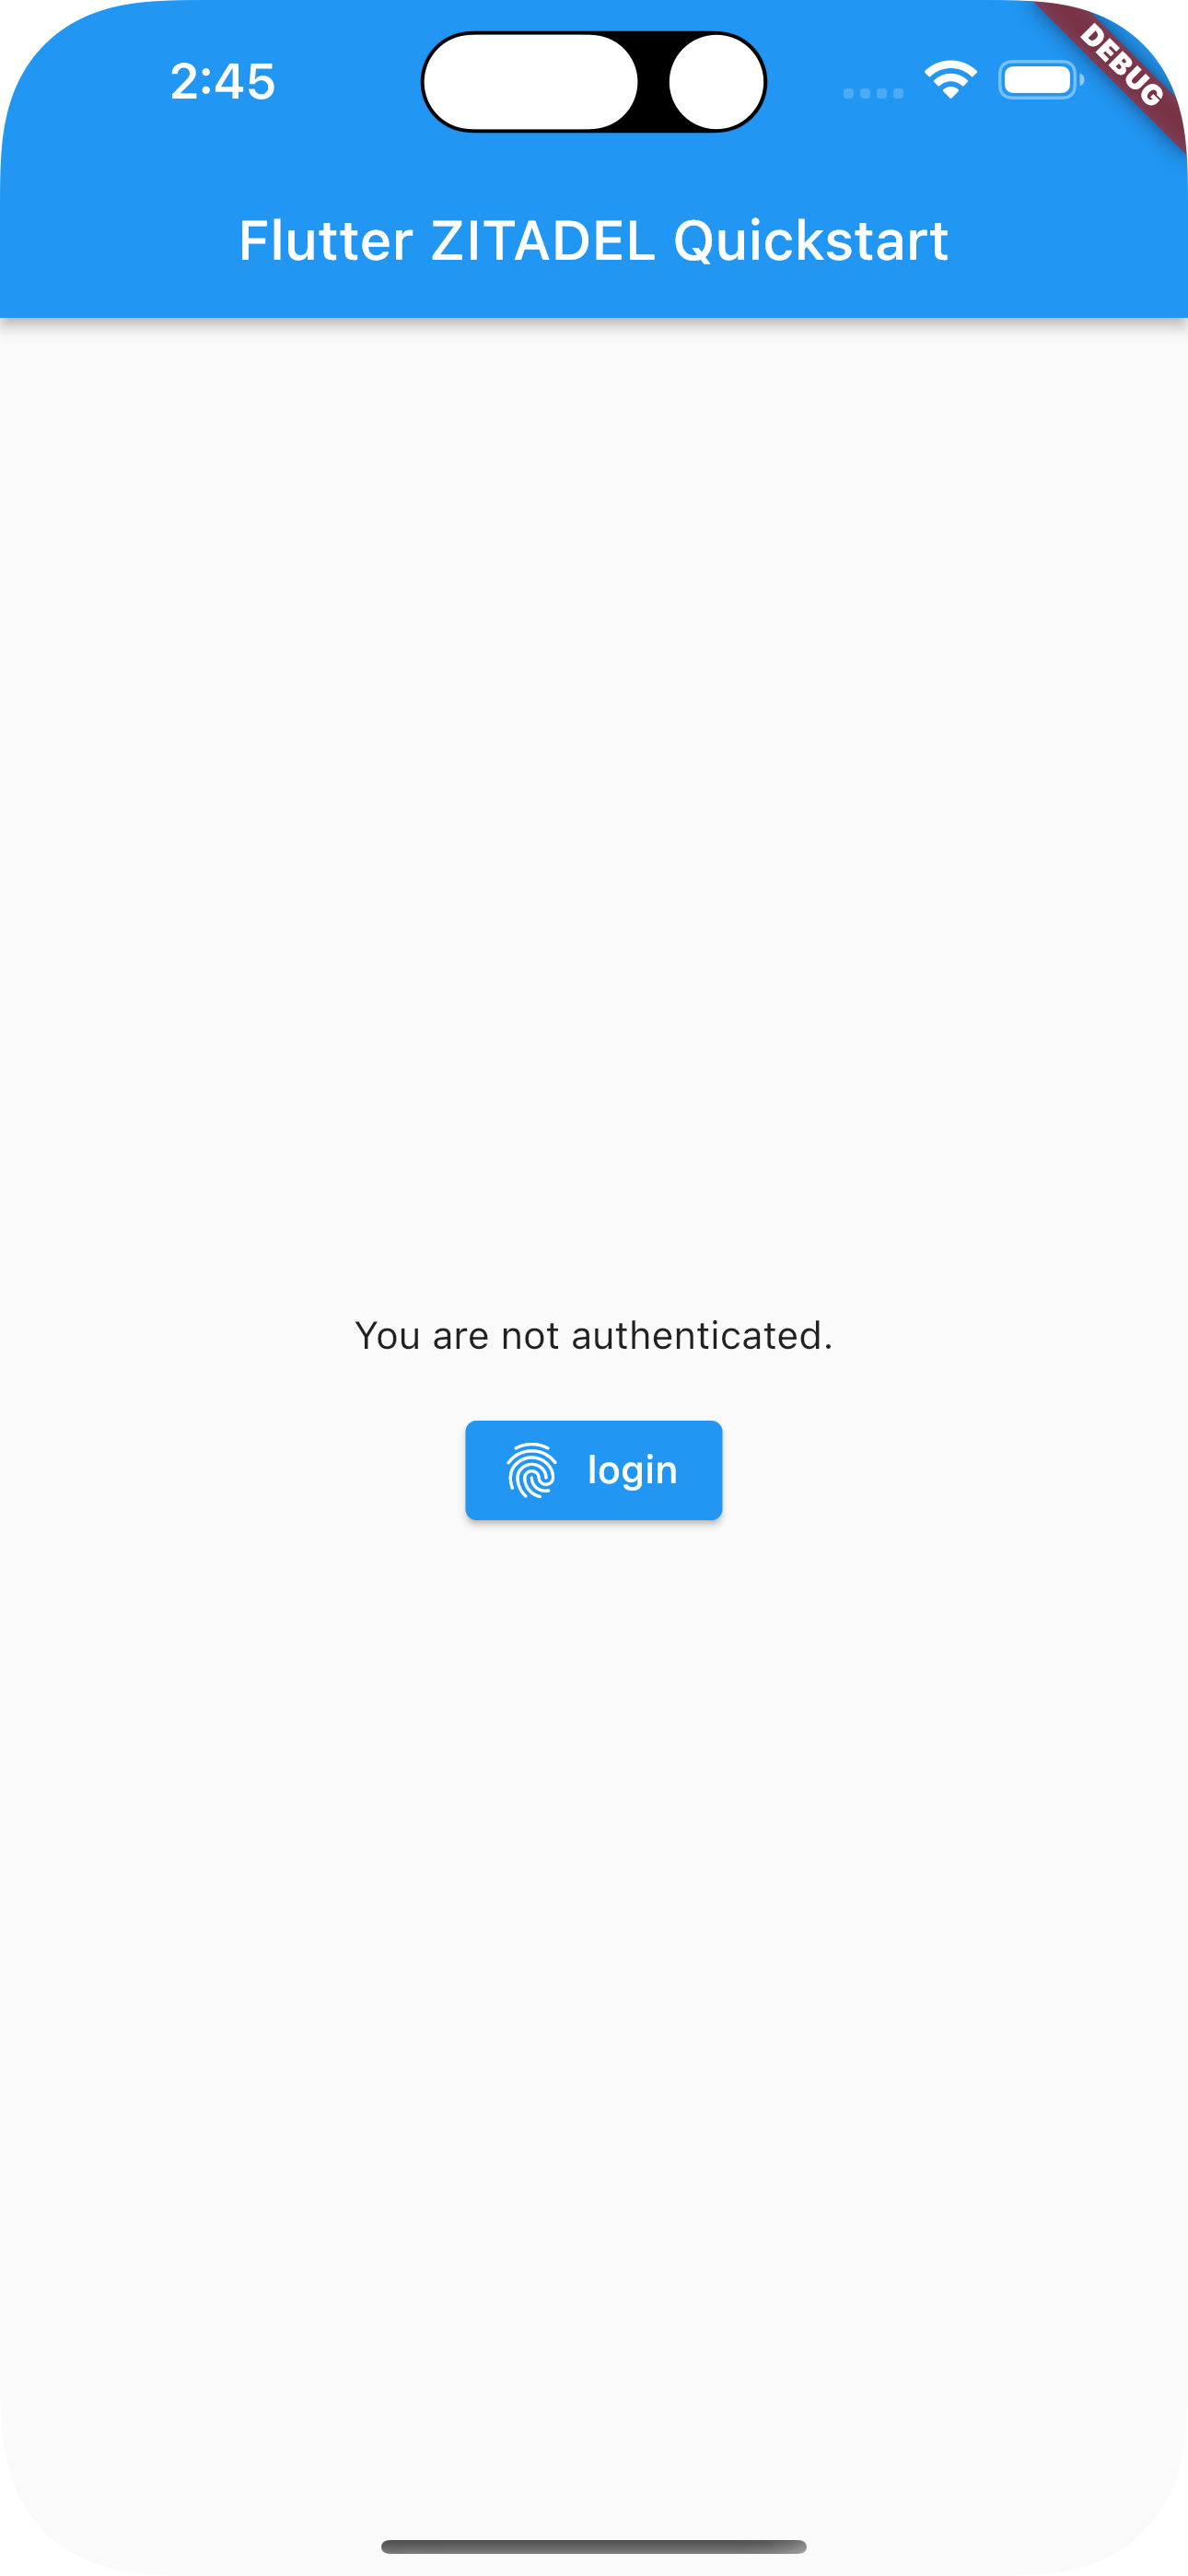
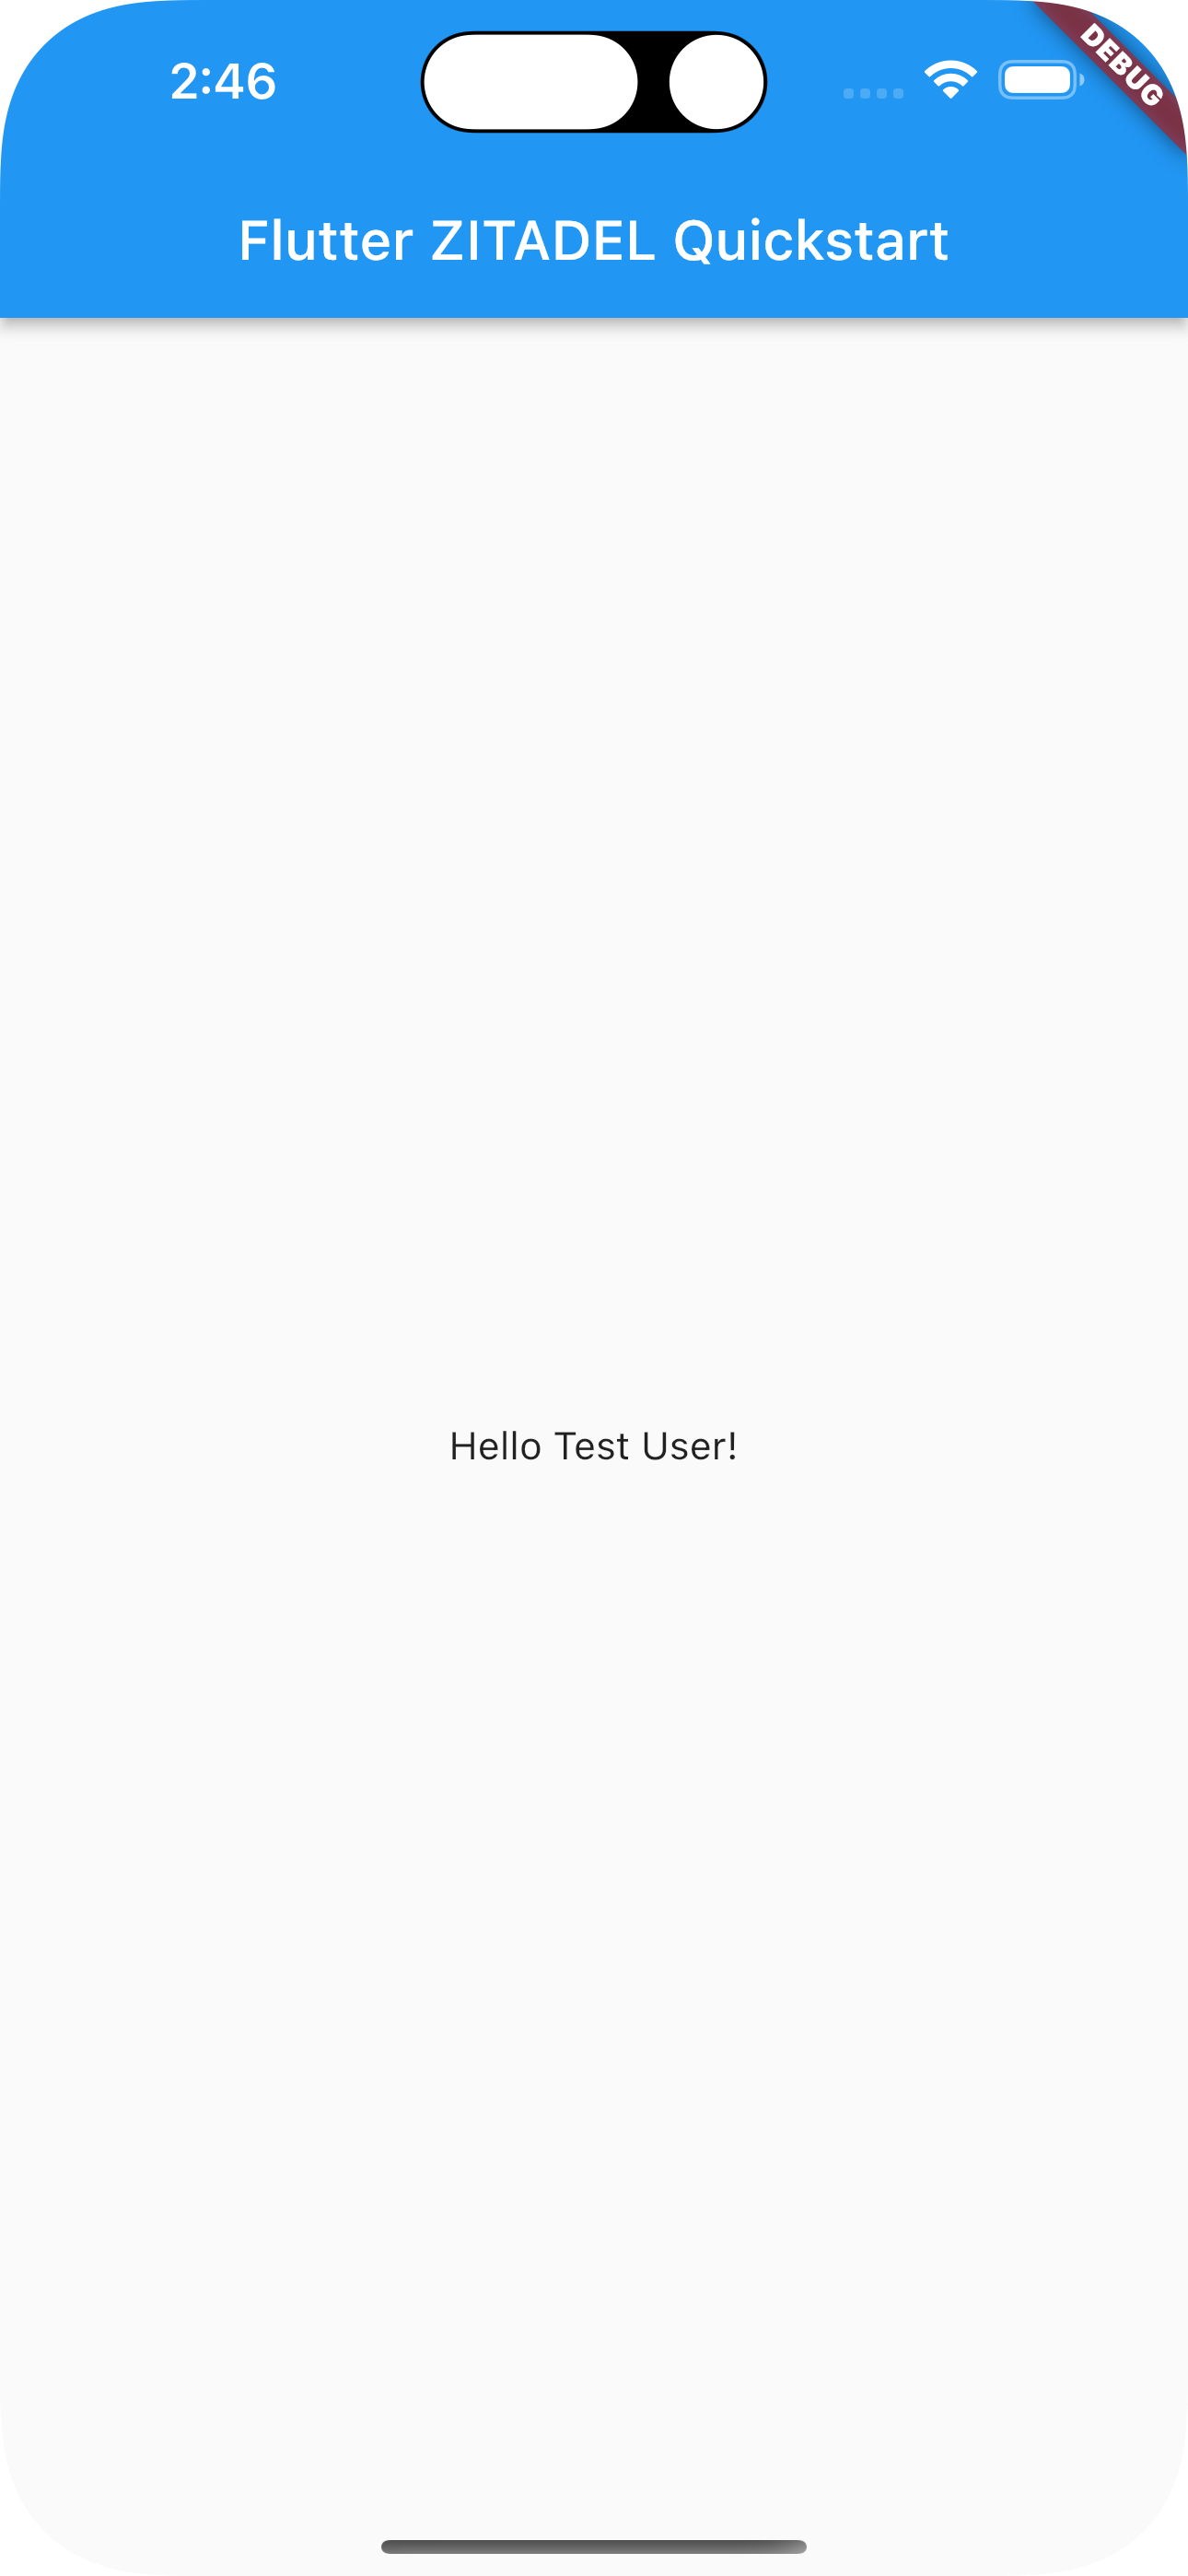
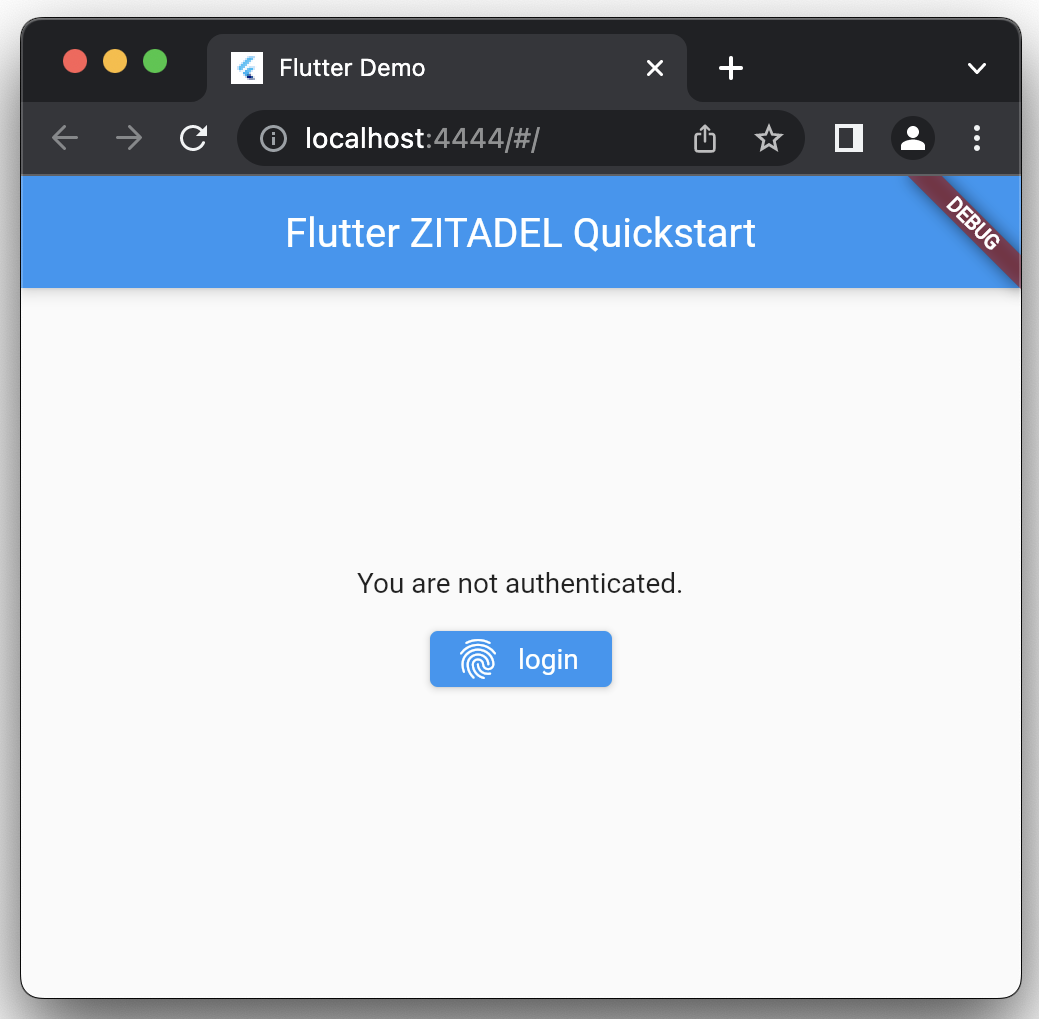
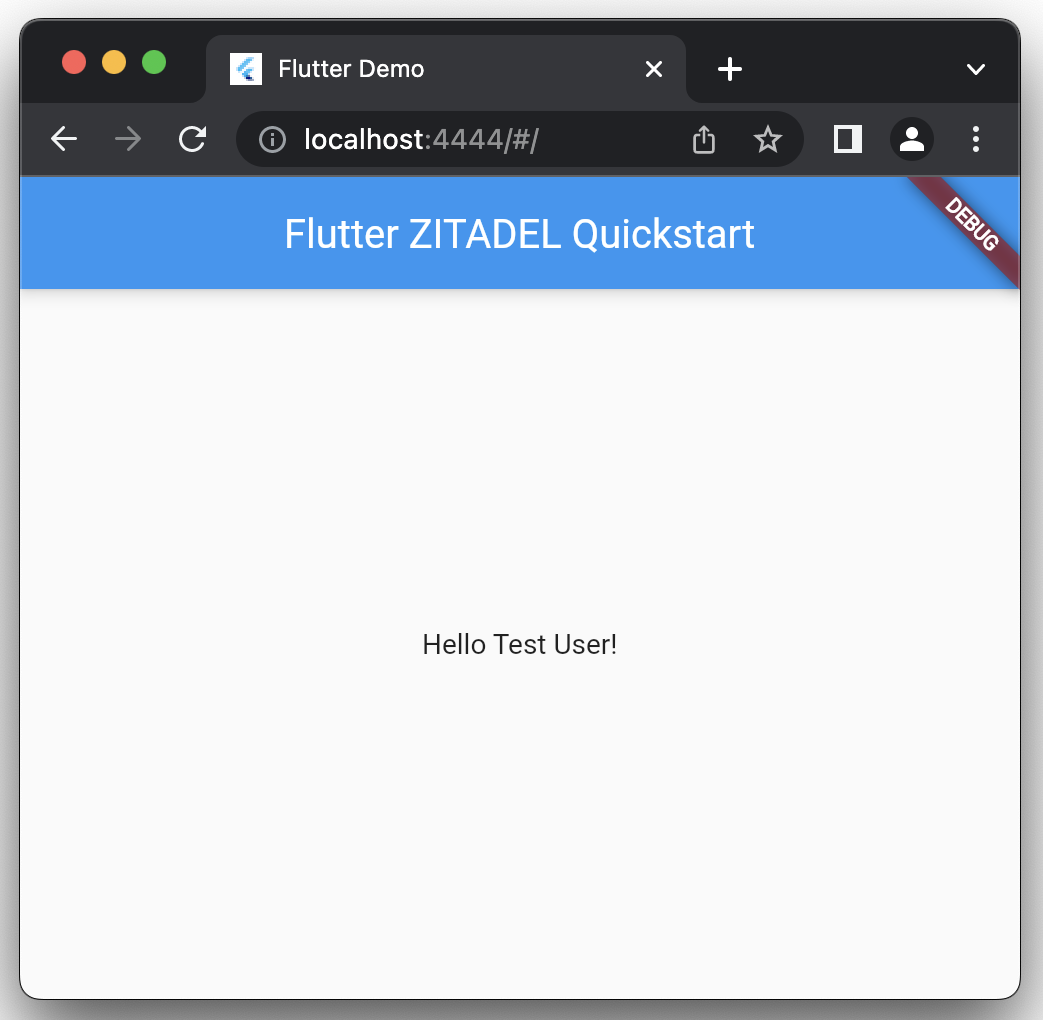
Result
If everything works out correctly, your applications should look like this:
Was this page helpful?