Go Web Application Login with ZITADEL
This integration guide demonstrates the recommended way to incorporate ZITADEL into your Go web application. It explains how to enable user login in your application and how to fetch data from the user info endpoint.
ℹ️ These examples and guides are based on our official Go SDK.
The SDK is a convenient wrapper around our low-level OIDC library. For most use cases, using the helpers provided in our Go SDK is the recommended approach for implementing authentication.
By the end of this guide, your application will have login functionality and will be able to access the current user's profile.
This documentation references our example on GitHub. You can either create your own application or directly run the example by providing the necessary arguments.
Set up application
Before we begin developing our application, we need to perform a few setup steps in the ZITADEL Console. You'll need to provide some information about your app. We recommend creating a new app to start from scratch. Navigate to your Project, then add a new application at the top of the page. Select the Web application type and continue.
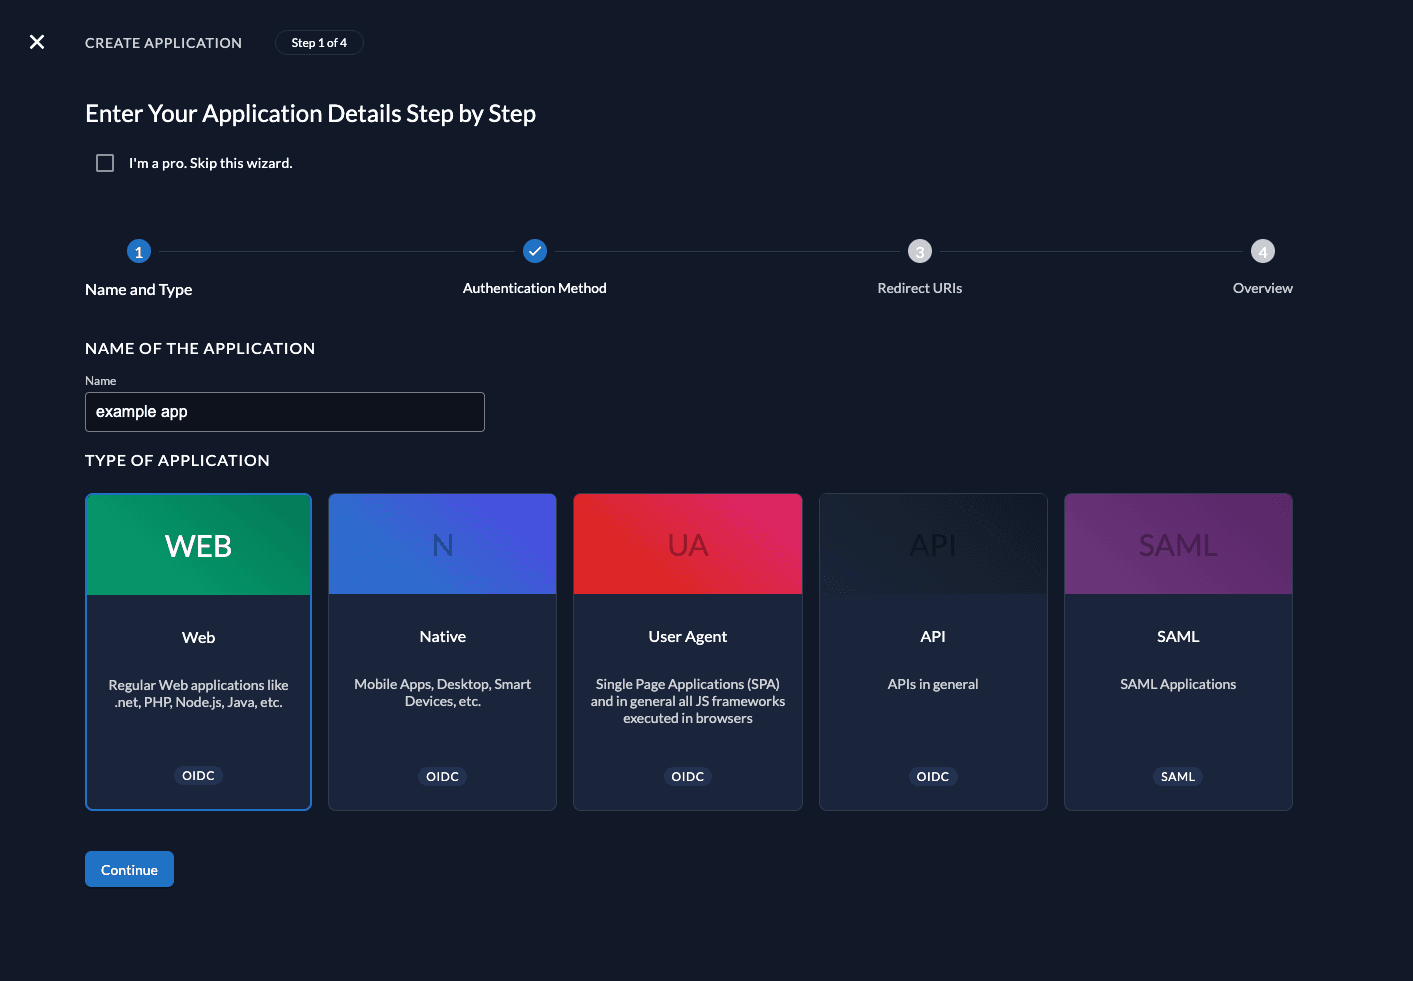
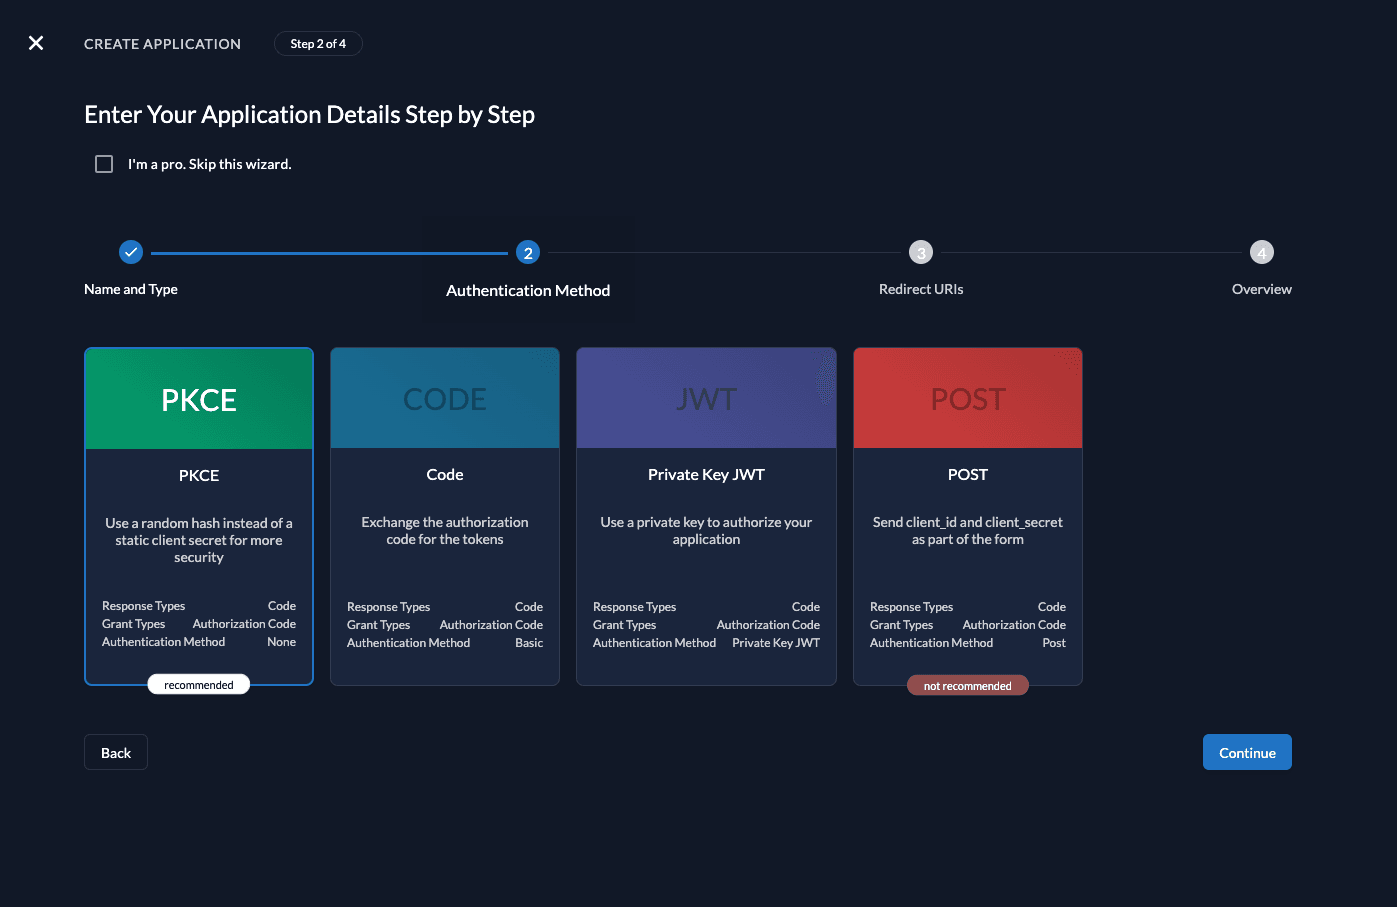
We recommend that you use Proof Key for Code Exchange (PKCE) for all applications.
Redirect URIs
The Redirect URIs field tells ZITADEL where it's allowed to redirect users after authentication. For development, you can set dev mode to true to enable insecure HTTP and redirect to a localhost URI.
The Post-logout redirect send the users back to a route on your application after they have logged out.
If you are following along with the example, set the dev mode to
true, the Redirect URIs tohttp://localhost:8089/auth/callbackand Post-logout redirect URI to http://localhost:8089/>.
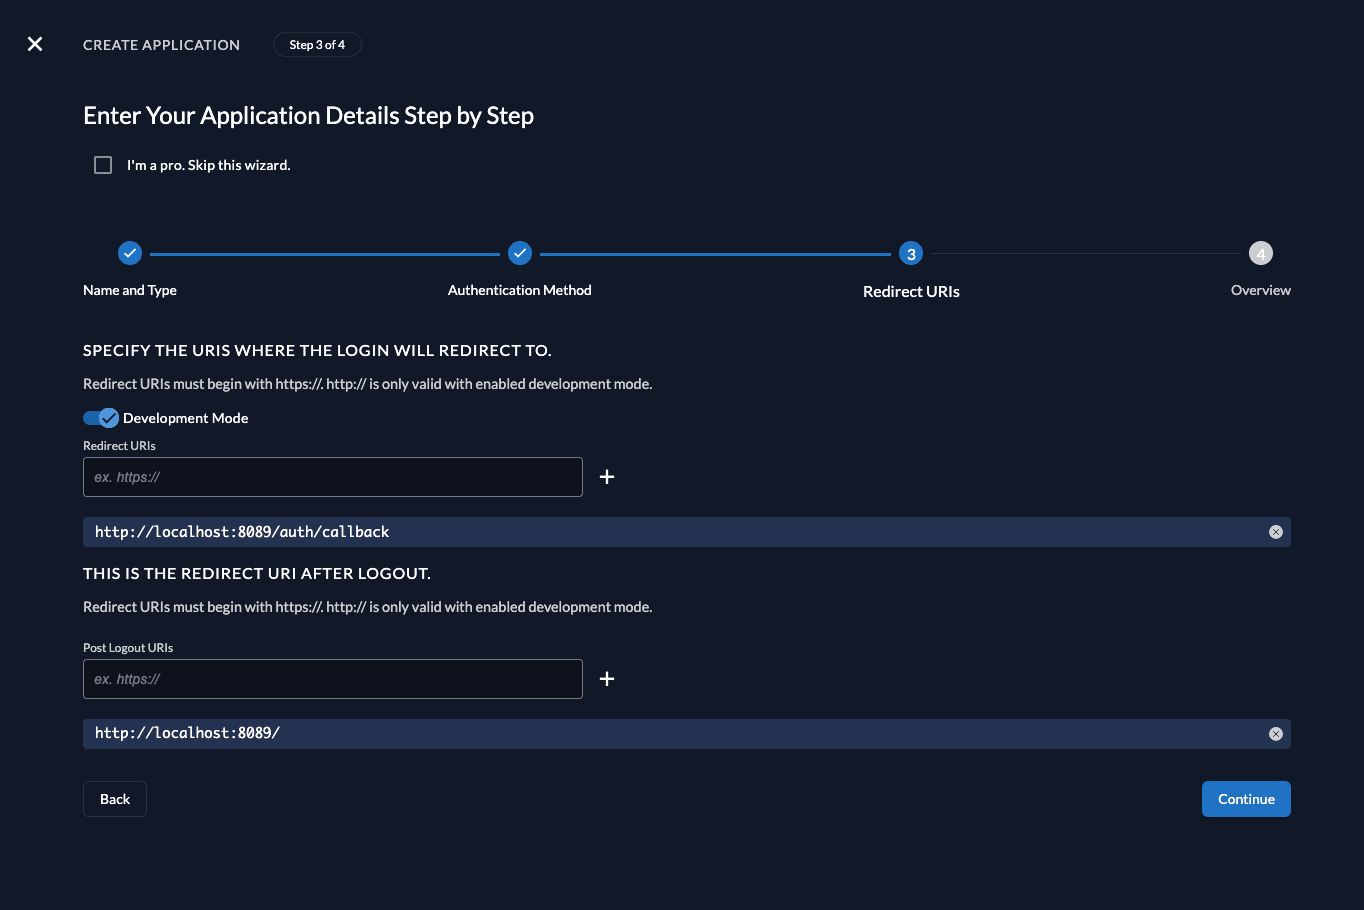
Continue and create the application.
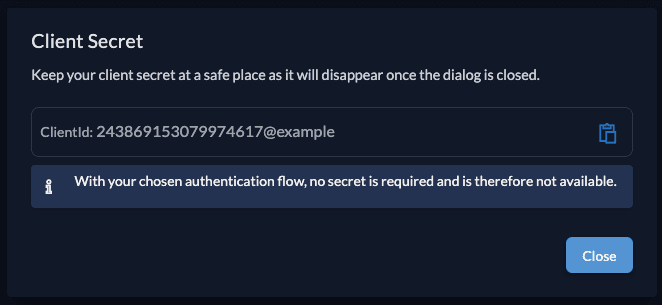
Client ID
After successful creation of the app, a pop-up will appear displaying the app's client ID. Copy the client ID, as you will need it to configure your Go application.
Go setup
Now that you have configured your web application on the ZITADEL side, you can proceed with the integration of your Go application.
Install ZITADEL Go SDK
To connect with ZITADEL, you need to install an OAuth/OIDC client. Run the following command:
go get -u github.com/zitadel/zitadel-go/v3Create the application server
Create a new go file with the content below. This will create an application with a home and profile page.
package mainimport ( "context" "embed" _ "embed" "encoding/json" "errors" "flag" "fmt" "html/template" "log/slog" "net/http" "os" "github.com/zitadel/zitadel-go/v3/pkg/authentication" openid "github.com/zitadel/zitadel-go/v3/pkg/authentication/oidc" "github.com/zitadel/zitadel-go/v3/pkg/zitadel")var ( // flags to be provided for running the example server domain = flag.String("domain", "", "your ZITADEL instance domain (in the form: https://<instance>.zitadel.cloud or https://<yourdomain>)") key = flag.String("key", "", "encryption key") clientID = flag.String("clientID", "", "clientID provided by ZITADEL") redirectURI = flag.String("redirectURI", "", "redirectURI registered at ZITADEL") port = flag.String("port", "8089", "port to run the server on (default is 8089)") //go:embed "templates/*.html" templates embed.FS)/* This example demonstrates how to authenticate a user for your application with ZITADEL using the provided authentication (AuthZ) middleware. The main endpoint of the application is the /profile page, where some information about the authenticated user will be displayed. Additionally, the authentication handler will register some routes on the /auth path prefix, to be able to redirect the user to the Login UI and back for authentication as well as for the sign-out.*/func main() { flag.Parse() ctx := context.Background() t, err := template.New("").ParseFS(templates, "templates/*.html") if err != nil { slog.Error("unable to parse template", "error", err) os.Exit(1) } // Initiate the authentication by providing a zitadel configuration and handler. // This example will use OIDC/OAuth2 PKCE Flow, therefore you will also need to initialize that with the generated client_id: authN, err := authentication.New(ctx, zitadel.New(*domain), *key, openid.DefaultAuthentication(*clientID, *redirectURI, *key), ) if err != nil { slog.Error("zitadel sdk could not initialize", "error", err) os.Exit(1) } // Initialize the middleware by providing the sdk mw := authentication.Middleware(authN) router := http.NewServeMux() // Register the authentication handler on your desired path. // It will register the following handlers on it: // - /login (starts the authentication process to the Login UI) // - /callback (handles the redirect back from the Login UI) // - /logout (handles the logout process) router.Handle("/auth/", authN) // This endpoint is only accessible with a valid authentication. If there is none, it will directly redirect the user // to the Login UI for authentication. If successful (or already authenticated), the user will be presented the profile page. router.Handle("/profile", mw.RequireAuthentication()(http.HandlerFunc(func(w http.ResponseWriter, req *http.Request) { // Using the [middleware.Context] function we can gather information about the authenticated user. // This example will just print a JSON representation of the UserInfo of the typed [*oidc.UserInfoContext]. authCtx := mw.Context(req.Context()) data, err := json.MarshalIndent(authCtx.UserInfo, "", " ") if err != nil { slog.Error("error marshalling profile response", "error", err) http.Error(w, err.Error(), http.StatusInternalServerError) return } err = t.ExecuteTemplate(w, "profile.html", string(data)) if err != nil { slog.Error("error writing profile response", "error", err) } }))) // This endpoint is accessible by anyone, but it will check if there already is a valid session (authentication). // If there is an active session, the information will be put into the context for later retrieval. router.Handle("/", mw.CheckAuthentication()(http.HandlerFunc(func(w http.ResponseWriter, req *http.Request) { // In this case we check for an active session and directly redirect the user to the profile page. // You could certainly also use [middleware.Context] to get more information and use it in the home page. if authentication.IsAuthenticated(req.Context()) { http.Redirect(w, req, "/profile", http.StatusFound) return } err = t.ExecuteTemplate(w, "home.html", nil) if err != nil { slog.Error("error writing home page response", "error", err) } }))) // start the server on the specified port (default http://localhost:8089) lis := fmt.Sprintf(":%s", *port) slog.Info("server listening, press ctrl+c to stop", "addr", "http://localhost"+lis) err = http.ListenAndServe(lis, router) if !errors.Is(err, http.ErrServerClosed) { slog.Error("server terminated", "error", err) os.Exit(1) }}This will basically set up everything. So let's look at some parts of the code.
Register authentication handler:
For the authentication to work, the SDK needs some handlers in your application.
In this example we will register them on the /auth/ prefix.
The SDK itself will then register three routes on that to be able to:
- start the authentication process and redirect to the Login UI (
/auth/login) - continue with the authentication process after the login UI (
/auth/callback) - terminate the session (
/auth/logout)
router.Handle("/auth/", z.Authentication)Authentication checks
To ensure the user is authenticated before they are able to use your application, the middleware provides two options:
- You can either require the user to be authenticated. If they haven't already, they will be automatically redirected to the Login UI:
mw.RequireAuthentication()(handler) - You can just check the user's authentication status, but still continue serving the page:
mw.CheckAuthentication()(handler)
Authentication context
If you used either of the authentication checks above, you can then access context information in your handler:
mw.Context(req.Context())Add pages to your application
To be able to serve these pages create a templates directory in the same folder as you just created the go file.
Now create two HTML files in the new templates folder and copy the content of the examples:
home.html
The home page will display a short welcome message and allow the user to manually start the login process.
<html><head> <title>Example - Home</title></head><body style="text-align: center"><h1>Example App</h1><div> <p>Welcome to the ZITADEL example web app for Go</p> <a href="/auth/login">Login</a></div></body></html>profile.html
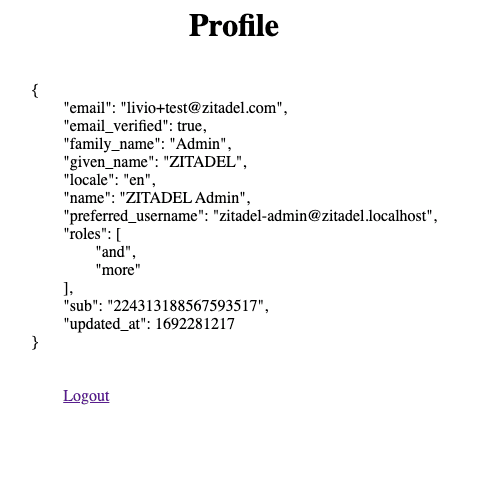
The profile page will display the Userinfo from the authentication context and allow the user to logout.
<html><head> <title>Example App - Profile</title></head><body><div> <h1 style="text-align: center">Profile</h1> <p style="white-space: pre; left: 50%; transform: translateX(-50%); position: absolute">{{.}} <br> <a href="/auth/logout">Logout</a> </p></div></body></html>Start your application
You will need to provide some values for the program to run:
domain: Your ZITADEL Custom Domain, e.g. my-domain.zitadel.cloudkey: Random secret string. Used for symmetric encryption of state parameters, cookies and PKCE.clientID: The clientID provided by ZITADELredirectURI: The redirectURI registered at ZITADELport: The port on which the API will be accessible, default it 8089
go run main.go --domain <custom domain> --key <key> --clientID <clientID> --redirectURI <redirectURI>This could look like:
go run main.go --domain my-domain.zitadel.cloud --key XKv2Lqd7YAq13NUZVUWZEWZeruqyzViM --clientID 243861220627644836@example --redirectURI http://localhost:8089/auth/callbackIf you then visit on http://localhost:8089 you should get the following screen:

By clicking on Login you will be redirected to your ZITADEL instance. After login with your existing user you will be presented the profile page:
Completion
Congratulations! You have successfully integrated your Go application with ZITADEL!
If you get stuck, consider checking out our example application. This application includes all the functionalities mentioned in this quickstart. You can directly start it with your own settings. If you face issues, contact us or raise an issue on GitHub.
Was this page helpful?