ZITADEL Roles and Role Assignments
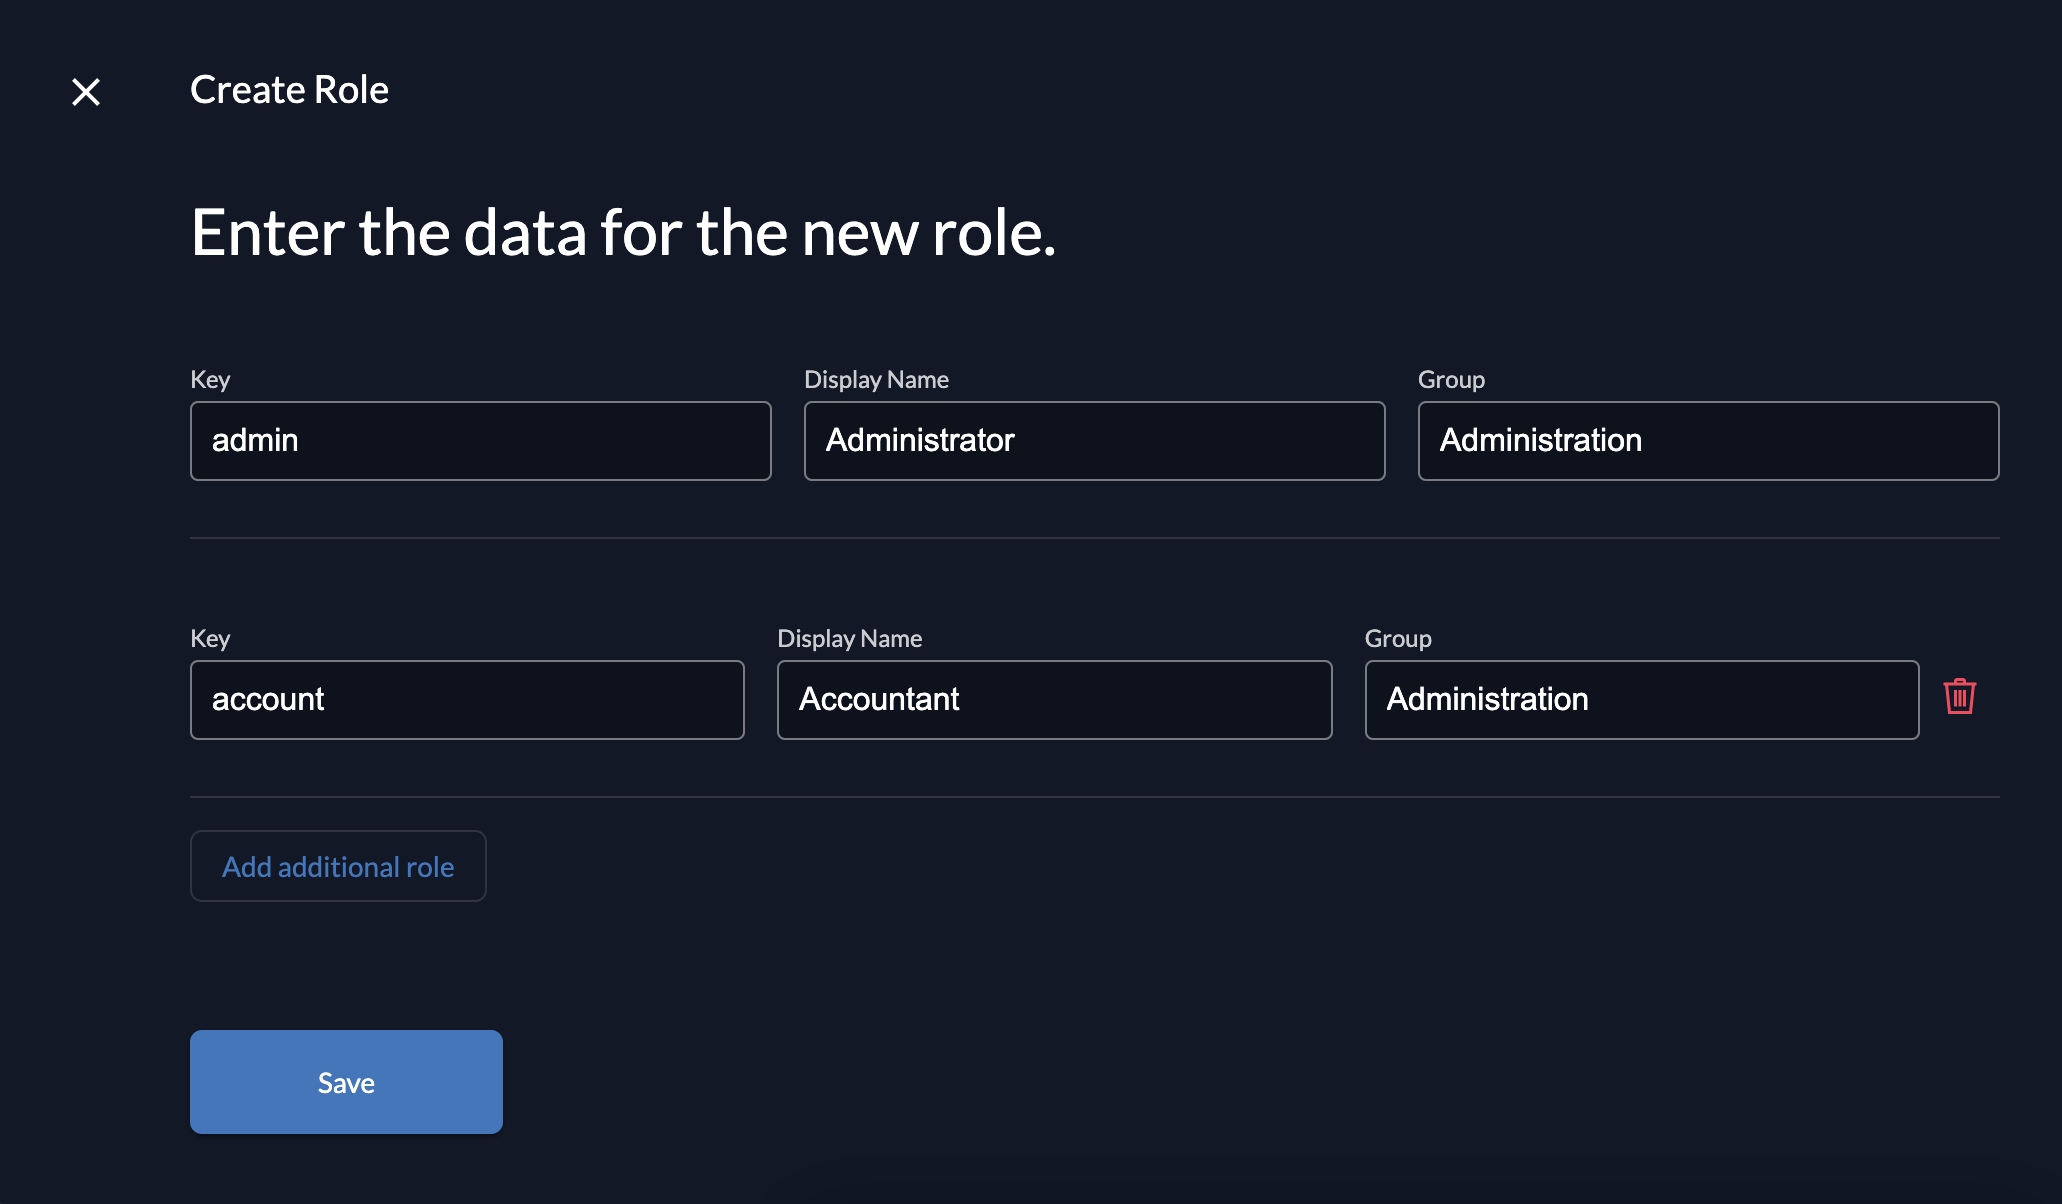
If you built out the POS use case example, you would probably need an application for administration. In this application you would probably have somebody accessing as an accountant and somebody as an administrator, who is somebody with enhanced rights. To achieve this, you would have to add this distinction as roles. To add roles, jump to the section Roles and create those new roles with the following values
- Key: admin
- Display Name: Administrator
- Group: Administration
and
- Key: account
- Display Name: Accountant
- Group: Administration
The Key is used for coding (can then, for example, be requested in the ID Token).
The Display Name is just for you to remember its use case
The Group is to make it easier to assign multiple roles at once.
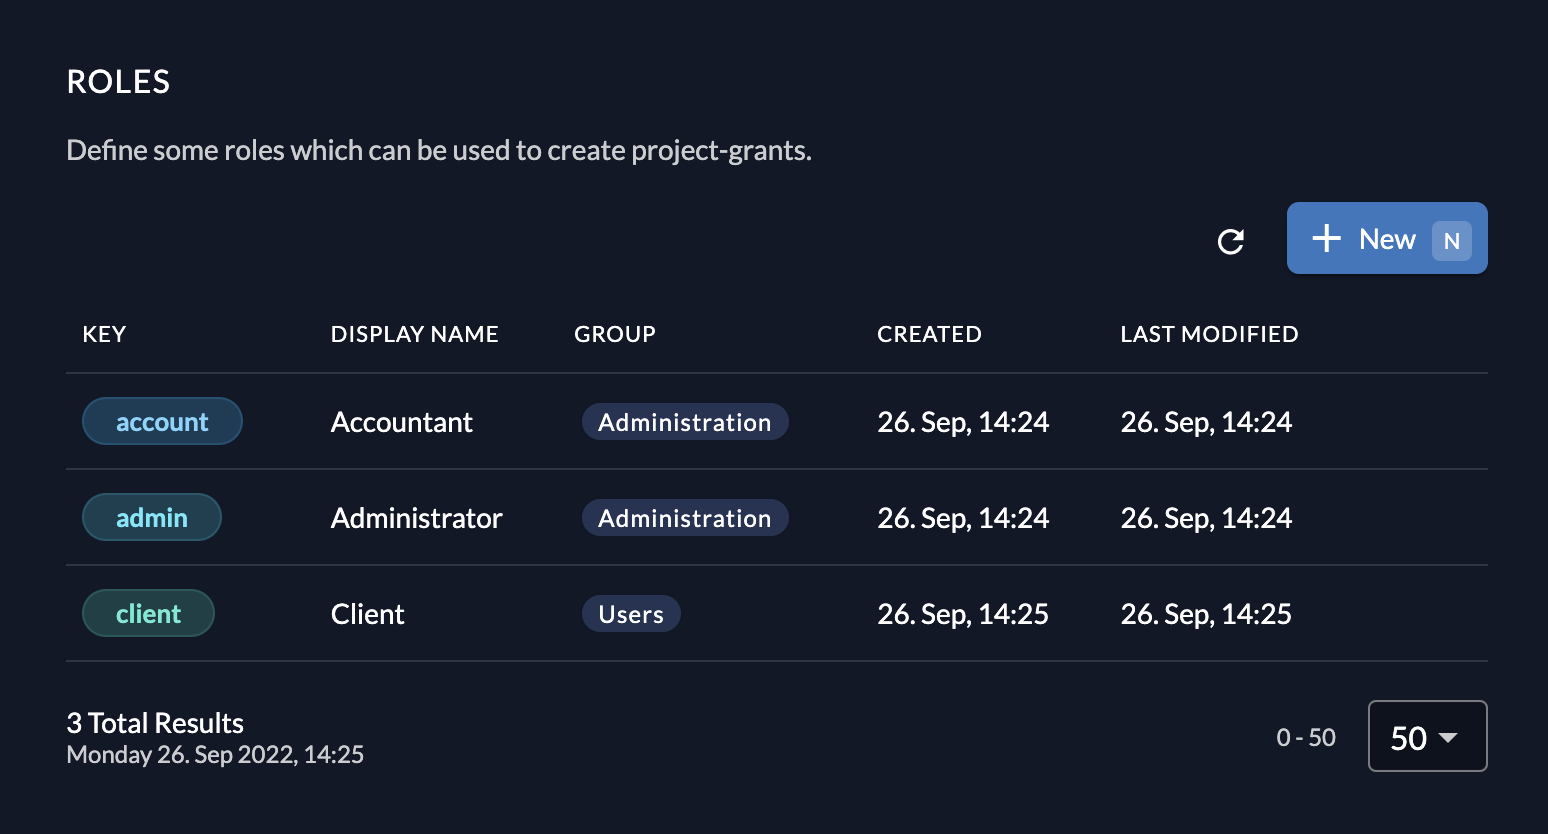
The role client is for another application of the project
POS, as all possible roles from your POS applications are defined in your project.
Role Assignments
Now, to make use of these roles, add a role assignment. A role assignment combines a user of your organization with one or multiple roles.
You can also add users of other organizations. Click on the hint below the username field to create an external user role assignment.
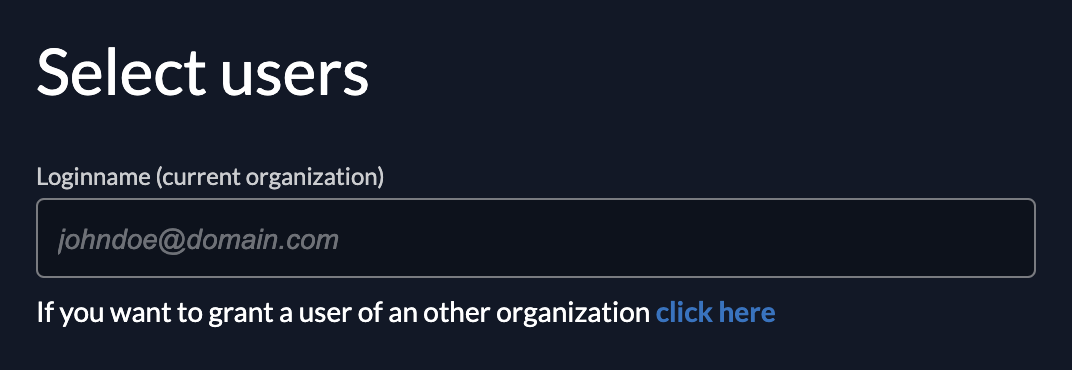
If you want to test your application with your own user, navigate to the Role Assignments section under your project and click on new.
Type your username, hit "Continue," select the roles you want your user to have, and save. If you want to add all roles of the Administration group, you can click on the group to select all.
Now you can retrieve those roles in your application. ZITADEL has multiple settings for you to access them more easily. Navigate to the General section of your project for more settings.
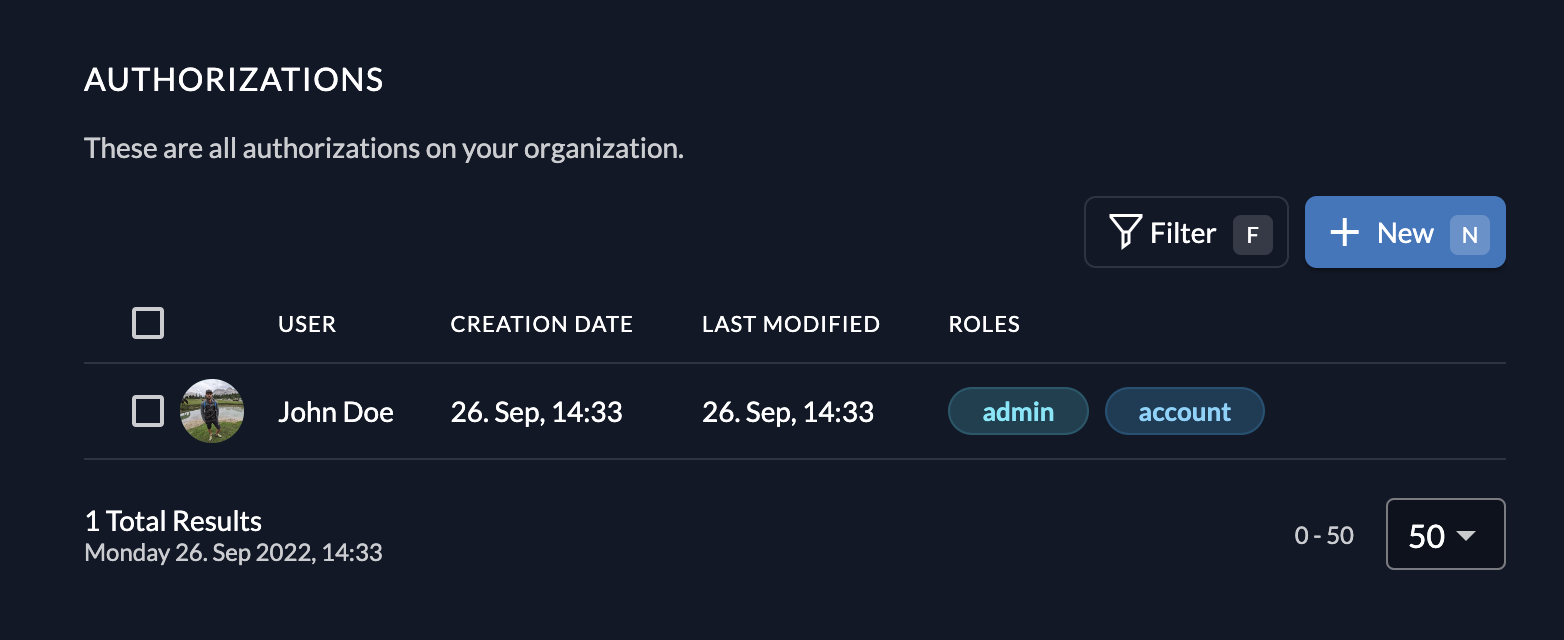
Note: We set up the role assignments from projects, but this can be achieved from multiple locations in the console. You can view and assign roles from the organization, the projects, or from the users page.
Was this page helpful?