Log in with ZITADEL on Ping Identity through SAML 2.0
This guide shows how to enable login with ZITADEL on Ping Identity.
It covers how to:
- create and configure the application in your project
- create and configure the connection in your Ping Identity tenant
Prerequisites:
- existing ZITADEL Instance, if not present follow this guide
- existing ZITADEL Organization, if not present follow this guide
- existing ZITADEL project, if not present follow the first 3 steps here
- existing Pingidentity environment here
We have to switch between ZITADEL and Ping Identity. If the headings begin with "ZITADEL" switch to the ZITADEL Management Console and if the headings start with "Ping" please switch to the PingIdentity GUI.
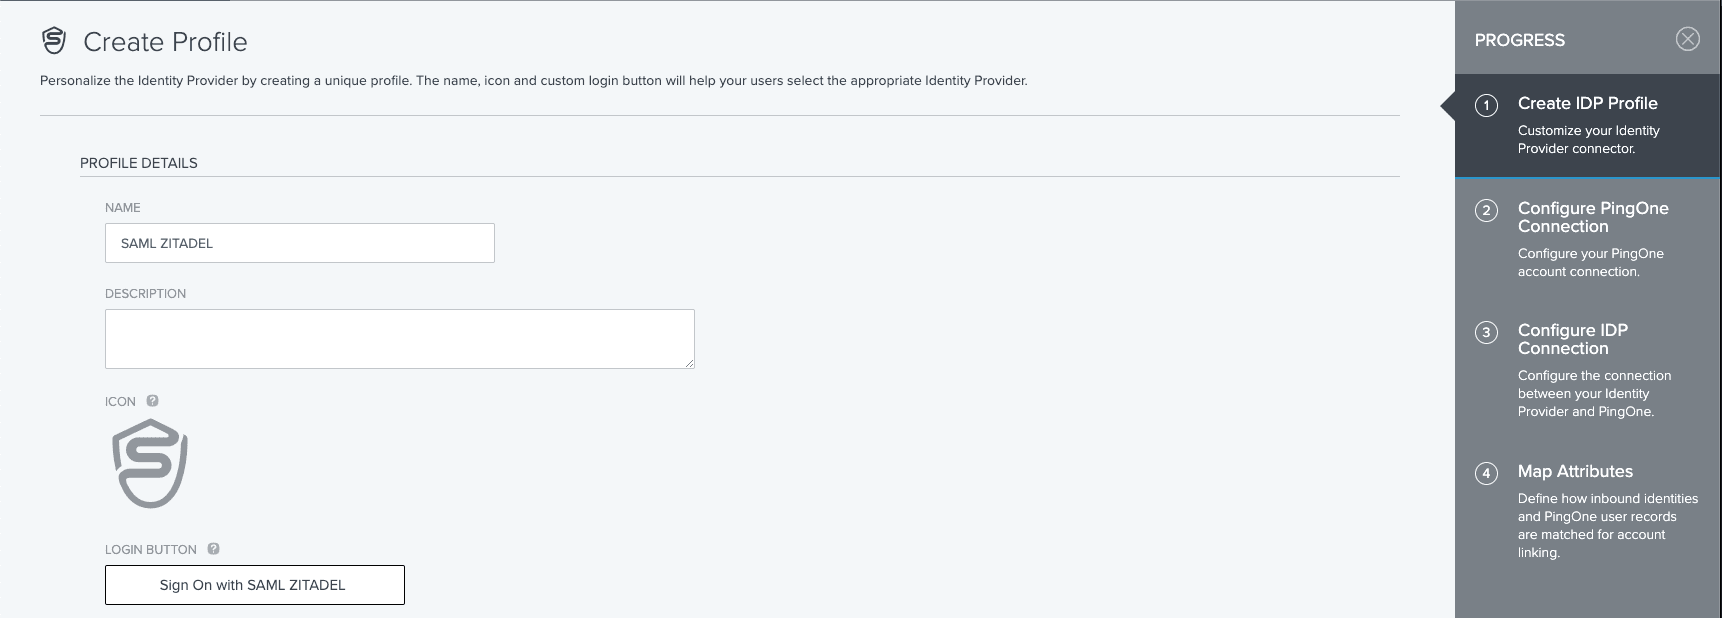
Ping: Create a new external identity provider
To add an external identity provider, you can follow the instructions here
- As described you have to create a new provider, with a unique identifier:
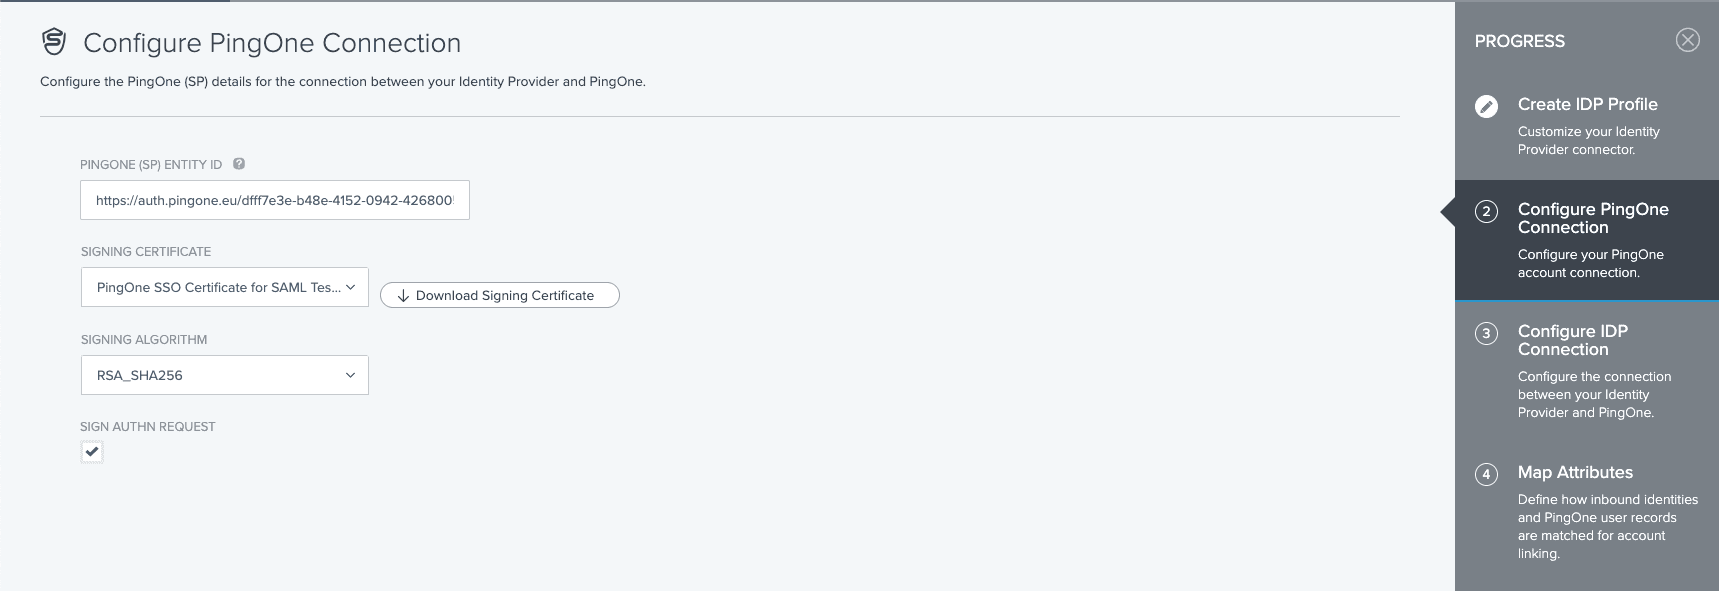
We recommend activating signing the auth request whenever possible:
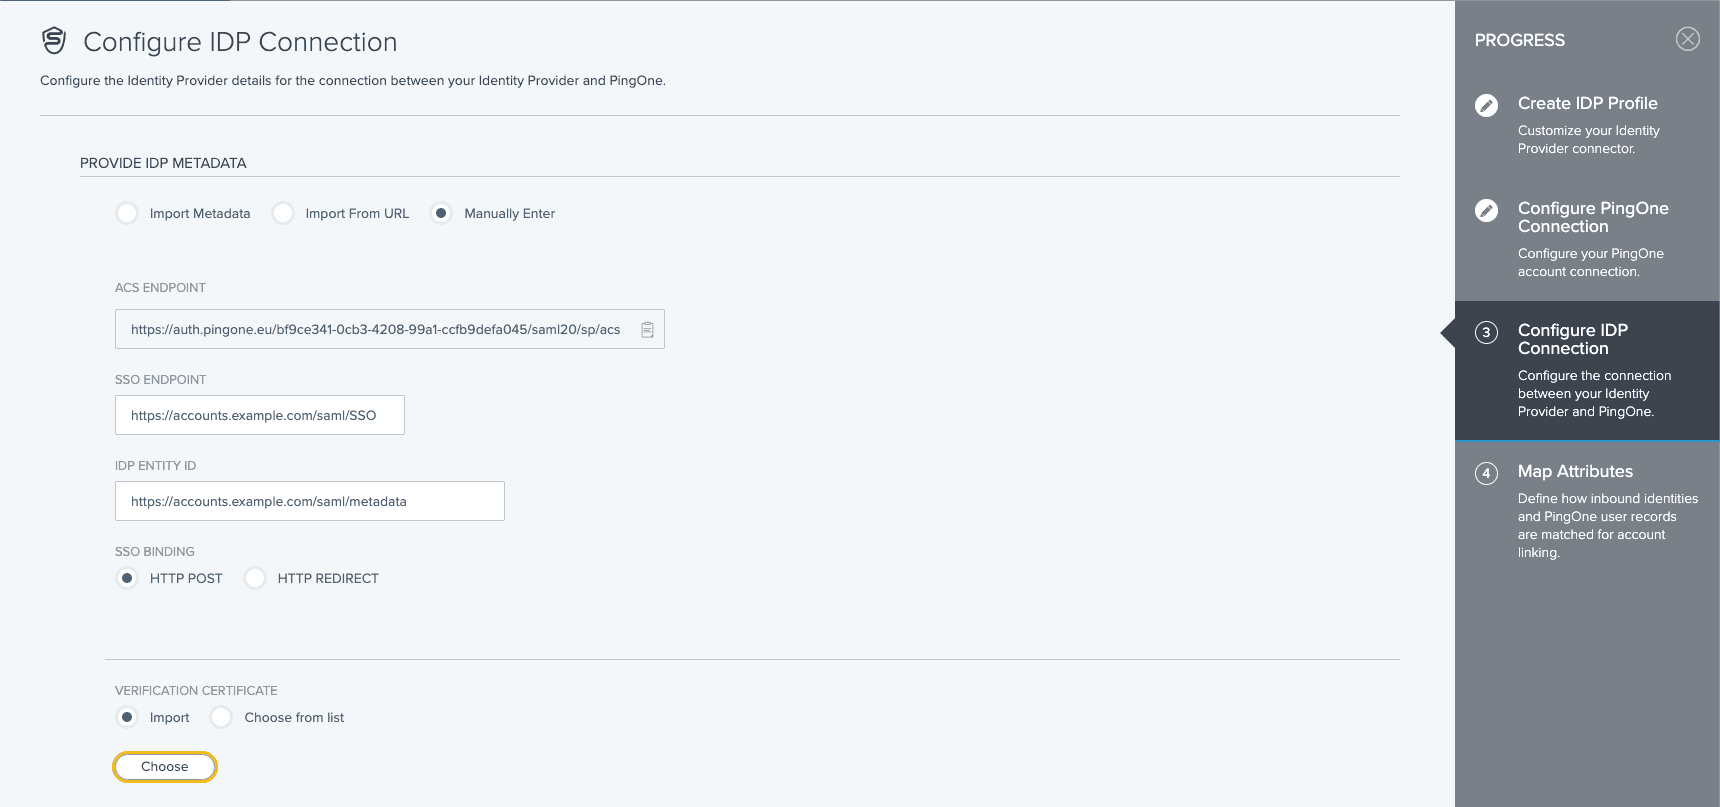
- Manually enter the necessary information:
- SSO Endpoint, for example https://accounts.example.com/saml/SSO
- IDP EntityID, for example https://accounts.example.com/saml/metadata
- Binding, which is a decision which you can take yourself, we recommend HTTP POST as it has fewer restrictions
- Import certificate, provided from the certificate endpoint
Everything you need to know about the attribute mapping you can find in Ping Identity's documentation
- With this you have defined to connection to ZITADEL as an external IDP, next is the policy to use ZITADEL as an IDP to connect to an application. The "How to" for that can be found here.
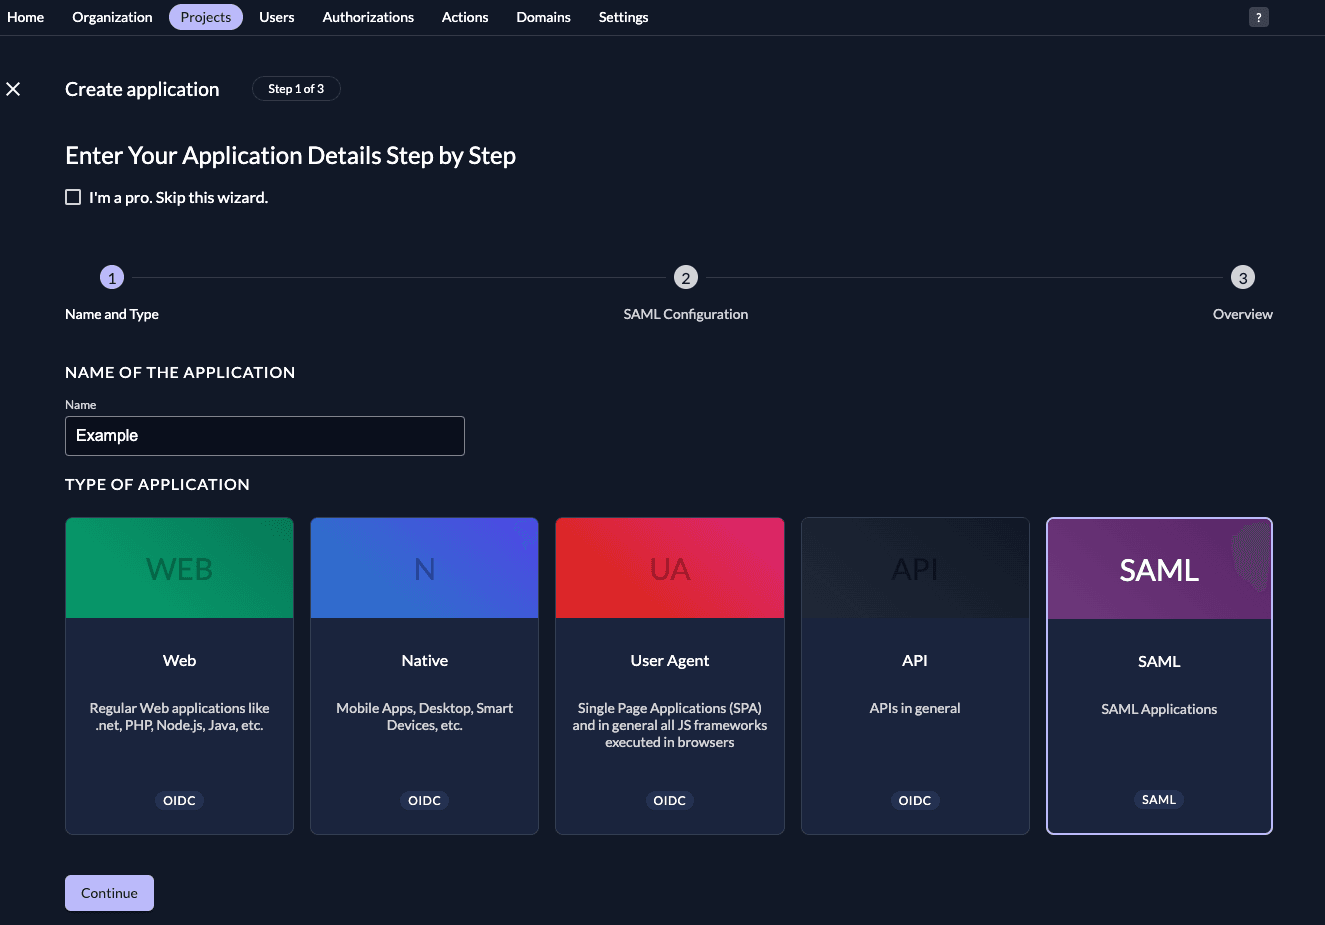
ZITADEL: Create the application
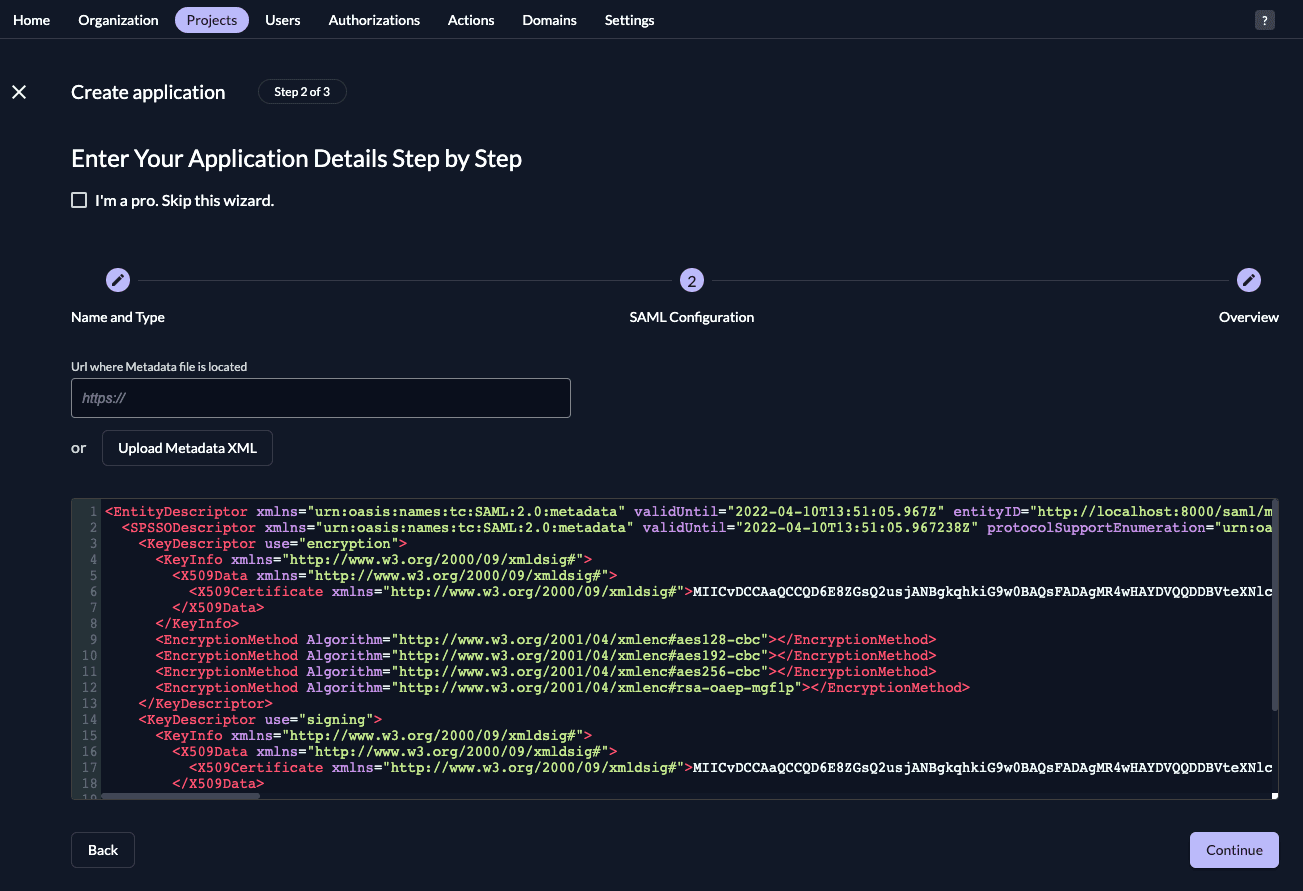
To add the connection to ZITADEL you have to build the metadata, which should minimalistic look like this, the necessary information can be found on the External IDPs page under "P1Connection" and "IDP Configuration" :
ENTITYID="PINGONE (SP) ENTITY ID"
        ACSURL="ACS ENDPOINT"
        <?xml version="1.0"?>
<md:EntityDescriptor xmlns:md="urn:oasis:names:tc:SAML:2.0:metadata" entityID="${ENTITYID}">
    <md:SPSSODescriptor
            protocolSupportEnumeration="urn:oasis:names:tc:SAML:2.0:protocol urn:oasis:names:tc:SAML:1.1:protocol">
        <md:AssertionConsumerService Binding="urn:oasis:names:tc:SAML:2.0:bindings:HTTP-POST" Location="${ACSURL}"
                                     index="0"/>
    </md:SPSSODescriptor>
</md:EntityDescriptor>

In your existing project:
- Press the "+"-button to add an application
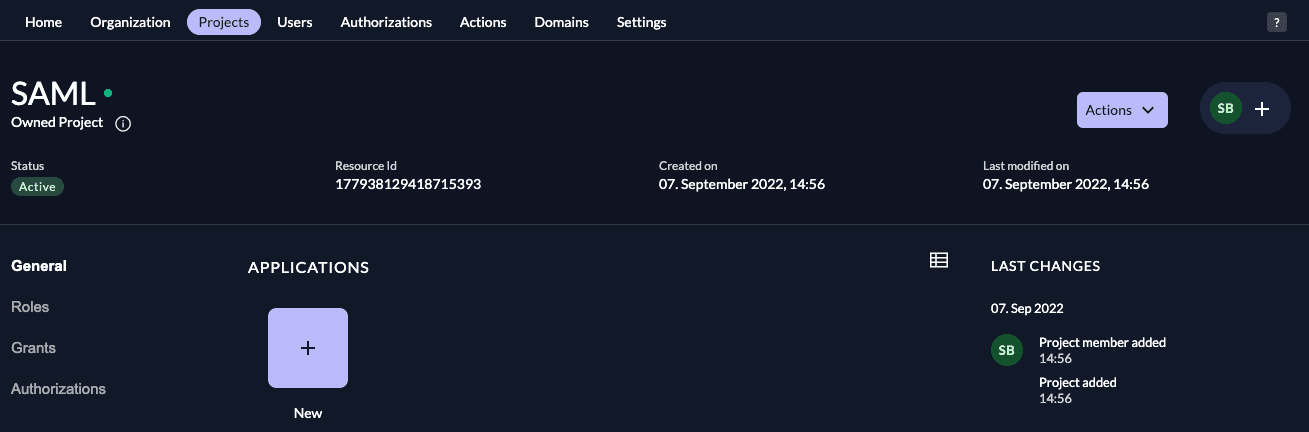
- Fill in a name for the application and chose the SAML type, then click "Continue".
- Either fill in the URL where ZITADEL can read the metadata from, or upload the metadata XML directly, then click "
Continue".
- Check your application, if everything is correct, press "Create".

Everything on the side of ZITADEL is done if the application is correctly created.
Was this page helpful?