Onboard B2B customers using organizations
In this guide we will explain how you can create and set up new organizations in ZITADEL to help you with your onboarding flows. Creating a new organization is the best choice for multi-tenancy use cases that require separation of customers, teams, or groups of users.
We will also explain how to leverage Administrators to delegate self-service team management and setting up policies to users of each organization.
When you want to build an onboarding process for your business customers you have to go through the following steps:
- Create an organization: The organization represents the customer or a team
- Create the first administrator user: This user is the account for your customer, which should be able to configure settings such as SSO, MFA, etc.
- Give the user permission to configure settings, create users and assign roles to users in ZITADEL
As soon as you have successfully created the organization and added an administrator, then your customer is able to start managing the organization and users themselves. The first actions they typically want to take are the following:
- Invite Team member
- Configure SSO
- Configure Security Settings
- Configure Branding
ZITADEL does have multiple possibilities to achieve that process.
Onboard customers through the ZITADEL Management Console
Each ZITADEL instance does automatically bring a management console with it. The console can be used to manage all your resources through a UI.
You can access it by calling the following URL: ${CUSTOM-DOMAIN}/ui/
Make sure that your admins have a Administrator role with permissions on an instance level such as "INSTANCE_OWNER"
Create a customer
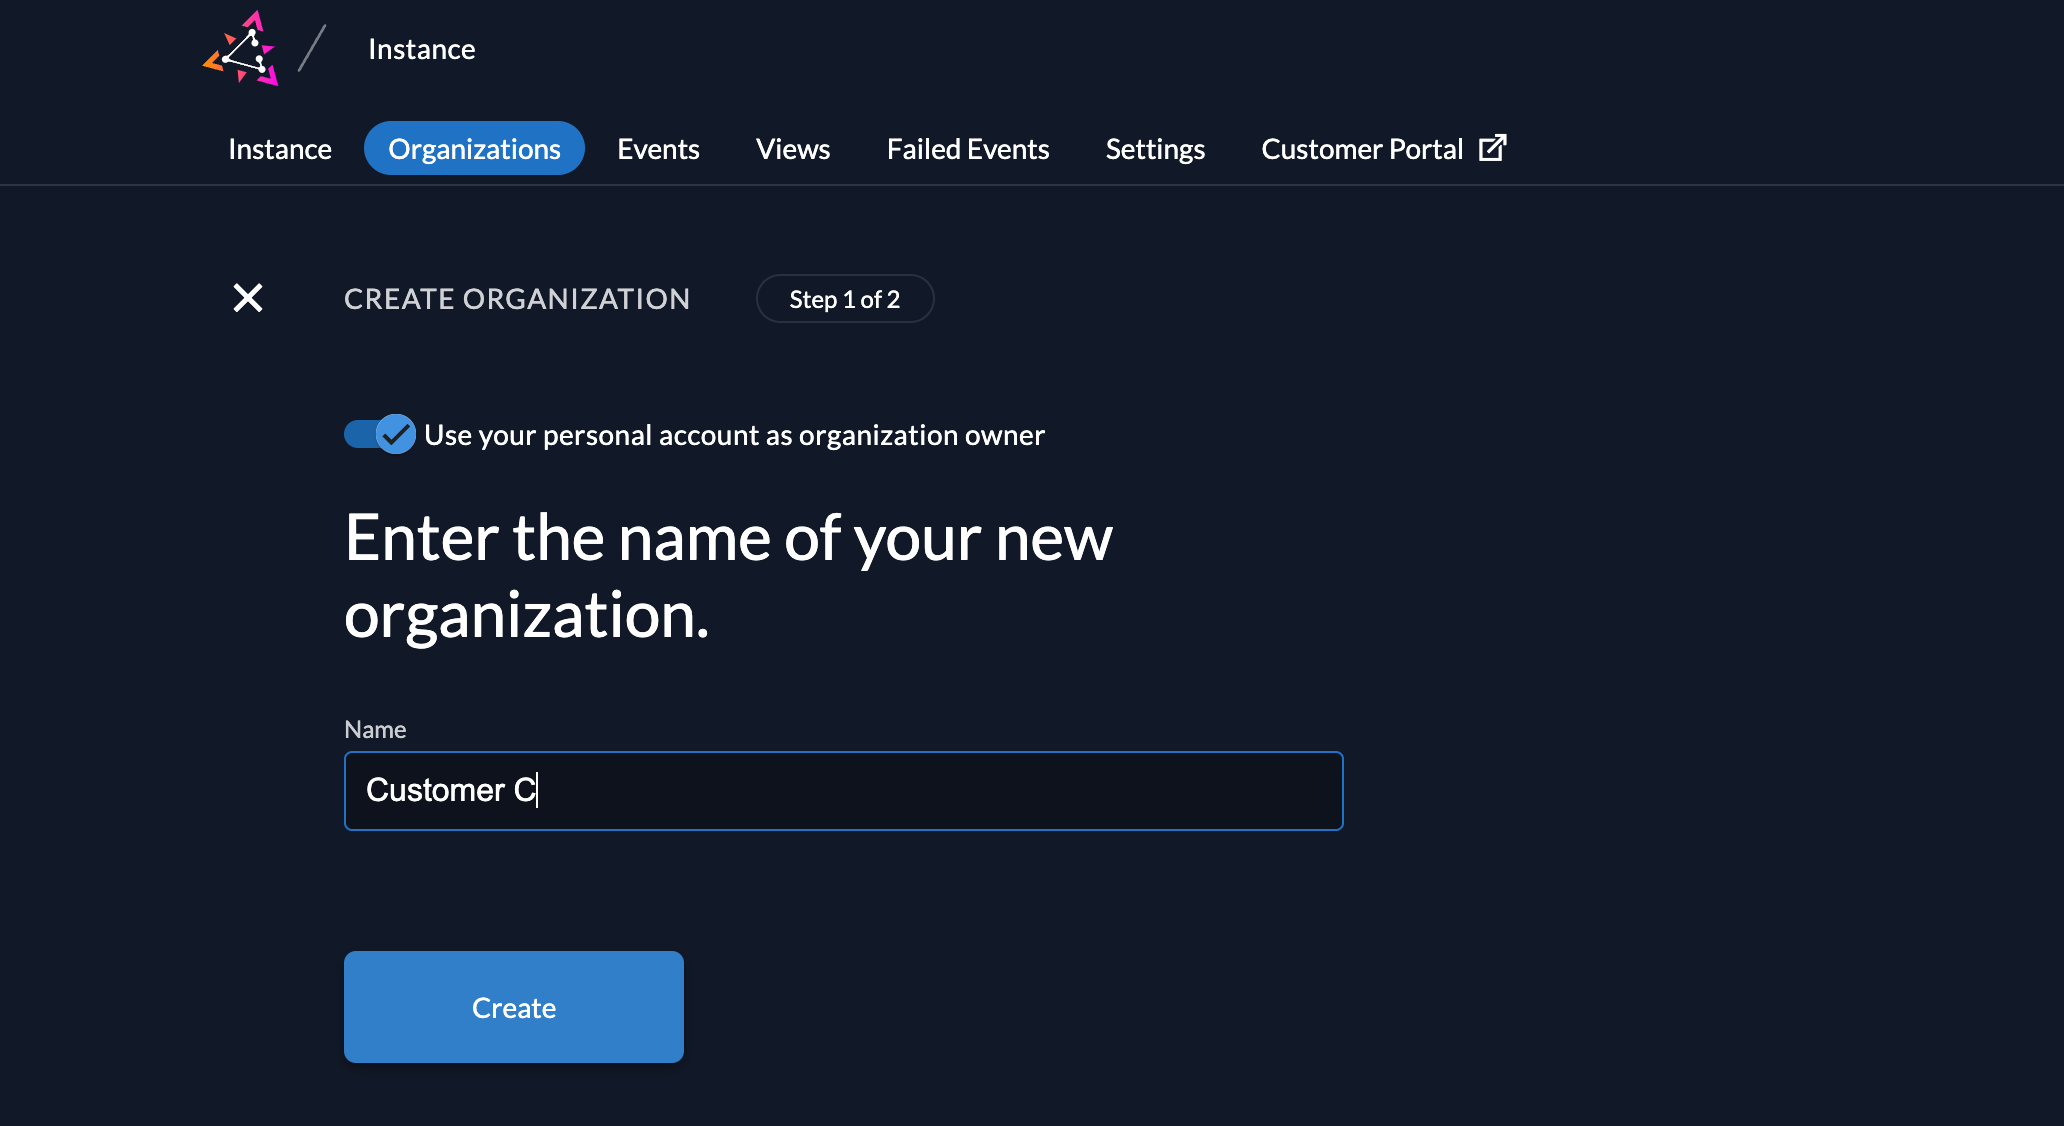
- Create a new Organization. Click the dropdown in the header and click "+ New Organization" to be redirected to the create organization screen.
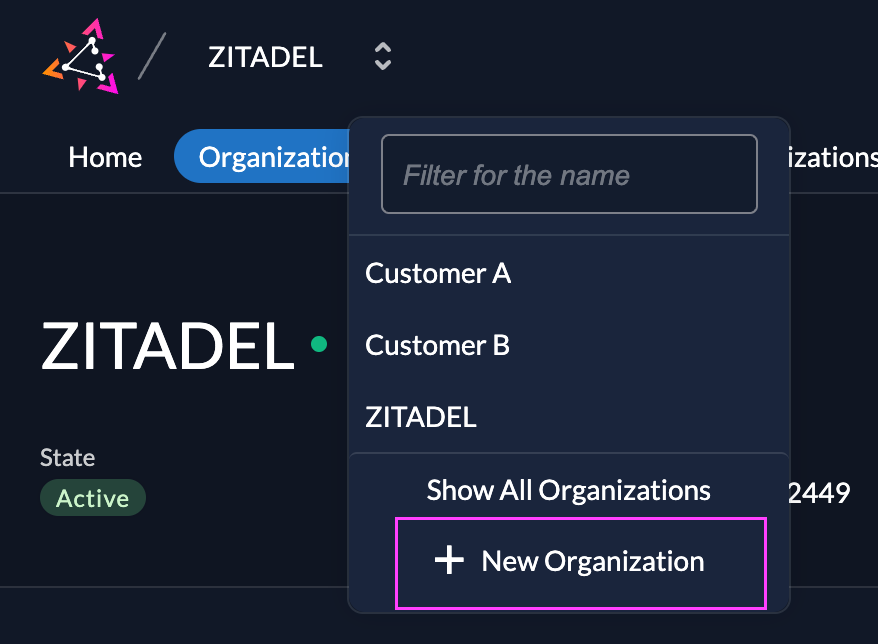
If the setting "Use your personal account as organization owner" is enabled, your user will automatically get the role "ORG_OWNER" in the organization. Give the organization a name and create it.
Click on the newly created organization in the list and you will switch your context to that organization.
Add First Administrator
Create the first user for your customer and ensure the user has enough permissions to self-manage the needed settings.
Create User
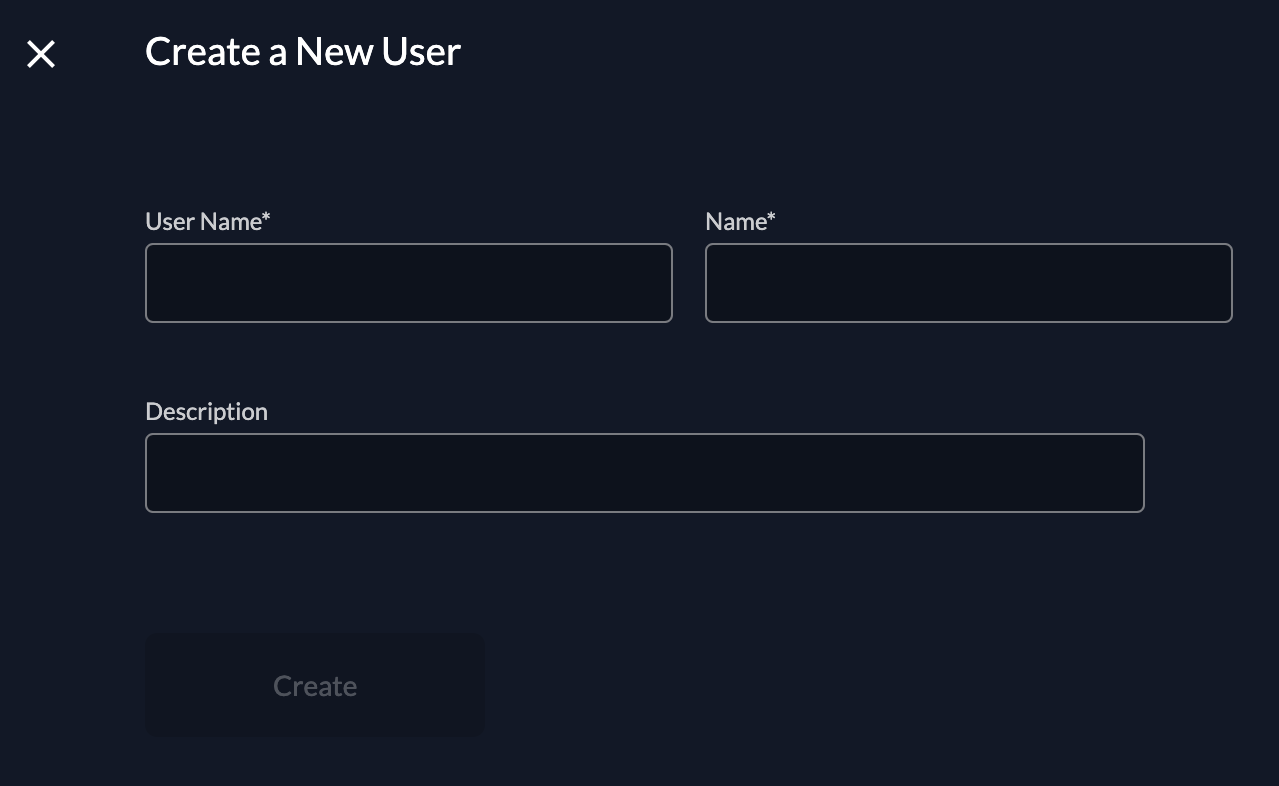
To create a new user, go to Users and click on New. Enter the required contact details and save by clicking “Create”.
If you started with Zitadel before version 3, you might have the "Human User [deprecated]" UI. In this case please enable the Feature Flag "Use V2 Api in Management Console for User creation" in the Default Settings.
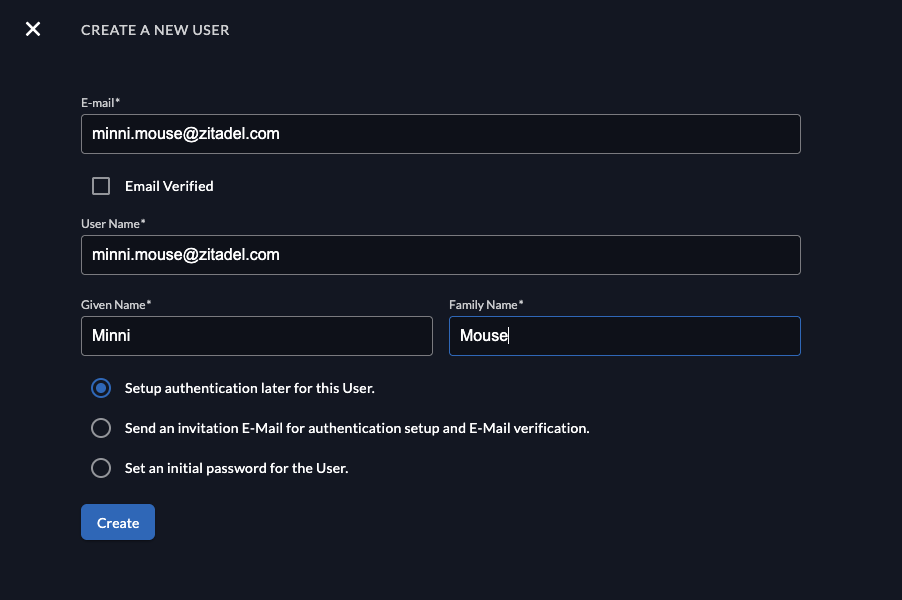
When creating a new user you have different options. First add the email, and select if the email address should be added automatically as "verified".
In the last section you can choose the authentication options:
- Setup authentication later for this user: This flow might be useful if an employee starts at a later point but you already want to prepare the account. The user will not have an authentication method, before they will be able to login, they need to setup a method.
- Send an invitation E-Mail for authentication setup and E-Mail verification: The user will receive an email and be able to setup an authentication method (e.g Password, Passkey, External SSO).
- When using the Zitadel Login V1 the user will be prompted to setup a password
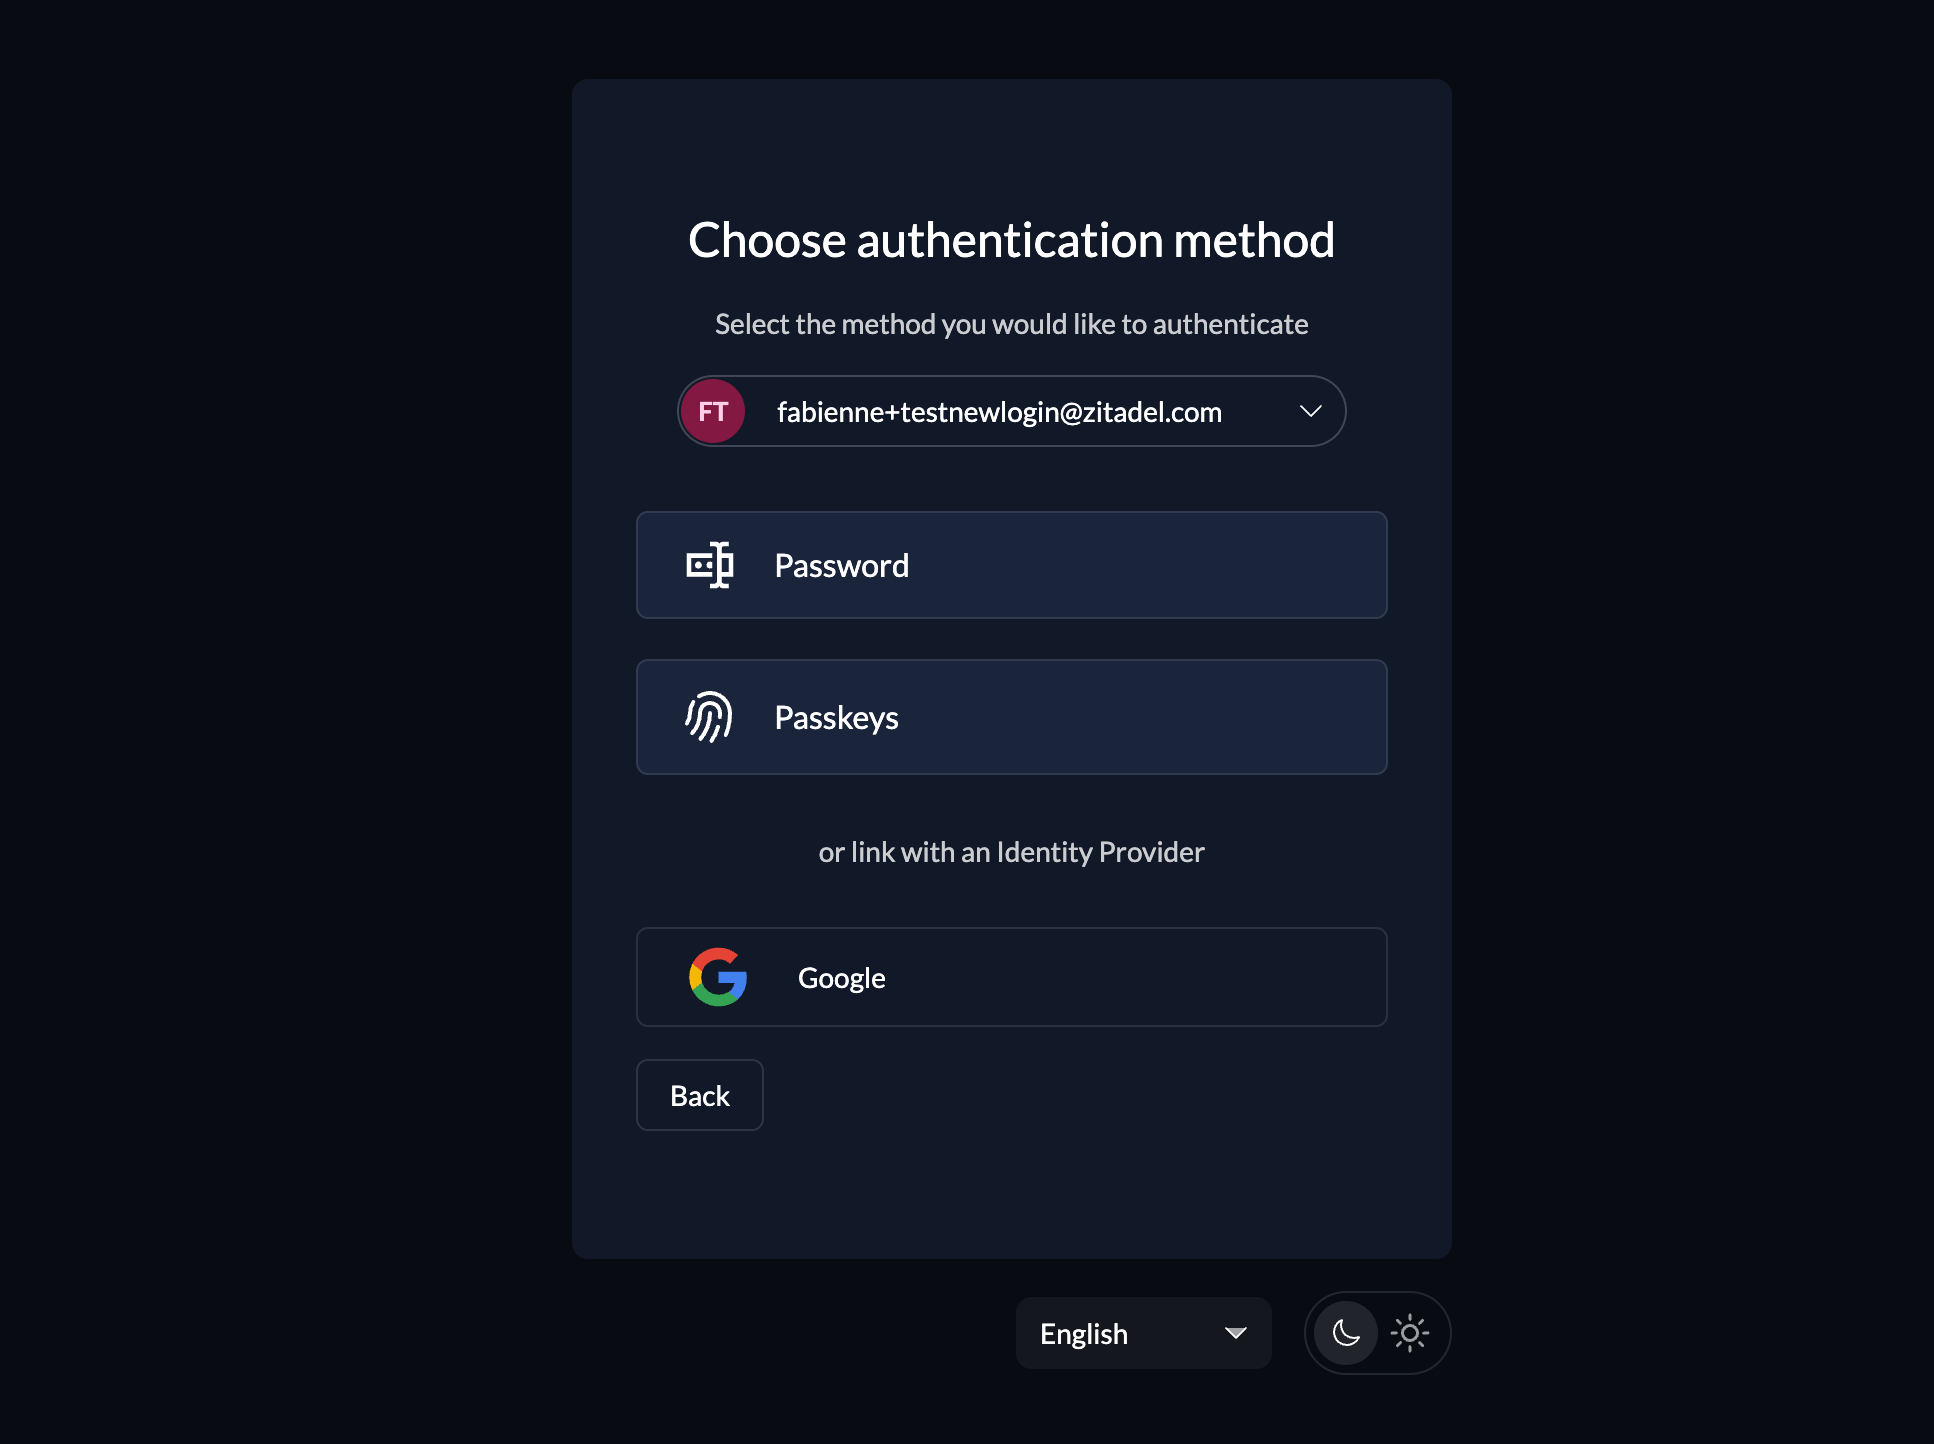
- When using the Zitadel Login V2 the user has the option to choose the authentication method (password, passkey, identity provider), based on the settings of the organization
- Set an initial password for the user: The user will receive an email and be able to setup an authentication method (e.g Password, Passkey, External SSO)
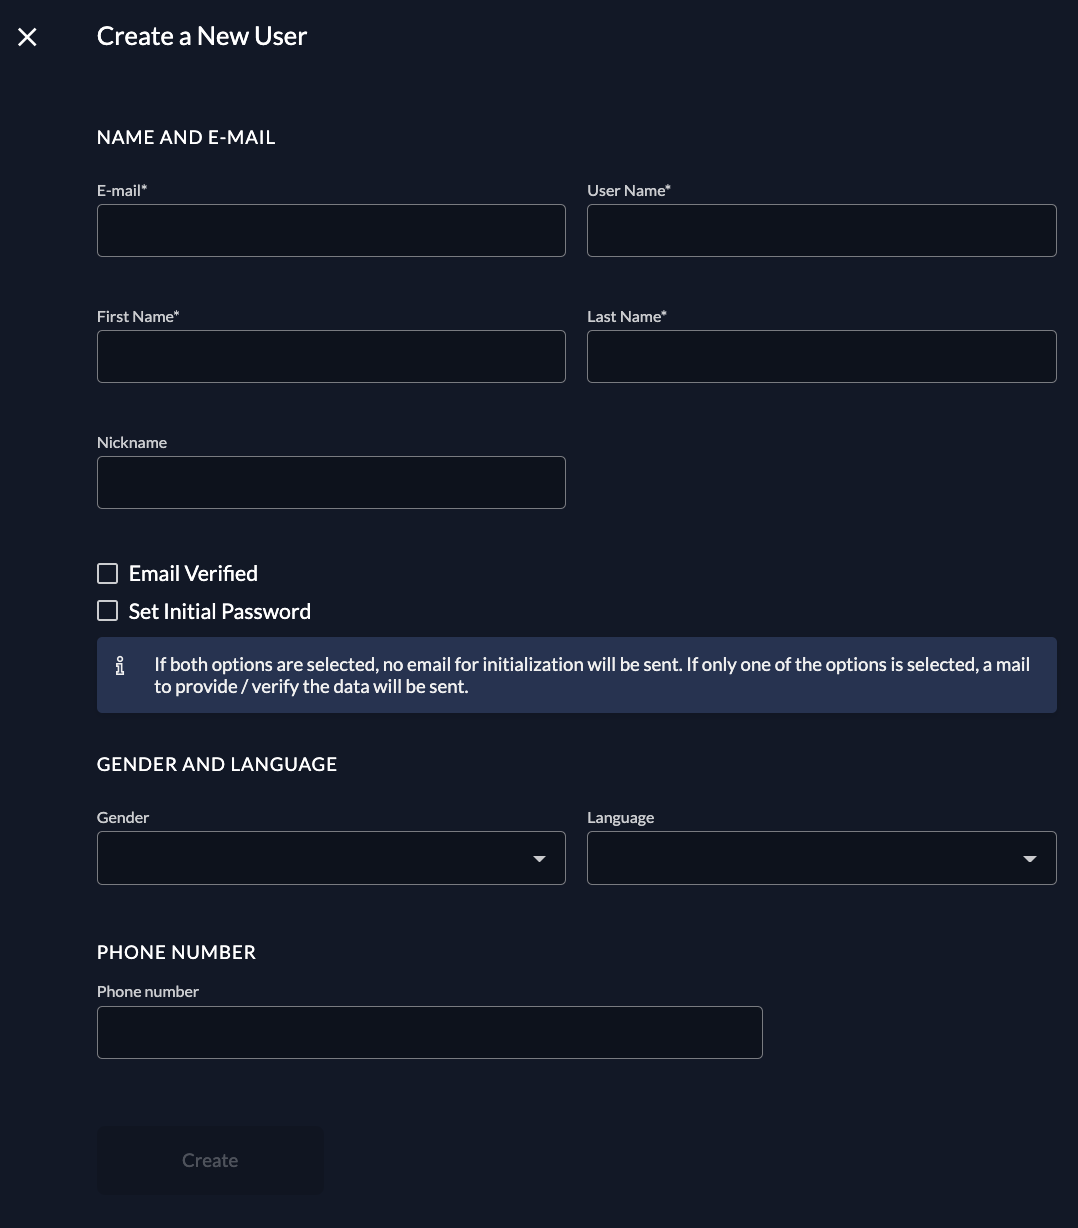
After a user is created, by default, an initialization mail with a code is sent to the registered email. This code then has to be verified on first login. If you want to omit this mail, you can check the email verified and set initial password toggle. If no password is set initially, the initialization mail prompting the user to set his password is sent.
You can prompt the user to add a second factor method too by checking the Force MFA toggle in Login behaviour settings.
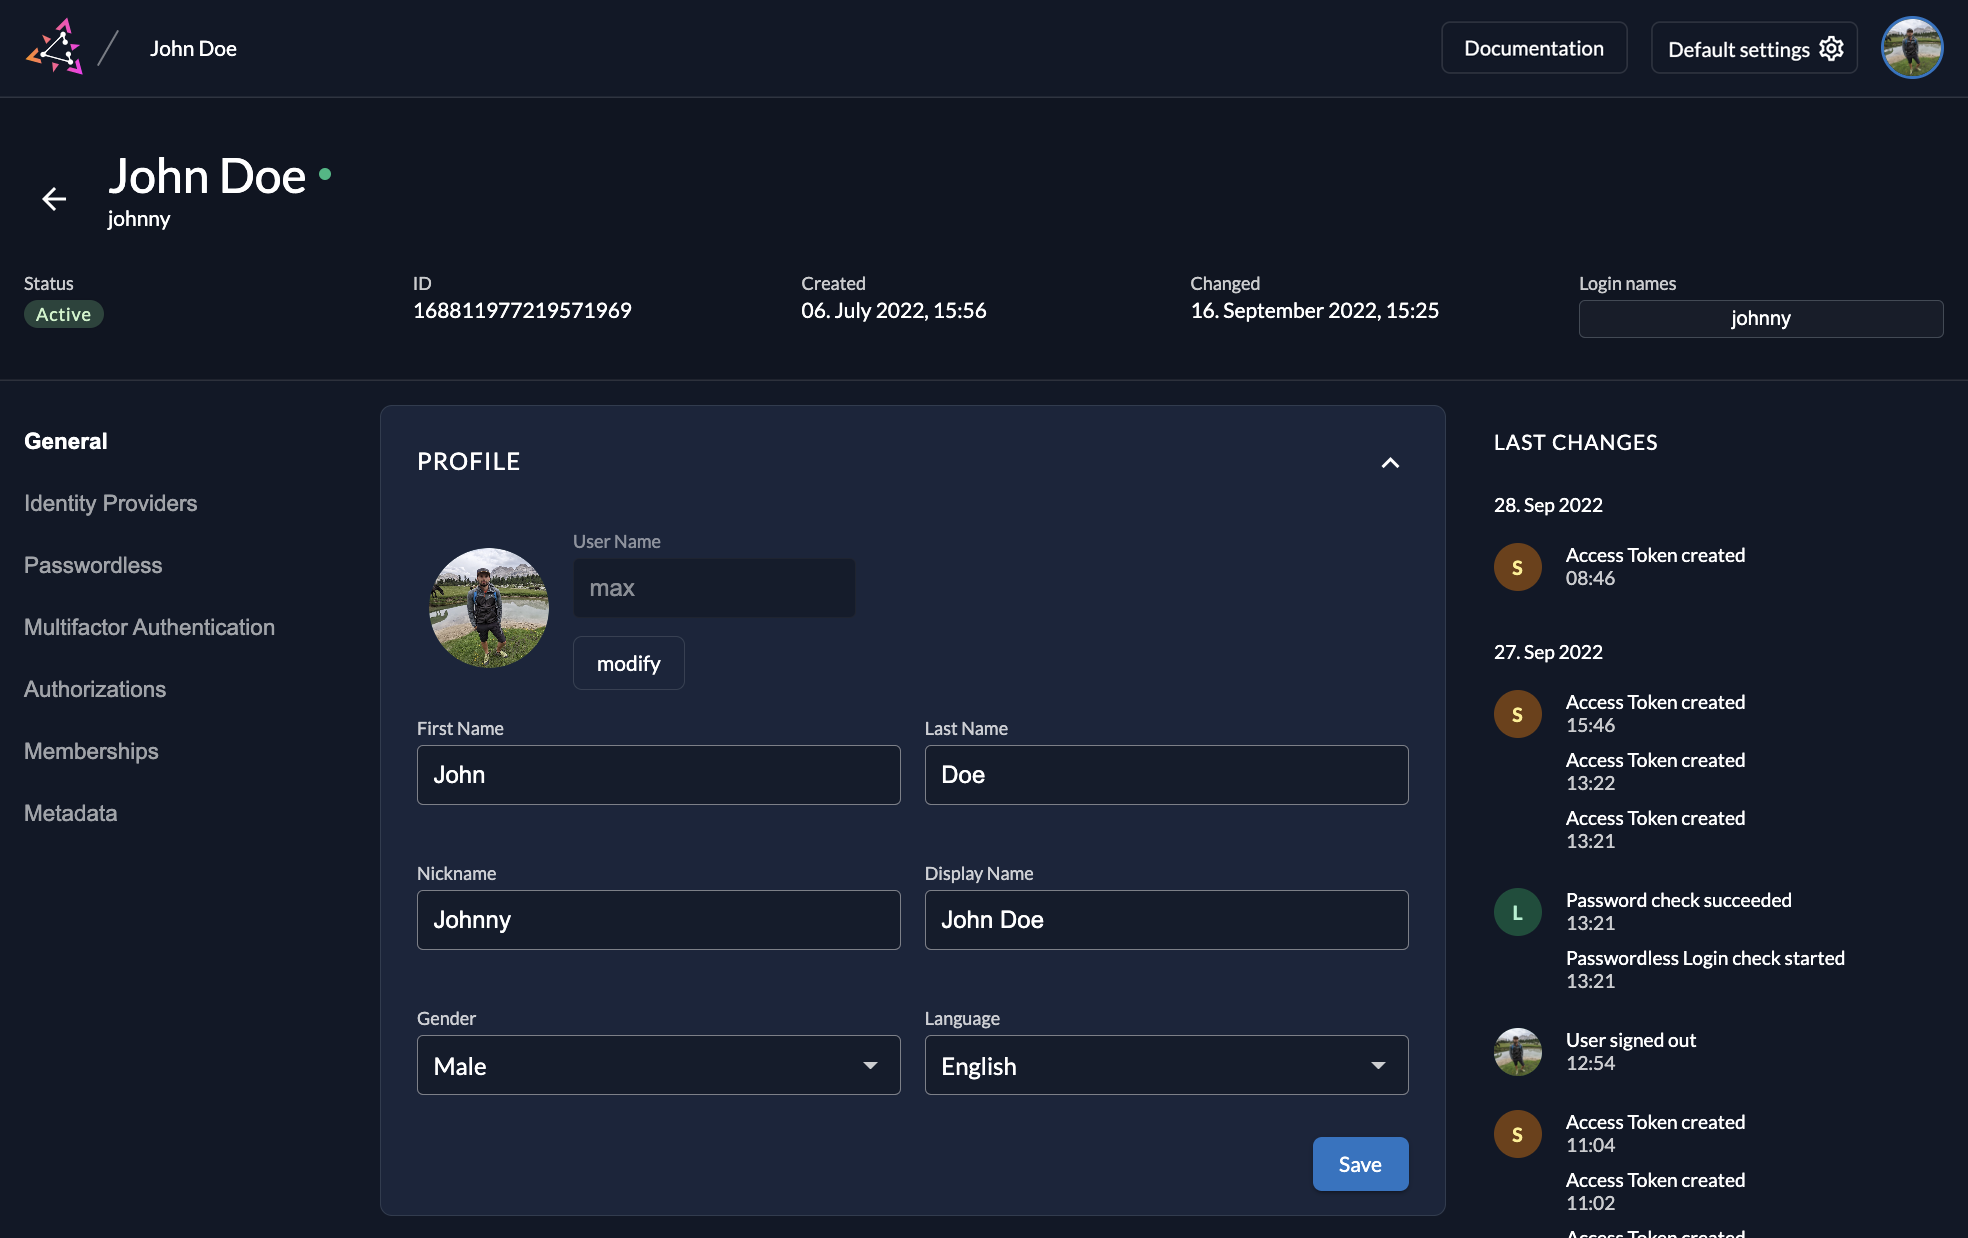
When logged in, a user can then manage the profile in the management console, adding a profile picture, external IDPs and Passkeys.
Add Administrator Role to User
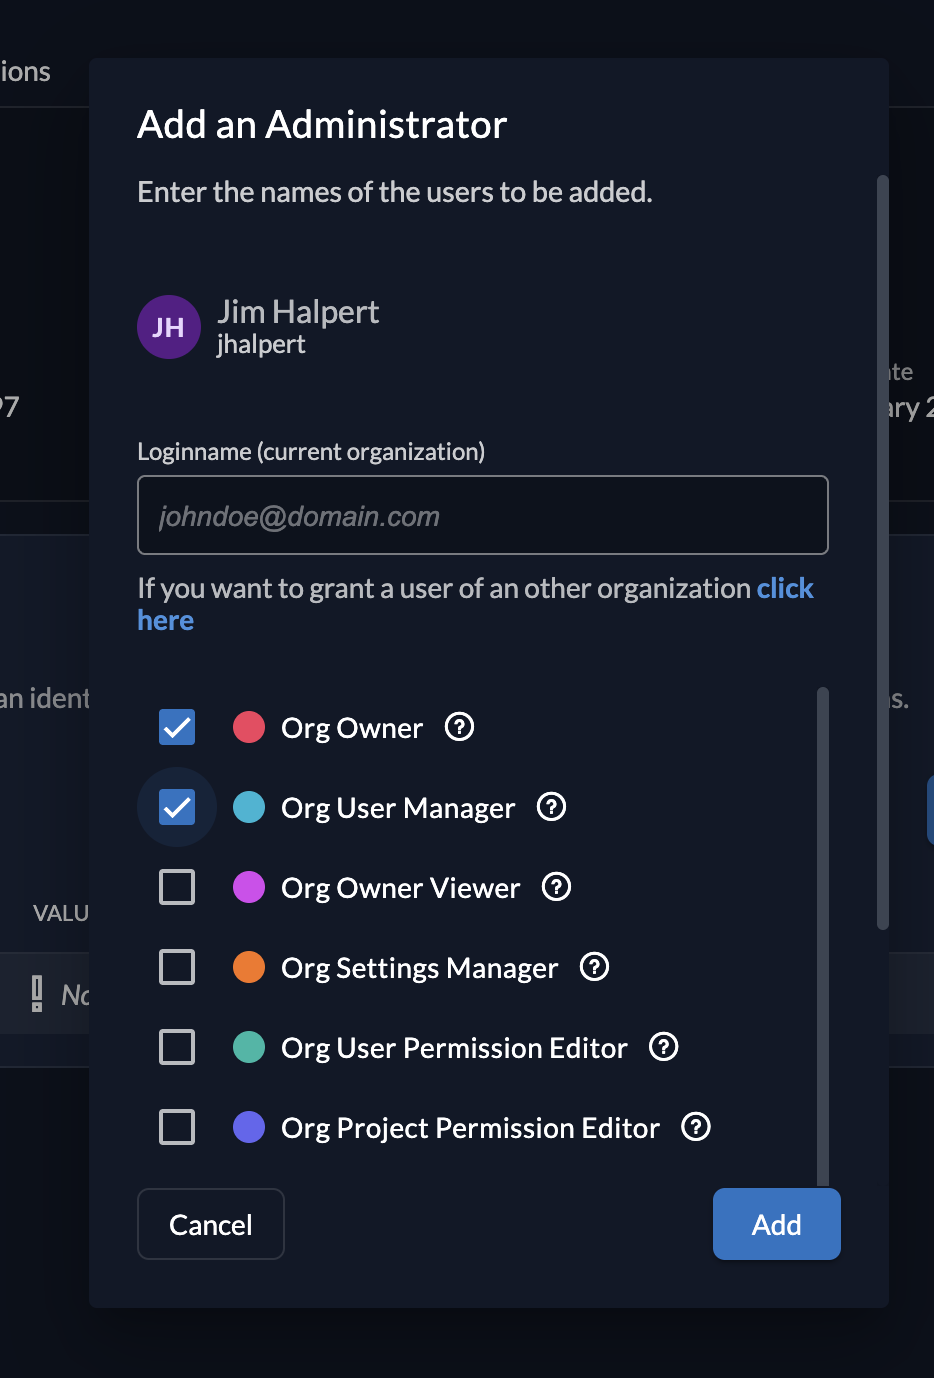
Now you need to assign the right administrator role to your user. In this case we want to give "ORG_OWNER". If you do want to know more about the roles, check out the ZITADEL Administrators Guide with the Role List
Go to the detail page of the organization and select the "+" button in the top right corner, where you already see a list of existing administrators.

When adding a new administrator, you can select multiple roles, some of which are only allowed to read data. This can be especially useful if you add service account for one of your projects where you only need read access.
By default, you will only search for users within the selected organization. If you like to give a role to a user outside the organization, you need to switch to the global search and type the exact loginname of the users. This will prevent users from guessing users from other organizations.
Invite Team Members
The first user of your customer is now ready to authenticate and manage resources in ZITADEL. The first task will be inviting a team member.
We are now switching to the view of your customer's administrator user.
The following actions can also be configured by an Instance Administrator for their customer. To show how you can use the self-management possibilities it is shown from the customer's administrator.
The Administrator user received an initialization e-mail after the user was created. With the link in the email, the admin will be able to set up a password and optionally some multi-factors.
As the administrator only has permission for its own organization, the ZITADEL Management Console UI does look slightly different.
To invite a team member, the admin has to repeat the steps you did before.
Setup Single-Sign-On (SSO)
Your next step is to configure SSO so your users can authenticate with an existing user into ZITADEL.
First, go to the Login Behavior and Security Settings. Make sure that the "External IDP allowed" is enabled. This setting does generally allow users to authenticate with an external provider.
- Go to the Settings Page
- Navigate to Identity Providers You might already see a list of activated providers here. If so, this is because some default providers are configured on the ZITADEL instances.
- Set up the identity provider you need. Follow our detailed setup description of the different providers we have: Set up the needed identity provider
Auto-register users with SSO
Let's assume you have configured Entra ID as an identity provider, and you want to allow all your employees to login with the corresponding user without having to register. This does need some specific settings on your provider.
- Go to the detail page of your configured identity provider (In this example Entra ID)
- Enable "Automatic creation" in the optional settings. Optionally, if you want to update the user information in ZITADEL, when they have changed in the Entra ID additionally enable "Automatic update"
- Enable the "Account creation allowed" if it is not already
- If you also want to allow users to link to an existing account, if they already have an account in ZITADEL, enable "Account linking allowed"
It is only possible to automatically create accounts, that send all the required information to register a new user. If your provider does not send all the required fields that ZITADEL needs to create a user, make sure to fill them in the background with an Action. Example for prefilling user data automatically
Login with your user
The last step is that your user can log in to ZITADEL and use the SSO account.
Per default the login ui of the default organization is shown. To allow users of a specific organization to register with their IDP (e.g. Entra ID) you have two options.
- Identify organization with organization scope
By sending the organization scope in the authorization request to ZITADEL the specified organization will directly be triggered. The configured settings of that organization such as IDPs will directly be shown. If only one IDP is configured and local accounts are disabled the user will directly be redirected to the external provider.
urn:zitadel:iam:org:id:{id}- Domain Discovery
When domain discovery is enabled, ZITADEL is able to identify the entered domain of a user and match it to a specific organization. If you want to know more about domain discovery and how to set it up please read the following guide: Domain Discovery in ZITADEL
Your user is now ready to log in with SSO.
Automated onboarding for your customers
If you want to start automating the process of onboarding your customers, the following sections give you some guidance.
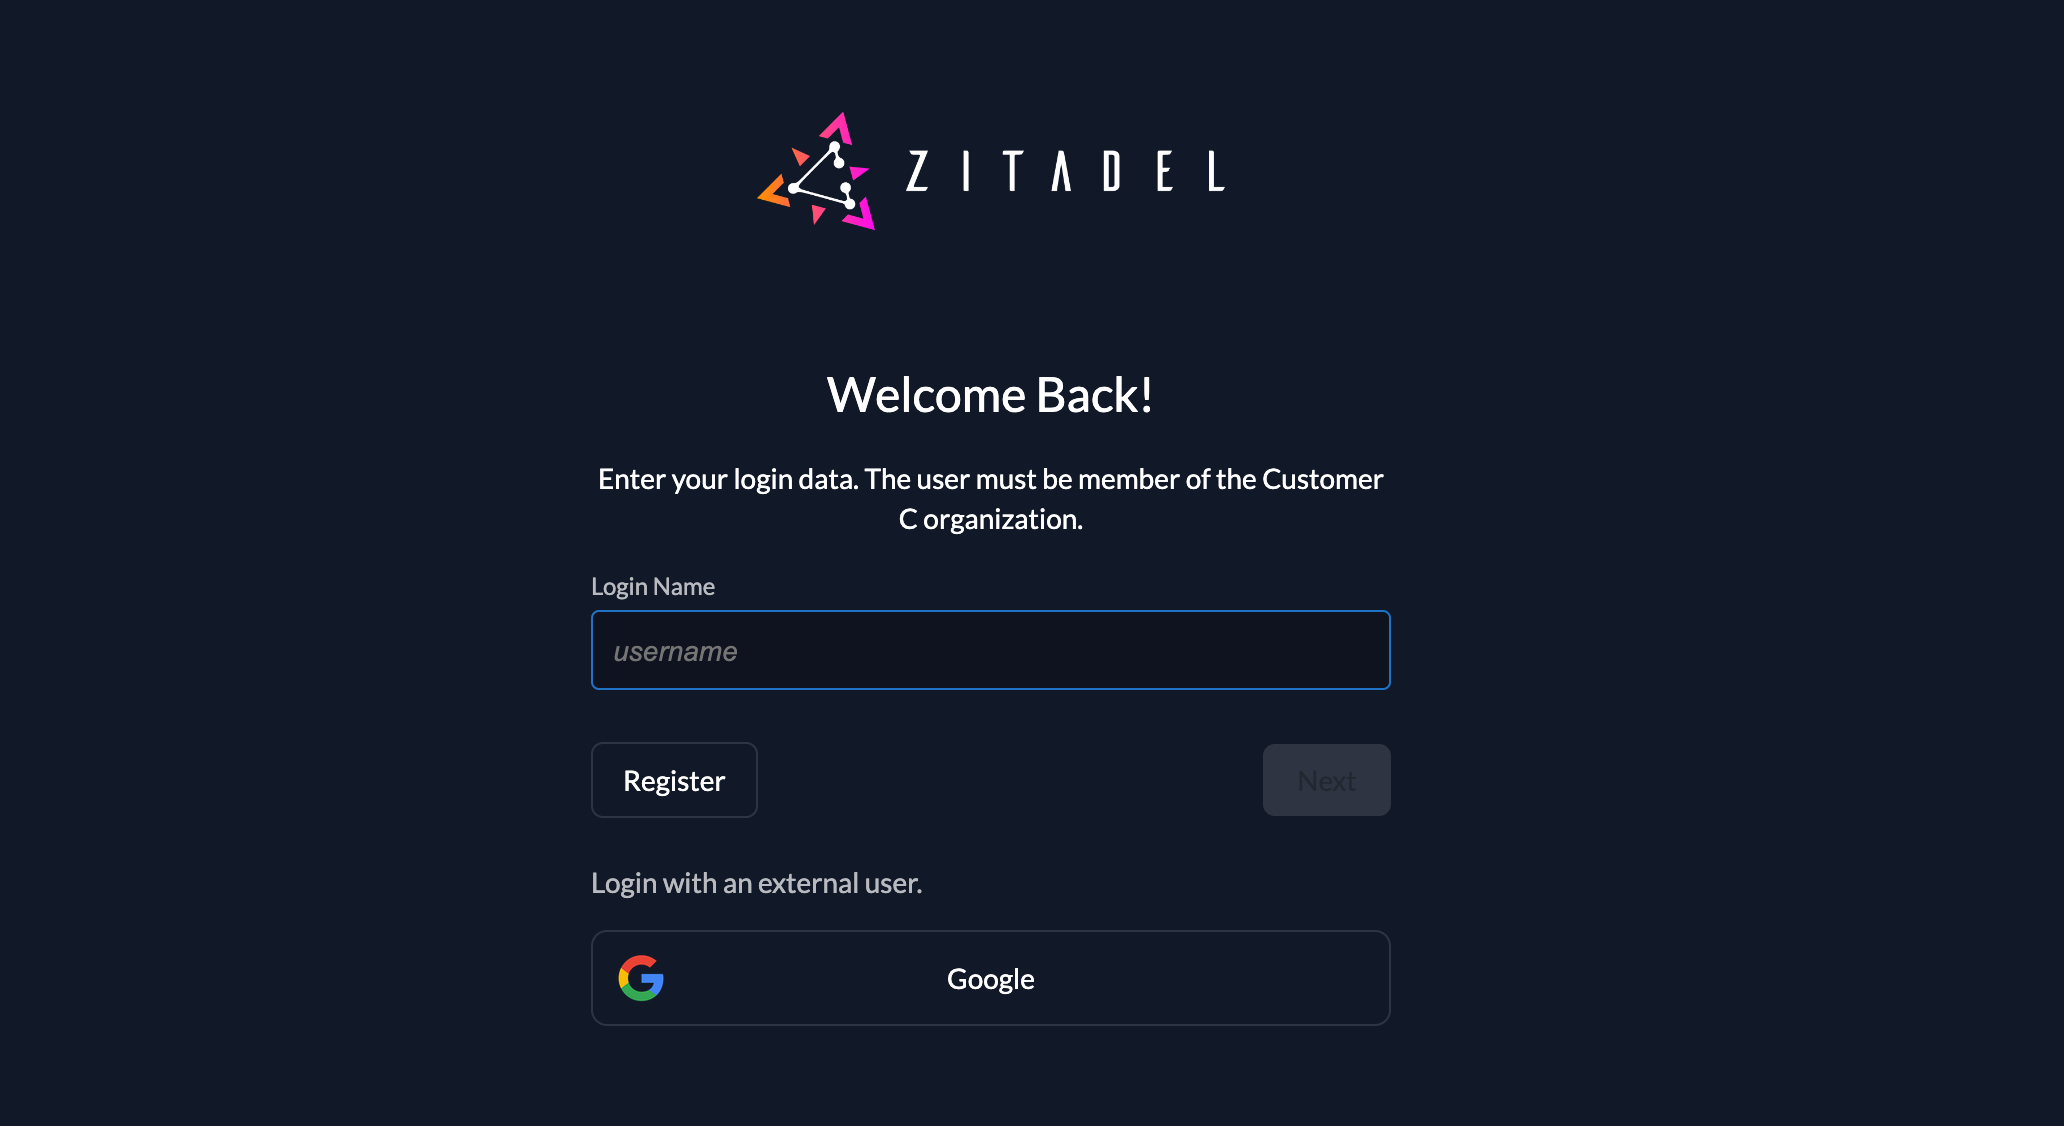
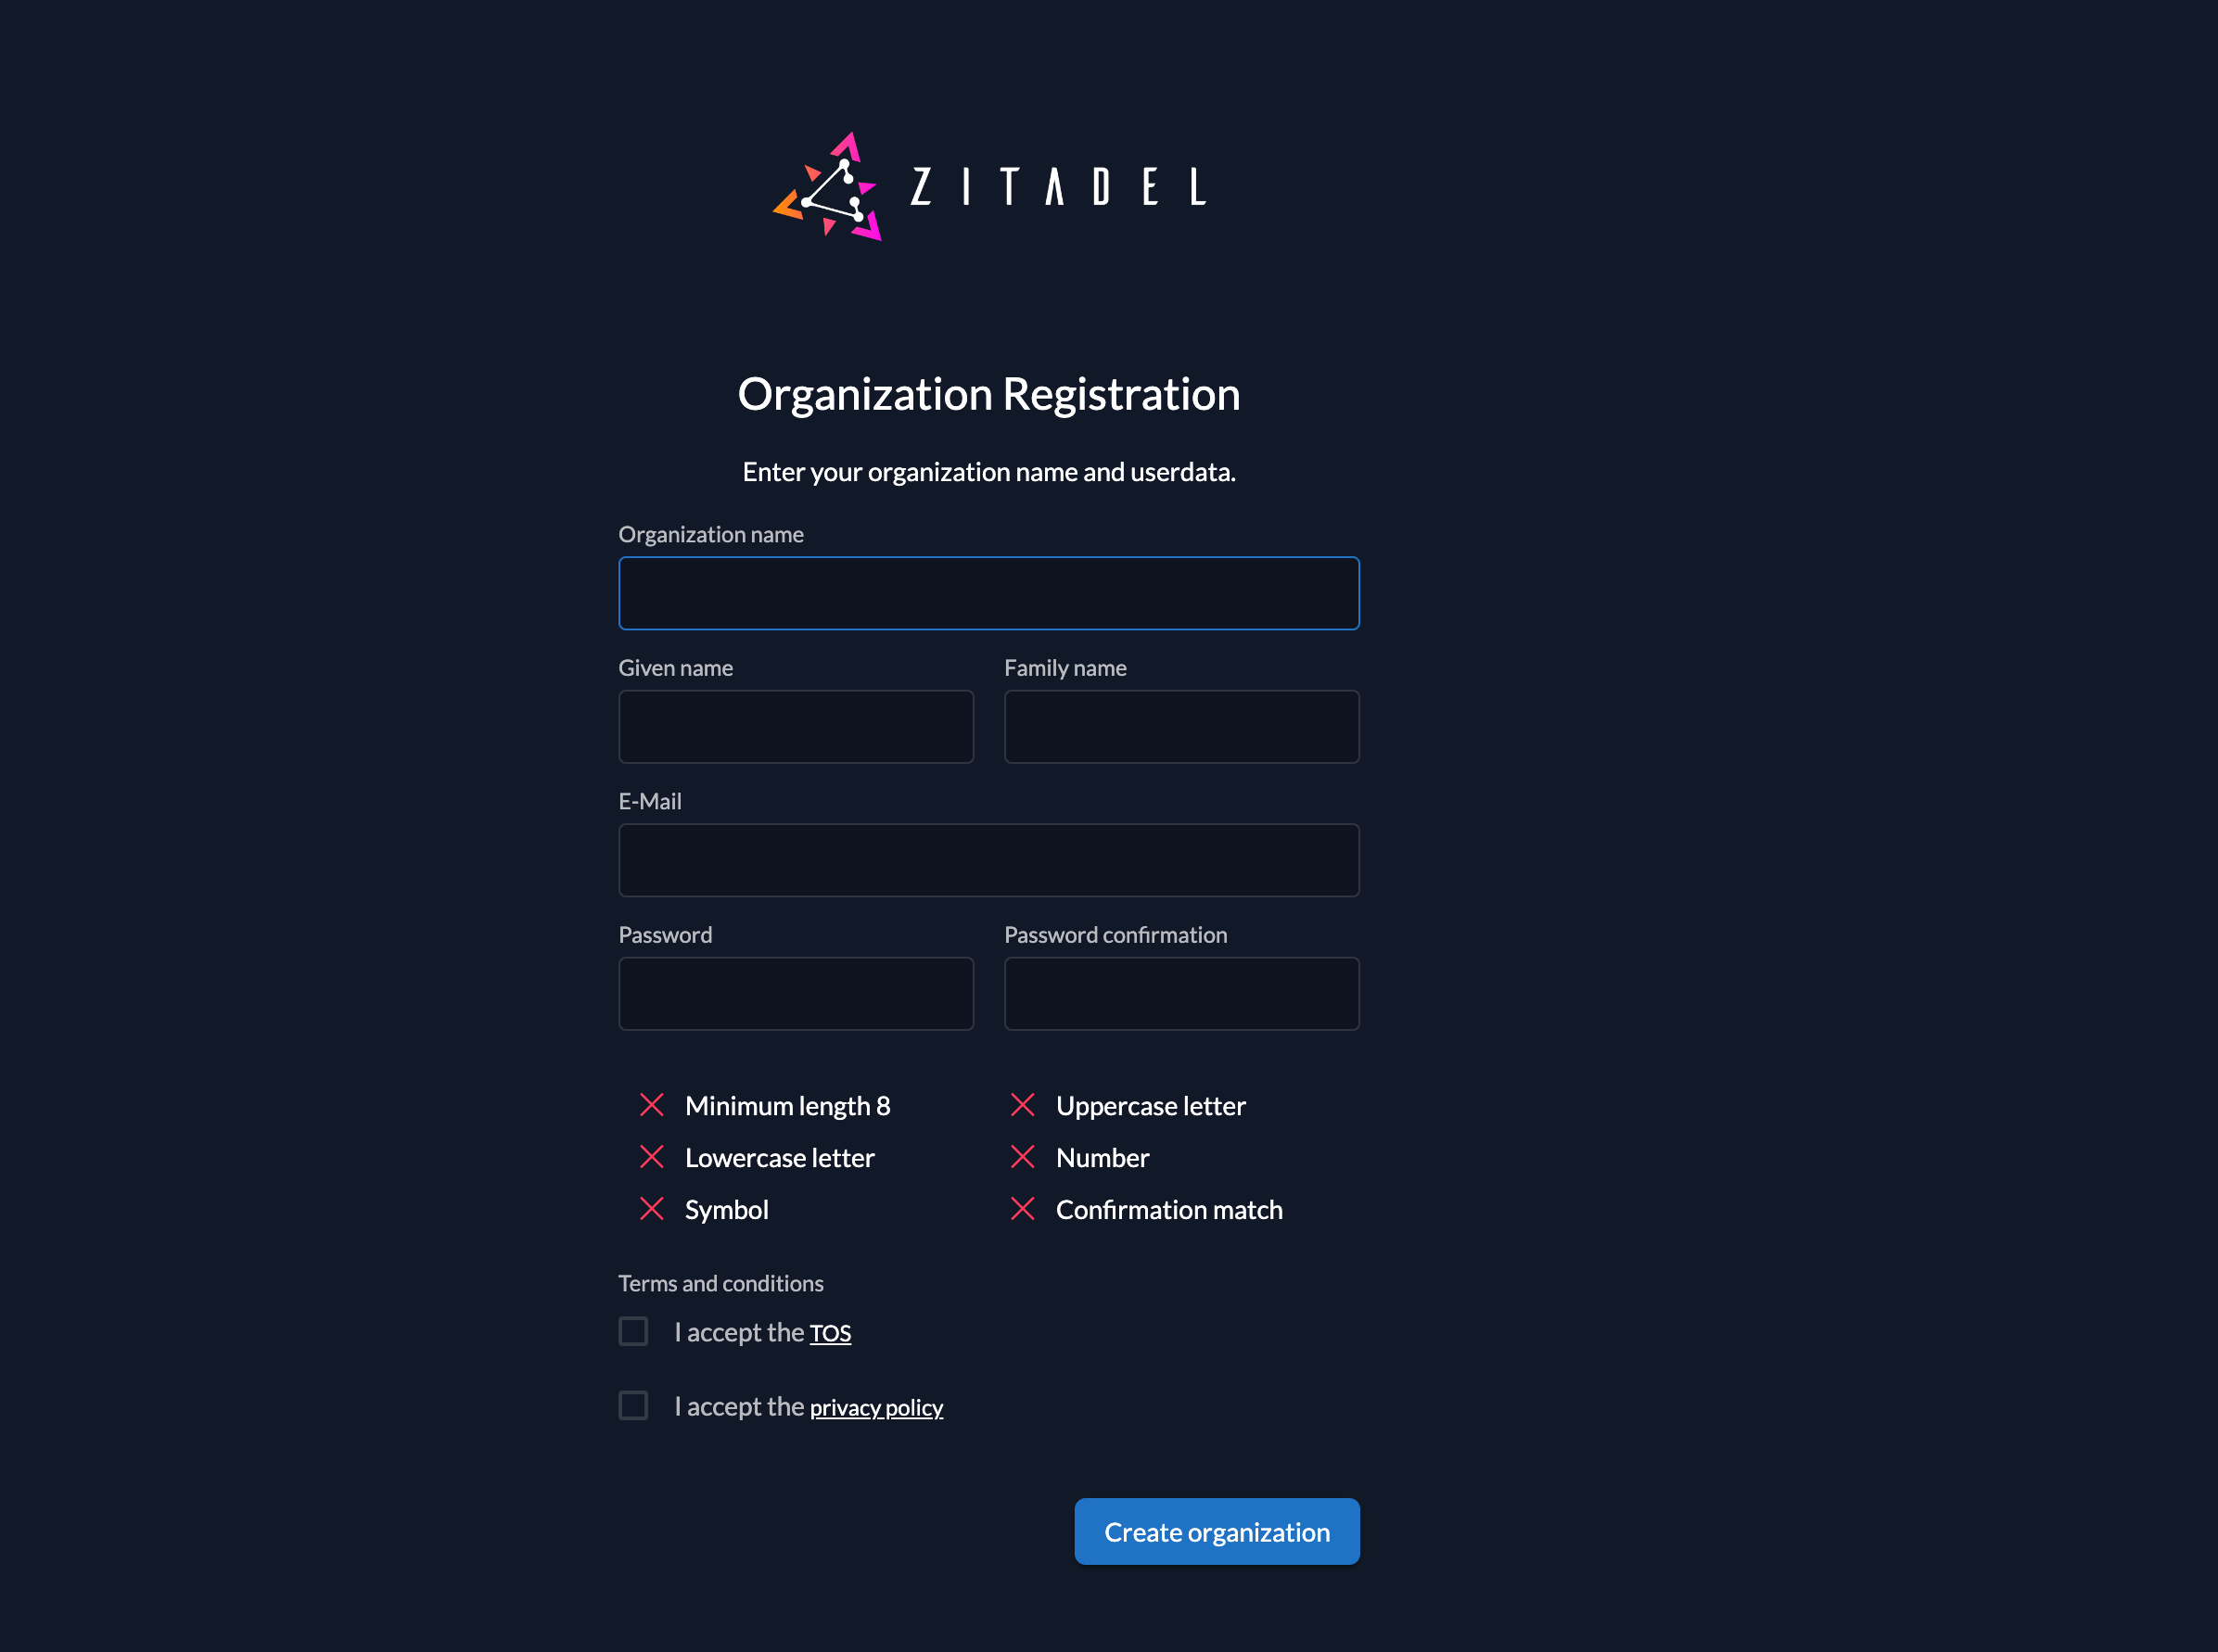
Built-in register organization form
A basic form that allows a customer to enter an organization name and a user account is hosted on the following URL:
{custom-domain}/ui/login/register/org
When a user registers through this form, an organization and a user are created. The user will automatically get the role "ORG_OWNER" withing ZITADEL and is able to manage the whole organization. You can read more about the administrators, roles and their meanings here
Disable built-in register organization form
If you do not want to allow users to register organizations with this form, you can disable it with the following request27: Restrict the instance features
Disabling the form makes sense if your administrators manage new customers themselves or if you build your own form.
Build your own form with setup organization request
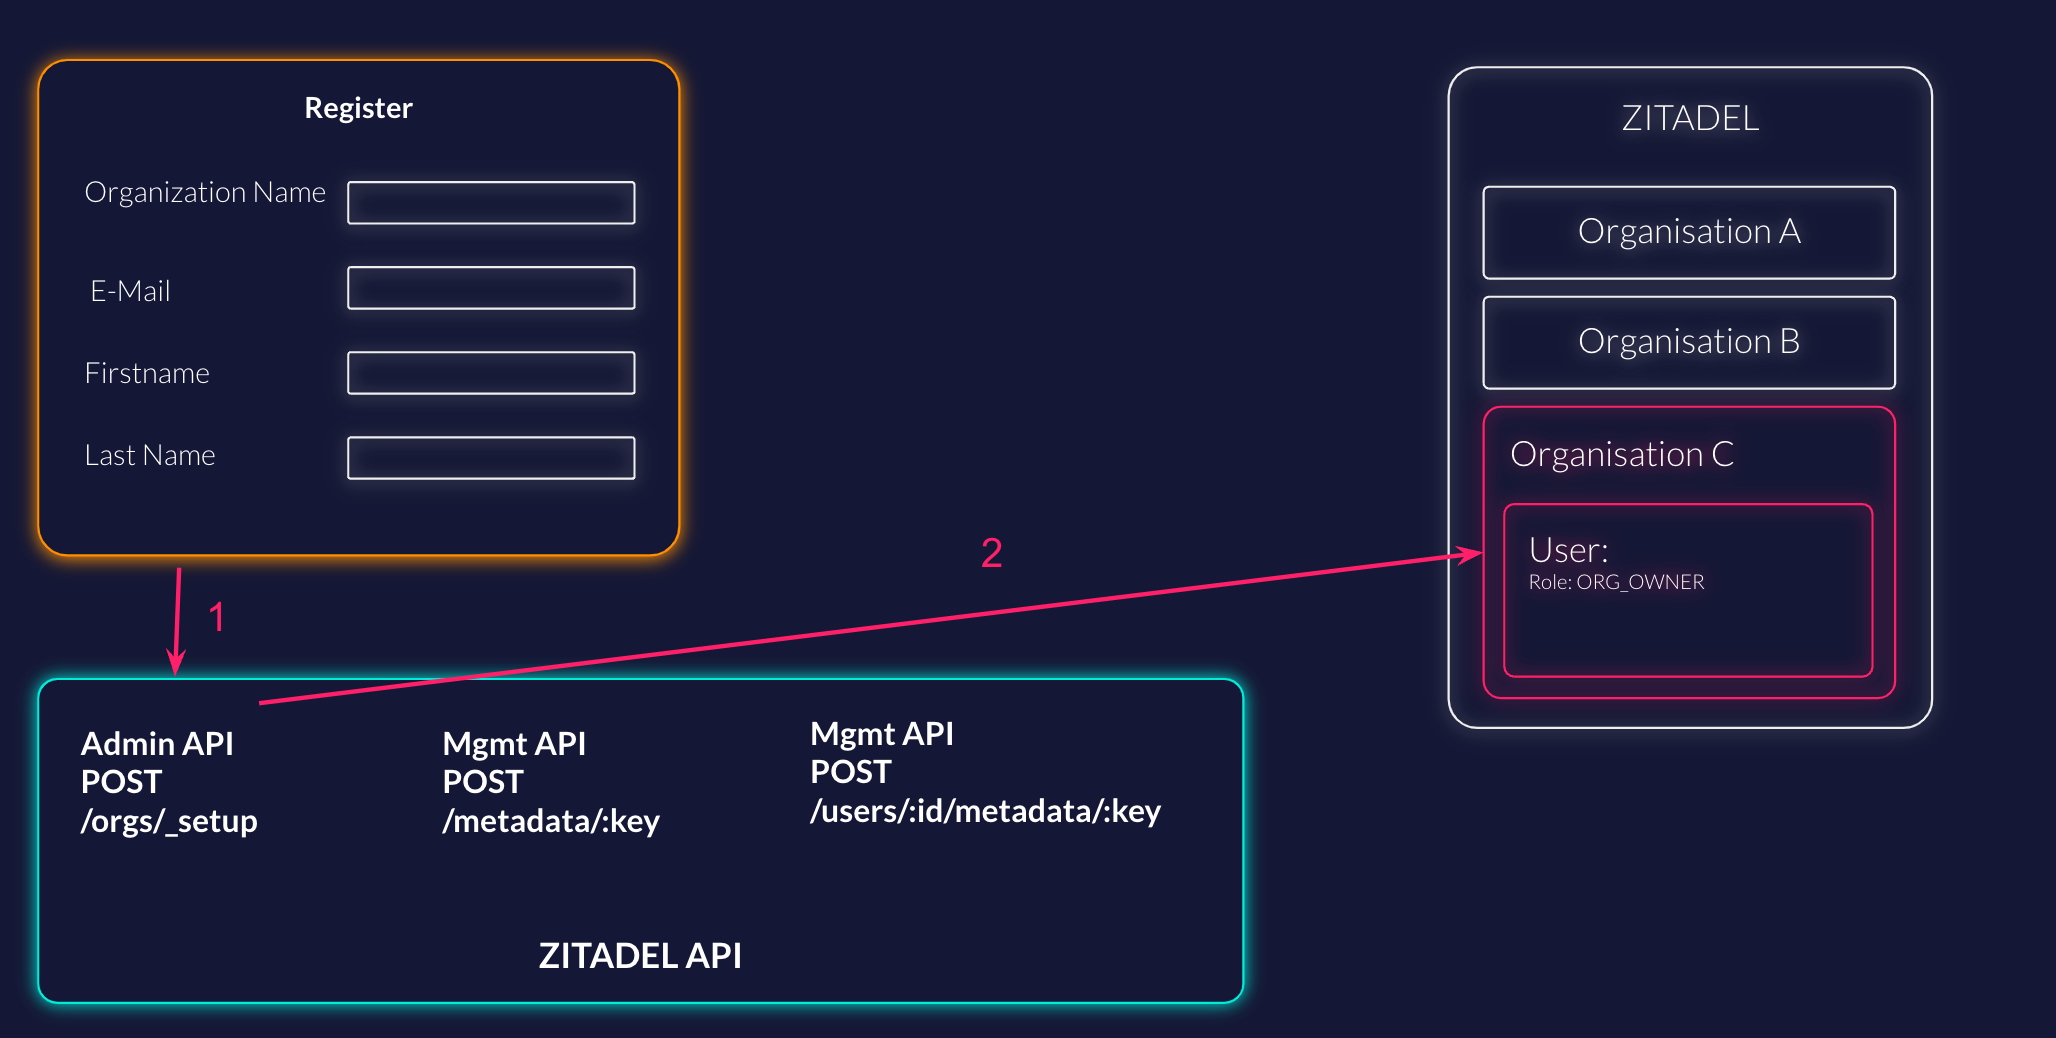
If the built-in register form doesn't fulfill your needs, we recommend building your own form.
The administration API of ZITADEL allows you to set up a new organization with a first administrator user. The setup organization requests, has the possibility to specify an organization with its name and a domain. You can directly send a human user with all the necessary information like the profile, email, password. etc. This request allows you only to set up a user with password authentication at the moment. By specifying the roles you can define which permission the user should have within ZITADEL. By default, the user will automatically get "ORG_OWNER".
Example Request
curl -L -X POST 'https://${CUSTOM_DOMAIN}/admin/v1/orgs/_setup' \
-H 'Content-Type: application/json' \
-H 'Accept: application/json' \
-H 'Authorization: Bearer <TOKEN>' \
--data-raw '{
  "org": {
    "name": "Organisation C",
    "domain": "org-c.com"
  },
  "human": {
    "userName": "gigi-giraffe",
    "profile": {
      "firstName": "Gigi",
      "lastName": "Giraffe",
      "nickName": "gigi-giraffe",
      "displayName": "Gigi Giraffe",
      "preferredLanguage": "en",
      "gender": "GENDER_UNSPECIFIED"
    },
    "email": {
      "email": "gigi@zitadel.com",
      "isEmailVerified": true
    },
    "phone": {
      "phone": "+41 71 000 00 00",
      "isPhoneVerified": true
    },
    "password": "my_53cr3t-P4$$w0rd"
  },
  "roles": [
    "string"
  ]
}'
Detailed description of Setup Organization
If you need to add custom data to either the organization or the user you can use the metadata. Metadata is a key value construct that allows you to store any additional information to the resources. The set organization metadata request allows you to add one key value pair to an organization: Set Organization Metadata If you have more than one field, you can use the bulk add request: Bulk Set Organization Metadata
The same requests also exist on the user resource: Set User Metadata Bulk Set User Metadata
Was this page helpful?
Personal access token authentication
Generate and manage Personal Access Tokens (PAT) for service accounts to enable non-interactive API access to ZITADEL.
Onboard Users
Onboard end-users with ZITADEL by enabling self-registration, manual user invites or automated provisioning using OIDC and external IdPs