Configure GitLab as an Identity Provider in ZITADEL
This guides shows you how to connect GitLab as an identity provider in ZITADEL.
In ZITADEL you can connect an Identity Provider (IdP) like GitLab to your instance and provide it as default to all organizations. Also, you can register the IdP to a specific organization only. If you allow so, your organizations members can do the same in self-service.
Open the GitLab Identity Provider Template
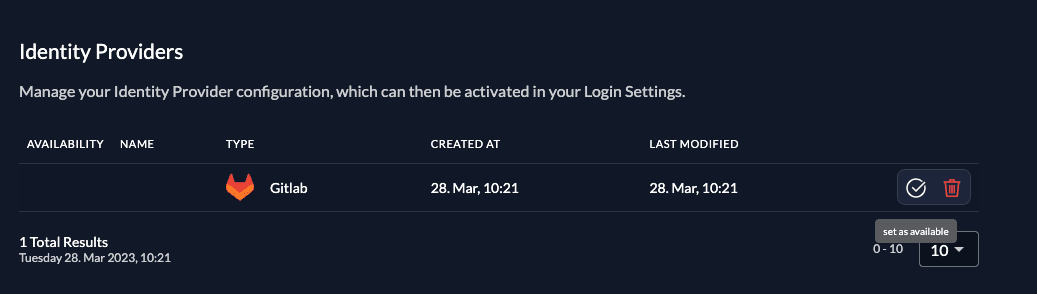
Go to the settings page of your instance or organization and choose "Identity Providers".
In the table you can see all the providers you have configured. Also, you see all provider templates that are available.
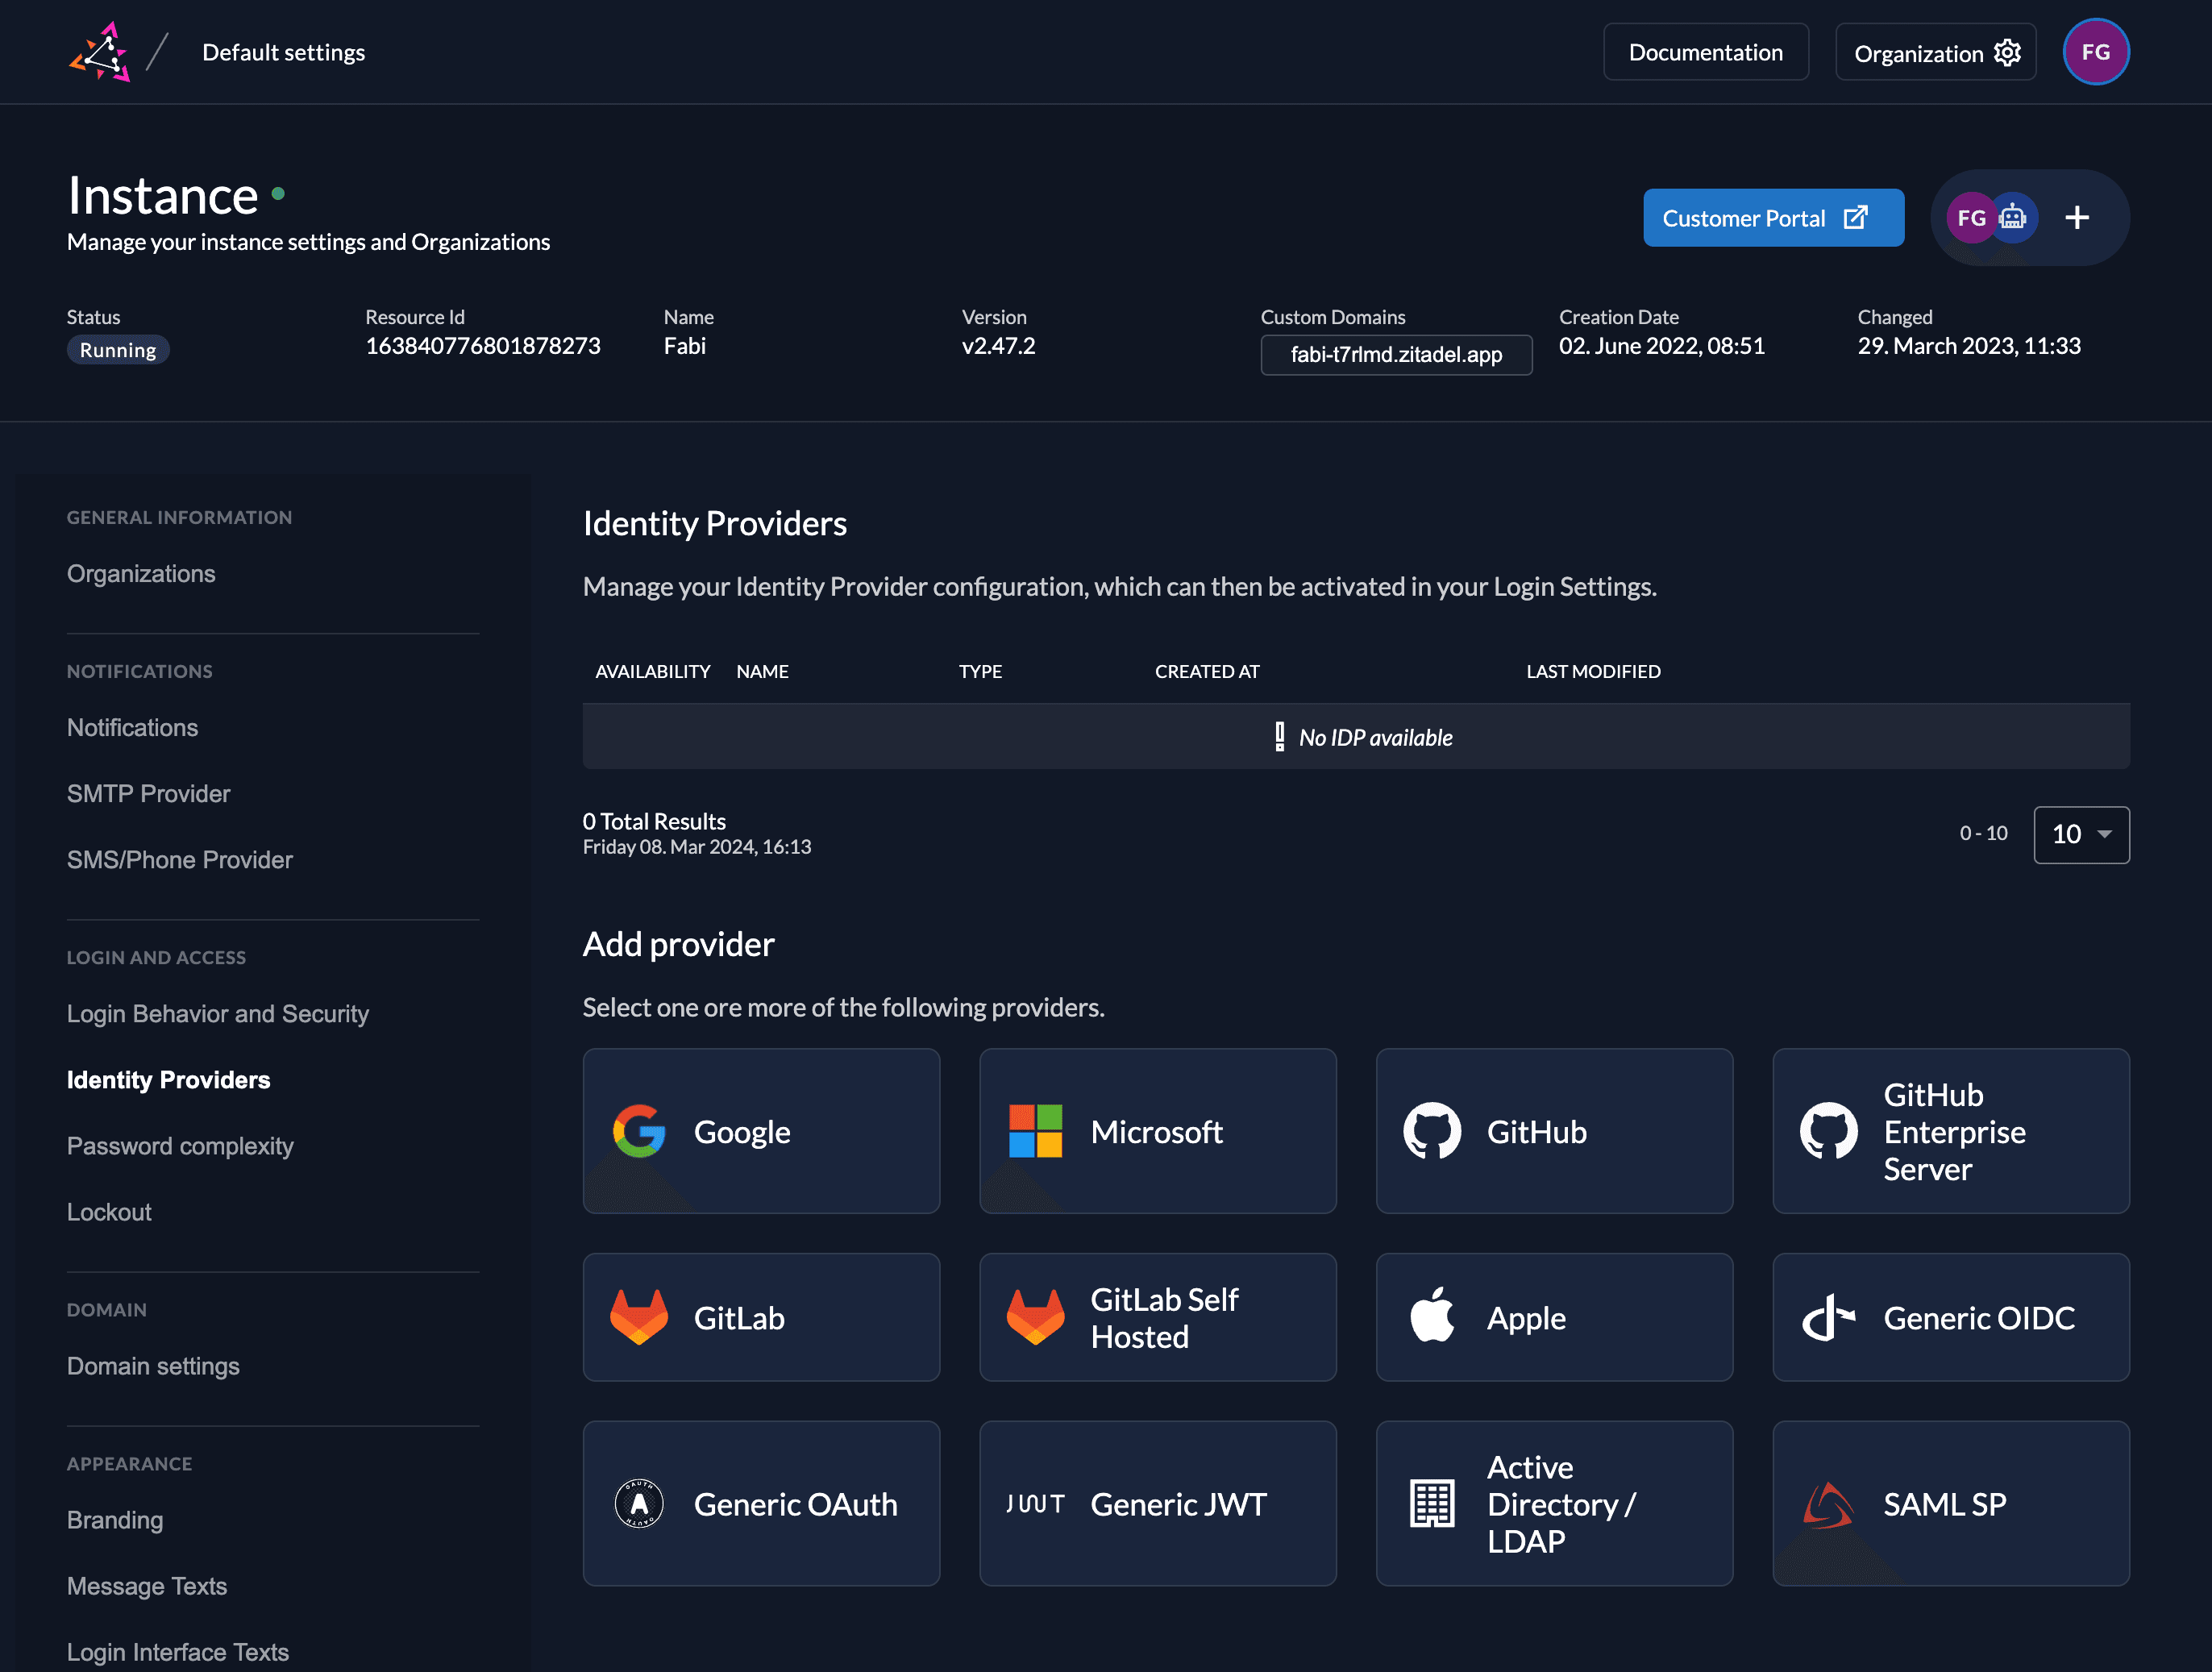
Select the GitLab or GitLab Self Hosted Provider template.
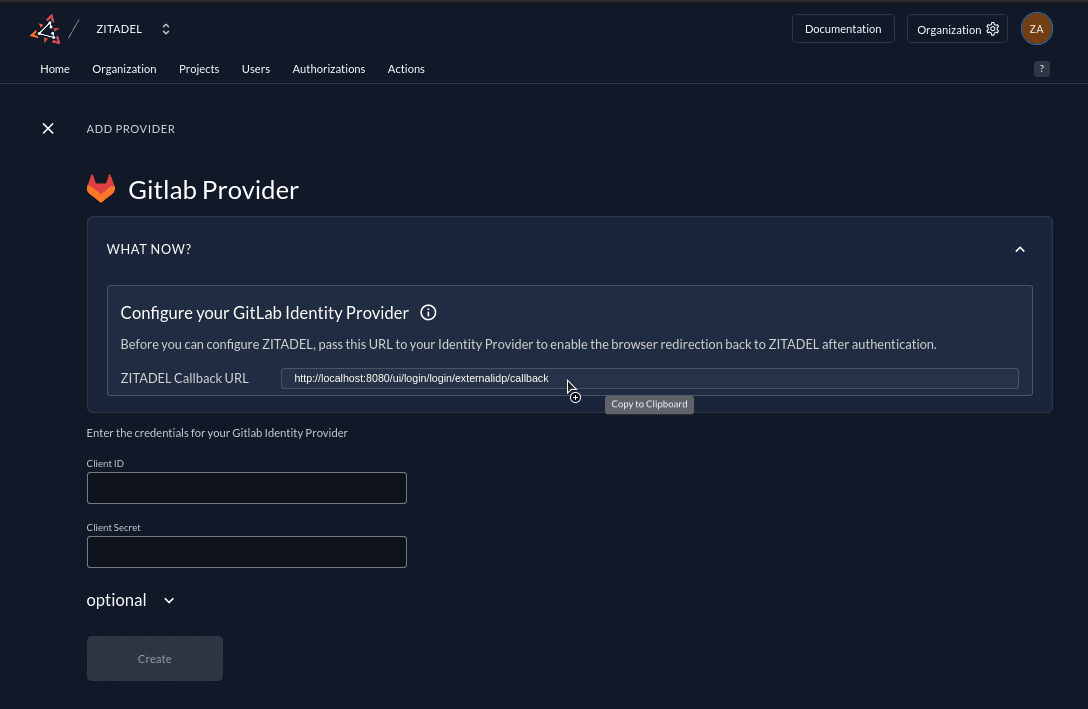
Click on the ZITADEL Callback URL to copy it to your clipboard. You will have to paste it to the GitLab Application later.
GitLab Configuration
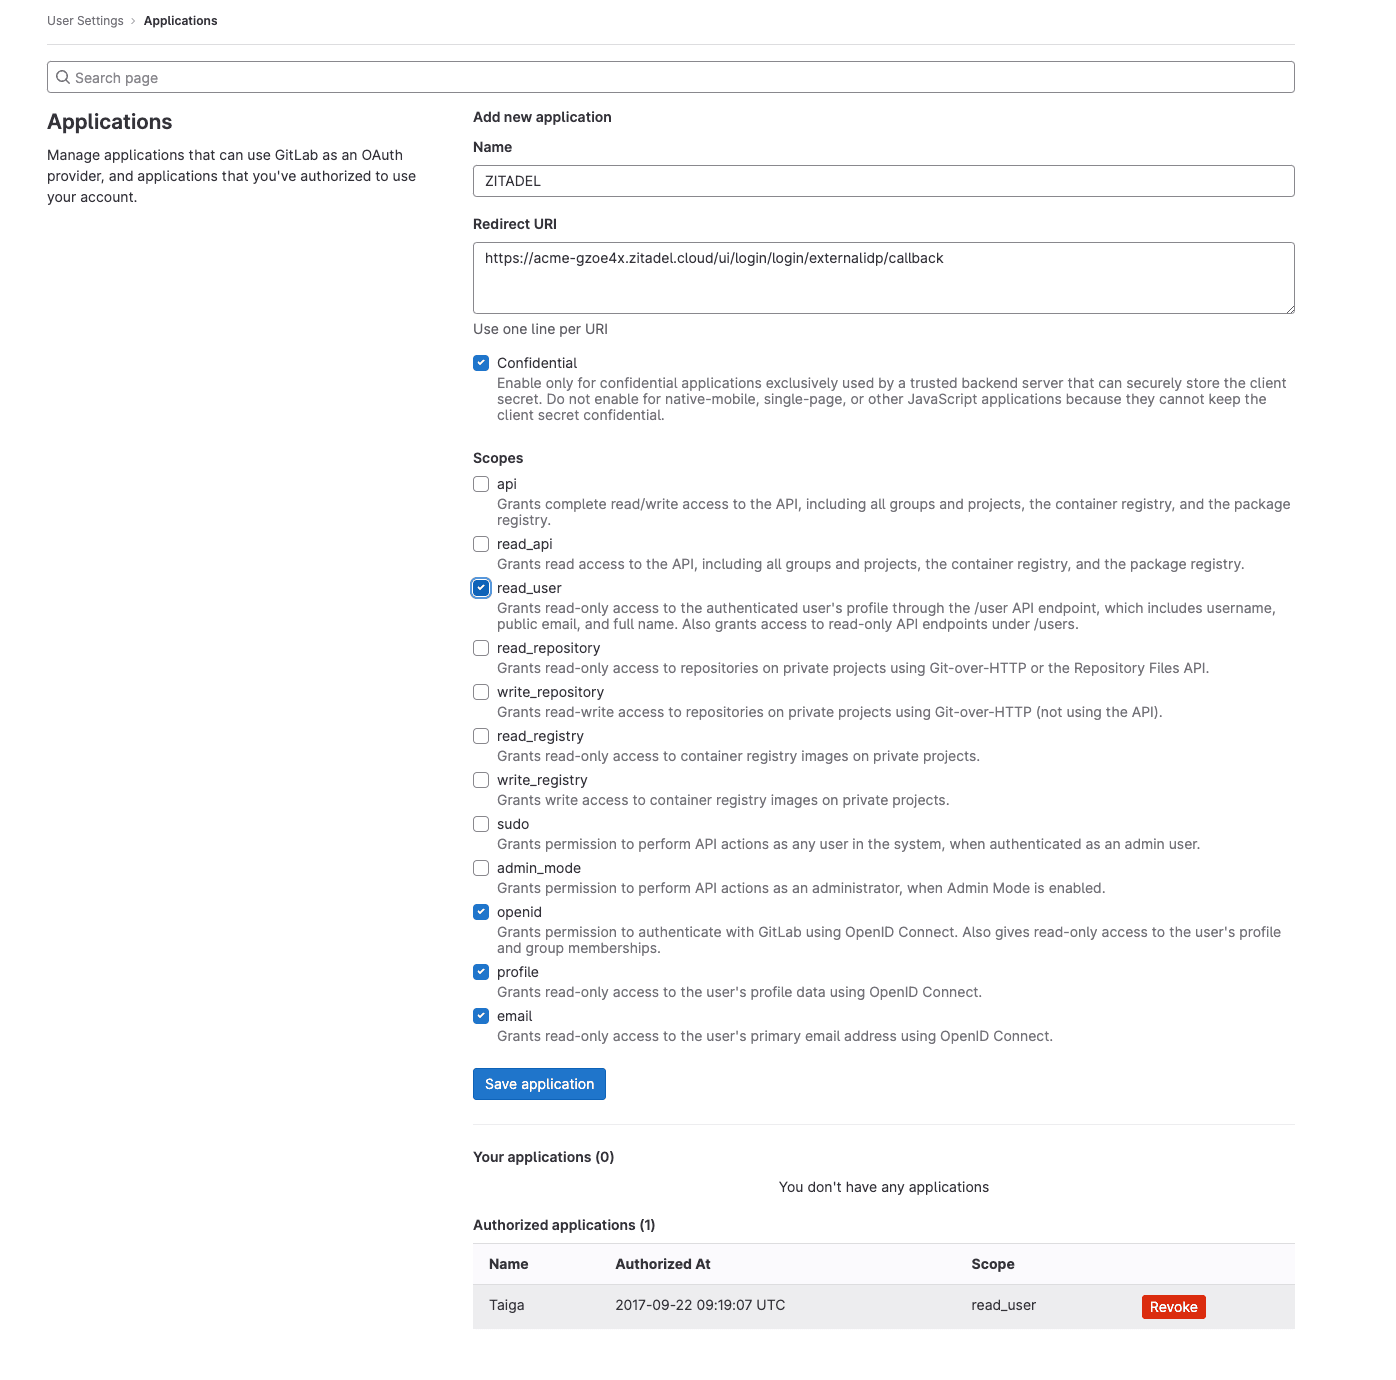
Register a new application
- Login to gitlab.com or to your GitLab self-hosted instance
- Select Edit Profile
- Click on Applications in the side navigation
- Fill in the application name
- Paste the ZITADEL Callback URL you copied before to the Redirect URI field.
Client ID and secret
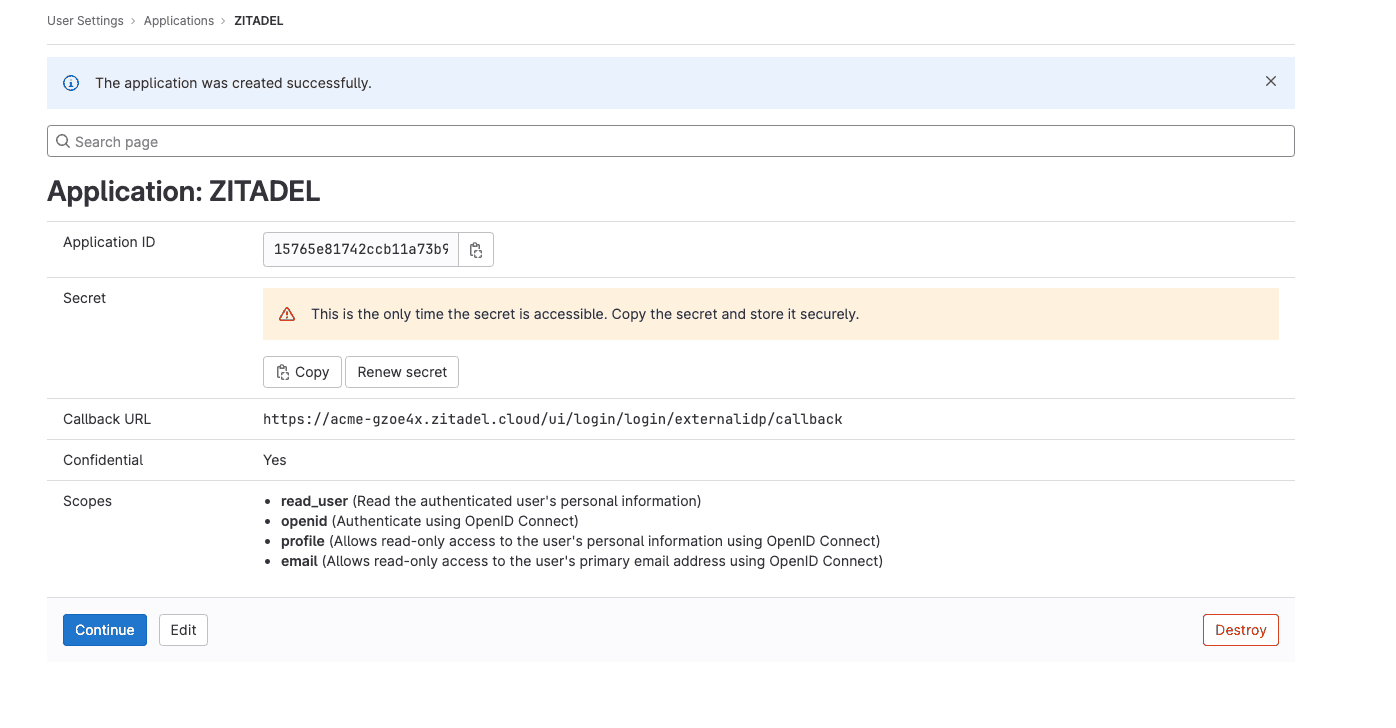
After clicking "Save application", you will see the detail page of the application you have just created. To be able to connect GitLab to ZITADEL you will need a client ID and a client secret. Save the ID and the Secret, you will not be able to copy the secret again, if you lose it you have to generate a new one.
ZITADEL Setup
Go back to the GitLab provider template you opened before in ZITADEL. Add the client ID and secret you created before when you registered your GitLab application.
You can optionally configure the following settings. A useful default will be filled if you don't change anything.
Scopes: The scopes define which scopes will be sent to the provider, openid, profile, and email are prefilled.
This information will be taken to create/update the user within ZITADEL.
ZITADEL ensures that at least the openid-scope is always sent.
Automatic creation: If this setting is enabled the user will be created automatically within ZITADEL, if it doesn't exist.
Automatic update: If this setting is enabled, the user will be updated within ZITADEL, if some user data is changed withing the provider. E.g if the lastname changes on the GitLab account, the information will be changed on the ZITADEL account on the next login.
Account creation allowed: This setting determines if account creation within ZITADEL is allowed or not.
Account linking allowed: This setting determines if account linking is allowed. When logging in with a GitLab account, a linkable ZITADEL account has to exist already.
Either account creation or account linking have to be enabled. Otherwise, the provider can't be used.
Activate IdP
Once you created the provider, it is listed in the providers overview. Activate it by selecting the tick with the tooltip set as available.
If you deactivate a provider, your users with links to it will not be able to authenticate anymore. You can reactivate it and the logins will work again.
The provider can also be activated via API. As the identity providers are sub-resources of the login settings, this is done by linking the provider to the settings:
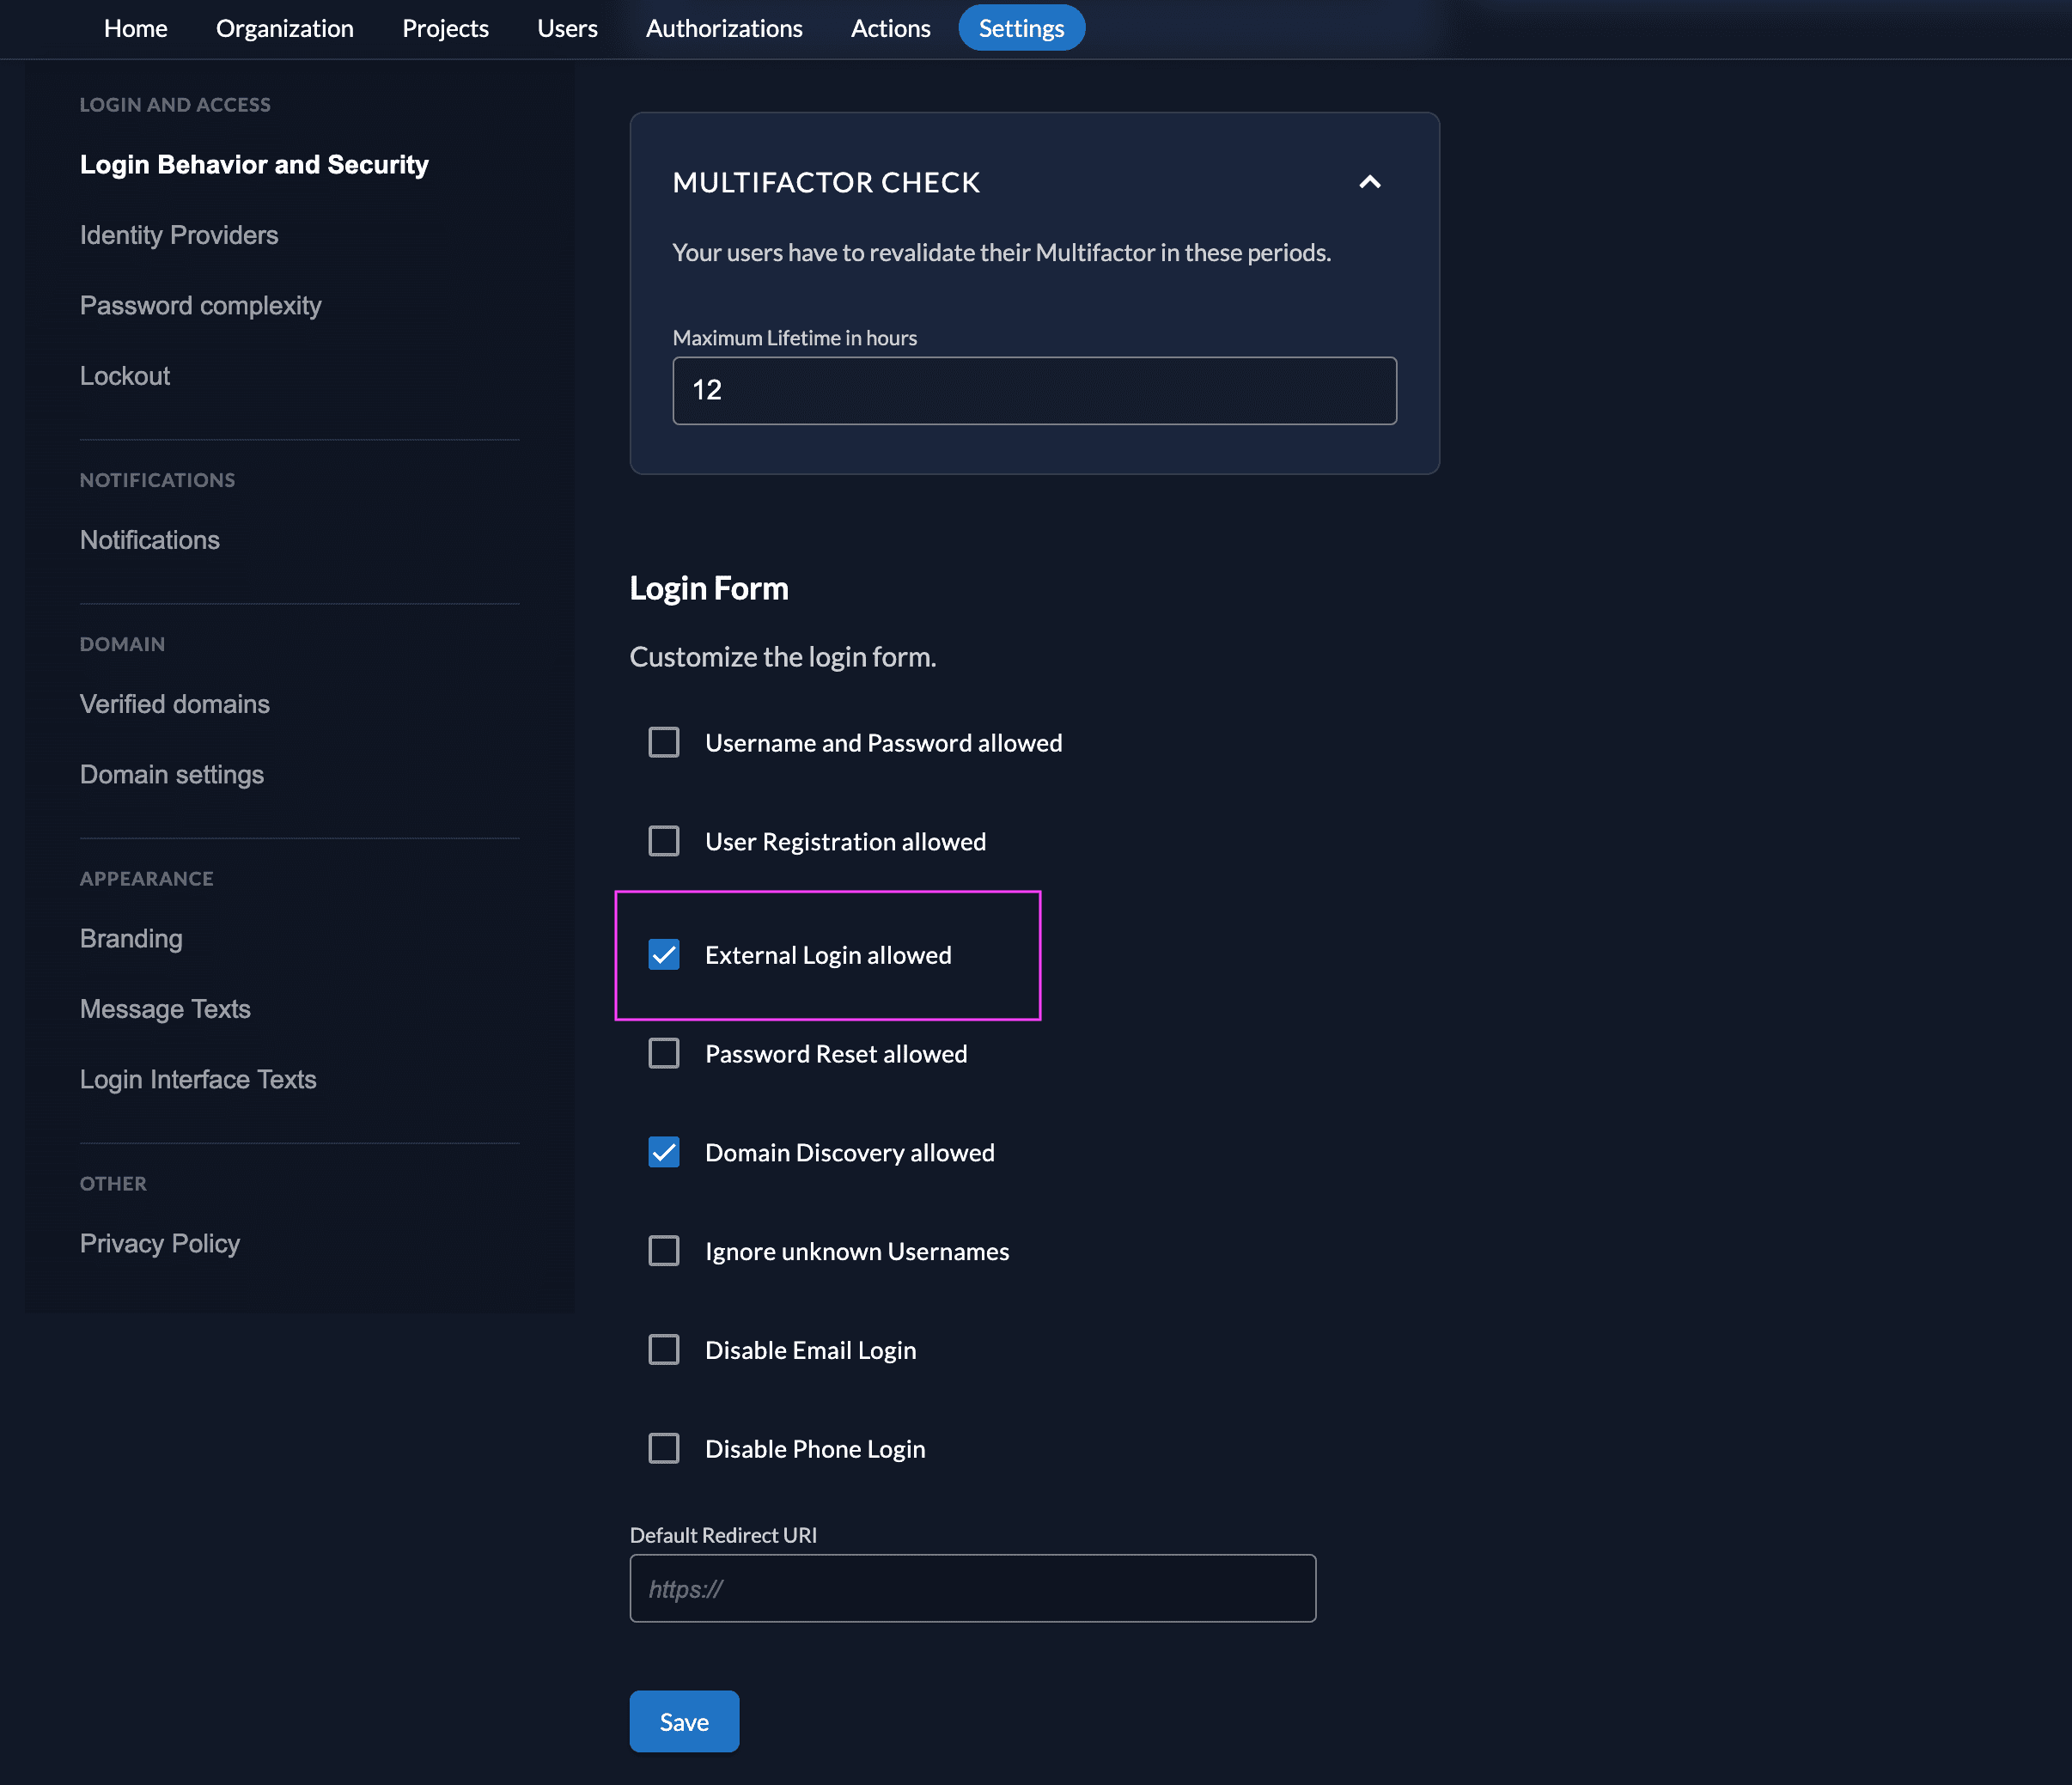
Ensure your Login Policy allows External IDPs
- Go to the Settings
- To allow external IdP logins by default, go to your instance default settings at
${CUSTOM_DOMAIN}/ui/console/instance?id=general - To allow external IdP logins on an organization, go to
${CUSTOM_DOMAIN}/ui/console/org-settings?id=loginand ensure you have the right org context.
- To allow external IdP logins by default, go to your instance default settings at
- Modify your login policy in the menu "Login Behavior and Security"
- Enable the attribute "External Login allowed"
You can also change the settings through the API directly either in the default settings or on a specific organization:
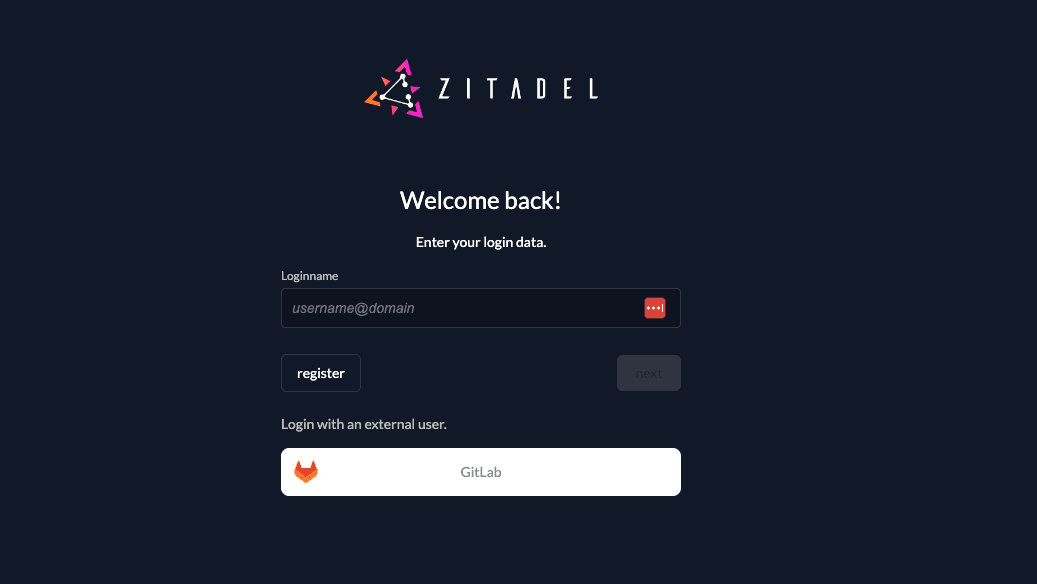
Test the setup
To test the setup, use incognito mode and browse to your login page. You see a new button which redirects you to your GitLab login screen.
By default, ZITADEL shows what you define in the default settings. If you overwrite the default settings for an organization, you need to send the organization scope in your auth request.
The organization scope looks like this: urn:zitadel:iam:org:id:{id}.
You can read more about the reserved scopes
or use the ZITADEL OIDC Playground to see what happens with the login when you send different scopes.
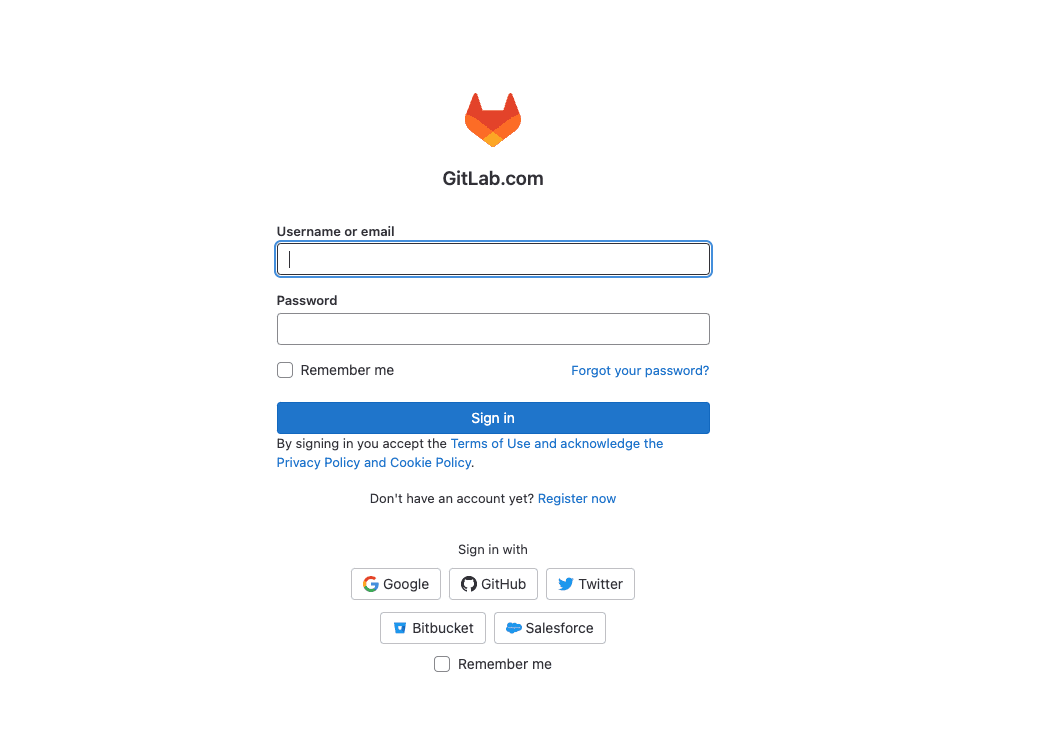
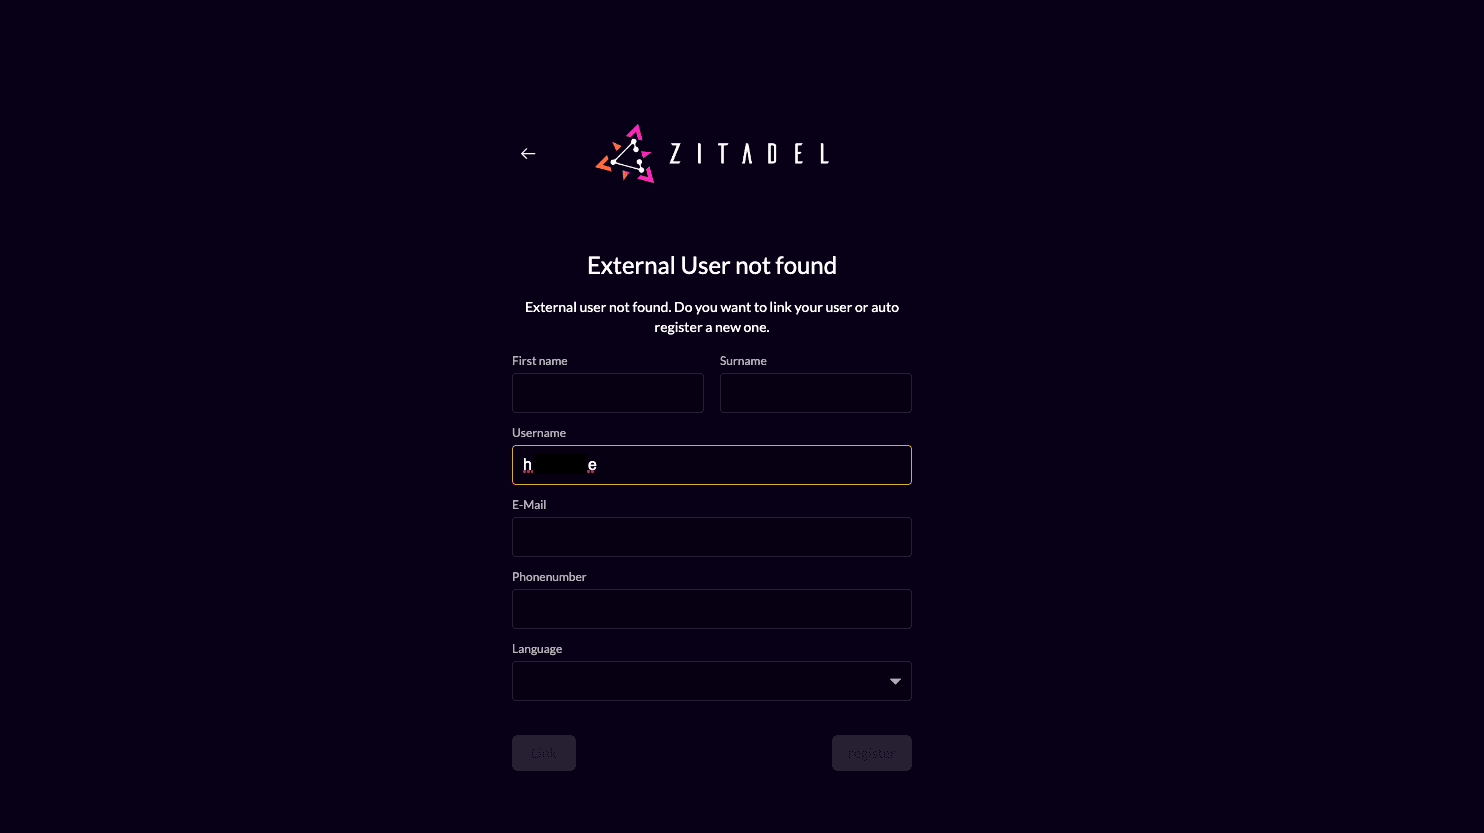
New unlinked users are presented with the screen below. GitLab is an OAuth provider and does not provide a standardized way to get the user data. This means that ZITADEL has no way to prefill the first and lastname fields.
Optional: Add ZITADEL action to autofill userdata
You can use a ZITADEL action if you want to prefill the fields firstname and lastname with GitLab data.
- Go to the users target organizations settings page.
- Add a new action with the body below. Make sure the action name equals the scripts function name. Also change the id in the script to match your provider settings id.
- Add the action to the flow "External Authentication" and trigger it on "Post Authentication"
/** * Set first and lastname of a user on just in time provisioning for gitlab. * Useful if you like to fill the first and lastname with the name stored on gitlab, so the user doesn't have to fill himself. * * Flow: External Authentication, Trigger: Post Authentication * * @param ctx * @param api */function mapGitLabOAuth(ctx, api) { if (ctx.v1.externalUser.externalIdpId != "your-idp-id") { return } api.setFirstName(ctx.v1.providerInfo.name); api.setLastName(ctx.v1.providerInfo.name);}Was this page helpful?