Secure Django (Python) API Application with ZITADEL
This integration guide demonstrates the recommended way to incorporate ZITADEL into your Django Python application. It explains how to check the token validity in the API and how to check for permissions.
By the end of this guide, your application will have three different endpoints that are public, private (valid token) and private-scoped (valid token with a specific role).
This documentation references our example on GitHub.
ZITADEL setup
Before we can start building our application, we have to do a few setup steps in the ZITADEL Management Console.
Create application
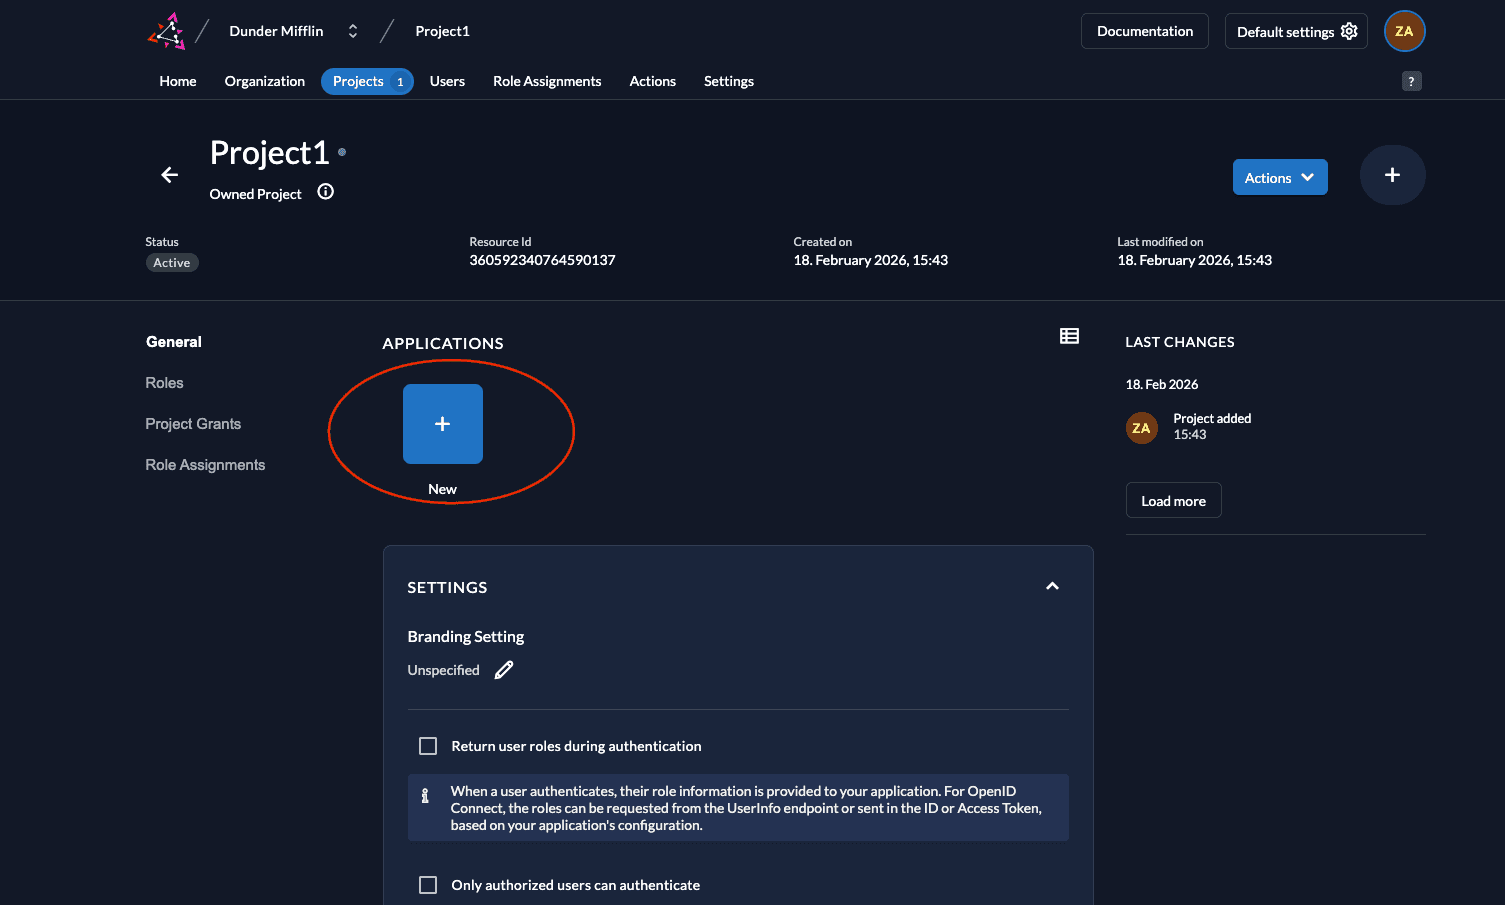
- Go to your Project and click on the New button as shown below.
- Give a name to your application (Test API is the name given below) and select type API.

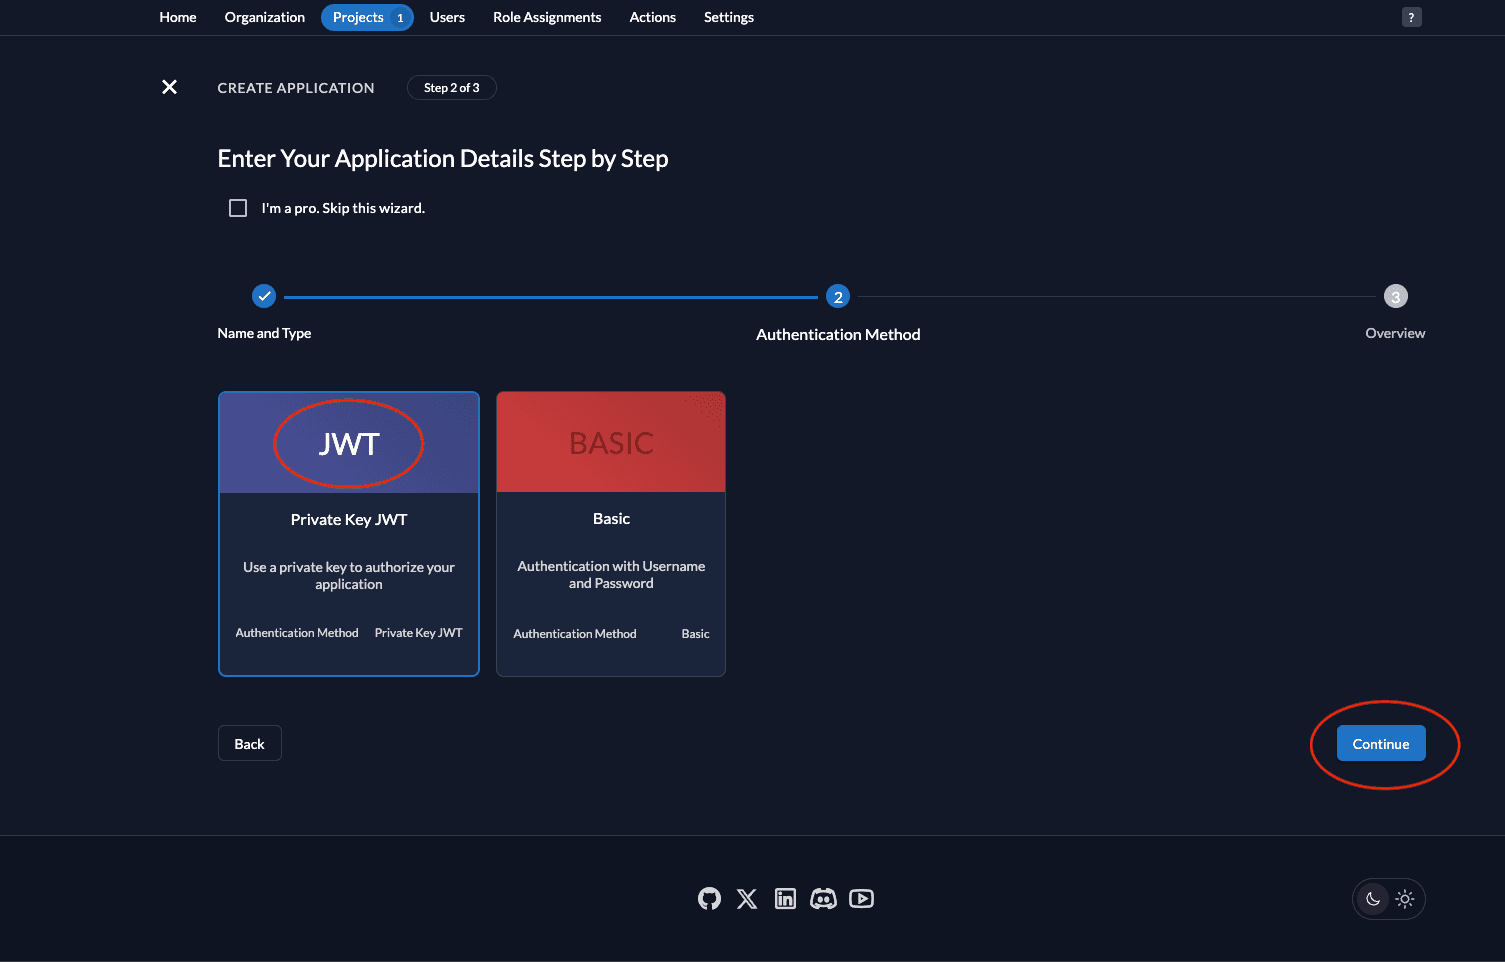
- Select JWT as the authentication method and click Continue.
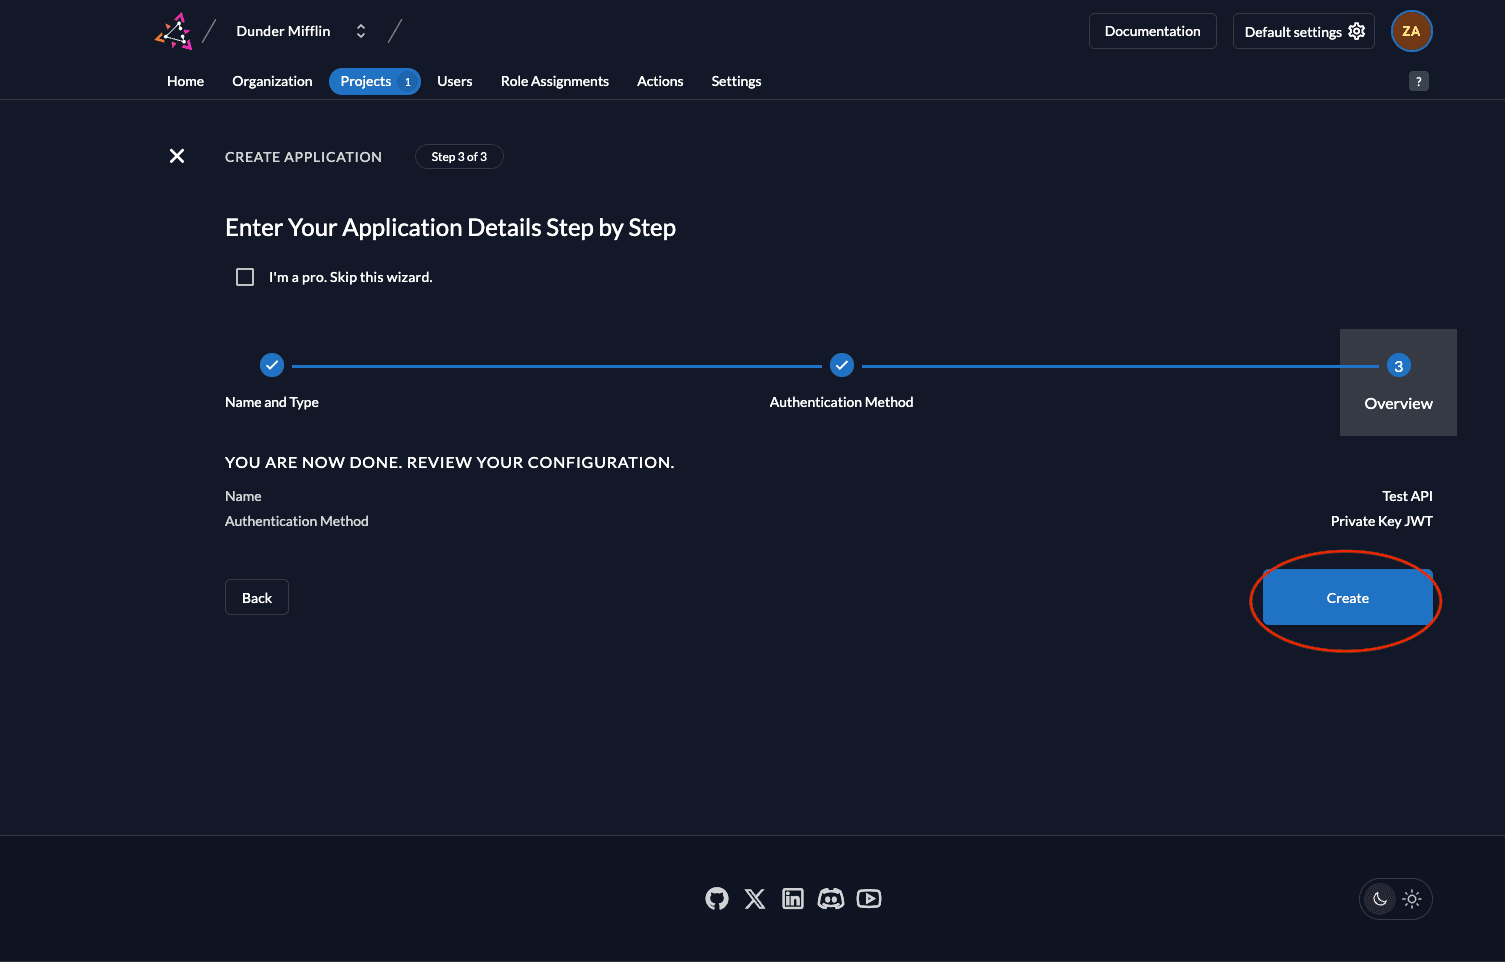
- Now review your settings and click Create.
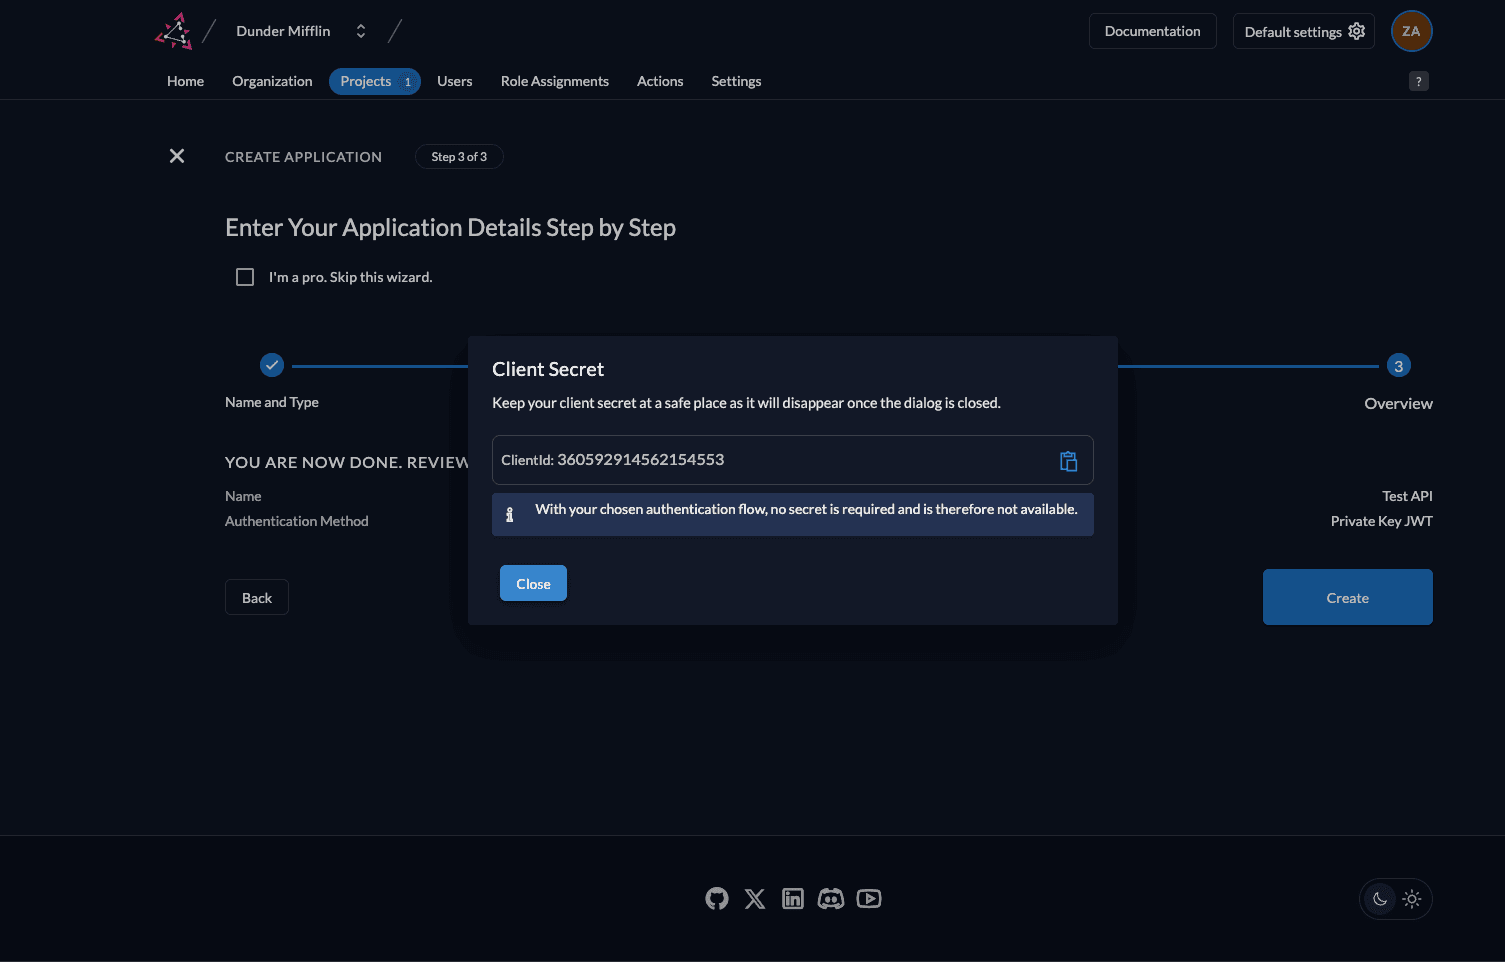
- You will now see the API’s Client ID. You will not see a Client Secret because we are using a private JWT key.
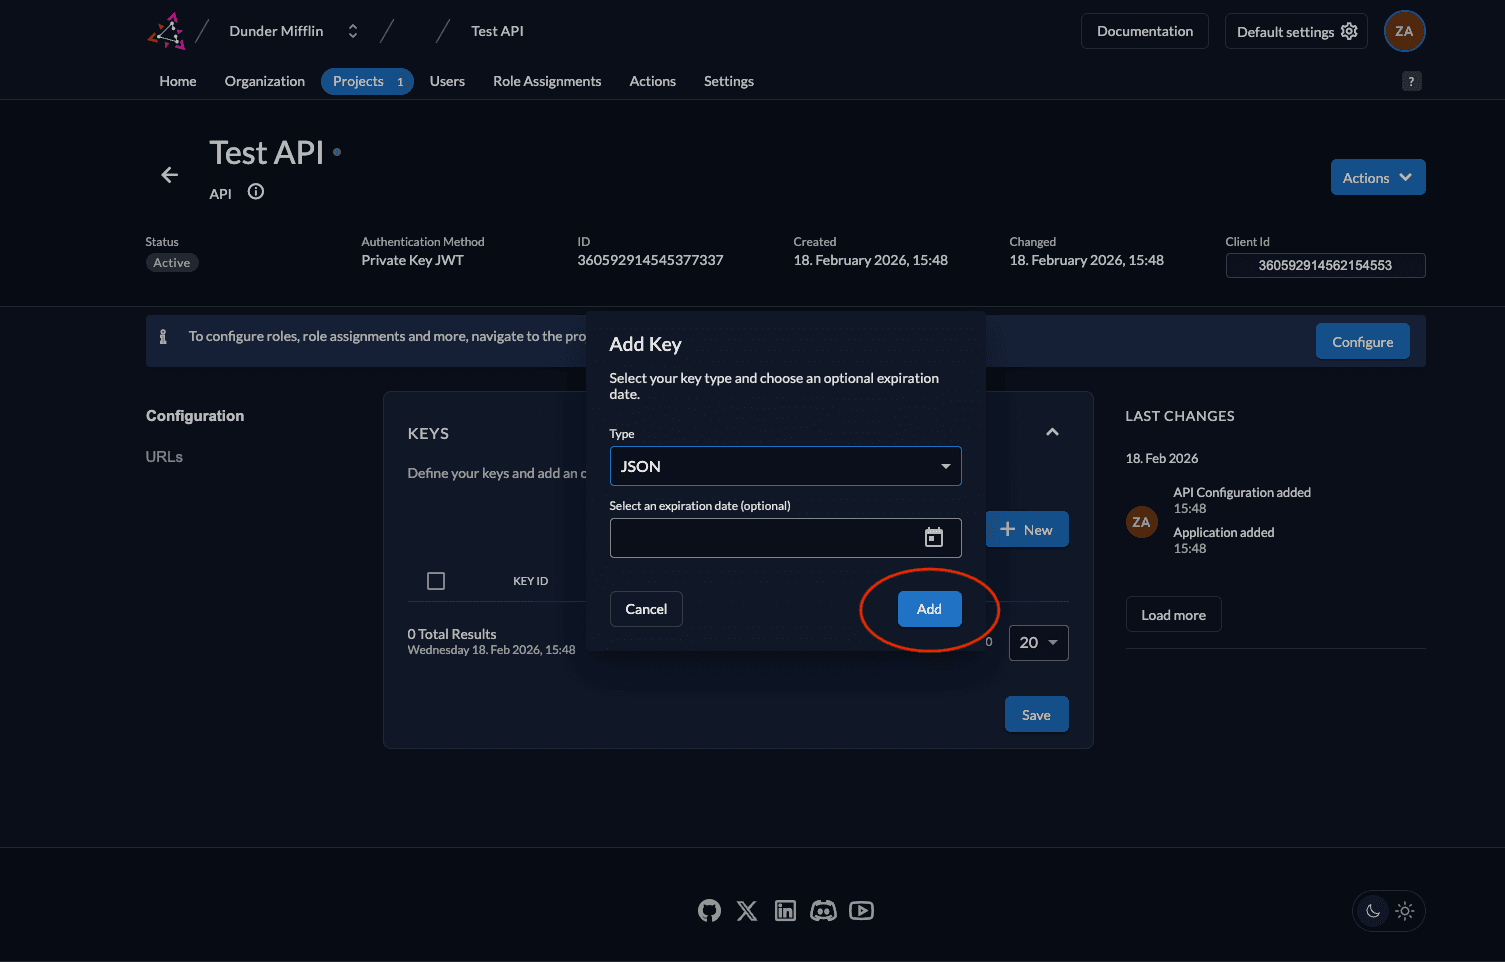
- Next, we must create the key pairs. Click on New.

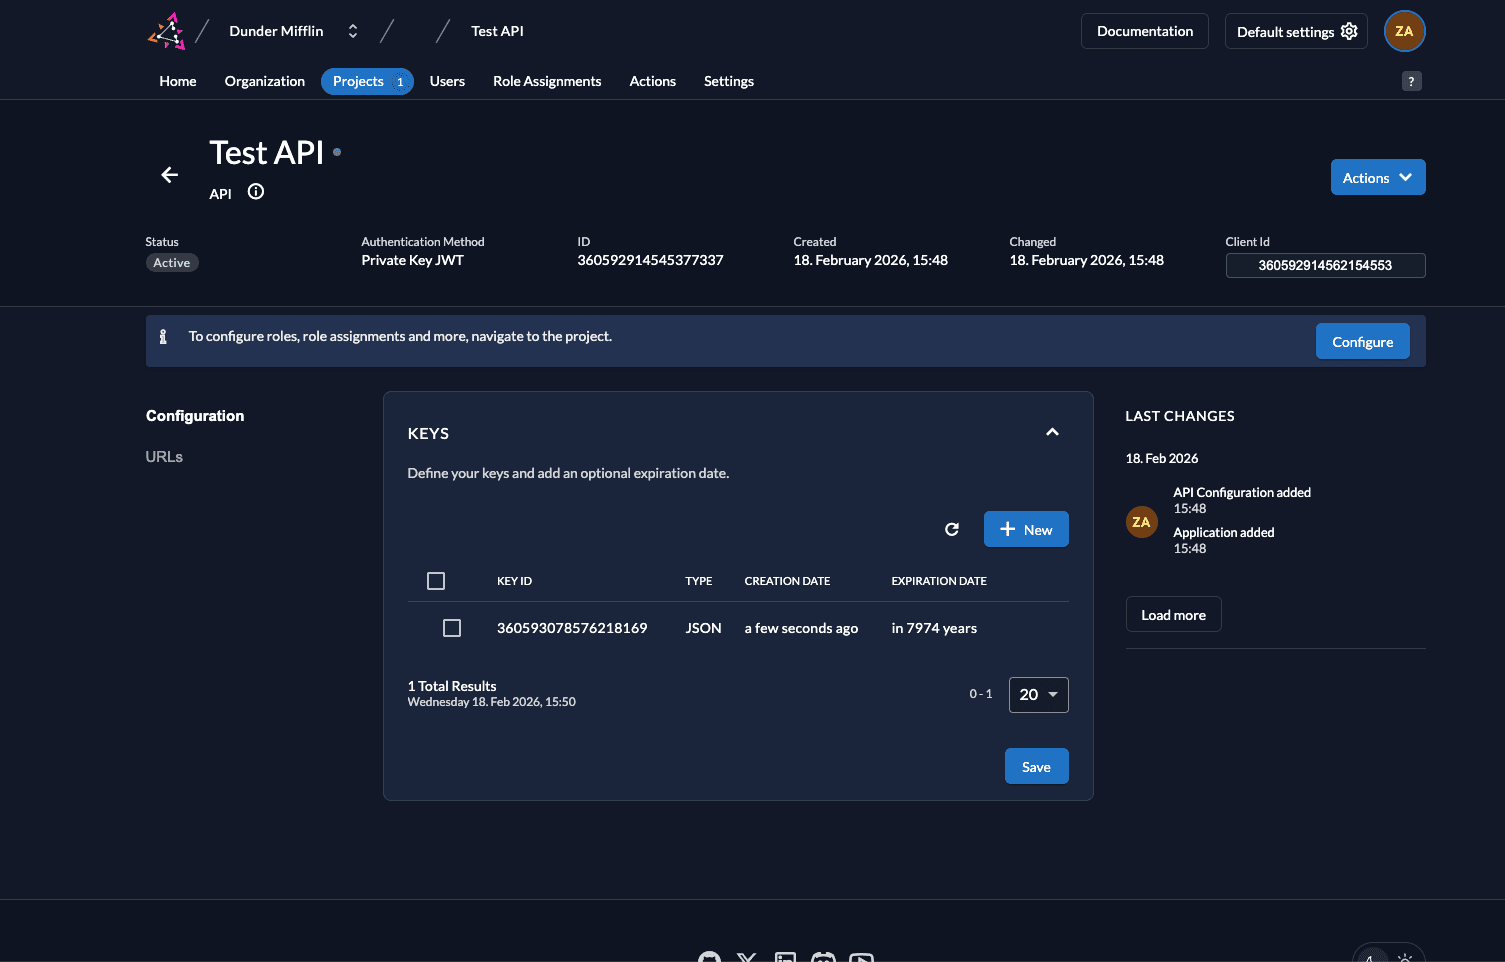
- Select JSON as the type of key. You can also set an expiration time for the key or leave it empty. Click on Add.
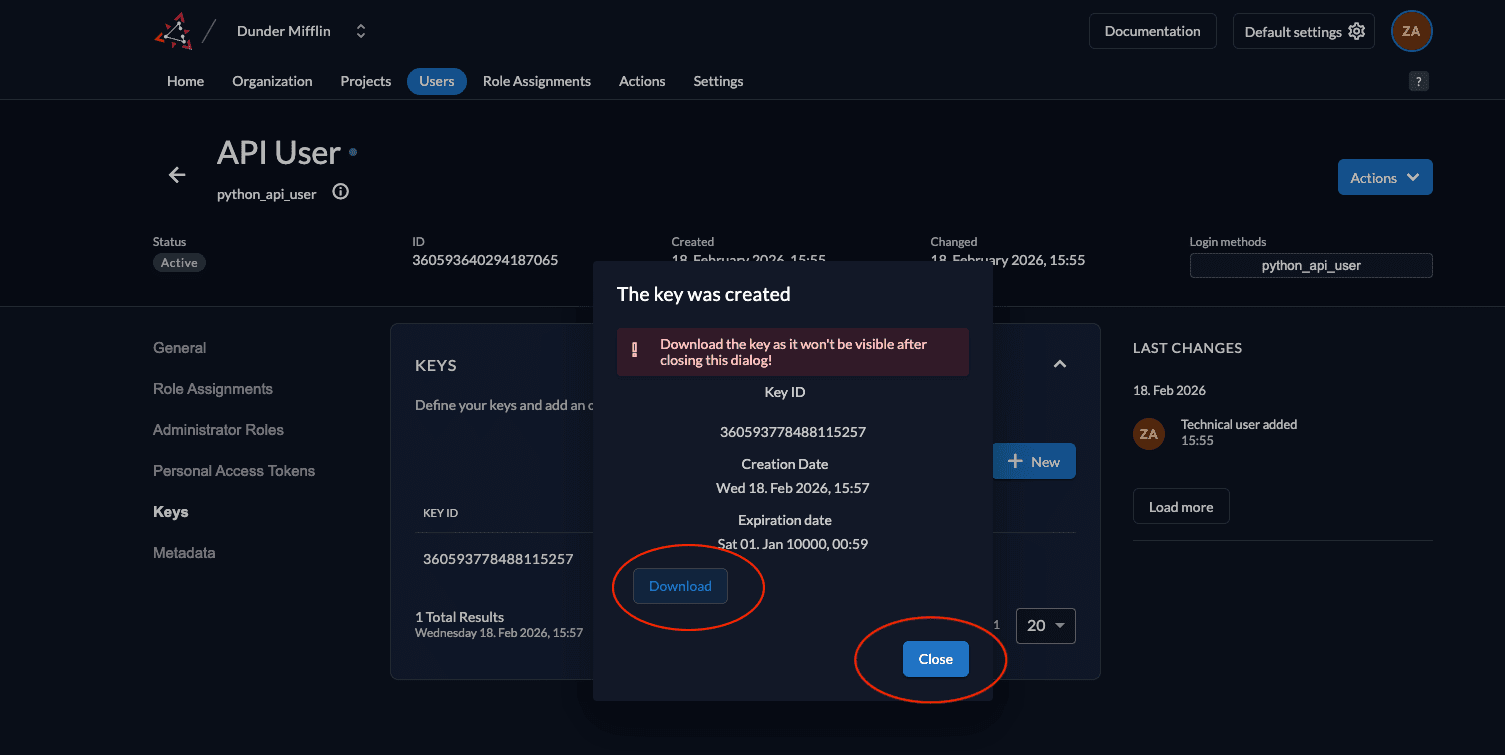
- Download the created key by clicking the Download button and then click Close.
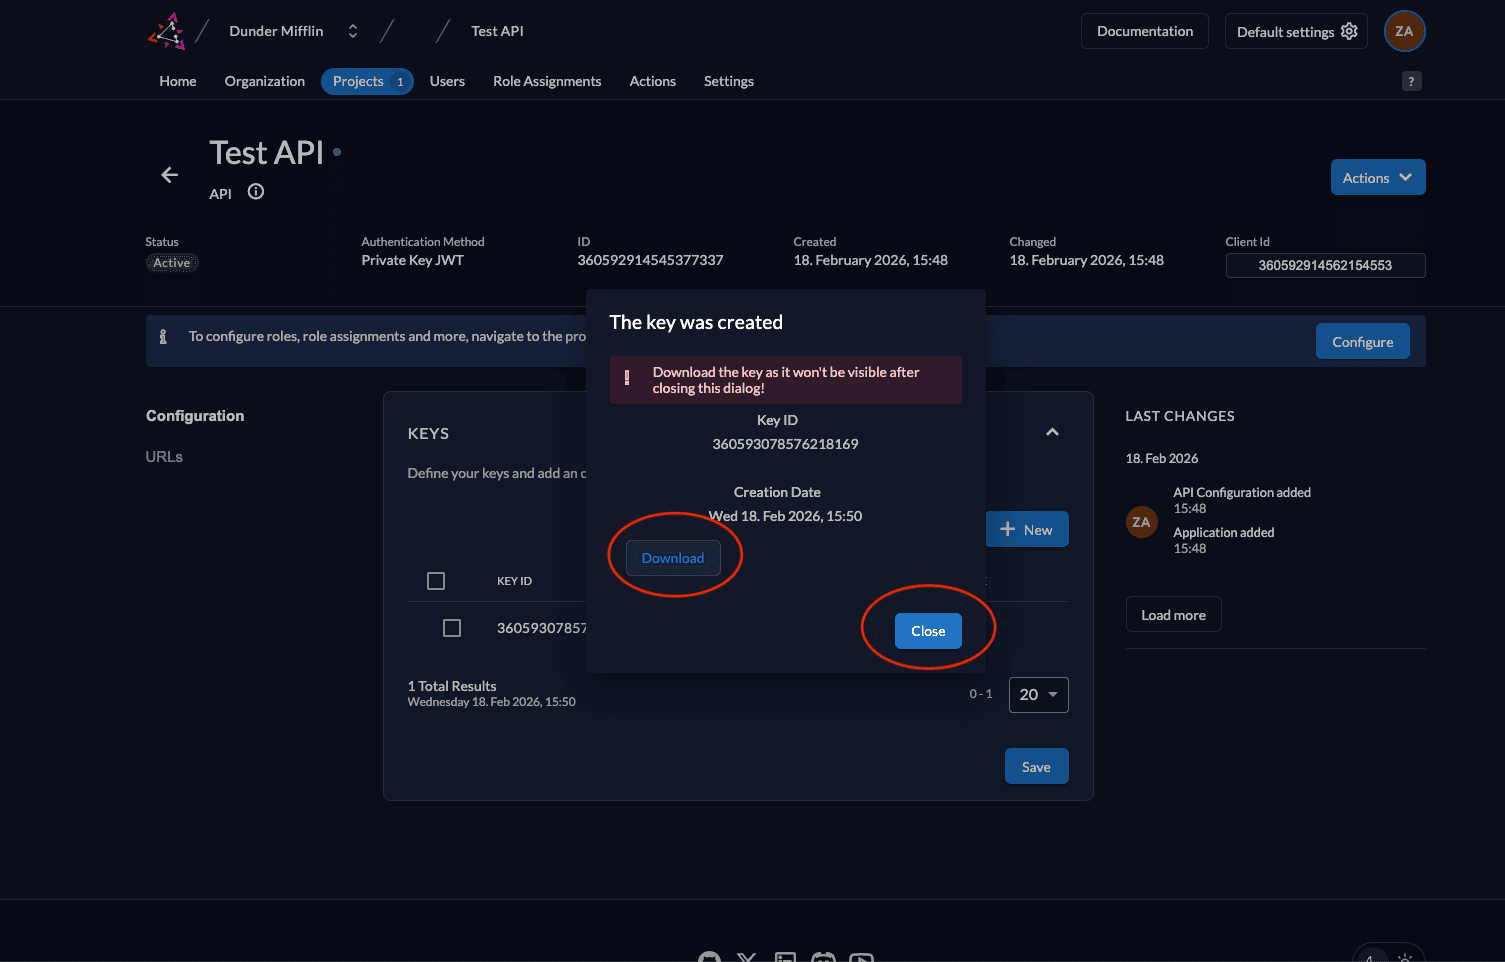
- The key will be downloaded.
- When you click on URLs on the left, you will see the relevant OIDC URLs. Note down the issuer URL, token_endpoint and introspection_endpoint.

- The key that you downloaded will be of the following format.
{
  "type":"application",
  "keyId":"<YOUR_KEY_ID>",
  "key":"-----BEGIN RSA PRIVATE KEY-----\<YOUR_PRIVATE_KEY>\n-----END RSA PRIVATE KEY-----\n",
  "appId":"<YOUR_APP_ID>",
  "clientId":"<YOUR_CLIENT_ID>"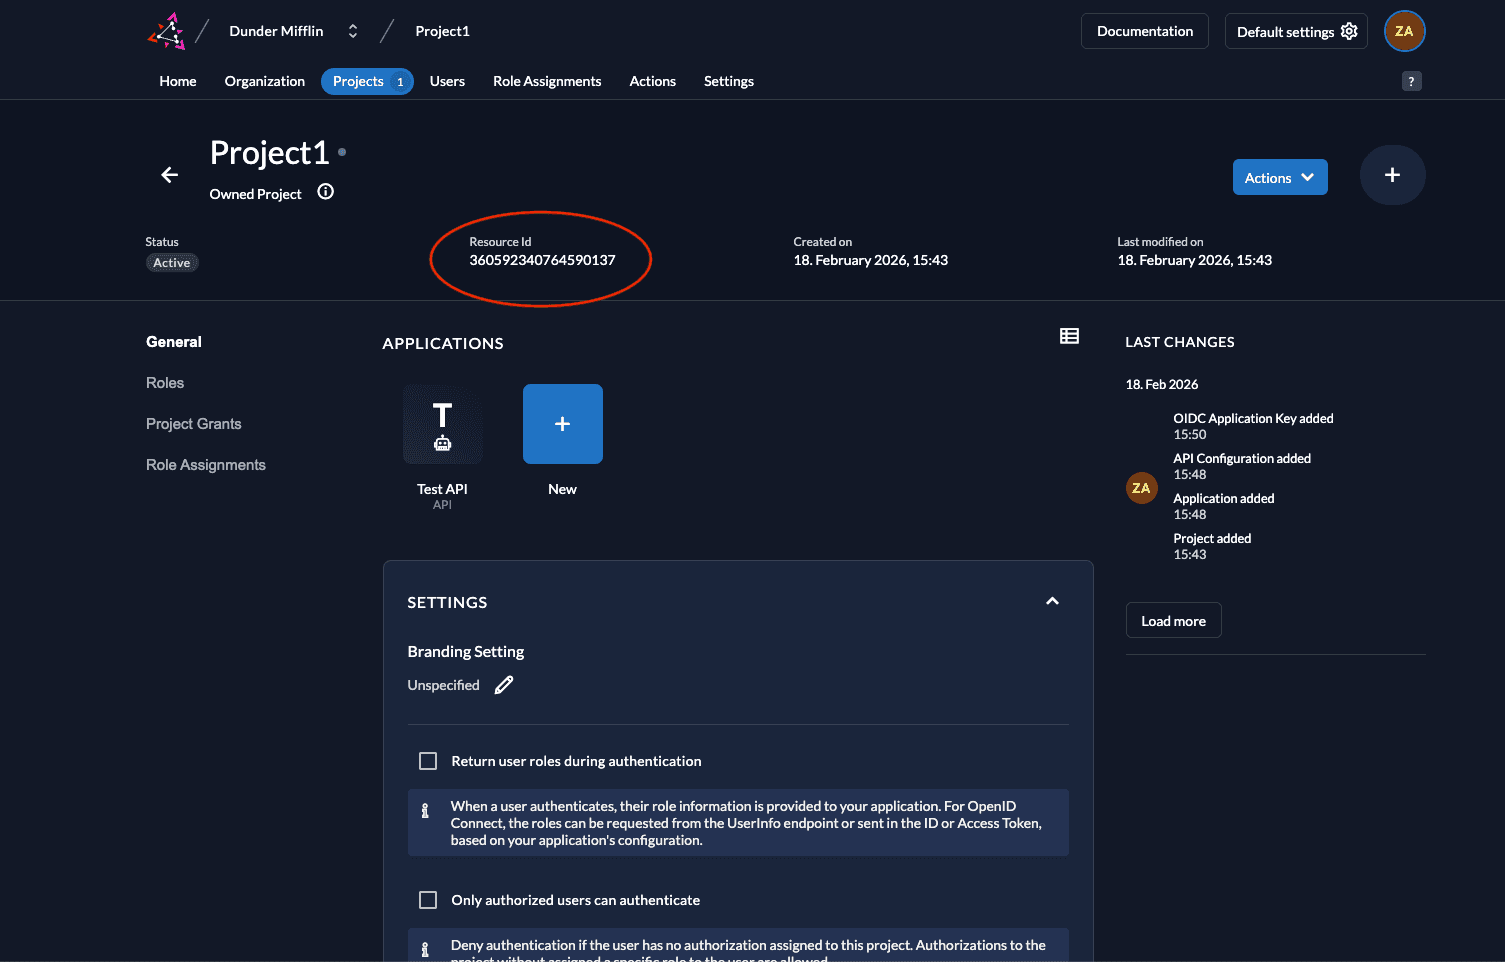
}- Also note down the Project ID of your project.
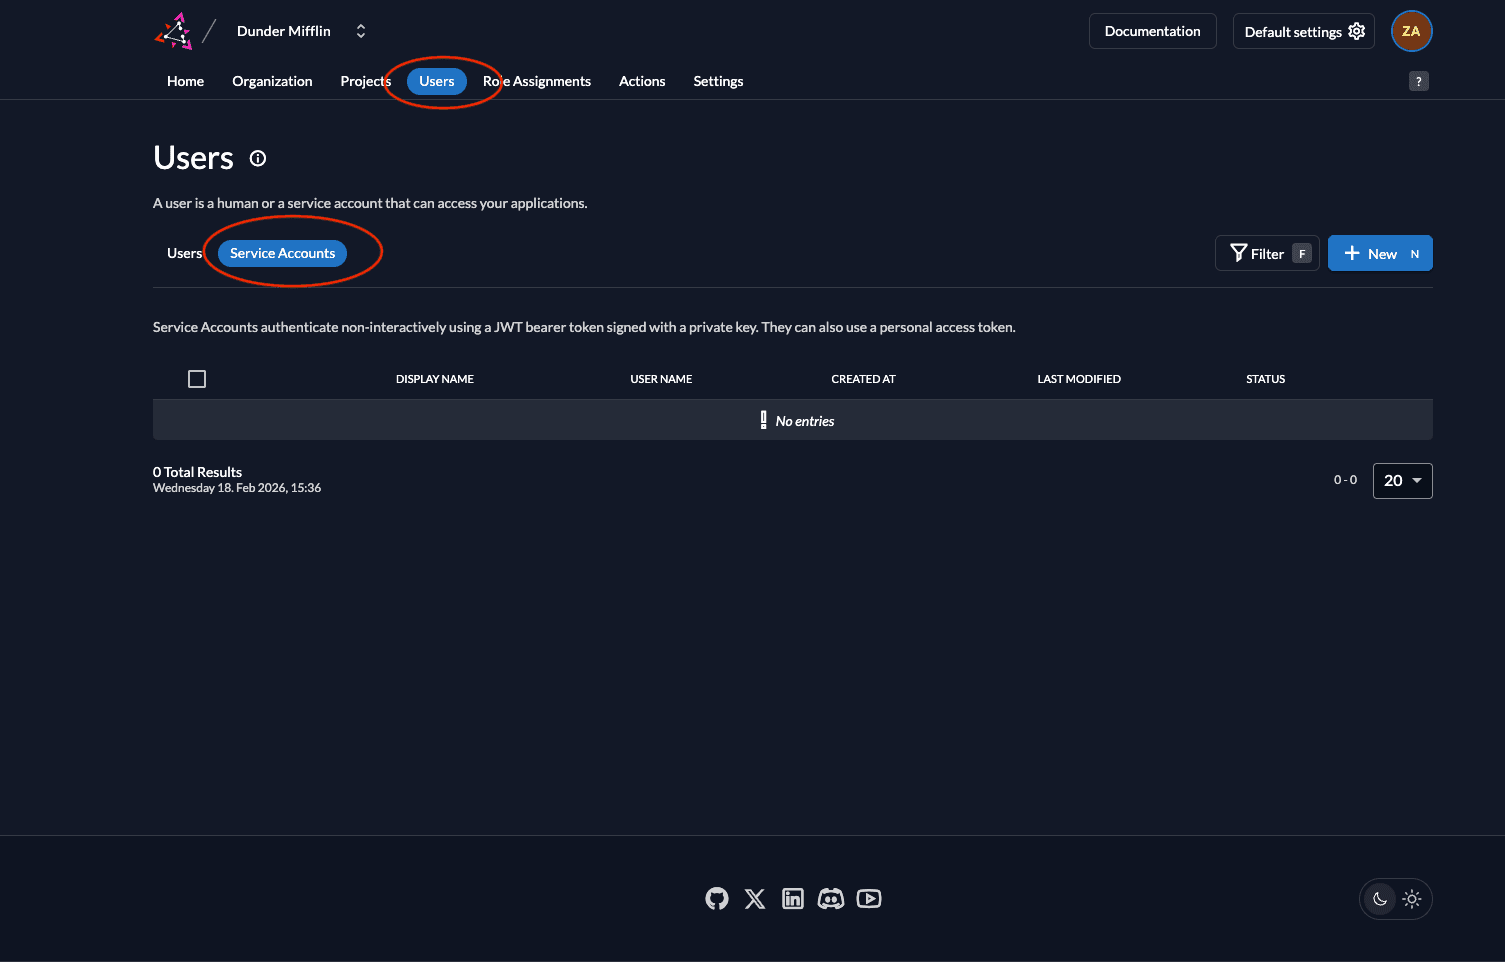
Create Service Account
- Go to the Users tab in your organization as shown below and click on the Service Accounts tab.
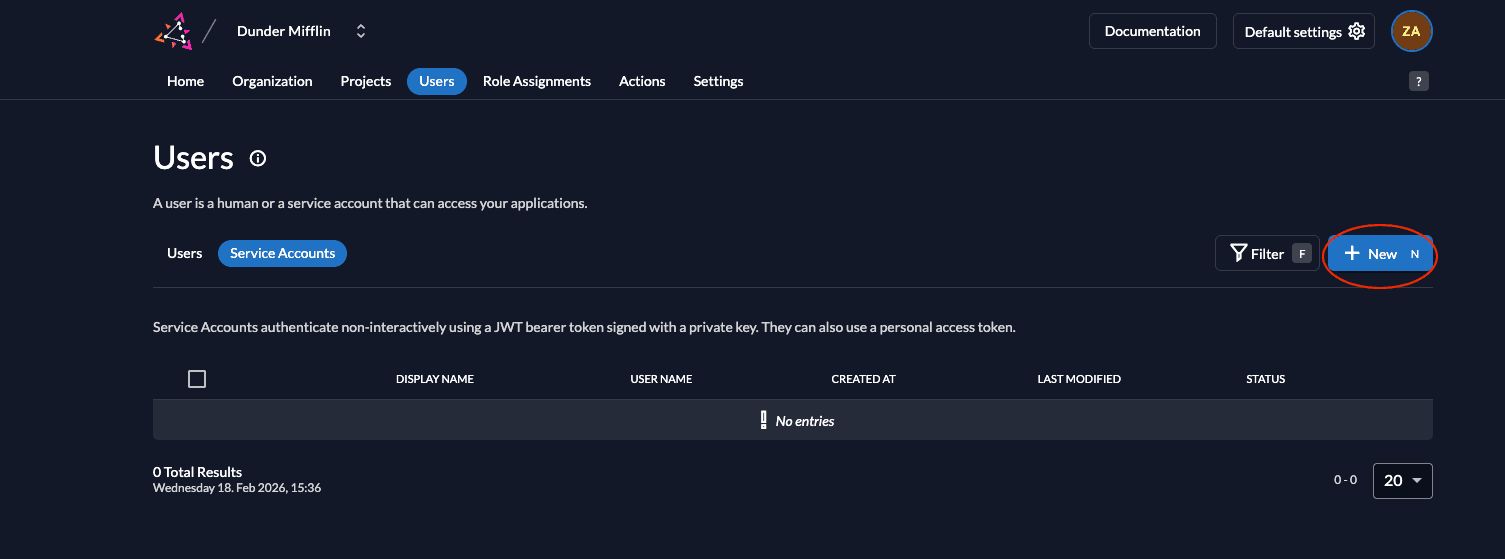
- To add a service account, click on the New button.
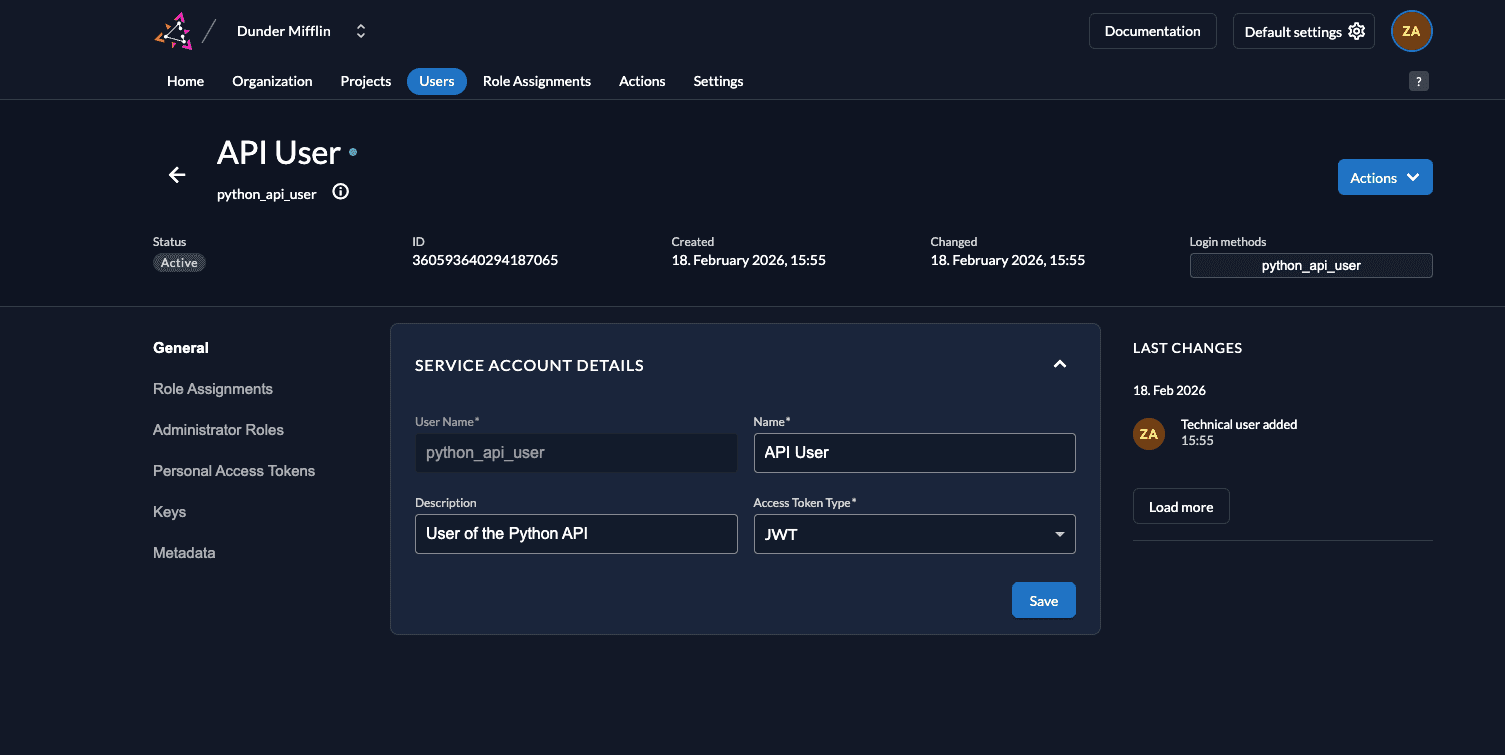
- Next, add the details of the service account and select either Bearer or JWT for Access Token Type and click on Create. For this example, we will select JWT.

- Now you will see the saved details.
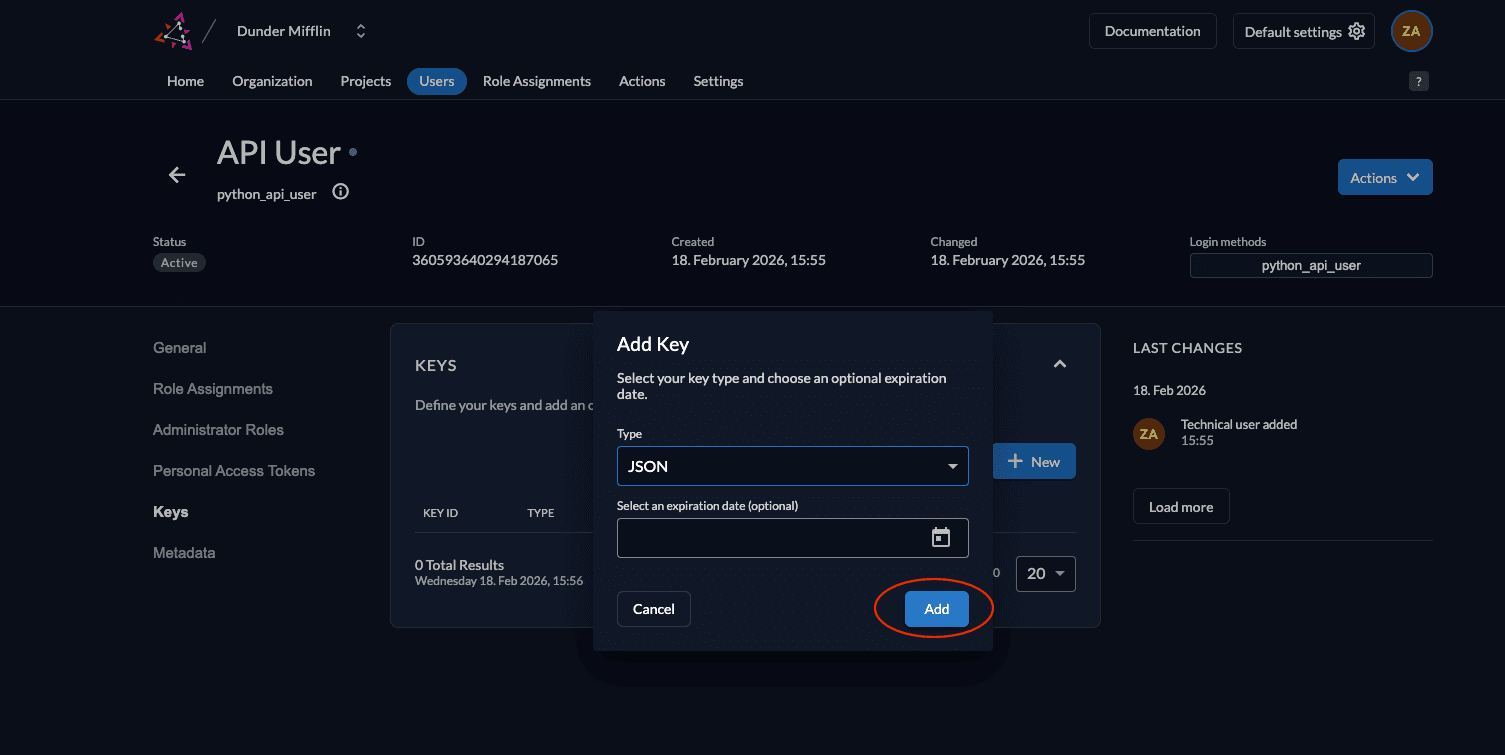
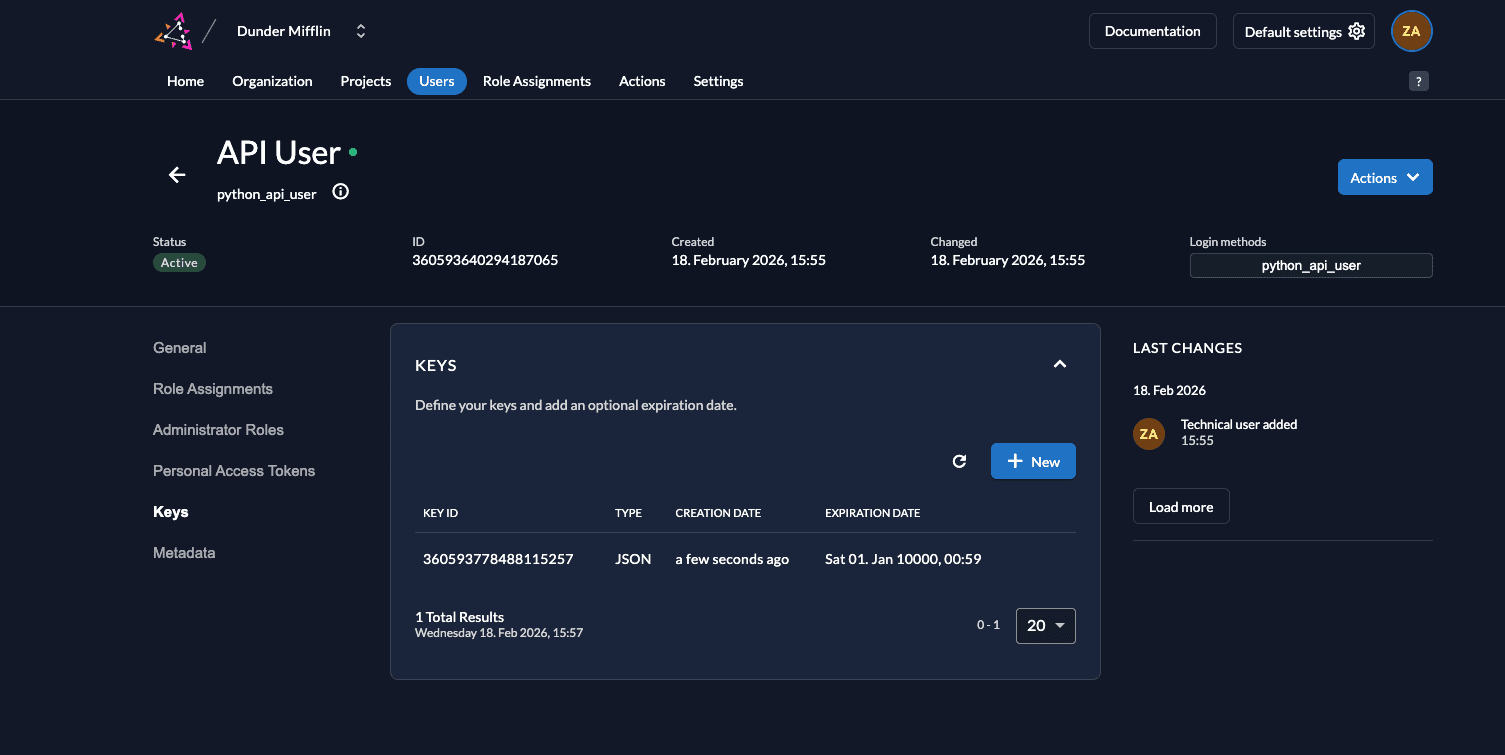
- Next, we need to generate a private-public key pair in ZITADEL and you must get the private key to sign your JWT. Go to Keys and click on New.

- Select type JSON and click Add.
- Download the key by clicking Download. After the download, click Close.
- You will see the following screen afterward.
- The downloaded key will be of the following format:
{
    "type":"serviceaccount",
    "keyId":"<YOUR_KEY_ID>",
    "key":"-----BEGIN RSA PRIVATE KEY-----\n<YOUR_KEY>\n-----END RSA PRIVATE KEY-----\n",
    "userId":"<YOUR_USER_ID>"
}
Assign a role to the Service Account
In order to access this route, you must create the role read:messages in your ZITADEL project and also assign a role to the service account you created by adding the role to the user. Follow these steps to do so:
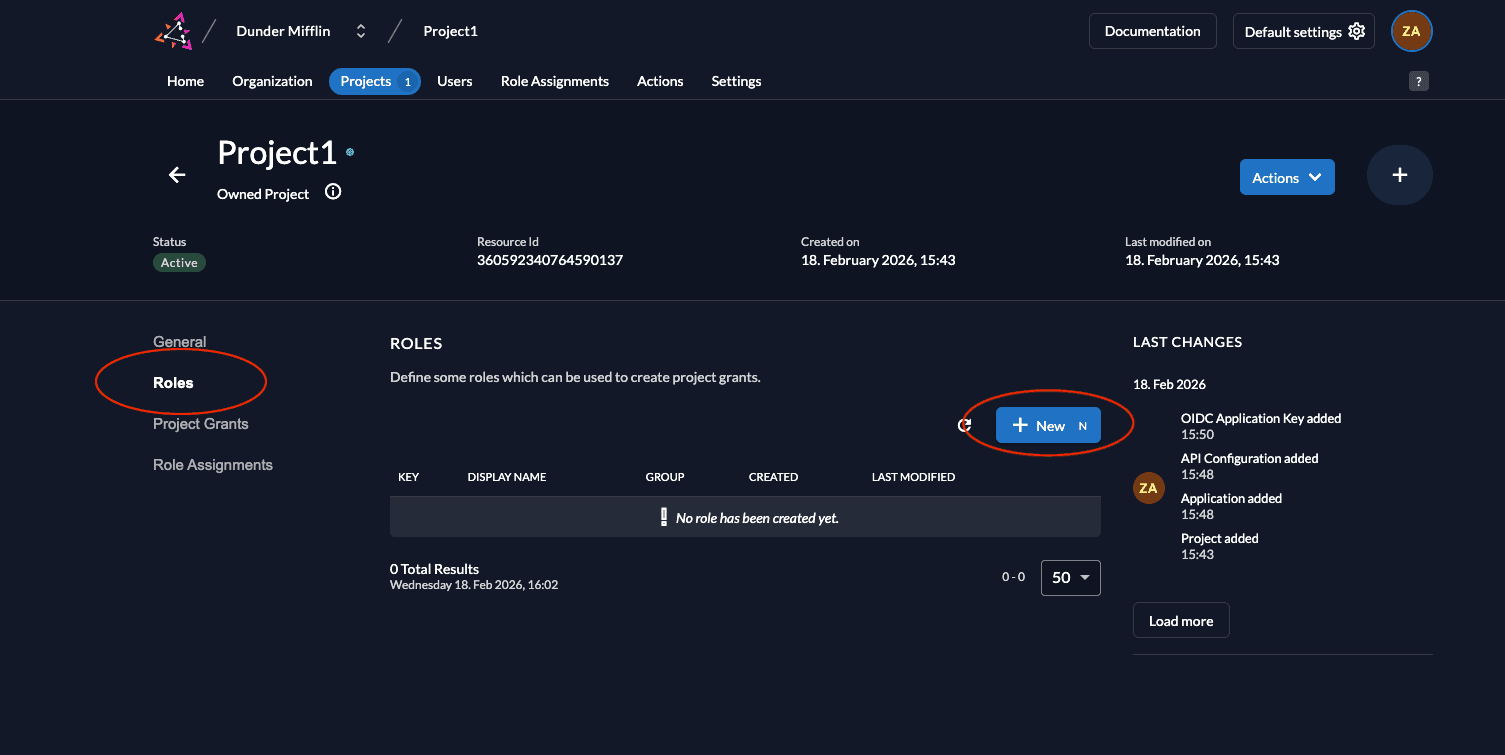
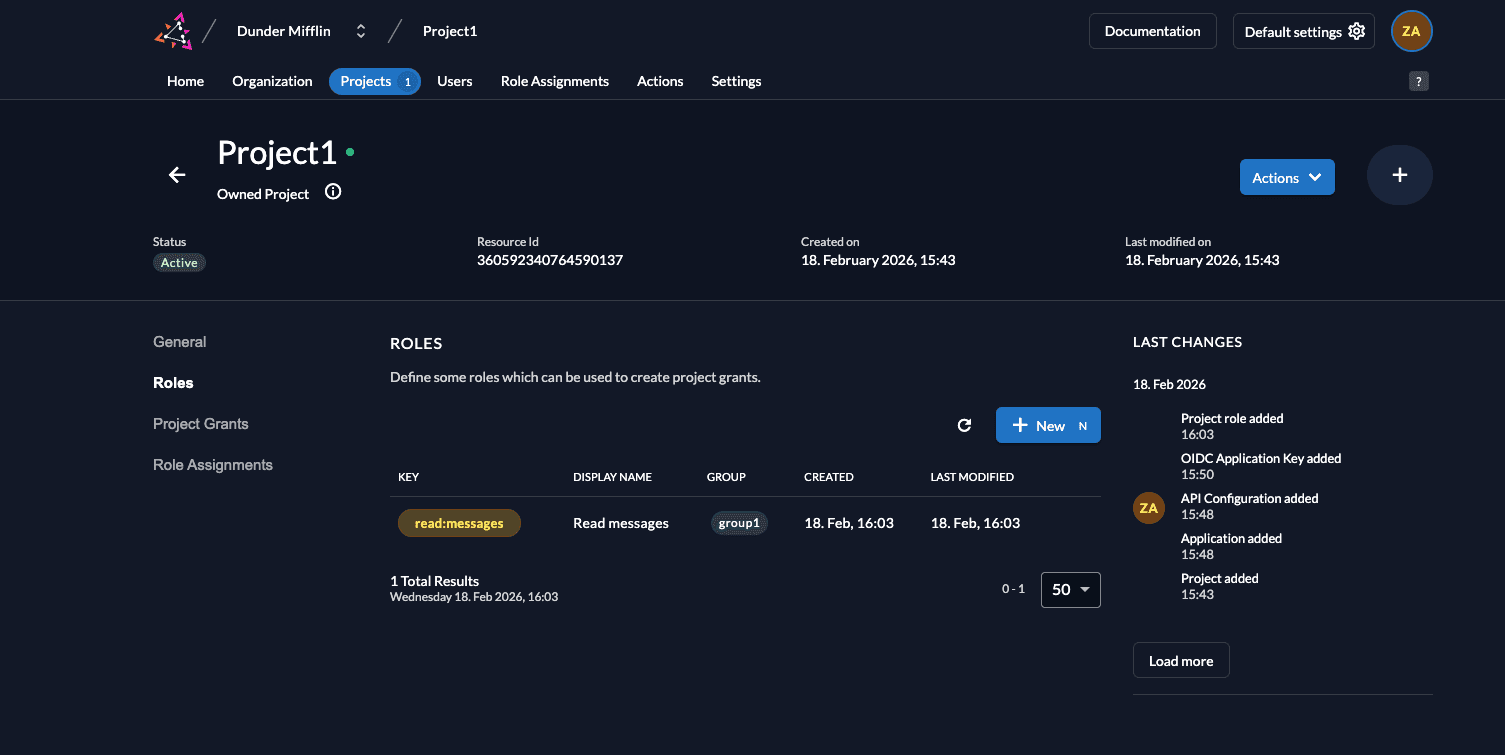
- Go to your project and select Roles. Click New.
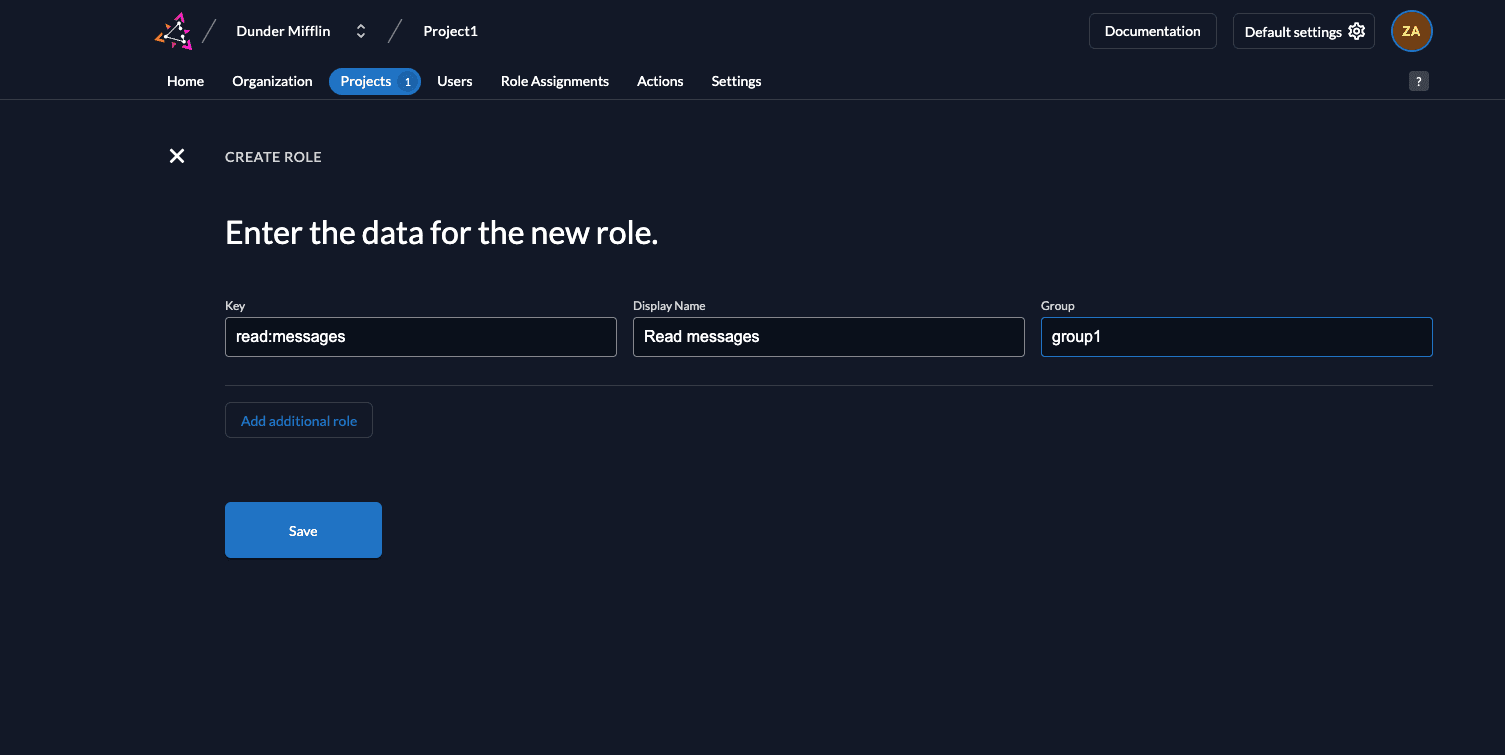
- Add the
read:messagesrole as shown below and click Save.
- You will see the created role listed.
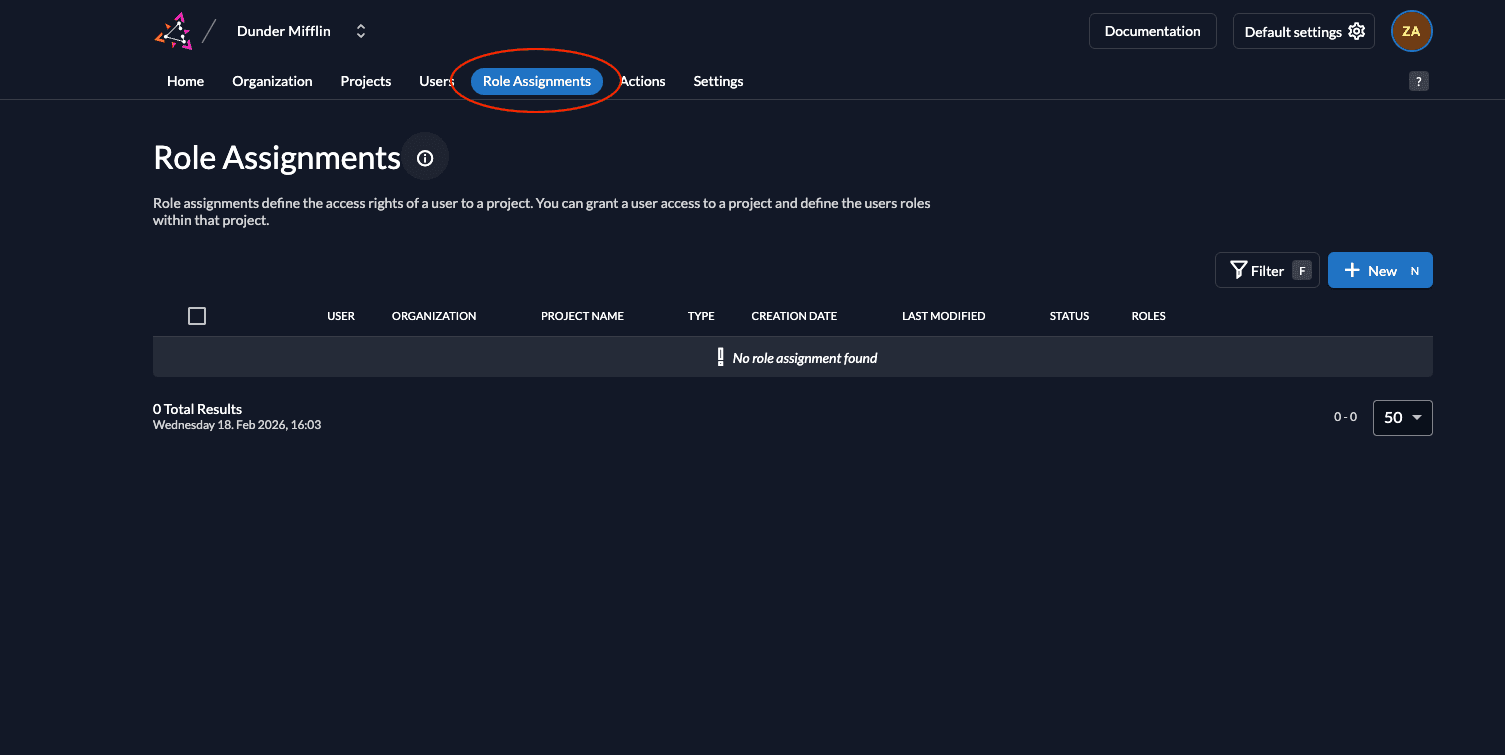
- To assign this role to a user, click on Role Assignments.
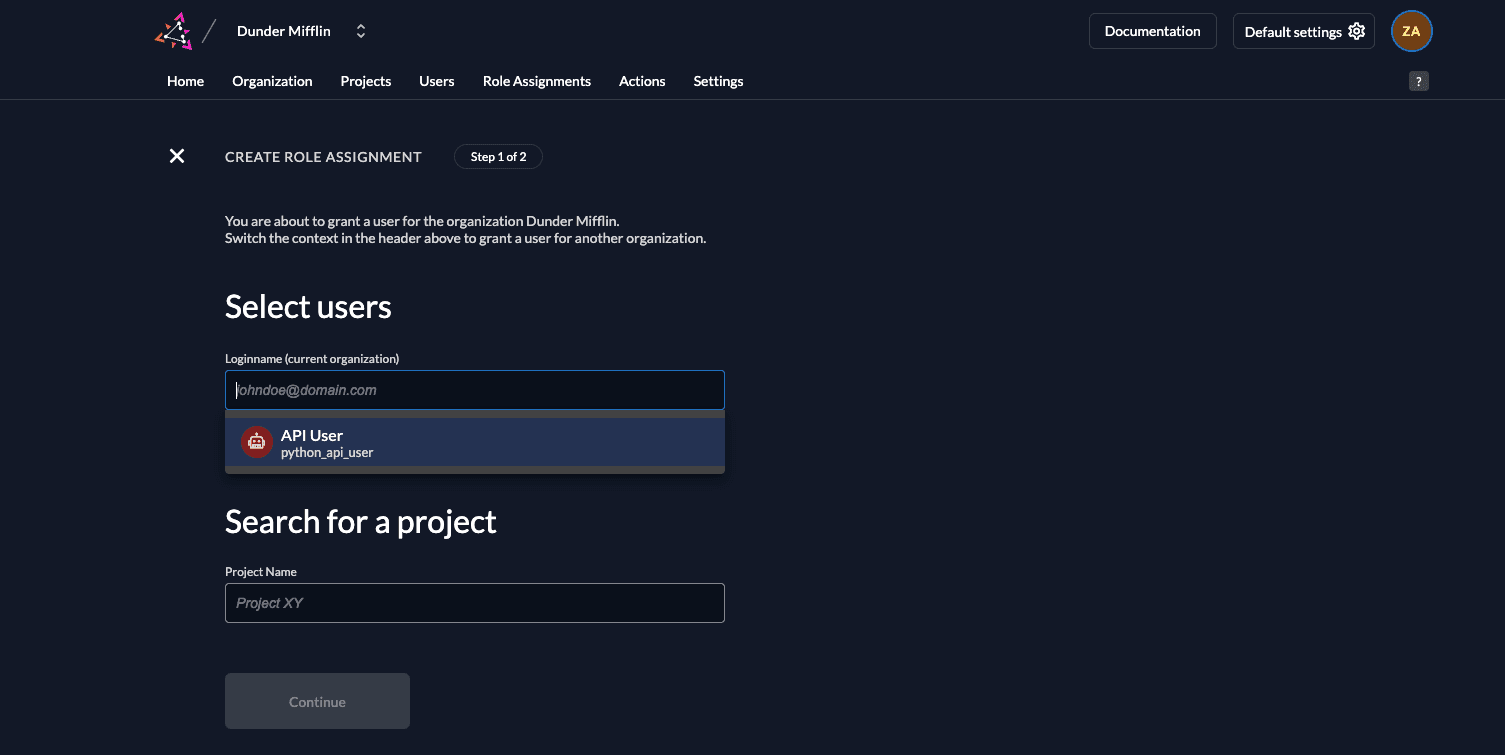
- Select the user you want to assign the role to.
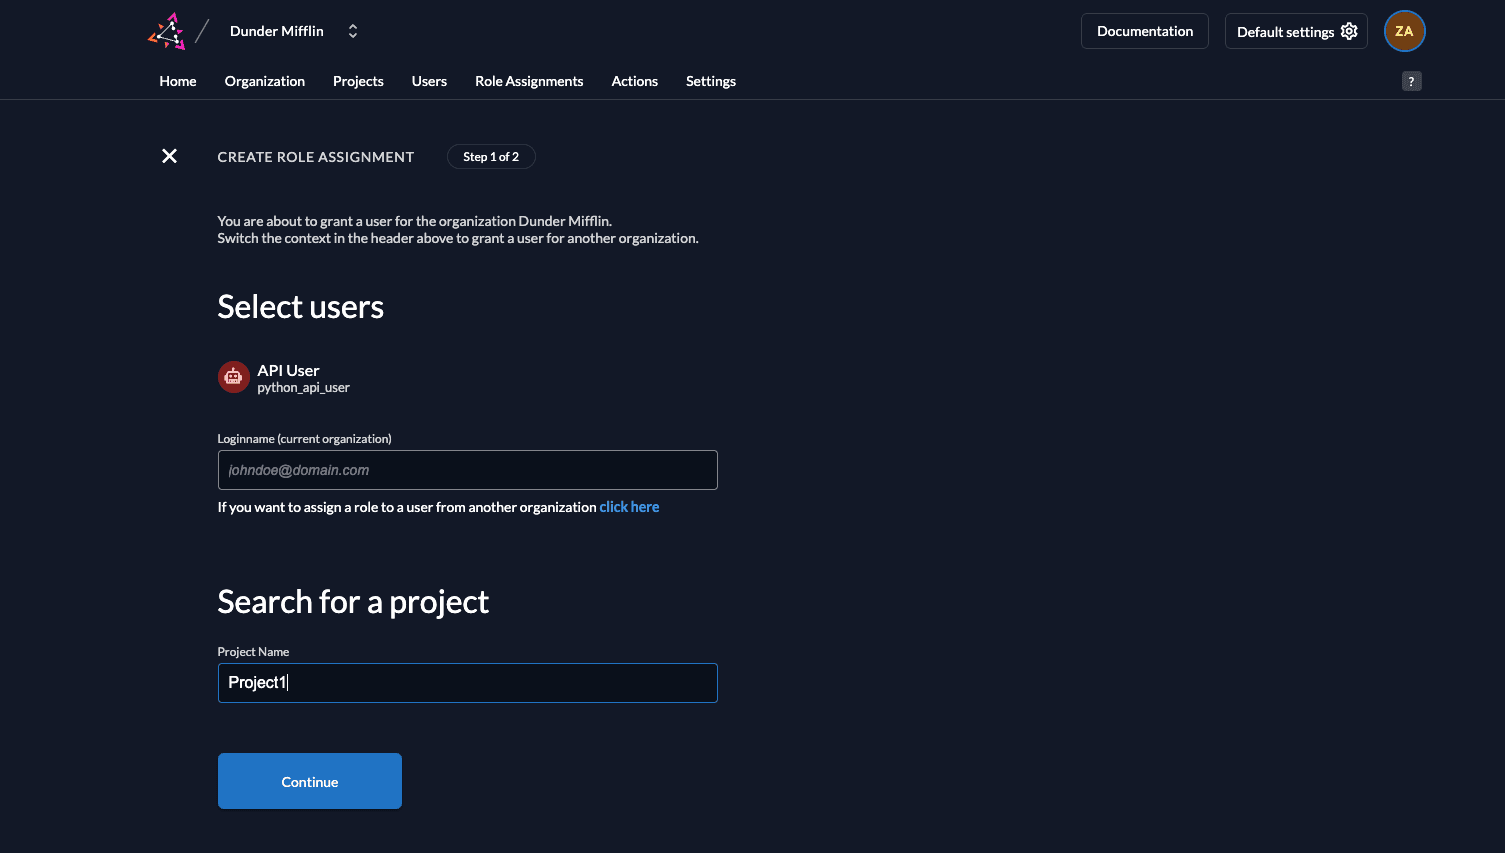
- Select the project where this role assignment is applicable.
 7. Click Continue.
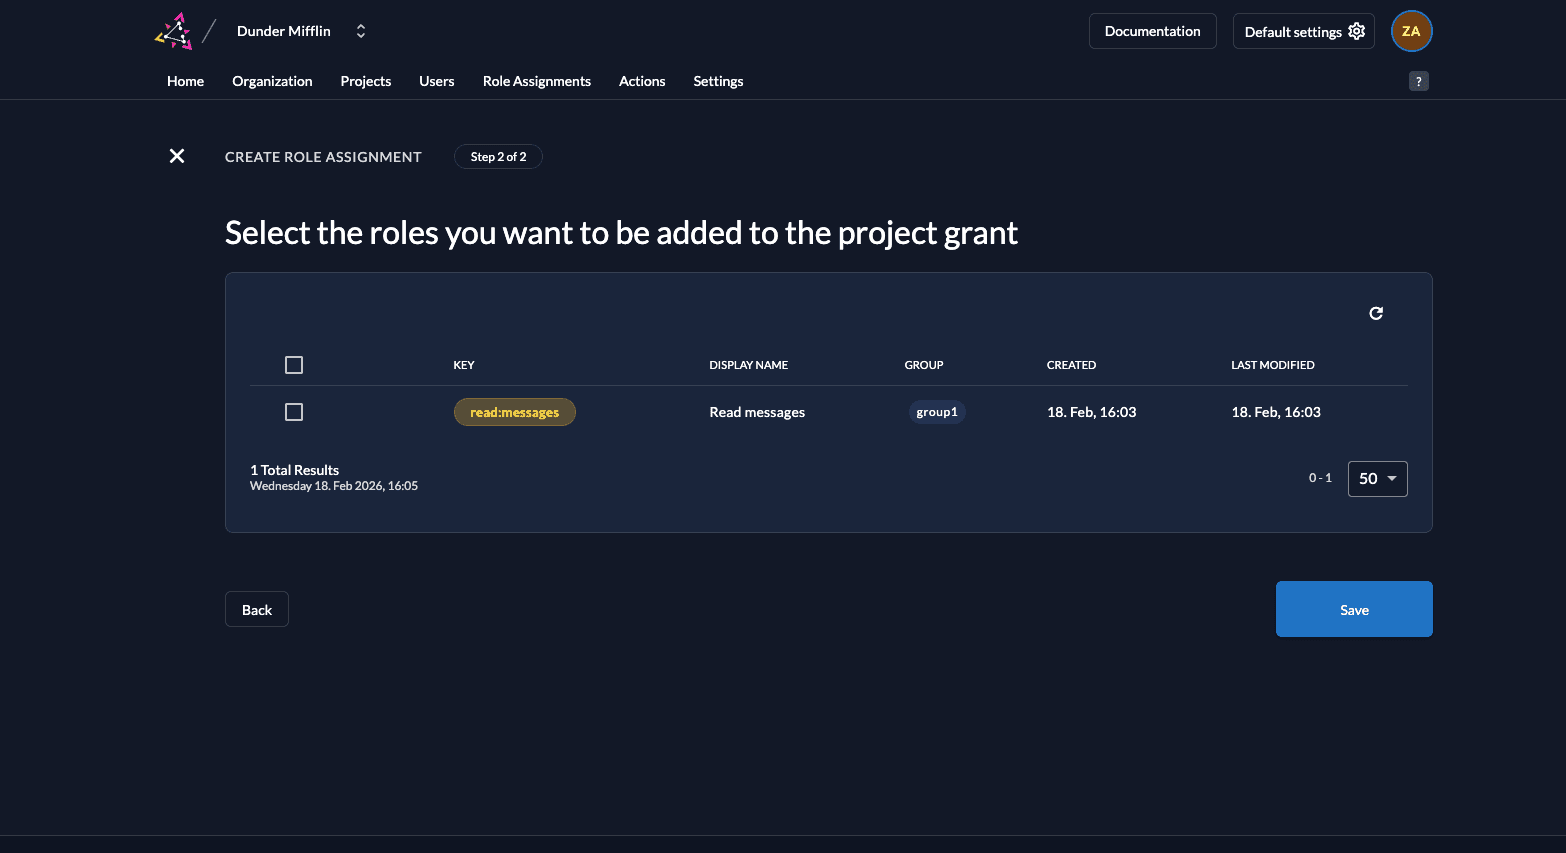
- Select the role read:messages and click Save.
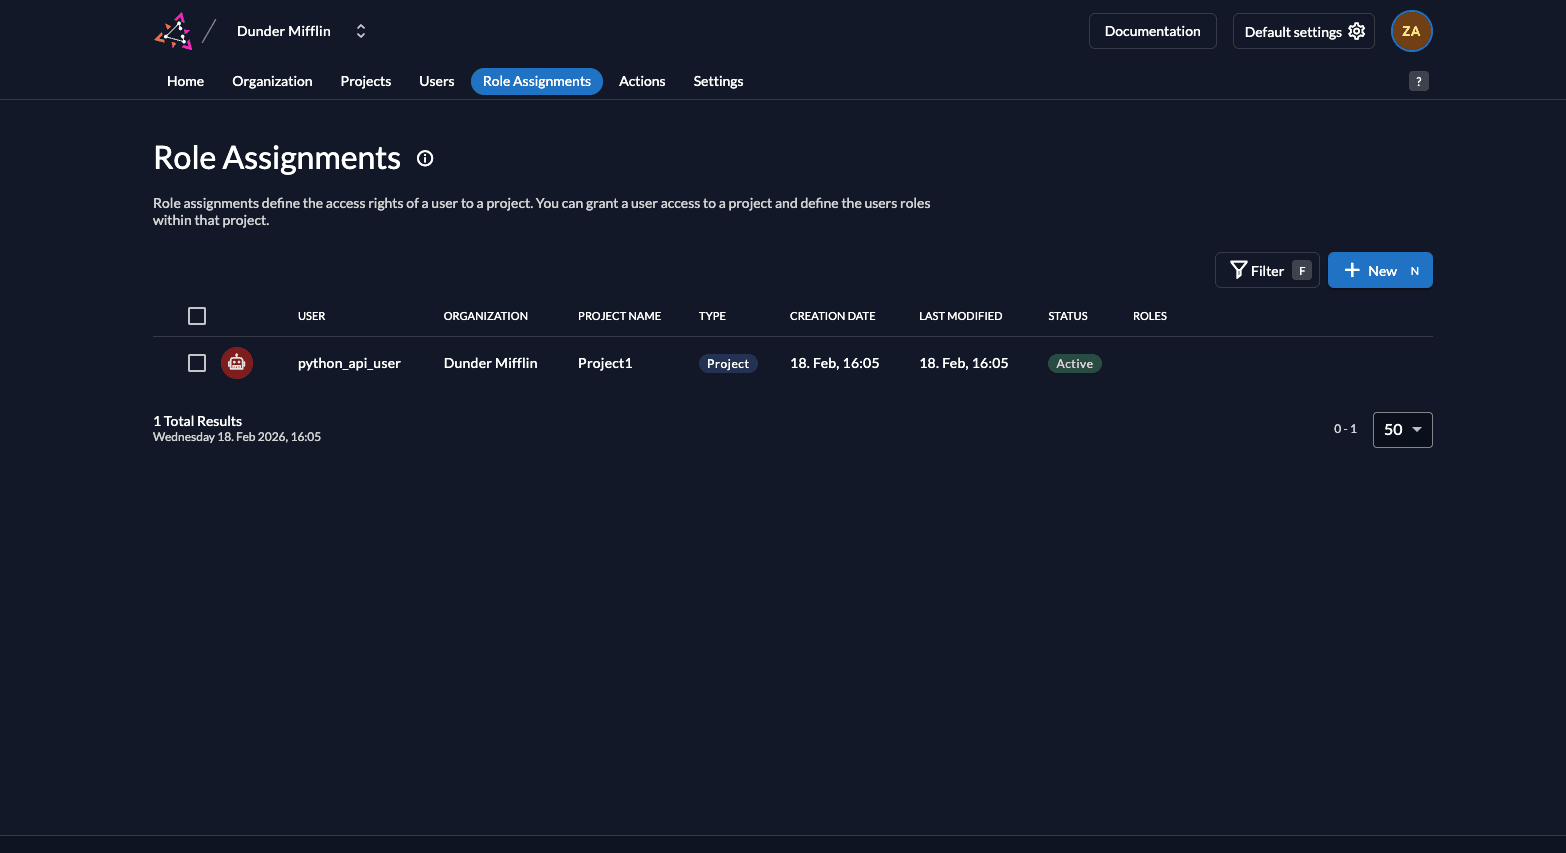
- You will now see the service account has been assigned the role read:messages.
Prerequisites
At the end you should have the following for the API:
- Issuer, something like
https://example.zitadel.cloudorhttp://localhost:8080 - Introspection URL, something like
https://example.zitadel.cloud/oauth/v2/introspect - Token URL, something like
https://example.zitadel.cloud/oauth/v2/token .json-key-file for the API, from the application- ID of the project
And the following from the Service Account:
.json-key-file from the service account
Setup new Django application
Setup Python
You have to install Python as described in their documentation.
Install dependencies
For this example we need the following dependencies:
django: to create an API with djangopython-dotenv: to use environment variables in the settingsauthlib: client-side OAuth functionalityrequests: HTTP requests for the introspection
For the dependencies we need a requirements.txt-file with the following content:
# To ensure app dependencies are ported from your virtual environment/host machine into your container, run 'pip freeze > requirements.txt' in the terminal to overwrite this filedjango==5.1.15python-dotenv==1.0.0authlib~=1.3.0requests~=2.31.0Then install all dependencies with:
python -m pip install -U requirements.txtThen in your folder of choice, call the following command to create a Django base:
django-admin startproject myapi .Define the Django API
Add to the settings.py to include ZITADEL info
There is info needed for the introspection calls, which we put into the settings.py:
from dotenv import load_dotenvimport osload_dotenv()ZITADEL_INTROSPECTION_URL = os.environ.get("ZITADEL_INTROSPECTION_URL")ZITADEL_DOMAIN = os.environ.get("ZITADEL_DOMAIN")API_PRIVATE_KEY_FILE_PATH = os.environ.get("API_PRIVATE_KEY_FILE_PATH")ALGORITHM = 'RS256'and create a ".env"-file in the root folder with the settings as an example:
ZITADEL_INTROSPECTION_URL = 'URL to the introspection endpoint to verify the provided token'
ZITADEL_DOMAIN = 'Domain used as audience in the token verification'
API_PRIVATE_KEY_FILE_PATH = 'Path to the key.json created in ZITADEL'
I should look something like this:
ZITADEL_INTROSPECTION_URL = 'https://example.zitadel.cloud/oauth/v2/introspect'
ZITADEL_DOMAIN = 'https://example.zitadel.cloud'
API_PRIVATE_KEY_FILE_PATH = '/tmp/example/250719519163548112.json'
Validator definition
To validate the tokens, we need a validator which can be called in the event of API-calls.
validator.py:
import timeimport jsonfrom authlib.jose import jwtfrom typing import Dictfrom authlib.oauth2.rfc7662 import IntrospectTokenValidatorimport requestsfrom . import settingsAPI_PRIVATE_KEY_FILE = {}class ValidatorError(Exception): def __init__(self, error: Dict[str, str], status_code: int): super().__init__() self.error = error self.status_code = status_codeclass ZitadelIntrospectTokenValidator(IntrospectTokenValidator): def __init__(self, *args, **kwargs): super().__init__(*args, **kwargs) self.load_api_private_key(settings.API_PRIVATE_KEY_FILE_PATH) @staticmethod def load_api_private_key(file_path): with open(file_path, "r") as f: data = json.load(f) API_PRIVATE_KEY_FILE["client_id"] = data["clientId"] API_PRIVATE_KEY_FILE["key_id"] = data["keyId"] API_PRIVATE_KEY_FILE["private_key"] = data["key"] def introspect_token(self, token_string): # Create JWT for client assertion payload = { "iss": API_PRIVATE_KEY_FILE["client_id"], "sub": API_PRIVATE_KEY_FILE["client_id"], "aud": settings.ZITADEL_DOMAIN, "exp": int(time.time()) + 60 * 60, # Expires in 1 hour "iat": int(time.time()), } header = {"alg": settings.ALGORITHM, "kid": API_PRIVATE_KEY_FILE["key_id"]} jwt_token = jwt.encode( header, payload, API_PRIVATE_KEY_FILE["private_key"], ) # Send introspection request headers = {"Content-Type": "application/x-www-form-urlencoded"} data = { "client_assertion_type": "urn:ietf:params:oauth:client-assertion-type:jwt-bearer", "client_assertion": jwt_token, "token": token_string, } response = requests.post( settings.ZITADEL_INTROSPECTION_URL, headers=headers, data=data ) response.raise_for_status() token_data = response.json() print(f"Token data from introspection: {token_data}") return token_data def match_token_scopes(self, token, or_scopes): if or_scopes is None: return True scopes = token.get("scope", "").split() for and_scopes in or_scopes: if all(key in scopes for key in and_scopes.split()): return True return False def validate_token(self, token, scopes, request): print(f"Token: {token}\n") now = int(time.time()) if not token: raise ValidatorError( {"code": "invalid_token_revoked", "description": "Token was revoked."}, 401, ) if not token.get("active"): raise ValidatorError( {"code": "invalid_token_inactive", "description": "Token is inactive."}, 401, ) if token["exp"] < now: raise ValidatorError( {"code": "invalid_token_expired", "description": "Token has expired."}, 401, ) if not self.match_token_scopes(token, scopes): raise ValidatorError( { "code": "insufficient_scope", "description": f"Token has insufficient scope. Route requires: {scopes}", }, 401, ) def __call__(self, token_string, scopes, request): token = self.introspect_token(token_string) self.validate_token(token, scopes, request) return tokenRequests and URLs
We define 3 different endpoints which differ in terms of requirements. views.py:
from authlib.integrations.django_oauth2 import ResourceProtectorfrom django.http import JsonResponsefrom . import validatorrequire_auth = ResourceProtector()require_auth.register_token_validator(validator.ZitadelIntrospectTokenValidator())def public(request): """No access token required to access this route """ response = "Hello from a public endpoint! You don't need to be authenticated to see this." return JsonResponse(dict(message=response))@require_auth(None)def private(request): """A valid access token is required to access this route """ response = "Hello from a private endpoint! You need to be authenticated to see this." return JsonResponse(dict(message=response))@require_auth("read:messages")def private_scoped(request): """A valid access token and an appropriate scope are required to access this route """ response = "Hello from a private endpoint! You need to be authenticated and have a scope of read:messages to see this." return JsonResponse(dict(message=response))To handle endpoints the urls have to be added to the urls.py:
from django.contrib import adminfrom django.urls import pathfrom . import viewsurlpatterns = [ path('admin/', admin.site.urls), path('api/public', views.public), path('api/private', views.private), path('api/private-scoped', views.private_scoped)]DB
Create and run migrations:
python manage.py migrateRun
You can use a local Django server to test the application.
python manage.py runserverCall the API
To call the API you need an access token, which is then verified by ZITADEL.
Please follow this guide here, ignoring the first step as we already have the .json-key-file from the serviceaccount.
Optionally set the token as an environment variable:
export TOKEN='MtjHodGy4zxKylDOhg6kW90WeEQs2q...'With the access token, you can then do the following calls:
curl -H "Authorization: Bearer $TOKEN" -X GET http://localhost:8000/api/public
curl -H "Authorization: Bearer $TOKEN" -X GET http://localhost:8000/api/private
curl -H "Authorization: Bearer $TOKEN" -X GET http://localhost:8000/api/private-scoped
Completion
Congratulations! You have successfully integrated your Django API with ZITADEL!
If you get stuck, consider checking out our example application. This application includes all the functionalities mentioned in this quick-start. You can start by cloning the repository and defining the settings in the settings.py. If you face issues, contact us or raise an issue on GitHub.
Was this page helpful?