Users
Overview
ZITADEL supports authentication and authorization for different user types. We mainly differentiate between users (interactive) and Service Accounts (machine-to-machine).
Types of Users
Users (Human)
Users represent actual people who log in via an interactive interface (e.g., a login page).
- Profile: Has an email address, password, and optional profile data (phone, nickname, gender, language).
- Authentication: Can authenticate via password, multiple factors (MFA), or passwordless authentication (Passkeys).
- Flow: The application redirects the user to ZITADEL, which handles the credentials and issues a token to the application.
Read more on how to login users with ZITADEL.
Service Accounts
Service accounts represent machines, backend services, or IoT devices requiring non-interactive access.
- Profile: Only has a name, description, and username.
- Authentication: Authenticates via JWT Profile or Personal Access Tokens (PAT). Both methods support expiration settings.
- Usage: Primarily used to gain access to the ZITADEL Management API or to secure backend-to-backend communication.
To see how service accounts are utilized in practice, check out our NextJS B2B Demo application.
Federated Users
Federated users are identities managed by a third-party Identity Provider (IdP) such as Google, Azure AD, or GitHub.
- Identity Brokering: Users log in via the external IdP ("Single Sign-On").
- Account Linking: Federated identities are linked to internal ZITADEL users to facilitate role assignment and audit trails.
External Users
In a multi-tenancy architecture, users are typically isolated within Organizations. However, using External User Grants, an organization can invite users from another organization to access their projects. These invited users are referred to as External Users within the context of the inviting organization.
Administrators
Any user—whether User or Service Account—can be assigned an Administrator Role.
A user with an administrator role is not just an end-user of your application but also has permissions to manage specific aspects of the ZITADEL instance, organization, or project (e.g., ORG_OWNER, PROJECT_OWNER).
Considerations
Uniqueness of Users
- Scope: Users exist strictly within one Organization. It is currently not possible to move users between organizations.
- Identifier: User accounts are uniquely identified by their
idor theirloginnamecombined with theOrganization Domain(e.g.,road.runner@acme.zitadel.local). - Emails: You can reuse the same email address for different user accounts across organizations.
Structuring User Pools
How you organize users depends on your scenario:
- B2B / Multi-Tenancy: We recommend creating separate organizations for each business customer (e.g., based on their domain). Grant your projects to these organizations so they can manage their own users.
- B2C / CIAM: You might want to store all users in a single organization and enable a specific set of social logins for that organization.
You can only verify a domain (e.g., acme.com) on one organization. If multiple teams share the same email domain but need separate management, they might need to be consolidated into a single organization.
Hierarchy
ZITADEL does not enforce a native hierarchy or inheritance for users or organizations. We recommend structuring users along the smallest unit of groups (Organizations). You can use organization metadata or your own business logic to map complex hierarchies if needed.
Managing Users
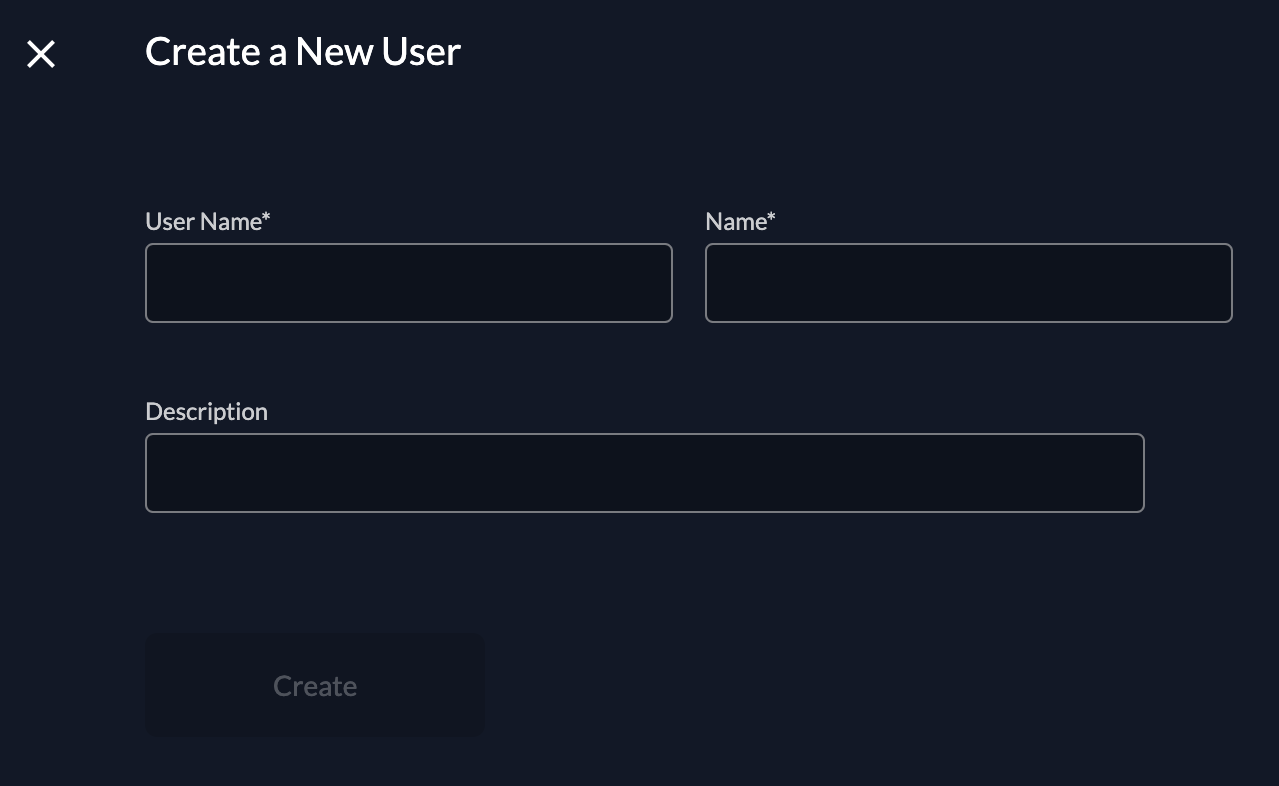
Create User
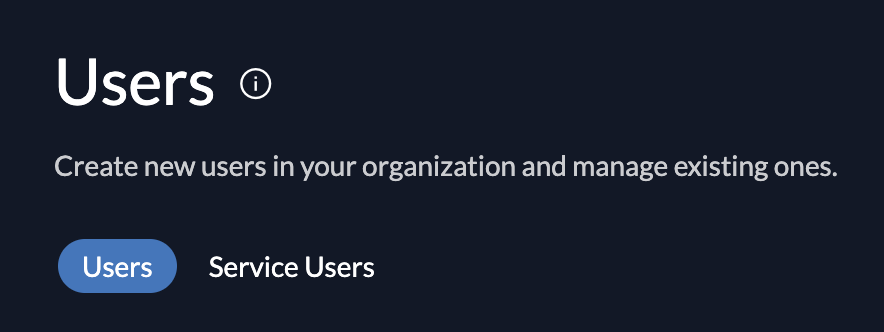
To create a new user, go to Users and click on New. Enter the required contact details and save by clicking “Create”.
If you started with Zitadel before version 3, you might have the "Human User [deprecated]" UI. In this case please enable the Feature Flag "Use V2 Api in Management Console for User creation" in the Default Settings.
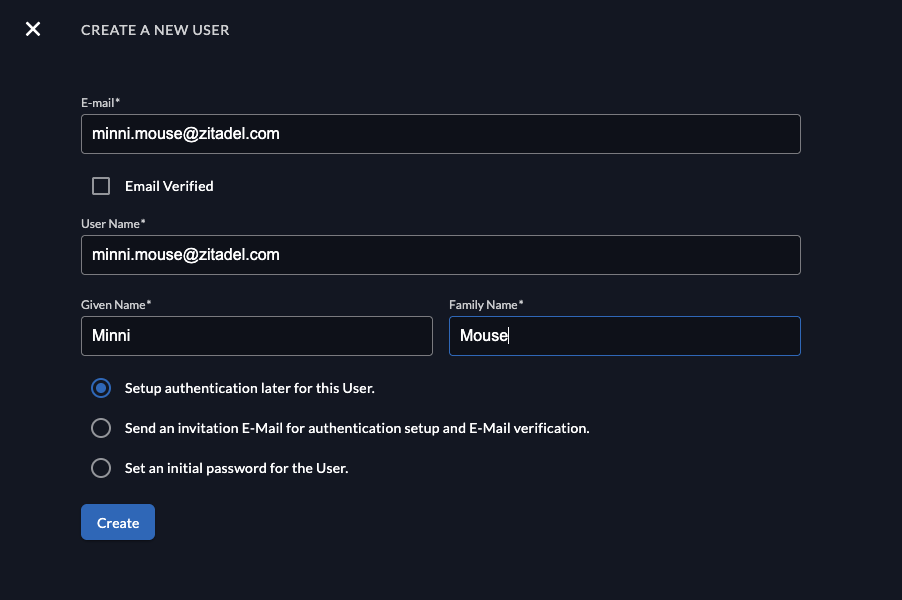
When creating a new user you have different options. First add the email, and select if the email address should be added automatically as "verified".
In the last section you can choose the authentication options:
- Setup authentication later for this user: This flow might be useful if an employee starts at a later point but you already want to prepare the account. The user will not have an authentication method, before they will be able to login, they need to setup a method.
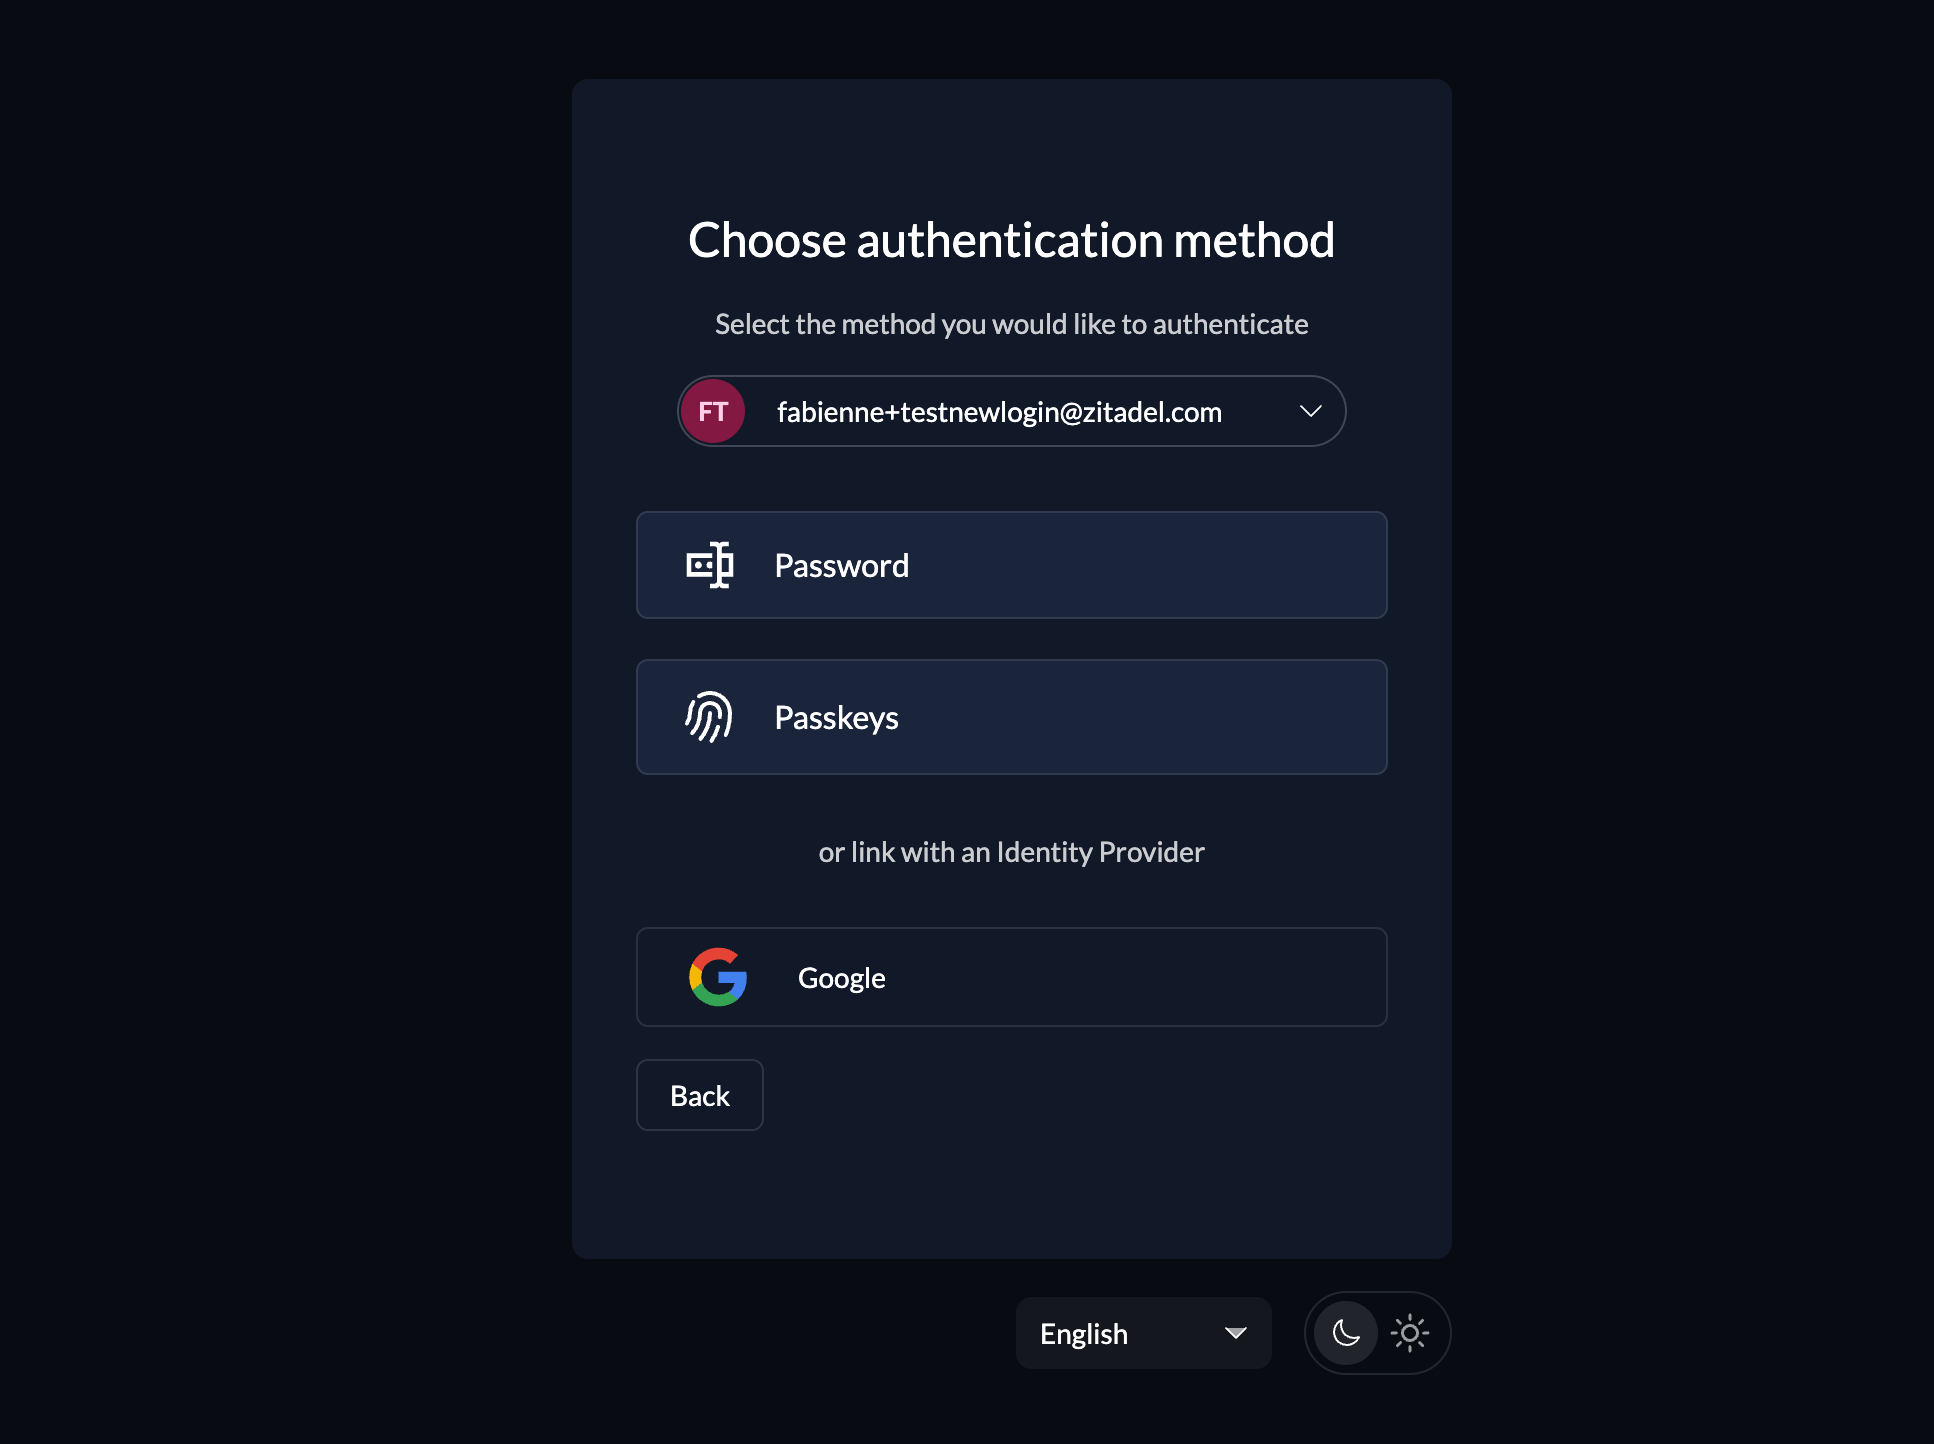
- Send an invitation E-Mail for authentication setup and E-Mail verification: The user will receive an email and be able to setup an authentication method (e.g Password, Passkey, External SSO).
- When using the Zitadel Login V1 the user will be prompted to setup a password
- When using the Zitadel Login V2 the user has the option to choose the authentication method (password, passkey, identity provider), based on the settings of the organization
- Set an initial password for the user: The user will receive an email and be able to setup an authentication method (e.g Password, Passkey, External SSO)
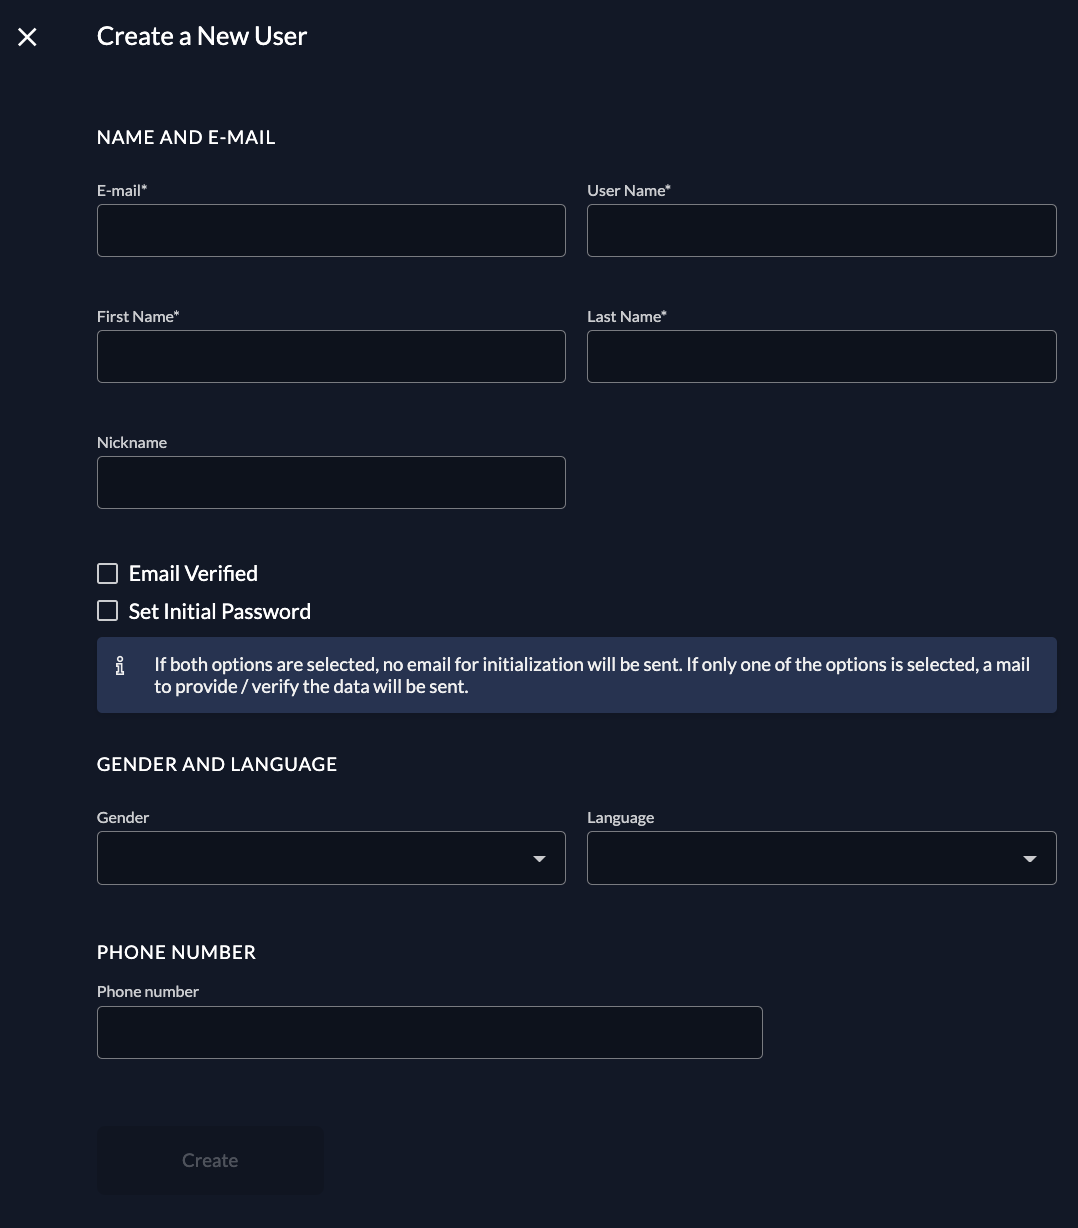
After a user is created, by default, an initialization mail with a code is sent to the registered email. This code then has to be verified on first login. If you want to omit this mail, you can check the email verified and set initial password toggle. If no password is set initially, the initialization mail prompting the user to set his password is sent.
You can prompt the user to add a second factor method too by checking the Force MFA toggle in Login behaviour settings.
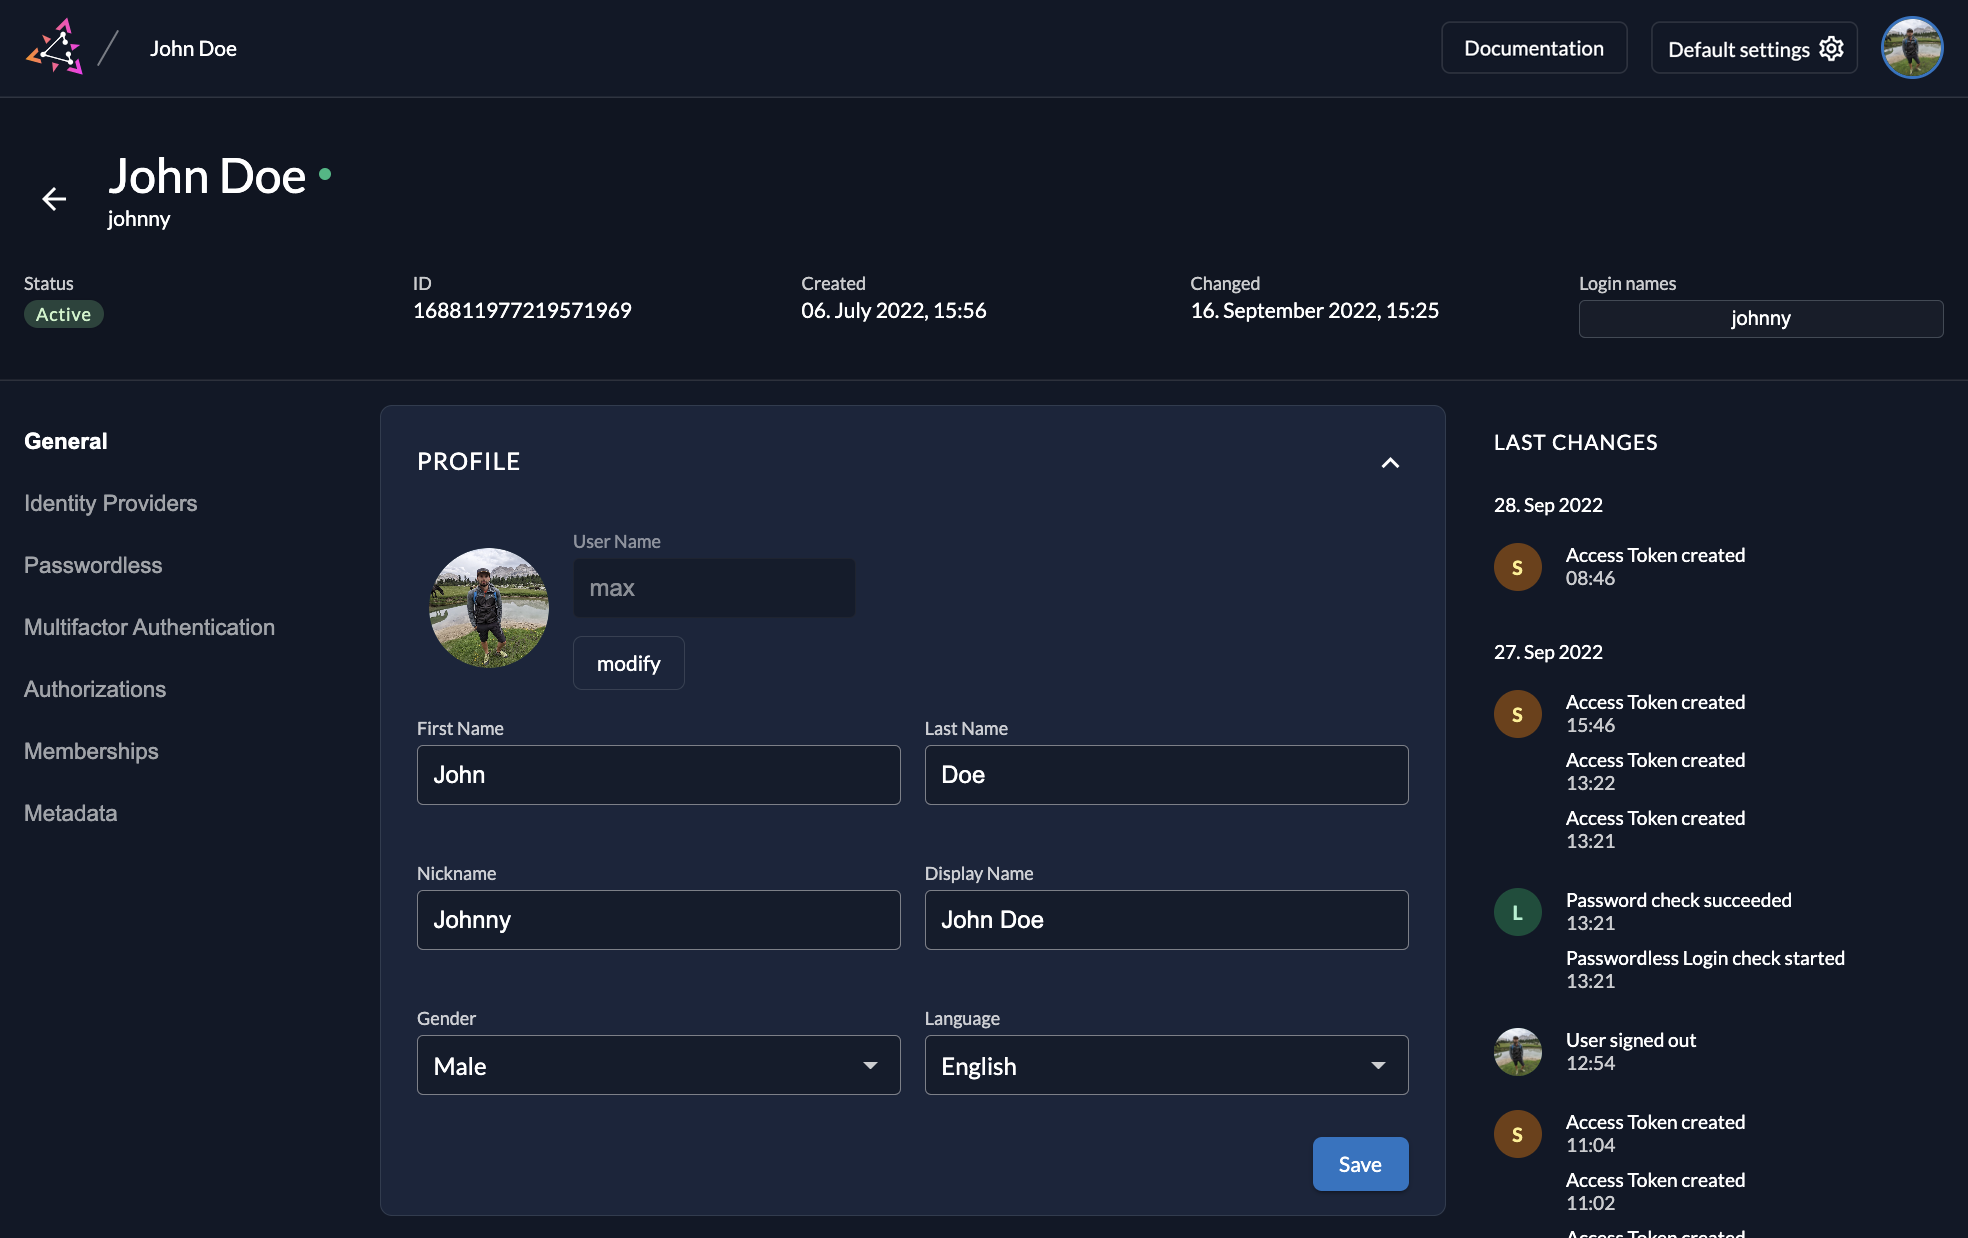
When logged in, a user can then manage the profile in the management console, adding a profile picture, external IDPs and Passkeys.
Metadata
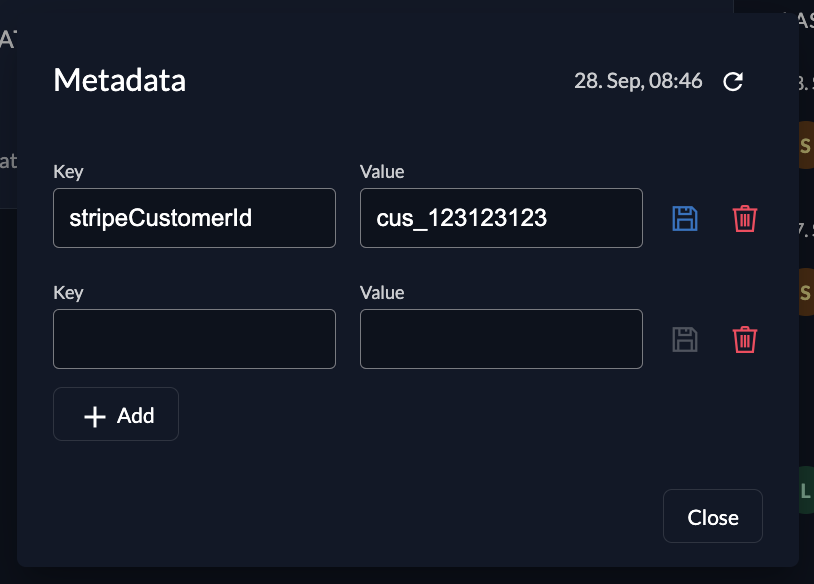
ZITADEL provides a key-value storage system for users, which is essential for building complex applications.
Example Use Case:
In a Point of Sales application, you could add a stripeCustomerId as a metadata key to a user. Your client application can then read this metadata to fetch payment details directly from the Stripe API.
Accessing Metadata: Metadata can be requested via the Auth and Management APIs, the Userinfo endpoint, or asserted directly into the ID Token.
- Userinfo Endpoint: Add the scope
urn:zitadel:iam:user:metadatato your authentication request. - ID Token: To include metadata in the token, navigate to your Application Settings and toggle User Info inside ID Token.

Role Assignments
The roles assigned to a user are displayed on user profile pages.
To access these roles in your application:
- Userinfo Endpoint: Check the Assert roles on authentication box in your Project Settings.
- ID Token: Toggle User roles inside ID Token in your Application Settings.
References
Was this page helpful?